How to Install a Shower Rod on Tile Without Cracking or Drilling Wrong
You can install a shower rod on tile without cracking or drilling wrong by picking the right system—tension, adhesive, or pressure mounts—or drilling only with the correct masonry bit and anchors. Clean and dry the tile, measure and level carefully, pad contact points with rubber, and ease tension to avoid over-tightening. If you must drill, go slow with a pilot bit and tape to prevent wandering. Keep going to learn step-by-step tips, tools, and troubleshooting.
Quick Answer Can You Install a Shower Rod on Tile Without Cracking or Drilling Wrong?
Yes — you can install a shower rod on tile without cracking it or drilling wrong if you use the right techniques.
Use adhesive or tension rods for a drill-free option, or pick the correct drill bit, tape, and anchors if you need a permanent mount.
Follow simple prep and slow, steady drilling to avoid slips and chips.
Short verdict and recommended methods
While you can install a shower rod on tile without cracking it, the key is choosing the right method and taking careful prep steps so you don’t drill wrong.
You’ll get secure, neat results if you follow proper how to install a shower rod on tile techniques and use the right tools.
- Use adhesive or tension rods when possible
- Pre-mark and drill slowly with a carbide bit
- Seal holes and anchor properly
Basic Understanding Why Installing on Tile Is Different
When you work on tile, you’re dealing with layers—tile bonded to backer board over studs—so force gets transferred differently than through drywall.
That makes cracking, water intrusion behind the tile, and weak anchor points real risks if you use the wrong fasteners or technique.
Choose the right rod type—tension or pressure-mounted options avoid drilling, while fixed brackets need proper anchors and careful drilling to stay secure without damage.
How tile and substrate interact (tile, backer board, studs)
Because tile is just the finished surface, you’ve got to think about what’s behind it: thinset and grout bond the tiles to a rigid backer board (like cement board) that’s fastened to the studs.
Each layer behaves differently under fasteners and loads. You’ll need anchors that engage the backer or studs, not just the tile, and account for thinset thickness and grout joints when locating holes.
Common risks: cracking, water intrusion, improper anchoring
Now that you know what’s behind the tile, you’ll want to think about how that layered construction changes the risks when you put holes and loads into it.
You can crack glaze or grout if the drill wanders or you use wrong bits. Poor sealing lets water reach backer board, causing rot or mold.
And inadequate anchors pull out, loosening the rod and stressing tile.
Types of shower rods and mount styles (tension, pressure-mounted, fixed with brackets)
There are three common mounting approaches you’ll encounter: tension rods that press between walls, pressure-mounted/expandable systems that use spring or cam tension with pads, and fixed rods secured with brackets and fasteners.
You’ll pick based on tile fragility, weight, and permanence. Tension is noninvasive; pressure adds stability but risks slip; fixed offers strength but needs proper anchoring.
- Tension: no drilling
- Pressure: padded support
- Fixed: bracketed installation
Which Method to Choose Comparison of Options
You’ll weigh tension rods, adhesive/suction options, and drilled anchors by matching their pros and cons to your situation.
Tension rods are quick and renter-friendly but can slip under heavy curtains.
Adhesive and suction mounts avoid holes but may fail on textured tile.
Drilled anchors give the strongest hold but permanently alter the tile.
Choose based on permanence, curtain weight, and your tile type.
Tension/pressure-mounted rods pros and cons
Although pressure-mounted rods install in minutes and don’t drill into tile, they trade permanence and heavy-duty strength for convenience; they’re great if you rent or want a quick, no-tools solution, but they can slip under moisture and can’t support heavy curtains or tension from frequent tugging. You’ll find them easy to adjust, inexpensive, but less stable long-term.
| Advantage | Drawback |
|---|---|
| No drilling | Can slip |
| Quick install | Limited load |
| renter-friendly | Affected by moisture |
| Adjustable | Not permanent |
Adhesive and suction-mounted solutions pros and cons
If you want a no-drill option that stays put better than a simple tension rod, adhesive and suction-mounted systems give you more stability and cleaner lines without permanent holes. You’ll trade some adhesive curing time and surface prep for damage-free removal; suction needs pristine tile and occasional re-seating.
| Type | Strength | Removal |
|---|---|---|
| Adhesive | High | Clean heat |
| Suction | Medium | Re-seat often |
| Hybrid | Best | Moderate care |
Drilling and using anchors into tile pros and cons
When you want the most secure, permanent option, drilling into tile and using anchors gives your shower rod the strongest hold and lets you mount heavier curtains or accessories without worry. You’ll get durability and stability, but risk cracks and need proper tools and skill. Weigh permanence against potential tile damage and time.
| Benefit | Drawback |
|---|---|
| Strong hold | Risk of cracking |
| Long-lasting | Requires tools |
When to choose each method (rental, permanent, heavy curtains, tile type)
Because your living situation, curtain weight, and tile type all affect which installation method works best, you should match the approach to those specific needs:
If you rent, use tension rods or non‑marking adhesive hooks.
For permanent installs on durable tile, drill with proper bits and anchors.
Choose ceiling mounts or reinforced brackets for heavy curtains.
Fragile or glazed tile favors non‑invasive solutions.
Preparation Before Any Installation
Before you start, gather your tools and materials so nothing slows you down—drill, masonry bit, anchors, level, tape measure, pencil, and safety gear.
Check the tile and wall for loose tiles, crumbling grout, and locate studs or decide where anchors are needed.
Measure and mark the rod height and bracket positions carefully with a level to guarantee a straight, secure installation.
Tools and materials checklist
Gathering the right tools and materials up front saves time and prevents surprises during installation.
You’ll need items for safe, precise work and to protect tile surfaces. Check everything before you start to avoid interruptions.
- Masking tape, pencil, and measuring tape
- Tile-safe drill bit or adhesive mounting kit
- Rubber pads, level, and soft cloth
How to inspect tile and wall for suitability (loose tiles, grout condition, stud location)
With your tools ready, inspect the tile and wall to make sure the surface will hold the rod and fasteners.
Tap tiles to detect hollow sounds, press grout lines for crumbling, and look for cracks or moisture stains.
Use a stud finder to locate framing behind tile; mark studs and note areas with loose tile or degraded grout that need repair before mounting the rod.
Measuring and marking for correct placement

Once you’ve confirmed the wall’s soundness, measure and mark the shower-rod height and bracket locations so the rod sits level and clears shower fixtures and curtain movement.
Use a tape measure, pencil, and a small level. Mark both walls at the same height, double-check spacing from the showerhead and soap dish, and measure diagonally to guarantee symmetry before drilling or using adhesive mounts.
Step-by-Step: Installing a Tension Shower Rod (No Drilling)
Start by picking a tension rod that matches your shower width and offers a reliable tension mechanism.
Clean and protect the tile where the rod will touch, then set the rod at the correct height and alignment before expanding it into place.
Finally, test and adjust the tension safely and review simple fixes for slipping or uneven mounting.
Step 1 Choose the right rod size and tension mechanism
Pick a rod that matches your shower’s width and the wall surfaces you’ll press against, and choose a tension mechanism that suits your needs—spring-loaded twists for quick installs, rubber-padded ends for better grip on tile, or a threaded twist-lock for heavier curtains.
Measure inside-to-inside, allow a few millimeters for compression, and pick corrosion-resistant material. Confirm weight rating for your curtain and liners before buying.
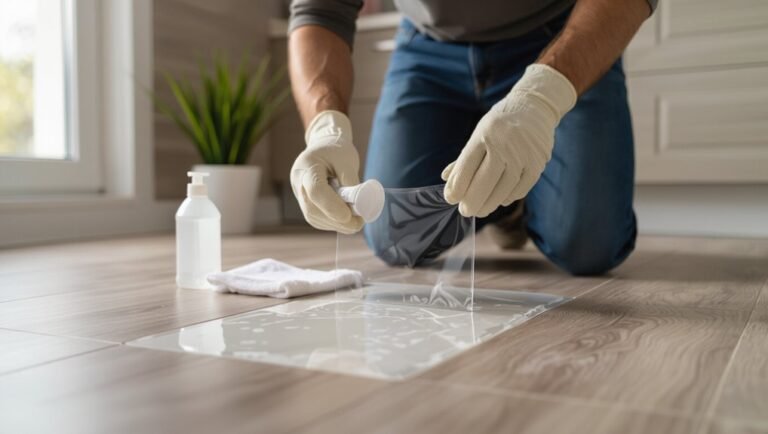
Step 2 Prepare contact surfaces (cleaning and protection)
Before you set the rod, clean and protect each contact area so the ends grip firmly and the tile stays scratch-free.
Wipe tiles with rubbing alcohol or a mild detergent and dry completely.
Remove soap scum and mildew with a nonabrasive pad.
Apply small rubber or foam pads to rod ends to cushion contact.
Check for dust before final placement.
Step 3 Install with correct height and alignment
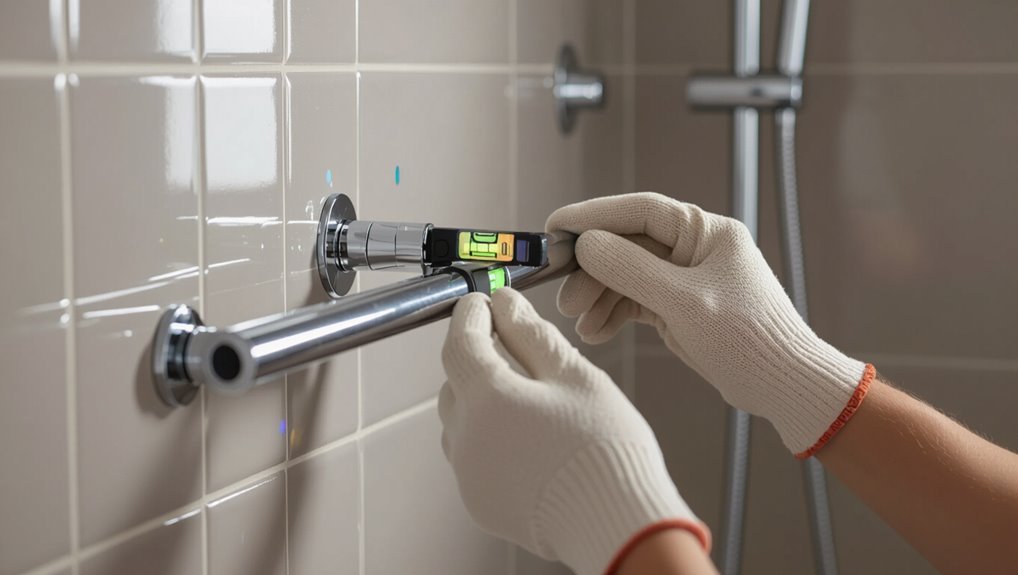
With the contact areas cleaned and cushioned, set the rod roughly at the shower’s midpoint and extend it until it presses lightly against both walls.
Measure height so the curtain clears tub edge by about 6–8 inches and keeps water inside.
Use a level to confirm straightness, adjust ends for even pressure, and mark final positions mentally before securing the tension mechanism.
Step 4 Test and adjust tension safely
Now test the rod by pressing gently upward and sideways to guarantee it holds firm without slipping; if it shifts, shorten or lengthen the tube slightly and re-seat the end caps until the rod resists moderate force.
Check both ends for even contact with tile and confirm curtain rings slide smoothly.
Re-check after a few minutes; retighten if any movement appears.
Troubleshooting common tension-rod problems
Expect a few hiccups when using a tension rod on tile; they’re usually easy to fix.
If the rod slips, clean surfaces, add rubber pads, or increase tension slightly.
If it’s crooked, loosen, level with a small square, then retighten.
For marks or scuffs, use a soft eraser or mild cleaner.
Replace worn end caps to restore grip and protect tile.
Step-by-Step: Installing Adhesive or Suction Mounts (No Drilling)
Pick adhesive or suction hardware rated for tile and wet environments, and check load limits before you buy.
Clean and dry the area, follow curing or set times exactly, then press or lock the pads/cups into place per the maker’s instructions.
After installation, load-test gently, schedule regular checks for leaks or slippage, and have simple reinforcement options ready if failure signs appear.
Step 1 Select rated adhesive/suction hardware for tile and moisture
Start by choosing adhesive or suction hardware that’s specifically rated for smooth tile and constant moisture, since ordinary hooks won’t hold up in a shower.
Check weight ratings for the rod plus curtain, prefer products listing tile and wet environments.
Look for strong adhesives (silicone-based or epoxy) or vacuum-style suction mounts with release tabs and pressure gauges.
Prioritize brands with good humidity performance reviews.
Step 2 Surface preparation and curing times
Clean the tile thoroughly and let it dry completely before you mount anything—adhesives and suction cups need a pristine, oil-free surface to bond properly.
Remove grout haze, soap scum, and residue with alcohol or a mild detergent, then dry with a lint-free cloth.
Check ambient temperature and humidity; follow manufacturer curing times, and avoid loading the mounts until full cure is achieved for reliable hold.
Step 3 Applying adhesive pads or suction cups correctly
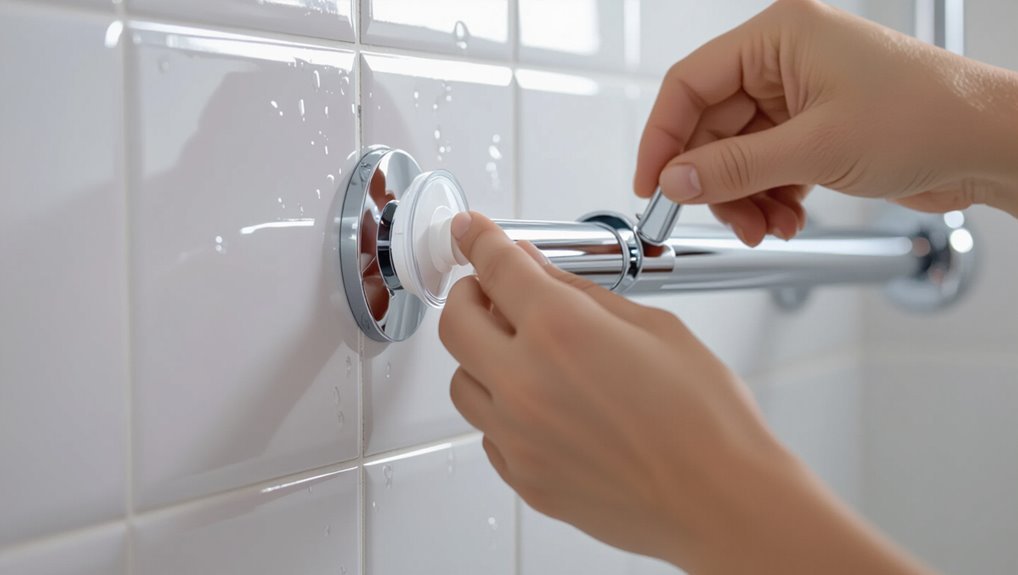
1. Clean the tile again with alcohol, let it dry, then mark mounting spots with a pencil.
Peel adhesive backing slowly, press firmly for 30 seconds, and avoid touching the pad surface.
For suction cups, wet the rim slightly, press flat, and release air by pushing the center.
Wait recommended cure time before loading, and follow manufacturer torque or weight limits.
Step 4 Load testing and maintenance schedule
After the adhesive pads or suction cups have cured, you’ll want to verify that the mounts can handle the anticipated load before hanging anything heavy.
Gently apply incremental weight—start with a towel, then a wet towel, then the shower curtain—observing any slip or flex.
Check mounts weekly for the first month, then monthly; reapply adhesive or reseat suction cups at the first sign of movement.
Failure modes and how to reinforce
While adhesive and suction mounts make a no-drill install quick and damage-free, they can fail if you don’t account for common causes like surface contamination, uneven tile, or gradual creep under load.
Step-by-Step: Drilling into Tile Without Cracking (When Drilling Is Necessary)
When you must drill into tile, pick the correct masonry or tile-specific bits and anchors for ceramic versus porcelain so the hole holds without cracking.
Protect and mark the spot with tape or a template, then drill slowly with light pressure, cooling as needed to avoid heat damage.
Finish by fitting anchors and brackets securely and sealing each penetration to stop water intrusion.
Step 1 Choose the right drill bits and anchors (masonry bits, ceramic vs porcelain)
1 essential choice before drilling is picking the right drill bit and anchor for your tile type; using the wrong ones increases the chance of cracks.
For ceramic, use a carbide-tipped or high-speed masonry bit and plastic or nylon anchors.
For dense porcelain, choose a diamond-tipped or specialized porcelain bit and toggle or metal anchors.
Match anchor size to screw and avoid oversized holes.
Step 2 Marking and protecting tile (tape, templates)
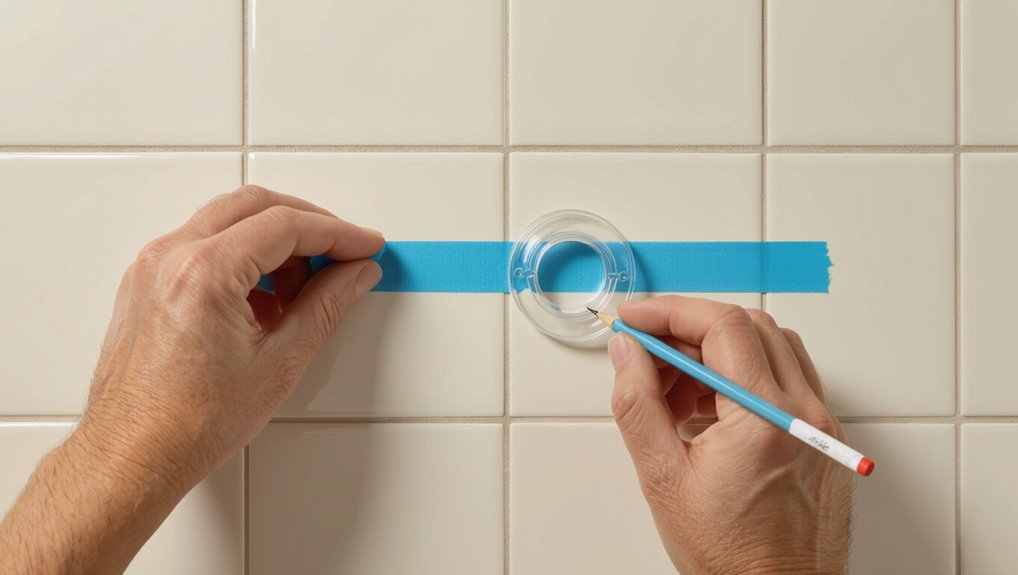
Anyone drilling into tile should take a few minutes to mark and protect the surface so the bit won’t wander or the glaze won’t chip.
Use painter’s tape over each hole location, press firmly, then mark through the tape with a pencil.
For multiple holes, make a cardboard or paper template to guarantee alignment. Tape the template in place before you drill.
Step 3 Drilling technique: speed, pressure, cooling
Start slow and steady: set a low drill speed, apply light, consistent pressure, and let the bit do the work rather than forcing it.
Use a carbide or diamond-tipped bit, pause periodically to cool the bit with water or a damp sponge, and back off if you feel chipping.
Maintain steady alignment, increase speed only after penetrating the glaze, and finish gently through the substrate.
Step 4 Installing anchors and mounting brackets properly
Once your holes are clean and correctly sized, install anchors and mounting brackets carefully to prevent tile damage and guarantee a secure hold.
Tap plastic anchors flush, or use sleeve anchors for heavier loads. Align brackets, insert screws slowly to avoid cracking glaze, and tighten evenly.
Check bracket plumb and rod fit before final torque; back off slightly if you feel resistance.
Step 5 Sealing penetrations to prevent water damage
Seal penetrations immediately after mounting so water can’t sneak into the wall and cause mold or rot.
Clean holes and surrounding tile, remove dust, and apply a bead of silicone caulk rated for bathrooms.
Smooth the joint for a tight seal, wipe excess, and let cure per manufacturer instructions.
Check periodically and reseal if you see gaps or deterioration.
Safety precautions and PPE
Before you drill into tile, protect yourself and anyone nearby by wearing the right PPE and preparing the work area.
Wear safety goggles, a dust mask, hearing protection, and gloves. Use drop cloths and tape off the area to catch shards.
Clear bystanders, ventilate the room, and keep a first-aid kit handy. Check tools and cords for damage before starting.
Common Mistakes That Cause Cracked Tile or Failed Installs
Don’t use the wrong drill bit or press too hard, or you’ll crack the tile the moment the bit bites.
Don’t mount over loose or damaged tile or rely on adhesives that aren’t rated for wet areas, because the whole assembly can fail.
And don’t over-torque mounts or ignore load distribution — uneven stress will pull anchors out or fracture grout.
Using wrong drill bit or too much pressure
When you grab the wrong drill bit or force too hard, the tile can chip, crack, or shatter—ruining the finish and making the mount insecure.
Use a carbide or diamond-tipped masonry bit sized for anchors, start with a pilot mark, and drill slowly with light, steady pressure.
Let the bit do the work, cool with water, and avoid sudden twists that stress the tile.
Installing over loose or damaged tile
If you mount a shower rod over loose or damaged tile, you’re asking for cracked tile, stripped anchors, or a rod that won’t hold—because the substrate can’t support fasteners properly.
Inspect tiles; tap for hollow spots, look for cracks and loose grout.
Replace or secure damaged tiles and repair backing before drilling.
Never anchor into unstable areas; they’ll fail under load.
Relying on adhesives not rated for wet areas
Because bathrooms stay damp, using adhesives that aren’t rated for wet areas leads to bond failure, stained grout, or tile damage over time.
Don’t guess with generic glue; pick a marine- or bathroom-rated silicone or epoxy specified for ceramic and porcelain.
Clean and dry the surface before applying, follow cure times, and test the bond gently.
Proper adhesive prevents peeling, mold, and costly repairs.
Over-torquing mounts or improper load distribution
Although you want a secure shower rod, overtightening mounts or failing to spread the load can crack tile or pull anchors loose. You should torque screws just enough to seat the mount and use backing or spreader plates where possible to distribute forces.
Check alignment, tighten incrementally with a torque-limited driver or hand tool, and test load capacity before finishing to prevent stress cracks and anchor failure.
Best Practices and Preventive Tips
Start with the least invasive mounting option you can use so you preserve your tile.
Check weight limits and choose sturdy curtain hardware, then inspect mounts and seals periodically to catch wear before it causes damage.
If you notice cracks, persistent movement, or you’re unsure about your tile, call a professional.
Choosing the least invasive method first
When possible, pick the least invasive mounting method so you preserve your tile and keep future repairs simple.
Start with tension rods, adhesive mounts, or suction systems before considering drilling. Test fit and surface-clean first, read product instructions, and choose removable options when you rent.
If a sturdier solution becomes necessary, plan placements to minimize visible damage and document tile layout for repairs.
Weight limits and curtain hardware recommendations
If you move from temporary mounts to more permanent fixtures, pay close attention to weight limits and pick curtain hardware that matches your shower’s needs.
Choose rods and brackets rated above your curtain plus liner weight, prefer stainless or brass for corrosion resistance, and match anchor type to tile and backing strength.
- Heavy-duty tension or mounted rod
- Rust-proof rings and glides
- Load-rated wall anchors
Regular inspection and maintenance tips
A few quick checks every month will keep your shower rod secure and your tile undamaged: look for loose brackets, rust on rings or screws, and any grout or caulk gaps where water could reach the wall behind the tile.
Tighten fasteners, replace corroded hardware, re-seal small gaps with mold-resistant caulk, and wipe surfaces dry after use to prevent moisture damage and staining.
When to call a professional
Because some issues can lead to costly water damage or unsafe fixtures, call a professional whenever you notice deep tile cracks, persistent leaks behind the wall, loose anchors that won’t tighten, or visible mold despite regular cleaning.
If your shower rod requires structural repair, plumbing access, or electrical work, stop DIY and hire a licensed pro to assess, repair, and guarantee long-term safety and code compliance.
Cost, Time, and Durability Comparison
Now let’s compare costs, time, and durability so you can pick the right method for your bathroom.
Tension rods are cheapest and quickest to install but may need replacing sooner.
Adhesive mounts fall in the middle for cost and lifespan.
Drilled installations cost more and take longer yet offer the best long-term durability and lower maintenance.
I’ll break down estimated prices, install time, and expected upkeep for each option.
Estimated costs and time for tension, adhesive, and drilled installations
Compare three common methods—tension, adhesive, and drilled—to pick the right balance of cost, time, and durability for your shower rod. You’ll typically spend: tension $0–30, 5–15 minutes; adhesive $10–50, 1–24 hours curing; drilled $20–100+, 30–90 minutes. Choose by budget and patience.
| Method | Typical cost/time |
|---|---|
| Tension | $0–30, 5–15 min |
| Adhesive | $10–50, 1–24 hr |
Expected lifespan and maintenance needs for each method
You’ve seen how cost and installation time differ among tension, adhesive, and drilled rods; next look at how long each will last and what upkeep they need.
Tension rods last a few years, need occasional retightening and rust checks.
Adhesive mounts last 1–3 years, require careful cleaning and re-gluing.
Drilled mounts last decades with minimal upkeep—sealant touch-ups and occasional screw tightening.
FAQs
You’ll likely have a few quick questions about strength, tile type, mounting options, and damage control.
You’ll learn whether a tension rod will hold a heavy curtain, if adhesive mounts will harm your tile, how to tell porcelain from ceramic before drilling, and whether you can install where there are no studs.
You’ll also get steps to take if a drilled hole cracks the tile.
Can a tension rod hold a heavy shower curtain or liner?
Because tension rods rely on friction between their ends and the walls, they can work with a heavy shower curtain or liner—but only up to a point.
You’ll want a high-quality rod with rubberized end caps and enough telescoping pressure. Heavy fabric or weighted liners may sag or slip over time; consider extra supports like a center bracket or switch to a drilled rod if weight causes movement.
Will adhesive mounts damage tile when removed?
Will adhesive mounts pull your tile finish off when you remove them?
Usually they won’t if you use high-quality, low-adhesion hooks and follow removal instructions: warm the adhesive with a hair dryer, peel slowly parallel to the surface, and use dental floss or fishing line for stubborn spots.
Test an inconspicuous area first.
Porcelain and glazed ceramic usually tolerate removal better than unglazed tile.
How do I know if my tile is porcelain or ceramic for drilling?
If adhesive hooks can usually come off tile without damage, you still need to know what kind of tile you’re working with before you start drilling for a permanent shower rod.
Check the unglazed backside—porcelain is denser, usually darker and harder; ceramic is softer, lighter and more porous.
Tap: porcelain sounds sharper. A small drill test with a carbide bit confirms hardness; wear eye protection.
Can I install a curtain rod where there are no studs?
Can you mount a curtain rod where there aren’t any studs? Yes—you can.
Use heavy-duty wall anchors rated for the load, toggle bolts, or molly anchors designed for tile and drywall. Measure and mark carefully, use a carbide bit for pilot holes in tile, and support the rod during installation.
For long spans, add a center support to prevent sagging and stress on anchors.
What to do if a drilled hole cracks the tile?
When a drilled hole cracks the tile, don’t panic—stop drilling immediately and assess the damage so you can choose the best fix.
If the crack is hairline, seal with waterproof epoxy and sand smooth.
For shattered or unsafe tile, remove it, patch the substrate, and replace with matching tile or use a decorative cover plate.
Let adhesives cure before mounting.
Quick Checklist Before You Start
Before you start, gather the right tools and check the tile surface so you won’t run into surprises mid-job: a measuring tape, pencil, level, drill with a carbide or diamond bit, anchors rated for tile, protective tape, and safety gear.
Also inspect the tile for cracks, confirm wall studs or backing, and decide on the mounting height.
- Mark and re-measure mounting points
- Protect tile with tape before drilling
- Use proper tile anchors and drill bit