How to Seam Vinyl Flooring So the Joint Is Nearly Invisible
You can make vinyl seams nearly invisible by planning seam placement, matching pattern and grain, and preparing perfectly square, clean edges; for weldable vinyl use a matched weld rod and a temperature‑controlled iron to fill a V‑groove smoothly, or for non‑weldable types use seam tape/adhesive with beveling and thorough rolling to remove gaps. Control temperature and humidity, test on scrap, and keep tools sharp—follow these basics and you’ll get discreet joints, with more detailed steps and tips ahead.
Quick Answer Making Vinyl Flooring Seams Nearly Invisible
For the cleanest result, you’ll get nearly invisible seams by matching plank edges precisely and using the correct seam technique for your vinyl type.
Use heat-welded seams for commercial or cushioned vinyl where a factory-like, waterproof bond is needed, and use adhesive seams for residential click‑lock or loose‑lay installations where heat isn’t practical.
Follow manufacturer guidelines and test a scrap to confirm the best method.
One-sentence summary of the best method
When you want seams that nearly disappear, the best method is to butt the edges tightly, heat-weld the seam with a matching vinyl welding rod, and then trim and roll the weld smooth so the color and texture blend seamlessly with the plank or sheet.
For a clear one-sentence summary on how do you seam vinyl flooring: tightly butt edges, heat-weld with matching rod, trim and roll smooth.
When to use heat-welded seams vs. adhesive seam methods
Although both methods can produce tight seams, you’ll choose heat-welding when you need a nearly invisible, waterproof joint on commercial-grade or sheet vinyl.
Pick adhesive seams for quick fixes, low-traffic areas, or where heat tools and matching weld rod aren’t available.
Use heat-welds for durability, sanitation, and heavy wear; use adhesive for ease, speed, and repairs.
Match method to traffic, material, and tool access.
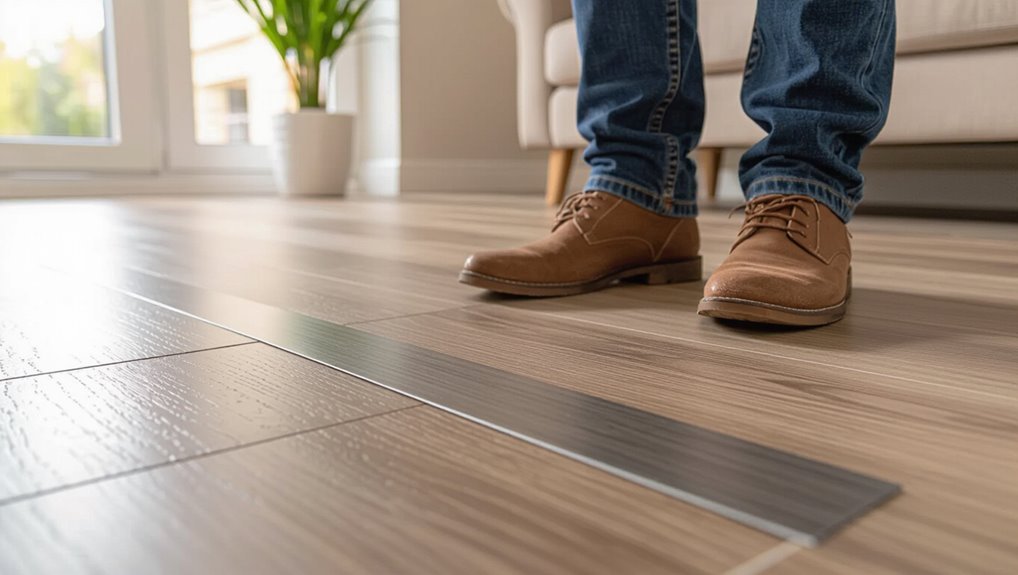
Basic Understanding What a Seam Is and Why It Shows
A seam is the line where two pieces of vinyl meet, and how it looks depends on your product—sheet, LVT/LVP plank, or vinyl tile each behave differently.
You’ll see seams when there are gaps, height differences, adhesive failure, or pattern mismatches.
The materials and tools you choose—adhesive type, seam roller, heat gun, and cutting blades—directly affect how visible those seams become.
Types of vinyl flooring (sheet, LVT/LVP plank, vinyl tile)
Flooring comes in three common vinyl forms—sheet, luxury vinyl plank/tile (LVP/LVT), and vinyl tile—and each shows and handles seams differently.
You’ll prefer sheet for long, near-seamless runs; LVP/LVT offers realistic joints you can hide with precise alignment; vinyl tile gives modular seams that can be staggered or eased.
- Smooth relief
- Precise craft
- Confident finish
Common causes of visible seams (gaps, height differences, adhesive failure, pattern mismatch)
When seams show up in your vinyl floor, they usually trace back to a few predictable problems: gaps from poor edge alignment or shrinkage, height differences where pieces weren’t cut or seated evenly, adhesive failures that let edges lift, and pattern mismatches that make joints obvious.
You can spot causes quickly: measure for gaps, check plank edges for curl, inspect adhesive coverage, and confirm pattern orientation before finishing.
Materials and tools that affect seam visibility
Because seams are where two pieces meet, the materials you pick and the tools you use have an outsized impact on how visible those joints will be.
You’ll want precise cutters, matching vinyl, and proper adhesive to minimize gaps, height differences, and color shifts.
- Sharp utility knife — control, clean cuts.
- Seam roller — pressure, invisibility.
- Matching adhesive — bond, seamless look.
Preparation Assessing Your Floor and Planning the Seam
Before you cut or join anything, measure the room and plan seam locations so they fall where they’re least visible.
Check that the subfloor is flat and dry, fixing high or low spots and addressing moisture before you lay the vinyl.
Match pattern, grain, and color across panels and pick the seam technique that suits your vinyl type for the cleanest result.
Measuring and planning seam locations for minimal visibility
If you want seams to disappear, start by mapping the room and noting traffic patterns, light sources, and focal points so you can place seams where they’ll be least noticeable.
Measure length and width precisely, accounting for pattern repeats and directional grain. Aim seams toward walls or under cabinets, stagger joints away from high-visibility zones, and mark cut lines clearly before trimming.
Checking subfloor flatness and moisture; correcting issues
Once you’ve mapped seams for minimal visibility, check the subfloor for flatness and moisture so your vinyl lays smooth and bonds properly.
Use a straightedge and feeler gauge to find high or low spots; mark deviations over 1/8″ in 6′.
Test moisture with a meter or damp-rag; address dampness, level low areas with patch or self-leveler, and sand or grind highs before seaming.
Matching pattern, grain, and color across panels
Although you’ve already mapped seam locations, you’ll now match pattern, grain, and color so panels read as one continuous surface; lay out full planks or sheets dry on the floor, align directional grain and repeating motifs, and compare adjacent edges under the room’s lighting to pick the best pairings.
Trim small offsets, stagger seams to disguise repeats, and mark matching cut lines before adhesive or welding.
Choosing the right seam technique based on vinyl type
Because different vinyl types respond to seam methods in distinct ways, you’ll pick a technique that matches both the material and the room’s demands. Assess sheet, plank, and luxury vinyl; choose welded, adhesive, or seam-taped joins accordingly. Match flexibility, traffic, and moisture needs, and test a scrap first.
| Vinyl Type | Recommended Seam |
|---|---|
| Sheet | Heat-weld |
| Plank | Seam-tape |
| LVT/LVP | Adhesive seam |
Step-by-Step Guide Heat Welding Seams (for heat-weldable vinyl)
You’ll need the right tools and materials before you start: a hot-air gun or welding iron, matching weld rod, V-groove cutter or trimming knife, and cleaning supplies.
Begin by cutting and dry-fitting the panels for a tight seam, then clean and apply adhesive if required and create a V-groove or channel for the weld rod.
Finally, run the heat-welder at the correct temperature, speed, and pressure to fuse the rod into the seam for a watertight finish.
Tools and materials needed
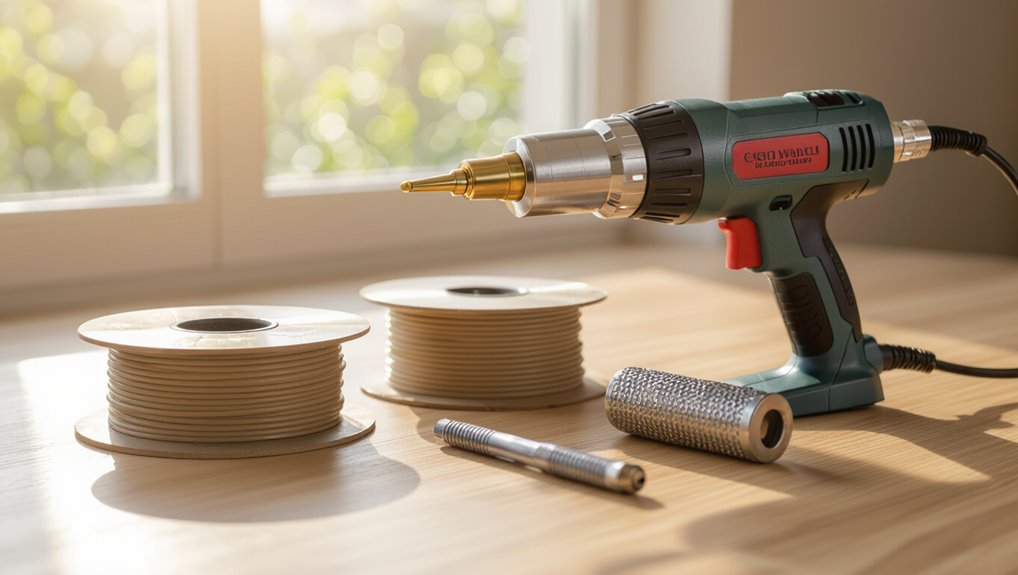
Before you start heat welding seams on heat-weldable vinyl, gather the right tools and materials so the job goes smoothly and the seam holds up.
You’ll need quality gear, steady hands, and patience to make seams disappear. Gather:
- Heat gun, welding rod, and temperature control — confidence.
- Seam roller, straightedge, and utility knife — precision.
- Safety gear and cleaning solvent — reassurance.
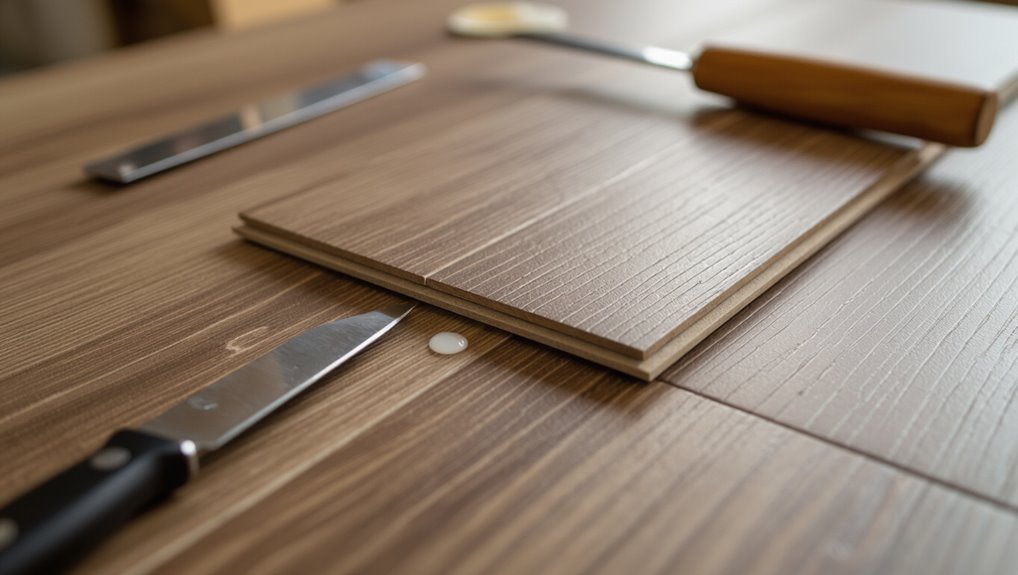
Step 1: Cutting and dry-fitting the seams for tight fit
Measure and mark each sheet carefully, then cut the vinyl slightly oversize so you can trim for a perfect edge during dry-fitting.
Align seams with pattern or grain, butt edges tightly without forcing. Use a straightedge and sharp blade to pare back small amounts until fit is snug.
Check multiple times, adjust edges, and guarantee panels lie flat with no gaps or overlaps before proceeding.
Step 2: Preparing the seam area (cleaning, adhesives if required)
Clean the seam area thoroughly so the weld and any adhesive can bond properly: sweep or vacuum to remove grit, then wipe with a manufacturer-recommended cleaner and allow the surface to dry completely.
Inspect edges for remaining residue, waxing, or old adhesive; remove any with a solvent the manufacturer approves.
If adhesive is required, apply sparingly and evenly, avoiding excess that could squeeze into the seam.
Step 3: V-Grooving or trimming seam channel for weld rod
Create a precise channel for the weld rod by V-grooving or trimming the seam to the correct depth and width for your material.
Use a straightedge and a V-groove cutter, router, or utility knife with steady passes. Match channel size to rod diameter, keep edges clean, remove debris, and test-fit the rod dry.
Stop if you see fraying or uneven depth.
Step 4: Heat-welding technique (temperature, speed, pressure)
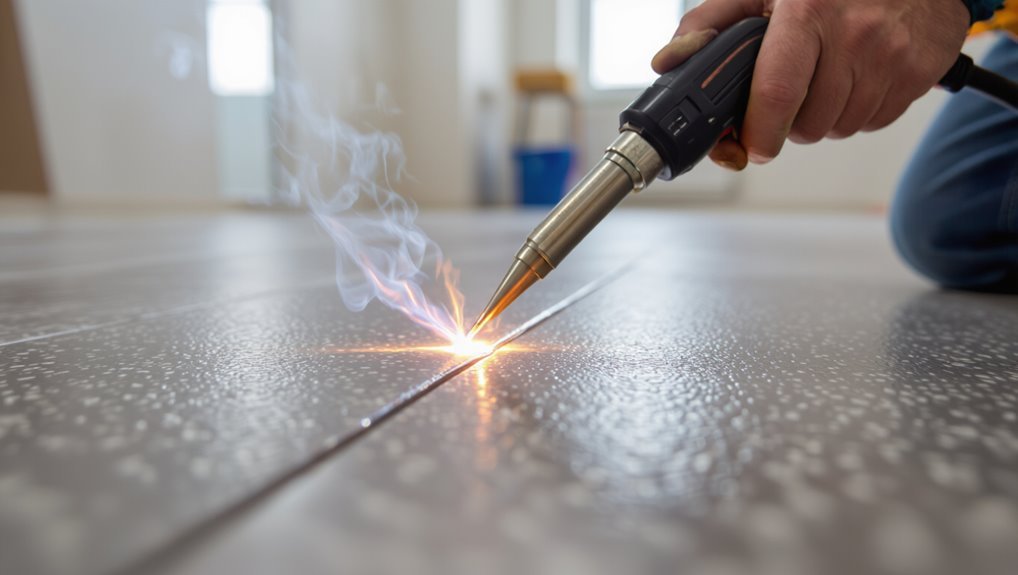
Once the groove is perfectly prepared, you’ll heat-weld the seam by running a temperature-controlled welding iron and matching rod through the channel at a steady speed and pressure so the rod fuses evenly to both edges without burning or displacing the vinyl.
Set iron to manufacturer-recommended temperature, feed rod smoothly, maintain consistent forward speed and light downward pressure, and pause briefly at joins to guarantee full fusion.
Step 5: Trimming and finishing the weld joint for invisibility
After the weld cools a few minutes, you’ll trim and shape the excess rod so the joint disappears into the surrounding vinyl.
Use a sharp trimming knife angled slightly toward the seam, remove the bulk, then switch to a rounded scraper or file to blend.
Work gently to avoid gouging, match texture and profile, and check alignment as you refine for an invisible, smooth finish.
Step 6: Cooling, cleaning, and inspection
Let the trimmed weld cool long enough to set and stabilize before you touch it; cooling solidifies the joint and makes final cleaning safer and more effective.
Once cool, remove debris and haze with a soft cloth and appropriate cleaner, avoiding aggressive solvents.
Inspect the seam for gaps, high spots, or color differences. If needed, make minor touch-ups and re-trim before final use.
Step-by-Step Guide Seam Adhesive and Tape Methods (for non-weldable vinyl)
You’ll need the right tools and materials—seam adhesive or tape, a beveling tool, roller, and clean rags—before you start.
Prep and bevel the edges, apply the adhesive or tape per the manufacturer’s directions, then roll and press the seam to remove gaps and air pockets.
Finally, wipe away any excess adhesive and finish the surface for a smooth, durable seam.
Tools and materials needed
Getting the right tools and materials makes seam adhesive and tape installations fast and reliable.
You’ll need quality seam tape, clear seam adhesive, and a sharp utility knife. Gather a seam roller, clean cloths, and weights. Keep solvent wipes and masking tape handy to control glue.
Prepare mentally for precision—small details create seamless results.
- Seam tape
- Seam adhesive
- Seam roller
Step 1: Edge preparation and beveling
With tools and materials ready, start by preparing the vinyl edges for a clean seam.
Trim both sheets square with a straightedge and sharp utility knife, cutting toward the backing to avoid ragged edges. Lightly bevel the top surface (0.5–1 mm) on each edge for a feathered join.
Clean debris and wipe with solvent recommended by the manufacturer before aligning panels.
Step 2: Applying seam adhesive or seam tape correctly
Choose the right method—seam adhesive or double-sided seam tape—based on your vinyl type and manufacturer recommendations, then gather the matching adhesive, a caulking gun or roller, applicator tools, and clean rags.
Align edges tightly, apply a thin, continuous bead of adhesive or press tape centered on the seam, remove release liner if used, wipe excess immediately, and keep edges steady until initial set.
Step 3: Rolling and pressing seams to eliminate gaps and air pockets
Press the seam firmly and roll it immediately to squeeze out excess adhesive or air and guarantee the edges bond evenly.
Work from the center toward ends with a weighted seam roller, applying steady pressure.
Check for lifted edges or gaps, re-roll as needed.
Use a hand roller for tight spots and a straightedge to align seams, ensuring continuous contact until adhesive sets.
Step 4: Wiping excess adhesive and finishing surface
After rolling the seam, wipe away any excess adhesive right away to prevent staining or a brittle residue as it cures.
Use a damp cloth or recommended solvent on a clean rag, working along the seam toward the edge. Remove residue without smearing, then lightly buff the surface to restore texture.
Check for glue lines and clean them promptly for a seamless finish.
Step 5: Allowing cure time and post-install inspection
Once you’ve wiped away adhesive and smoothed the seam, let the joint cure undisturbed so the bond can reach full strength; this usually takes 24–48 hours for most seam adhesives and tapes, but always follow the manufacturer’s specified cure window.
Afterwards, inspect the seam for gaps, ridges, or adhesive bleed.
Roll the seam with a floor roller if recommended and trim stray fibers or edges for a clean, invisible finish.
Alternative Techniques for Planks and Tiles
When working with planks or tiles, you’ll get the cleanest look by using tight-click installation and following best practices to keep joints snug.
Match micro-bevels and apply edge treatments so seams blend visually instead of standing out.
Where seams are unavoidable, plan and install junction strips or reducers to hide them and maintain a smooth flow between surfaces.
Tight-click installation best practices to minimize seams
If you want seams to nearly disappear in tight-click vinyl plank or tile installations, focus on precise layout, consistent panel engagement, and the right tools.
Measure and chalk straight lines, stagger end joints for stability, and dry-fit rows to check gaps.
Use a tapping block and pull bar to fully seat locks without forcing. Trim cleanly and maintain even pressure while locking panels.
Using micro-bevel matching and edge treatments
Some installers swear by micro-bevel matching and edge treatments to make seams less visible while preserving plank or tile definition.
You’ll align bevels so light doesn’t catch joint lines, trim inconsistent edges, and sand tiny high spots. Use matching color fillers or thin seam sealants sparingly.
Test on scrap pieces first, then clamp and roll seams to confirm uniform contact and appearance.
Transition strips and reducers to hide unavoidable seams
Alongside micro-bevel matching and edge treatments, you’ll often need hardware to disguise seams that can’t be eliminated by fitting alone.
Use low-profile connector strips where planks meet different heights or materials; choose reducers for doorways or step-downs.
Match color and profile to flooring, secure per manufacturer instructions, and trim edges so the strip sits flush, creating a clean, intentional joint.
Common Problems and How to Fix Them
You’ll run into a few common seam issues—visible gaps, seams that pull apart, wavy or uneven joins, and discolored or dirty seam lines—and each has a specific cause and fix.
You’ll learn how to repair gaps and re-adhere separating seams, diagnose whether the subfloor or your technique caused waviness, and clean or restore stained seams.
Start by identifying the symptom and the likely source so you can apply the right repair.
Visible gaps after installation causes and repairs
If gaps show up between seams after you’ve finished installing vinyl flooring, they usually point to a few common causes and straightforward fixes you can handle yourself.
Check for temperature changes causing contraction, insufficient adhesive, or uneven subfloor.
Reheat and press seams, add adhesive beneath lifted edges, or level low spots with a patching compound.
Trim errant edges and roll seams for a tight finish.
Seams that separate over time prevention and remediation
When seams start to pull apart months or years after installation, it’s usually due to movement, wear, or installation issues you can prevent and often fix yourself.
Controlling temperature and humidity, using the right adhesive, and ensuring seams are properly welded or rolled at install will cut the risk.
Timely repairs like re-bonding, heat-sealing, or replacing damaged sections will stop separation from worsening.
Inspect, clean, apply adhesive or heat-seal, clamp until set, and trim or replace failing pieces promptly to prevent water intrusion and further delamination.
Wavy or uneven seams diagnosing subfloor or installation errors
Besides gaps and separations, another common seam issue is waviness or uneven edges, and that usually points to subfloor or installation problems rather than the vinyl itself.
Check for uneven subfloor, loose underlayment, or improper adhesive application. Measure and level high and low spots, re-secure or replace underlayment, and reroll seams with proper heat and pressure so edges lie flat before trimming and bonding.
Discolored or dirty seam lines cleaning and restoration
Although seams can look tidy at first, they often darken or collect grime over time from dirt, spilled substances, or residue left by cleaning products.
You can restore them by vacuuming, using a mild pH-neutral cleaner, and gently scrubbing with a soft brush. For stubborn stains, try a diluted isopropyl solution, rinse thoroughly, then dry.
Replace seam filler if discoloration persists.
Best Practices and Pro Tips for Nearly Invisible Seams
To get nearly invisible seams you’ll want to watch timing, temperature, and humidity so the vinyl settles and adhesive cures properly.
Keep your cutting and seaming tools clean and calibrated, and know when a pro’s experience is worth the cost versus a DIY try.
Finally, follow simple long-term care—gentle cleaning, prompt spill management, and periodic checks—to keep seams looking seamless.
Timing, temperature, and humidity considerations
When you’re planning seams, timing, temperature, and humidity matter because vinyl expands and contracts with environmental changes; install when conditions are stable to keep seams tight and nearly invisible.
Wait for steady indoor temps (65–85°F) and relative humidity around 35–60%.
Acclimate flooring in the room 48–72 hours, avoid drafts or heat sources during seam welding, and schedule work during consistent weather.
Tool maintenance and calibration tips
A clean, well-calibrated tool gives you the best shot at invisible seams, so regularly inspect and tune your seam roller, heat gun, and hot-welding unit before each job.
Check roller bearings, replace worn edges, verify temperature accuracy with a thermometer, clean nozzle buildup, and test weld speed on scrap.
Keep spare tips and follow manufacturer maintenance schedules to guarantee consistent, predictable seams.
When to hire a professional vs. DIY
Curious whether you should tackle seam welding yourself or call in a pro?
If you’ve done precise layout, have calibrated tools, steady hands, and budget for mistakes, DIY saves money and teaches skills.
Hire a professional when seams are highly visible, rooms are large or irregular, material is expensive, or you lack experience.
Pros guarantee consistent pressure, temperature, and nearly invisible joints.
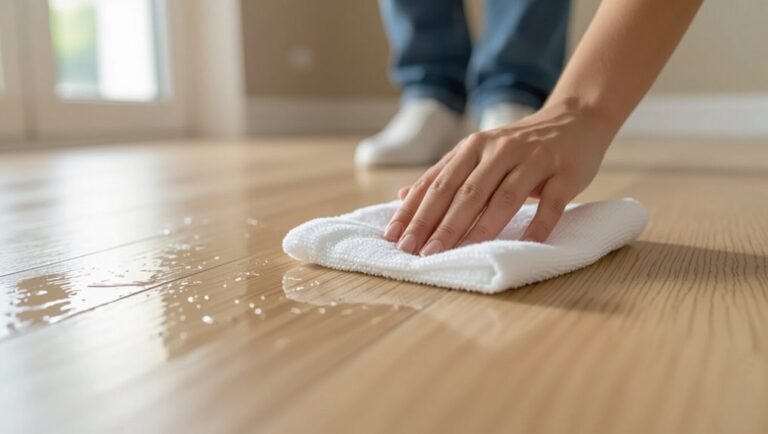
Long-term care to keep seams invisible
If you want seams to stay nearly invisible for years, commit to regular cleaning, cautious traffic habits, and prompt repairs.
Wipe spills immediately, use pH-neutral cleaners, and avoid steam mops.
Place mats at entrances, use felt pads under furniture, and rotate rugs to balance wear.
Inspect seams monthly, reheat and press minor gaps, and reseal with compatible adhesive when needed.
Materials, Tools, and Cost Comparison
You’ll want to compare typical costs for welded seams versus adhesive seams so you can pick the method that fits your budget and project size.
I’ll cover price ranges, plus the specific tools and consumables each method needs.
Then I’ll recommend trusted brands and materials that give the best, longest-lasting results.
Typical costs for weld vs. adhesive seam methods
When weighing seam options for vinyl flooring, expect welds to carry higher upfront tool and material costs than adhesive methods but often save money long-term through durability and fewer repairs. You’ll pay more for welders, rods, and skilled labor, while adhesives cost less initially but may need rework. Compare lifecycle costs and installation complexity.
| Method | Typical Cost Range |
|---|---|
| Hot weld | $150–$600+ |
| Adhesive seam | $20–$200 |
Recommended brands and materials for quality seams
Having weighed weld vs. adhesive seams and their cost implications, now look at the specific brands and materials that give you reliable, long-lasting results.
Choose heat-weld rods from Leister or Trimaco for clean, durable joins.
Use Roberts or Henry seam adhesives for tack and flexibility.
Pick a quality seam roller and straightedge to finish like a pro.
- Leister heat rods
- Roberts adhesive
- Henry tools
FAQ Common Questions About Vinyl Flooring Seams
You probably have a few practical questions before you seam your vinyl, like whether every type can be heat-welded or how wide a seam can be before it shows.
You’ll also want to know if seam adhesive can discolor, whether you can fix an opened seam yourself, and how long to wait before walking on newly seamed flooring.
Let’s answer those common concerns so you can finish the job right.
Can all vinyl floors be heat-welded?
Can all vinyl floors be heat-welded? Not all can.
Homogeneous and many commercial vinyls with a PVC wear layer are designed for heat welding; click-lock LVT, some residential LVP, and glue-down sheets often aren’t compatible.
Check manufacturer specs. If welding isn’t recommended, use seam adhesive or professional techniques.
Never weld unknown vinyl—testing or vendor confirmation prevents damage and warranty voiding.
How wide can a seam be before it becomes visible?
How noticeable a seam will be depends largely on the seam width, the vinyl’s pattern and texture, and how the light hits it.
Generally, seams under 0.5 mm are hard to see on patterned, textured vinyl; plain, glossy surfaces reveal wider gaps sooner.
Aim for under 0.3–0.5 mm with proper alignment and welding to keep joints effectively invisible in most conditions.
Will seam adhesive yellow or stain the vinyl over time?
Curious whether seam adhesive will yellow or stain your vinyl over time? Most quality seam adhesives are formulated to be non-yellowing and safe for vinyl.
Still, low-grade or solvent-heavy glues can discolor lighter floors. Always test adhesive on a scrap, use manufacturer-recommended products, and allow full cure.
Proper ventilation and avoiding excess glue at the seam further reduce staining risk.
Can I repair a seam myself if it opens later?
If a seam does open later, you can often fix it yourself without replacing the whole floor.
Clean the gap, dry thoroughly, then apply a recommended vinyl seam adhesive or seam sealer with a syringe or fine nozzle.
Press edges together, weight the seam, and wipe excess adhesive promptly.
Allow full cure per product instructions before light use to guarantee a durable, nearly invisible repair.
How long should I wait before walking on newly seamed vinyl?
Want to make sure your repair holds?
Wait at least 24 hours before light foot traffic so adhesive sets; avoid heavy furniture or rolling loads for 48–72 hours.
Temperature and humidity affect cure time—warmer speeds it up, cold slows it.
Keep the seam flat and undisturbed during curing.
If manufacturer guidelines differ, follow their recommendations for best results.