How to Stop Water Seeping Through a Concrete Floor for Good
You can stop water seeping through a concrete floor for good by first finding the source, fixing grading and gutters, and relieving hydrostatic pressure with perimeter drains or a sump pump. Seal surface cracks and use deep-penetrating crystalline or cementitious waterproofers, or install an exterior membrane if you can excavate. For finished interiors, add an interior drain and vapor barrier. Use proper surface prep and maintenance to keep fixes lasting, and keep going to learn practical step-by-step options.
Quick Answer How to Stop Water Seeping Through a Concrete Floor for Good
You can use quick fixes like sealants or channeling to stop minor seepage temporarily, but they’re not always permanent.
For lasting results you’ll need to address drainage, exterior grading, or install a proper vapor barrier or drain system.
If water keeps coming back or the problem seems structural, call a professional to assess and fix it right.
Immediate fixes vs permanent solutions
While quick patches can stop water now, they rarely fix the root cause—so you’ll want to pair immediate measures with permanent solutions to keep your concrete floor dry for good.
You’ll learn how to stop water seeping through concrete floor by combining short-term fixes with lasting repairs.
- Apply surface sealant
- Use epoxy patching
- Improve drainage away from slab
- Install interior or exterior waterproofing membrane
When to call a professional
When should you call a professional? You should call one if the problem’s persistent, large, or unsafe.
Consider a pro when you can’t find the source, DIY fixes fail, or structural damage appears.
- Persistent seepage after remedies
- Visible cracks or floor movement
- Mold, mildew, or health concerns
- Complex waterproofing or drainage needed
Basic Understanding Why Concrete Floors Leak
To stop seeping for good, you need to understand how water moves through and under concrete — by capillary action and hydrostatic pressure — so you can target the right fix.
Check common sources like groundwater, plumbing leaks, condensation, and poor grading around the slab.
Learn to tell seepage from other moisture issues by spotting efflorescence, persistent damp spots, or mold.
How water moves through and under concrete (capillary action, hydrostatic pressure)
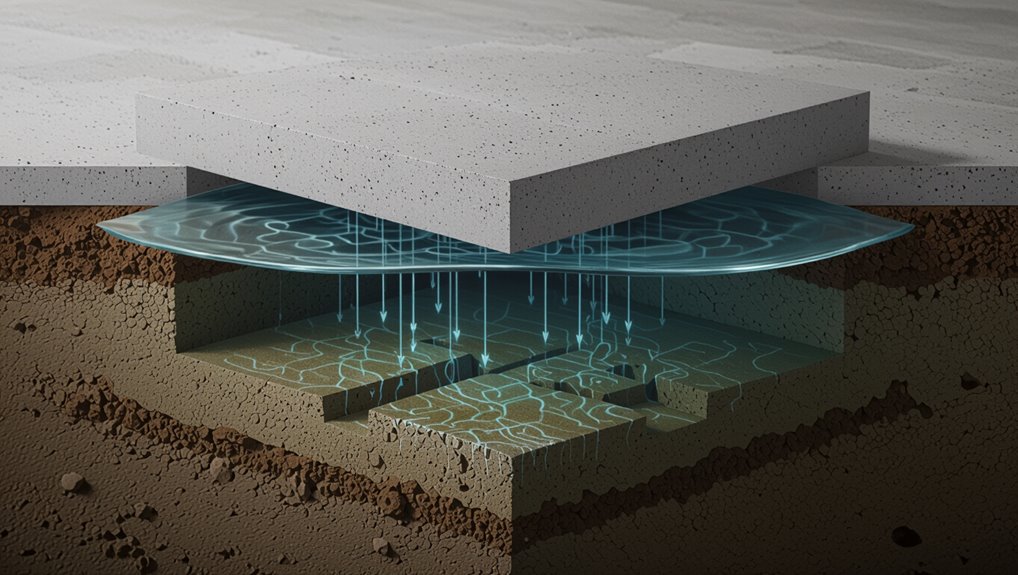
Because concrete is porous and often sits on saturated soil, water can move through and under a slab by two main processes: capillary action pulls moisture up through tiny pores and cracks, and hydrostatic pressure forces water horizontally or upward when the surrounding groundwater level rises.
You’ll see capillary rise wick moisture into the slab while hydrostatic pressure exploits voids, joints, and imperfect seals.
Common sources of seepage (groundwater, plumbing leaks, condensation, grading issues)
Although water can come from several places, four sources cause most concrete floor seepage: groundwater pushing up or sideways, hidden plumbing leaks, indoor condensation, and poor exterior grading or drainage.
- Groundwater: seasonal rises and hydrostatic pressure you can’t see.
- Plumbing: slow leaks under slabs or in walls.
- Condensation: humid indoor air meeting cool concrete.
- Grading: bad slope or clogged drains directing water toward the slab.
Signs of seepage vs other moisture problems (efflorescence, damp spots, mold)
How can you tell seepage from other moisture issues? Look for persistent wetness tracing from floor edges, wet spots after heavy rain, or water pooling — that’s seepage.
Efflorescence appears as white powdery deposits, while condensation leaves temporary dampness and mold shows fuzzy or discolored growth with a musty smell.
Use a moisture meter and timing (after rain vs daily) to pinpoint the cause.
Diagnose the Problem Inspecting and Testing Your Floor
Start by doing a visual inspection checklist: look for stains, efflorescence, cracks, and warped or discolored areas.
Then run simple tests to pinpoint the source, like a moisture meter reading, a plastic-sheet condensation test, or a dye test in suspected leaks.
Call a professional waterproofing inspector if you find structural cracks, signs of recurring flooding, or anything beyond simple surface moisture.
Visual inspection checklist
Before you grab tools or sealants, do a careful visual inspection so you know exactly where water’s coming in and why.
Check surfaces, joints, and nearby walls for clues. Look for stains, efflorescence, or cracks. Note patterns and timing.
- wet spots or puddles
- hairline or wide cracks
- floor-wall joint gaps
- discoloration streaks
Simple tests to locate source (moisture meter, plastic sheet test, dye test)
Once you’ve completed the visual check, run a few simple tests to pinpoint where moisture’s coming from:
- Use a moisture meter across the slab to map damp spots.
- Tape a 2×2 ft plastic sheet, seal edges, wait 24–72 hours for condensation.
- Flood-test suspect cracks with colored dye and check for seepage.
- Monitor after rain to distinguish exterior vs. interior sources.
When to perform a professional waterproofing inspection (structural cracks, recurring flooding)
If your quick tests point to persistent or large-scale moisture, call a professional for a waterproofing inspection.
You’ll want one when you see structural cracks wider than hairline, repeated flooding after storms, chronic damp or mold, uneven floor settlement, or water pooling despite DIY fixes.
A pro will diagnose sources, test hydrostatic pressure, recommend repairs like exterior drainage, sealants, or structural fixes, and prevent recurring damage.
Permanent Solutions Step-by-Step Repair and Waterproofing Plan
Start by fixing external causes like grading, gutters, and downspouts so water’s directed away from your foundation.
Then repair surface damage—seal cracks and patch with epoxy or cementitious materials—before adding an exterior waterproofing membrane or drainboard.
Finish by installing or repairing interior drainage (French drain, perimeter channel, sump) and applying internal treatments like crystalline sealers, cementitious coatings, or vapor barriers.
Step 1 Fix external causes (drainage, grading, gutters, downspouts)
Because most basement leaks come from water pooling around your foundation, you should first eliminate external causes by fixing drainage, grading, gutters, and downspouts.
Check and adjust soil slope away from the house, clear and extend downspouts, repair or replace damaged gutters, and install or clean exterior drains.
Follow this checklist:
- Regrade soil to slope 6″ over 10′
- Extend downspouts away
- Repair gutter leaks/joints
- Install French drain or surface drains
Step 2 Repair concrete surface issues (crack repair, epoxy or cementitious patching)
Inspect the slab for cracks, spalls, or voids and prioritize repairs so water can’t find a path through the concrete.
You’ll clean, widen hairline cracks, and choose epoxy for structural fixes or cementitious patching for surface damage.
Follow these steps:
- Clean and dry the area
- Inject epoxy into active cracks
- Use polymer-modified patch for spalls
- Grind and seal patched surfaces
Step 3 Install exterior waterproofing membrane or drainboard
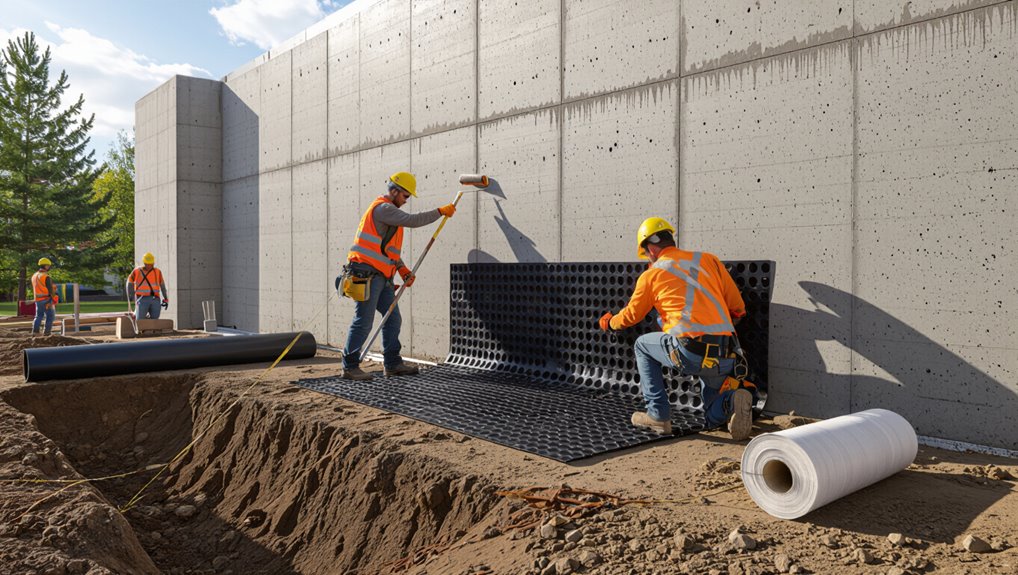
With surface repairs finished, you’ll now protect the slab’s exterior face by installing a waterproofing membrane or drainboard to stop groundwater from reaching the concrete.
Dig to expose the footing, clean and dry the wall, apply a compatible liquid or sheet membrane, and anchor the drainboard.
Backfill with free‑draining aggregate and compact.
Check overlaps and terminations for a continuous, bonded barrier.
Step 4 Install or repair interior drainage systems (French drain, perimeter channel, sump pump)

Start by planning the interior drainage layout so water has a clear path away from the slab: decide whether a French drain, perimeter channel, or combination with a sump pump best fits your basement’s slope, soil conditions, and water load.
Excavate along the footings, install perforated pipe in gravel, connect to a sump basin, guarantee proper fall, seal joints, and test the pump and discharge.
Step 5 Apply internal waterproofing treatments (crystalline sealers, cementitious coatings, vapor barriers)
Once your interior drainage is routed to a sump or outlet and you’ve confirmed proper flow, it’s time to treat the concrete itself to stop moisture and salt migration. You’ll choose crystalline sealers, cementitious coatings, or internal vapor barriers, prep surfaces, apply per manufacturer, and monitor for effectiveness.
| Treatment | Strength | Best use |
|---|---|---|
| Crystalline | Deep | Salt-laden walls |
| Cementitious | Surface | Wet basements |
| Vapor barrier | Complete | Finished floors |
Step 6 Address hydrostatic pressure (relief drains, sump installation)
Because hydrostatic pressure pushes groundwater through any weak spot, you’ll need to relieve that force rather than just patching leaks.
Install a perimeter relief drain, tie into a sump, and use a reliable pump. Maintain access and alarms. Consider professional excavation if needed.
- Perimeter drain (French drain)
- Sump pit placement
- Submersible pump selection
- Backflow prevention system
Step 7 Final surface finishing and moisture-resistant flooring options (tiles with grout, epoxy, sealed concrete)
With hydrostatic forces managed and your sump and drains in place, you can focus on the finished floor that will resist moisture and look good for years.
Choose sealed concrete for simplicity, epoxy for a seamless, impermeable surface, or porcelain/ceramic tile with waterproof membrane and grout sealed properly.
Install per manufacturer specs, use moisture barriers where required, and inspect seals periodically to maintain dryness.
Comparison of Waterproofing Methods Pros, Cons, Cost, Longevity
You’ll want to weigh exterior membranes against interior sealers to see which tackles the source of water best.
Consider drainage and sump pump solutions versus surface treatments for long‑term control and repair scope.
Also compare DIY fixes to professional systems, noting cost, risk, and whether you’ll get a warranty.
Exterior membrane vs interior sealers
When choosing how to stop water seeping through a concrete floor, you’ll mainly decide between an exterior membrane that blocks moisture before it enters and interior sealers that manage it after it arrives; each approach has distinct trade-offs in cost, durability, and maintenance. You’ll weigh upfront cost, lifespan, repair complexity, and suitability for existing structures.
| Method | Pros | Cons |
|---|---|---|
| Exterior membrane | Long-lasting | Higher install cost |
| Interior sealer | Cheap, quick | Shorter life |
| Hybrid | Balanced | More planning needed |
Drainage + sump pump vs purely surface treatments
Although surface treatments can quickly seal visible cracks and repel moisture, relying on them alone won’t stop water that’s driven by hydrostatic pressure or poor site drainage; installing proper drainage and a sump pump addresses the source by collecting and removing groundwater before it reaches the slab. You’ll choose long-term protection with drainage/sump for durability versus cheaper, temporary surface fixes.
| Option | Emotion | Impact |
|---|---|---|
| Surface sealer | Frustration | Temporary |
| Drainage + sump | Relief | Lasting |
| Cost | Worry | Value |
DIY approaches vs professional systems (risk and warranty considerations)
If you’re weighing DIY fixes against hiring pros, think about risk, cost, and how long the solution needs to last. DIY saves money but may miss root causes; pros cost more, offer warranties and longevity. Choose based on skill, budget, and severity.
| Option | Key takeaway |
|---|---|
| DIY | Lower cost, higher risk |
| Professional | Higher cost, warranty |
| Hybrid | Moderate cost, targeted |
Common Mistakes and Why Repairs Fail
Don’t assume a patch will fix water problems if you haven’t addressed the root cause like poor grading or high groundwater.
Make sure products and surface prep are compatible, include drainage or hydrostatic relief where needed, and don’t skip routine maintenance after repairs.
If any of these steps are missed the same leak will come back.
Ignoring the root cause (grading, groundwater)
When you patch cracks or install a dehumidifier without addressing poor grading or a high water table, the problem will keep coming back—surface fixes just mask the true source of seepage.
You need to find and fix the cause, or repairs fail.
- Check yard slope and drains
- Inspect seasonal groundwater levels
- Consider exterior waterproofing
- Hire a pro for diagnostics
Using incompatible products or improper prep
Fixing the source of seepage is only part of the job; you also have to use the right materials and prep the surface properly or repairs won’t hold.
You’ll ruin results by mismatching products or skipping surface prep. Be exact: choose compatible coatings, clean and etch, repair cracks, then apply.
- Check product compatibility
- Clean and degrease
- Etch or grind as needed
- Follow manufacturer cure times
Skipping drainage or hydrostatic pressure relief
Leave out drainage or hydrostatic relief, and most surface fixes will fail regardless of coatings or sealants.
You need to relieve pressure and redirect water, or moisture will force through cracks and joints. Address sub-slab drains or sump systems, or plan interior relief channels.
- Hydrostatic pressure forces water
- Surface sealants aren’t enough
- Install drains or sumps
- Provide proper grading
Inadequate maintenance after repair
Even after you install proper drains or a sump, repairs will fail if you don’t keep up with maintenance.
You must inspect, clean, and test systems regularly or leaks return. Ignore clogged drains, cracked seals, or failed pumps and water finds a way. Act quickly on issues.
- Check drains monthly
- Replace worn seals
- Test pump operation
- Clear debris regularly
Prevention and Best Practices to Keep Floors Dry Long-Term
To keep floors dry long-term, you’ll want a plan that combines routine exterior maintenance like gutters, proper grading, and thoughtful landscaping with indoor humidity control and good ventilation.
Schedule regular inspections of drainage and sump systems so small issues don’t become big leaks, and pick durable materials and products backed by solid warranties.
Following these practices will reduce recurrence and make any future repairs simpler and less costly.
Routine exterior maintenance (gutters, grading, landscaping)
A few simple, regular exterior tasks—keeping gutters clear, grading soil away from the foundation, and tending landscaping—prevent most water from ever reaching your concrete floor.
You should inspect and act seasonally: clear debris, adjust slopes, and manage plants to divert runoff. Quick checks reduce seepage risk.
- Clean gutters and downspouts
- Regrade soil away from foundation
- Extend downspout discharge
- Trim or relocate plants
Indoor humidity control and ventilation strategies
Outdoor fixes keep most water out, but indoor humidity and airflow determine whether any remaining moisture winds up in your concrete floor.
You should control humidity, add ventilation, and prevent condensation.
Key steps:
- Use a dehumidifier sized for the space
- Install continuous or timed exhaust fans
- Keep vents and airpaths clear
- Seal gaps and insulate cold surfaces
Scheduled inspections and maintenance of drainage/sump systems
Because even small clogs or pump failures can lead to major seepage, you should schedule regular inspections and maintenance for gutters, drains, and sump systems to catch problems before they damage your concrete floor.
Check these regularly:
- Inspect gutters and downspouts for debris and alignment.
- Test sump pump operation and battery backup.
- Clear interior floor drains and traps.
- Repair cracks and seal joints promptly.
Choosing long-term materials and warranties
Regular inspections keep systems working, but long-term protection depends on the materials and warranties you choose when installing or upgrading drains, sealants, and membranes.
Pick proven, durable products rated for hydrostatic pressure and chemical exposure. Demand clear warranty terms covering labor and materials for at least 10 years.
Keep receipts, installation photos, and maintenance records to preserve claims and guarantee prompt remediation if leaks recur.
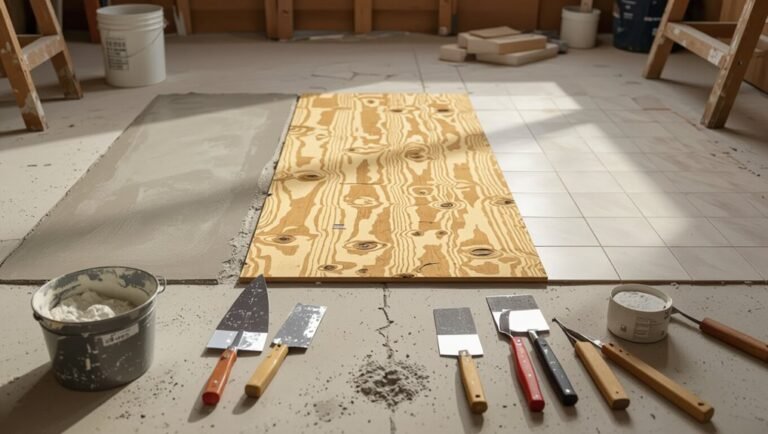
Tools, Materials, and Costs What You’ll Need
You’ll need a basic DIY toolkit—hammer, chisel, wire brush, stiff broom, bucket, and safety gear—plus sealants and patching compounds for simple repairs.
For larger problems you may want professional-grade materials and equipment like epoxy injection kits, hydraulic cement, and surface primers, or to hire a contractor who brings specialized tools.
Expect wide cost ranges: simple DIY fixes can run $20–$200 in materials, while professional repairs often start around $500 and can go into the thousands depending on scope.
Basic DIY toolkit and supplies
Getting the job done doesn’t require a professional-grade shop—just a compact, well-chosen toolkit and a few affordable materials you can pick up at most hardware stores.
You’ll need basic tools and sealants to patch cracks, clean surfaces, and apply coatings. Keep costs low by buying small quantities.
- Wire brush, shop vacuum
- Hammer, chisel, trowel
- Concrete patch, hydraulic cement
- Waterproofing sealer, caulk
Professional-grade materials and equipment
If your project goes beyond a weekend patch or you want longer-lasting results, you’ll need higher-performance tools and materials that professionals use.
You’ll want reliable, durable options and the right gear to apply them correctly.
- Epoxy or polyurethane injection kits for cracks
- Cementitious waterproofing membranes
- High-strength hydraulic cement and grout
- Industrial-grade concrete grinders and vacuum systems
Rough cost ranges for common solutions (DIY vs pro)
One of the first things to nail down is budget: DIY fixes like patch kits, sealers, and a rental grinder usually run from about $50 to $600, while professional repairs—epoxy injections, full membrane applications, or slab regrading—can cost from $800 up to several thousand dollars depending on scope and labor.
| Solution | DIY cost | Pro cost |
|---|---|---|
| Crack patching | $20–$150 | $200–$800 |
| Surface sealer | $30–$200 | $300–$1,000 |
| Membrane/slab | $100–$600 | $800–$5,000 |
Case Examples Typical Scenarios and Recommended Solutions
You’ll see different causes require different fixes, so we’ll look at three common scenarios and what works best for each.
For a shallow basement with small seepage, you’ll get results from surface sealers and targeted crack repair for quick and long-term relief.
If you face a high water table or hydrostatic pressure you’ll need a full drainage or interior perimeter system.
For a cracked slab over a plumbing leak you’ll diagnose the leak first, repair plumbing, then replace or patch the slab and waterproof as needed.
Shallow basement with small seepage (best quick and long-term fixes)
For a shallow basement with only minor seepage, you can often stop the water quickly with a few targeted fixes and prevent recurrence with modest long-term measures.
Identify source, dry area, then apply repairs:
- Patch cracks with hydraulic cement
- Add interior sealant/epoxy
- Improve exterior grading and gutters
- Install a small perimeter drain or dehumidifier to keep moisture down
High water table and hydrostatic pressure (recommended system)
When a high water table puts steady hydrostatic pressure under your slab, water will find any weakness and force its way up.
So you need an all-encompassing system rather than spot repairs. You’ll install external drainage, perimeter footing drains, a sump pump with backup, and a concrete floor membrane to control and divert groundwater before it reaches the slab:
- exterior foundation drains
- interior perimeter drain
- reliable sump pump
- vapor/pressure membrane
Cracked slab over plumbing leak (diagnosis and repair sequence)
Exterior drainage and sump systems handle groundwater, but standing or moving water from a failed plumbing line under a slab creates a very different problem: the slab can crack, settle, and keep leaking until the pipe is fixed and the concrete is repaired.
You should:
- Locate leak with cameras or dye
- Shut water and dry area
- Excavate and replace pipe
- Repair slab, compact, and seal concrete
FAQ Frequently Asked Questions
You probably have a few quick questions about fixes, lifespan, and causes, so let’s answer the most common ones.
Can sealing the surface alone stop seepage?
How long do crystalline treatments last?
Will a French drain help if water’s coming through the middle of a slab?
You’ll also learn how to tell groundwater from a plumbing leak and whether homeowners insurance typically covers waterproofing.
Can I stop seepage by sealing the surface alone?
Can sealing the surface alone stop water seepage? Not usually.
Surface sealers block moisture temporarily but don’t fix active leaks, cracks, or hydrostatic pressure from below. You’ll need to address the source—repair cracks, improve drainage, or use internal treatments—plus proper prep.
Use surface sealers as part of a system, not a lone cure, for lasting protection.
How long do internal crystalline treatments last?
While no waterproofing method is truly permanent, crystalline internal treatments can last decades when properly applied and left undisturbed. This is because they chemically bond with the concrete to form insoluble crystals that block pores and hairline channels.
You’ll get long-term protection if moisture levels stay manageable and the slab isn’t mechanically damaged. Periodic inspections guarantee the system’s integrity and performance over time.
Will a French drain fix water coming through the middle of a slab?
Wondering whether a French drain will stop water seeping up through the middle of your slab?
A perimeter or interior French drain can help if groundwater pressure or poor exterior drainage pushes water under the slab. It collects and redirects water away, reducing hydrostatic pressure.
It won’t fix slab cracks or plumbing leaks; pair it with slab repairs or waterproofing for a durable solution.
How do I know if seepage is from groundwater or a plumbing leak?
How can you tell whether the wet spot in your slab comes from groundwater or a plumbing leak?
Check timing, location, and odor: groundwater’s moisture often appears after heavy rain, near edges or low spots, and smells earthy.
A plumbing leak shows steady dampness, water pooling regardless of weather, possible hot-water warmth, and nearby fixtures or pipes.
Use a moisture meter and, if unsure, get a plumber.
Is waterproofing covered by homeowners insurance?
Is waterproofing covered by your homeowners insurance? Usually not.
Standard policies cover sudden damage (burst pipes, roof leaks) but often exclude preventative work like waterproofing or routine maintenance.
If seepage causes sudden, covered damage, repairs might be eligible.
Check your policy, ask your agent about endorsements or flood insurance, and document damage promptly to improve claim chances.