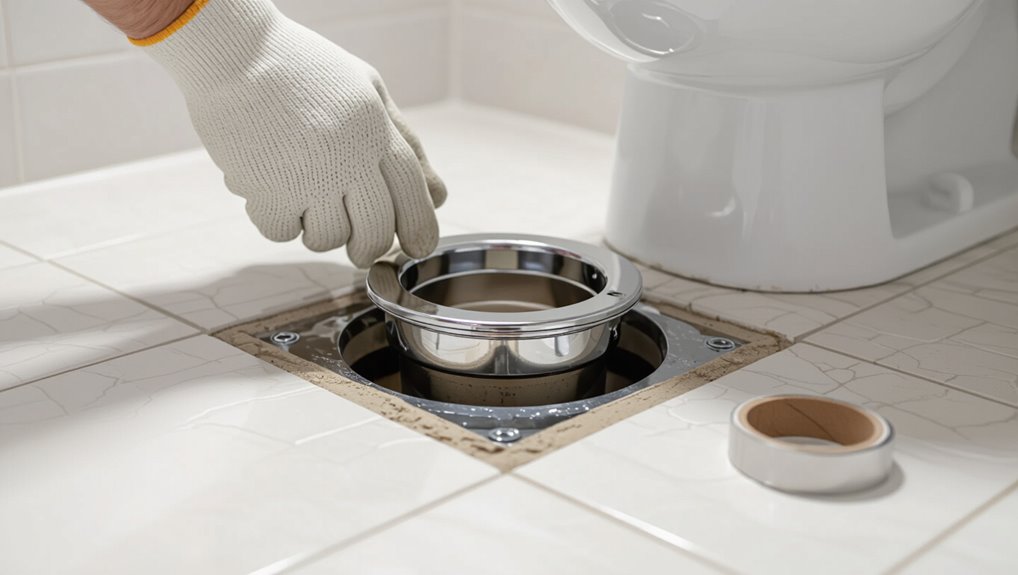
How to Install a Toilet Floor Flange: A Step-by-Step Guide for Beginners
You can replace a toilet floor flange yourself in a few hours with basic tools and patience. Shut off the water, remove the toilet, inspect the subfloor, then clean and square the drain pipe. Choose a matching flange and wax or waxless seal, secure the flange to the pipe and floor with corrosion-resistant fasteners, set bolts, and reseat the toilet, checking for leaks and proper alignment. Follow the full guide below for step-by-step tips and troubleshooting.
Quick Answer Can You Install a Toilet Floor Flange Yourself?
Yes—you can usually install a toilet flange yourself if you’re comfortable with basic plumbing, cutting, and fastening.
Expect the job to take 1–3 hours, requiring common tools (wrench, screwdriver, saw, putty knife) and parts costing about $20–$60 for a flange and seal.
If the flange or subfloor is badly damaged, plan for more time, materials, and possibly professional help.
Short summary of the process and skill level required
You can usually install a toilet floor flange yourself if you’re comfortable with basic plumbing tasks and have the right tools.
The process involves removing the old flange, inspecting the drain, preparing the surface, fitting a new flange, and sealing and securing it.
With patience and attention to alignment and seal integrity, a DIYer can handle how to install a toilet floor flange reliably.
Typical time, tools, and cost estimate
Plan on about 1–3 hours to replace a toilet floor flange if nothing unexpected comes up; that covers removing the toilet, stripping the old flange, prepping the drain, fitting the new flange, and reinstalling the toilet.
You can DIY with basic skills, common tools, and modest cost.
- Tools: wrench, screwdriver, putty knife, level
- Materials: flange, wax ring, bolts
- Cost: $20–$80
- Difficulty: easy–moderate
Basic Understanding What Is a Toilet Flange and Why It Matters
A toilet flange is the ring that anchors your toilet to the drain and seals the connection, and you’ll want to know how it works before you start the job.
Flanges come in PVC, ABS, brass, or cast iron and use either wax or waxless seals, so choosing the right type affects fit and longevity.
If the flange is cracked, corroded, or sitting below floor level you’ll usually replace it, but minor damage or loose bolts can often be repaired.
Definition and function of a toilet flange
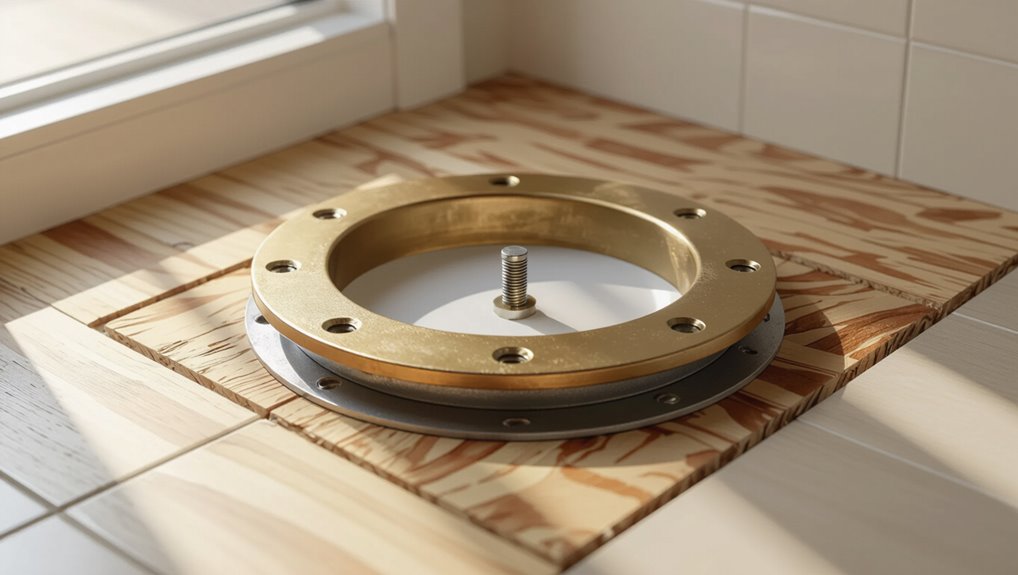
Think of the toilet flange as the essential link between your toilet and the drainpipe: it secures the fixture, seals the waste line with a wax or rubber ring, and anchors the toilet to the floor so nothing shifts or leaks.
You rely on it to align the outlet, provide a tight seal preventing odors and water damage, and bear toilet weight for stable, leak-free operation.
Common types and materials (PVC, ABS, brass, cast iron, wax vs. waxless)
Most toilets use one of a few common flange materials—PVC, ABS, brass, or cast iron—each chosen for compatibility with the drainpipe, durability, and cost. You’ll also pick between wax and waxless seals based on seal reliability and replacement ease.
| Material | Pros | Cons |
|---|---|---|
| PVC | Cheap, common | Less heat resistant |
| Brass | Durable | Costly |
| Cast iron | Heavy, strong | Prone to corrosion |
| ABS | Tough | Less common |
When to replace vs. repair an existing flange
When your toilet wobbles, leaks at the base, or the flange sits below the finished floor, you’ll need to decide whether to repair or replace it; evaluating bolt tightness, flange material, and visible damage tells you which path is safer and more cost-effective.
- Tight bolts, minor cracks: repair with flange spacer or epoxy
- Corroded or broken metal: replace
- Flange below floor level: usually replace
- Repeated leaks or toilet resets: replace
Safety, Permits, and Preparation
Before you start, protect yourself with gloves, eye protection, and a mask for dust and sewer odors.
Check local codes and call a plumber or pull a permit if your wall or drain stack work will be affected.
Shut off the water, drain and disconnect the tank, and remove the toilet so the flange area is clear and dry.
Safety precautions and personal protective equipment
Because you’re working with plumbing, tools, and potential biohazards, you should wear appropriate personal protective equipment and follow basic safety precautions to prevent injury and contamination.
Use gloves, eye protection, and a mask; shut off water; ventilate work area; keep tools organized.
- Nitrile gloves
- Safety goggles
- Respirator or mask
- Closed-toe shoes
When a permit or plumber is required
If your local building code or the complexity of the job requires it, get a permit and hire a licensed plumber rather than attempting the work yourself.
You should also call a pro if the flange ties into cast iron, shared stacks, sewer lateral issues, or structural floor repairs.
Permits guarantee inspections and code compliance; a plumber protects you from costly mistakes and liability.
Site preparation: turning off water, draining tank, removing toilet
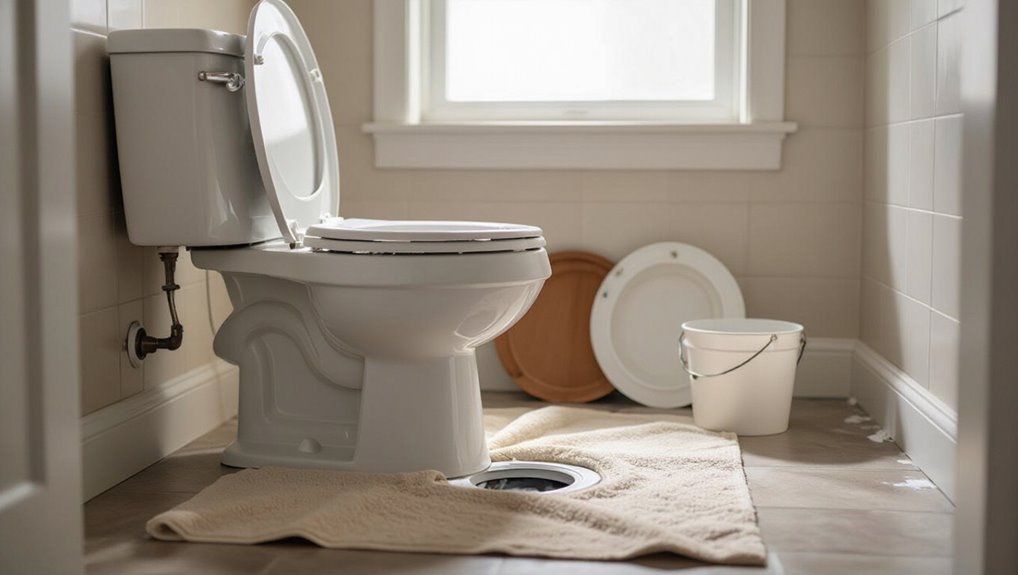
Once you’ve confirmed permits and called a plumber if needed, shut off the toilet’s water supply at the shutoff valve, flush to drain the tank, and sponge out any remaining water so the bowl and tank are as empty as possible.
Disconnect the supply line, remove tank bolts, lift the tank (if separate), unbolt the toilet from the flange, rock gently to break the wax seal, and lift the fixture clear.
Tools and Materials You’ll Need
You’ll need a handful of essential tools like a wrench, screwdrivers, a tape measure, and a caulk gun to remove the old toilet and secure the new flange.
Gather replacement parts and materials—choose the right flange type, new bolts, and a wax ring or one of the modern seal alternatives.
For unusual jobs you might also want optional tools such as a cast-iron cutter or a flange extender kit.
Essential tools
Before you start, gather the right tools so the job goes smoothly and safely.
You’ll need basic hand and power tools, safety gear, and measuring devices to remove the old flange and secure the new one properly.
- Adjustable wrench and socket set
- Screwdriver and pry bar
- Drill with masonry bit
- Tape measure and level
Replacement parts and materials (flange types, bolts, wax ring alternatives)
With your tools gathered, pick the right replacement parts and materials so the flange fits and seals correctly.
Choose a PVC, ABS, or brass flange to match pipe type. Use stainless steel closet bolts and a reinforced wax ring or wax-free gasket for a reliable seal.
Confirm bolt spacing and flange diameter match your toilet.
- PVC/ABS/brass flange
- Stainless bolts
- Reinforced wax ring
- Wax-free gasket
Optional tools for specific situations (cast iron cutter, flange extender kits)
If your flange sits on cast iron or the finished floor is too low, you’ll need a few specialty tools and kits to get a proper fit:
- Cast iron cutter or reciprocating saw with carbide blade for old pipes
- Flange extender kit to raise flange height
- Repair ring for cracked flanges
- Long corrosion-resistant bolts and spacers for uneven surfaces
Step-by-Step Installation Guide
Now you’ll walk through the actual installation steps so you can replace the flange correctly.
First you’ll remove the toilet and old flange parts, inspect the drain pipe and subfloor for damage, and prepare the pipe by cleaning, cutting, and leveling.
Then you’ll pick the right flange type and secure it to the drain and subfloor with the appropriate adhesives, screws, or bolts.
Step 1 Remove the toilet and old flange components
Shut off the water, flush to empty the bowl, and sponge out any remaining water before you start—this keeps the work area dry and prevents spills.
Disconnect the supply line, unbolt the toilet, and lift it off the flange with help if needed.
Remove old wax ring, scrape debris, and unscrew or cut away the damaged flange pieces so the drain opening is clear.
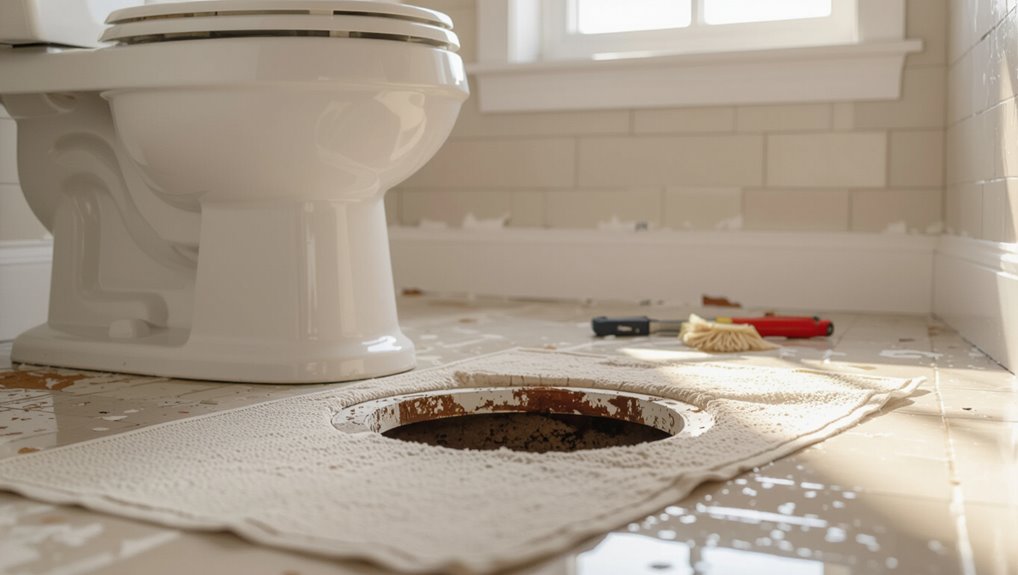
Step 2 Inspect drain pipe and subfloor for damage
Lift back any remaining debris and take a close look at the drain pipe and surrounding subfloor to spot cracks, rot, or loose fittings.
If you find damage, note location and severity before proceeding.
Check for water stains, soft spots, odor, and loose joints so you can decide repair or replacement.
- Water stains or discoloration
- Soft or spongy subfloor
- Cracked or corroded pipe
- Loose or leaking joints
Step 3 Prepare the drain pipe (cleaning, cutting, and leveling)
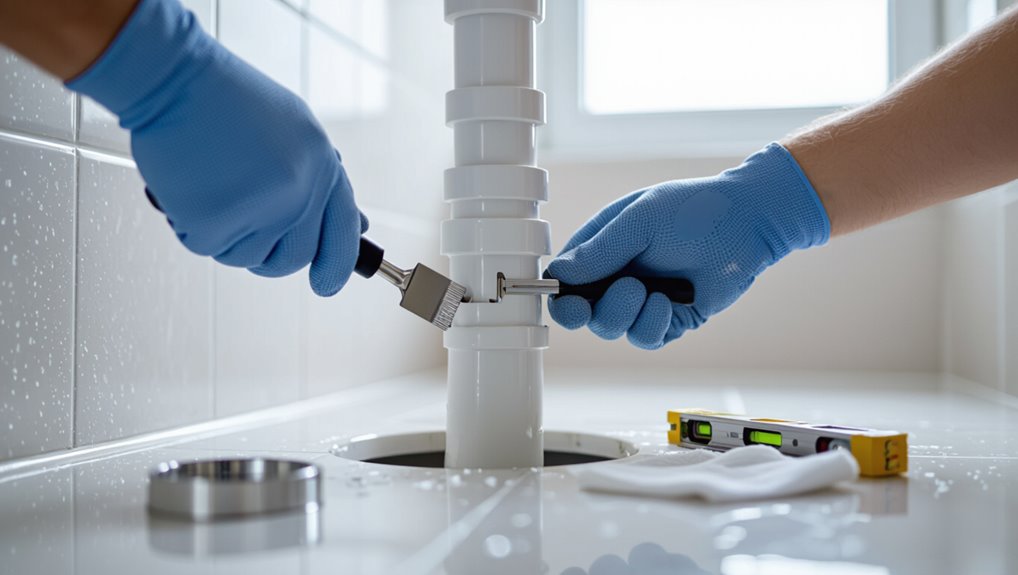
Clear away debris inside and around the drain, then clean the pipe thoroughly so you can see the cut line and check for damage.
Measure and mark the required length, then cut squarely with the right saw.
Deburr and chamfer the edge, remove burrs, and level the pipe so the flange will sit flat.
Dry-fit and recheck measurements before final installation.
Step 4 Choose and fit the correct flange type (PVC, hub, ring-on, repair flange)
Before you set the flange in place, identify which type fits your pipe and toilet: PVC for plastic DWV systems, hub flanges for cast-iron spigots, ring-on flanges for retrofit or offset situations, and repair flanges when the floor or existing flange is damaged. Pick matching size, align bolt slots, and test fit the wax ring.
| Type | Use | Fit |
|---|---|---|
| PVC | Plastic DWV | Slip |
| Hub | Cast iron | Spigot |
| Ring-on | Retrofit | Seat |
| Repair | Damaged floor | Clamp |
| Size check | Bolt alignment | Test fit |
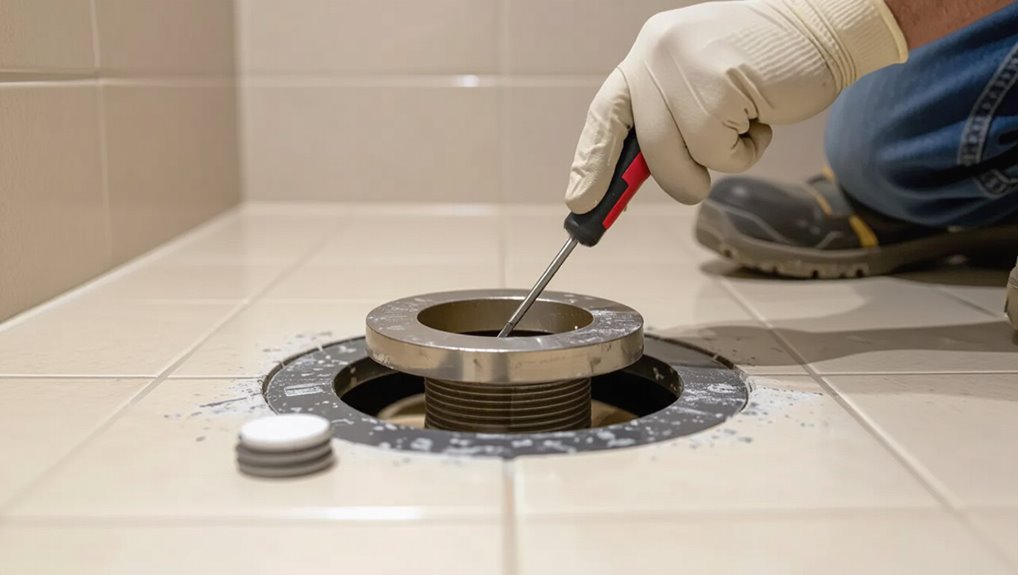
Step 5 Secure the flange to the drain and subfloor (adhesives, screws, bolts)

Fasten the flange to both the drain and the subfloor so it won’t shift when you set the toilet.
Apply a bead of plumber’s or PVC cement where the flange meets the drain if recommended for your material.
Then drill pilot holes and drive corrosion-resistant screws or bolts into joists or blocking.
Tighten evenly; avoid cracking the flange.
Check for firm, wobble-free seating.
Step 6 Leveling and sealing the flange (use of shims, flange extenders)
Level the flange so the toilet will sit flat and seal reliably; even a slight tilt can cause leaks or a rocking bowl.
Check with a level, then add corrosion-resistant shims under the flange rim where gaps exist. Trim shims flush.
If the flange is too low, fit a compatible flange extender or spacer, fasten securely, and apply a bead of silicone around the perimeter for moisture protection.
Step 7 Install toilet bolts and wax/waxless ring properly
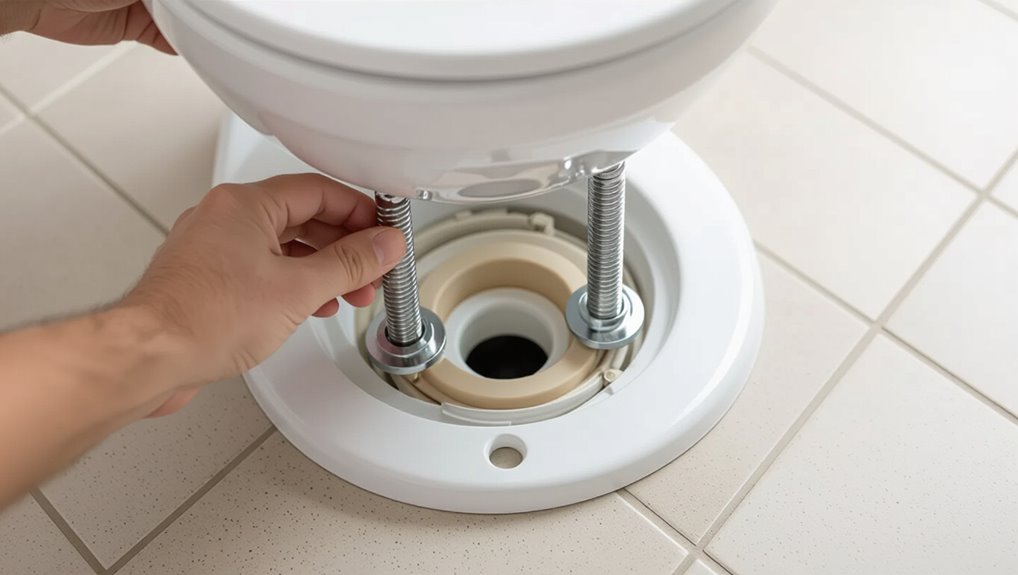
Grab your bolts and seal and get ready to set the toilet: install the closet bolts into the flange slots, slide on the washers and nuts loosely so the bowl can still be positioned, then center the wax or waxless ring on the flange before lowering the toilet straight down to avoid shifting the seal.
Check bolt alignment, press evenly to compress the ring, and keep the bowl steady.
Step 8 Re-seat the toilet, tighten bolts, and test for proper alignment
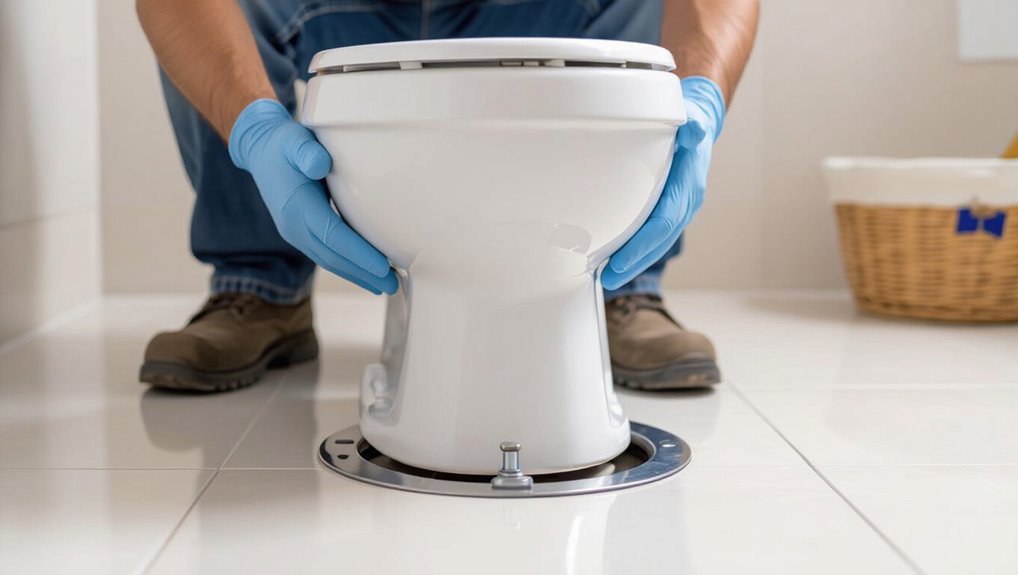
Set the bowl back down onto the flange, then align the bolts with the slots in the base and let the toilet settle evenly so the wax ring seals without gaps.
Press down firmly, install washers and nuts, and tighten alternately in small increments to avoid rocking.
Check that the bowl is level and doesn’t shift; if it rocks, add shims before fully tightening.
Step 9 Reconnect water, check for leaks, and final caulking
With the bowl seated and bolts snugged, you can reconnect the water supply and prepare to check for leaks.
Turn the shutoff back on slowly, flush several times, and inspect connections and base. If dry, apply a thin bead of silicone around the base, smoothing it for a clean seal.
- Turn water on slowly
- Flush and inspect
- Tighten any weeps
- Caulk and smooth
Special Scenarios and Solutions
You’ll run into tricky situations like anchoring a flange to concrete, working with cast-iron pipe, or using extenders and repair rings for a recessed flange.
I’ll also cover how to handle uneven or rotted subfloor and when the subfloor really needs replacing.
Read on for clear solutions and the right tools for each case.
Installing on a concrete floor or slab (anchor methods)
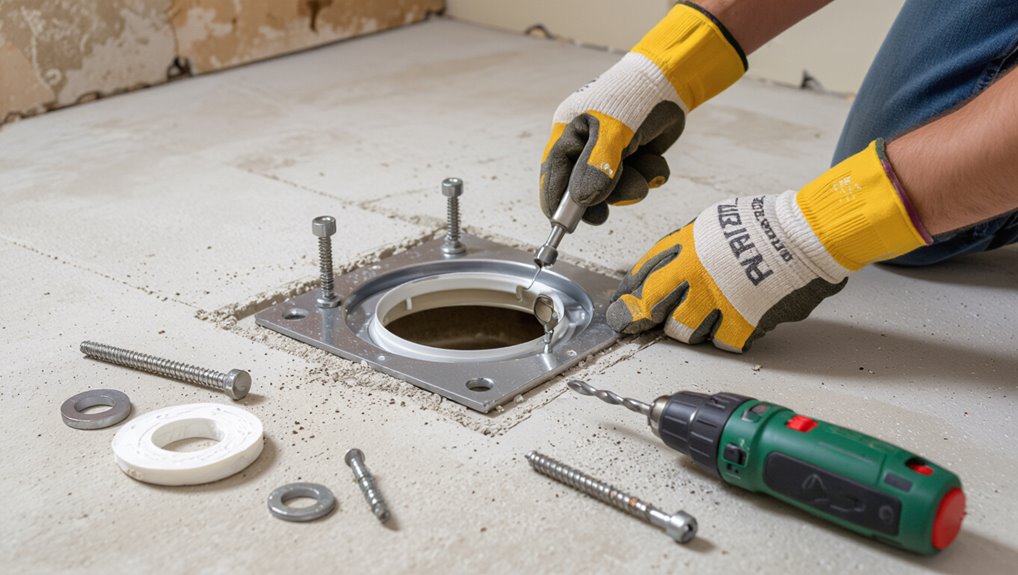
Drill pilot holes, anchor the flange securely, and you’ll prevent leaks and wobble on a concrete slab.
Use a masonry bit, insert sleeve or wedge anchors sized for your flange, and set anchors flush.
Check flange level, torque anchors evenly, and seal around the base with silicone or hydraulic cement.
Let cure per product instructions before installing the toilet to guarantee stability.
Repairing or replacing flange on cast-iron pipe
Working on a cast-iron waste stack calls for different steps than PVC: cast-iron flanges are often corroded, seized, or riveted to the pipe, so you’ll need the right tools and a plan before you start.
You can cut, remove, or sleeve the pipe; brace and prevent collapse; use penetrating oil and heat; then fit a compatible flange or adapter.
- assess corrosion
- cut pipe safely
- install sleeve/adapter
- secure and test
Using flange extenders or repair rings for recessed flanges
If the flange sits too far below the finished floor after you’ve cleaned or replaced the cast-iron pipe, flange extenders and repair rings let you raise the flange to a proper height without redoing the pipework.
Choose a compatible extender or ring, seal with wax or a rubber gasket per manufacturer instructions, bolt it securely to the existing flange, and confirm a level, tight fit before reinstalling the toilet.
Dealing with uneven or rotted subfloor when to replace subfloor
When your toilet flange sits on a sagging or rotted subfloor, you’ll need to assess and often replace the damaged decking before reinstalling the flange; patching over soft spots or shimming rarely gives a reliable, long-term seal.
Inspect joists, cut out rotten plywood, and fit new, level subflooring secured to structural framing.
Replace flange, wax ring, and bolt flange to solid, stable decking.
Common Mistakes and How to Avoid Them
Watch for a few common mistakes that can turn a simple flange job into a headache.
Don’t over-tighten bolts and crack the toilet base. Make sure the flange sits at the correct height for your finished floor, and never skip proper sealing or you’ll risk leaks.
If the flange is misaligned, reposition or shim it before you bolt the toilet down to guarantee a secure, leak-free fit.
Over-tightening bolts and cracking the toilet base
Although tightening the closet bolts until they feel rock-solid seems smart, over-tightening can crack the porcelain base and create expensive damage.
You should snug bolts evenly, alternate sides, and stop once the toilet sits stable and doesn’t rock. Use a torque-limited driver or hand wrench with restraint.
If cracks appear, replace the toilet—don’t try to patch structural porcelain failures.
Incorrect flange height relative to finished floor
If the flange sits too high or too low compared to your finished floor, you’ll face leaks, seal failures, or an unstable toilet that rocks.
Measure finished floor height before installing, and set flange so its top sits flush with or slightly above the finished surface.
Use spacer rings or shim the flange on uneven floors, and trim or recess when it’s excessively high.
Skipping proper sealing and causing leaks
Once you’ve set the flange at the correct height, don’t skip proper sealing—it’s a common cause of leaks and water damage.
You should apply a quality wax or rubber gasket and use plumber’s putty or silicone where the flange meets the floor.
Tighten bolts evenly, test for wobble, and inspect for gaps.
Replace seals if you detect any dampness to prevent future leaks.
Misaligned flange and how to correct alignment
When a flange sits off-center or tilted, your toilet will rock, leak, or fail to seal properly, so correct alignment before you bolt anything down.
Check flange level with a straightedge and use shims or a flange spacer kit to raise or center it.
Tighten mounting screws evenly, confirm wax ring contact, and test fit the bowl to guarantee a snug, wobble-free seal.
Best Practices and Professional Tips
Pick a flange material that matches your plumbing and budget—PVC for most jobs, ABS for compatibility, or brass/stainless for long-term corrosion resistance.
Make the flange easy to service by keeping bolts accessible and noting placement with a photo or quick sketch for future repairs.
Clean the area, use the right seal and fasteners, and check connections periodically to extend the flange’s life.
Choosing the right flange material for your plumbing
Because the flange is the connection between your toilet and drain, choosing the right material affects durability, leak resistance, and compatibility with your existing plumbing.
Pick PVC for corrosion resistance and easy solvent-welding on plastic drains.
Use cast iron or brass-compatible flanges for metal stacks to prevent galvanic issues.
Stainless steel offers longevity in moist environments.
Match material to your drain type and local code.
Preparing for future repairs (accessible bolts, documentation)
Choosing the right flange material also affects how easy future repairs will be, so plan for access and documentation before you finish the installation.
Leave bolts slightly exposed or use bolt caps that you can remove without removing the toilet.
Photograph the flange orientation and bolt locations, note torque and seal type, and tape a copy of those notes under the tank or in a nearby cabinet.
Maintenance tips to extend flange life
Inspect and clean the flange and surrounding area every six months to catch leaks, corrosion, or wax-ring breakdown early.
Keep bolts tight, replace corroded hardware, and reseal as needed to prevent water damage. Use a protective flange cover if exposed, and document repairs for future reference.
- Tighten and check bolts
- Replace corroded parts
- Reseal with appropriate caulk
- Use protective cover
Cost, Time Estimates, and When to Call a Pro
Expect DIY materials to run a few dozen dollars for a PVC or bronze flange while pro installation typically costs $150–$400 or more depending on labor and parts.
If you find rot, cracked waste pipe, or tricky venting and drain layouts, it’s beyond most DIYers and you should call a plumber.
When you do hire one, check licenses, read reviews, get a written estimate, and confirm warranty and insurance.
Typical DIY costs vs. professional installation
While you can save money by replacing a toilet flange yourself, you should weigh parts, tools, and time against the risk of leaks or misalignment that lead to bigger repairs. Expect DIY costs $20–$80 and 1–3 hours; pros charge $150–$400 and 1–2 hours. Hire a pro if you’re unsure.
| Item | Typical Cost |
|---|---|
| DIY parts | $20–$80 |
| Tools | $10–$50 |
| Pro service | $150–$400 |
Signs the job is beyond DIY (structural damage, complex piping)
If the flange sits on rotten subfloor, the drain pipe’s alignment looks off, or water has been leaking into the ceiling below, this isn’t just a simple swap—you should call a pro.
You should also hire help if pipes are corroded, hidden vents must be rerouted, or the joists need repair.
Complex fixes cost more and take longer than a weekend DIY.
How to vet and hire a plumber
Wondering when to call a pro and what it should cost?
Get written estimates, ask for license and insurance proof, and check reviews.
Expect simple flange replacement to take 1–2 hours; complex repairs cost more.
Ask hourly vs. flat rates, warranty terms, and references.
If you spot rot, leaks, or sewer odors, call a licensed plumber immediately.
FAQ
You’ll likely have a few quick questions about flange condition, installation steps, seal types, flange height, and lifespan.
I’ll answer how to spot a bad flange, whether you can replace one without removing the toilet, pros and cons of wax vs waxless seals, the correct flange height, and typical longevity.
Read on for clear, practical answers so you can decide what to do next.
How do I know if my flange is bad?
How can you tell when a toilet flange is failing?
Look for wobbling or shifting toilet, persistent or recurring leaks at the base, water stains or dampness around the floor, and a rotten or soft subfloor.
You might notice sewer smells, loose or broken flange bolts, or visible cracks in the flange.
These signs mean repair or replacement is needed.
Can I install a flange without removing the toilet?
If your flange shows those failure signs, you might hope to swap it without removing the toilet — but in most cases you can’t safely replace a flange while the toilet stays in place.
You can sometimes repair or bolt a damaged flange from above for minor issues, but full replacement usually requires removing the toilet to access, level, and secure the new flange properly.
What’s better: wax ring or waxless seal?
Wondering which gives a better seal: a traditional wax ring or a modern waxless gasket? You’ll choose based on fit and future service.
Wax rings compress, create a reliable seal, and’re cheap but messy and replaceable only by removing the toilet.
Waxless seals clamp, resist leaks after movement, and let easier reinstallations.
Pick wax for simplicity, waxless for convenience and adjustability.
How high should the flange sit relative to the finished floor?
Want a trouble-free seal? Position the flange so its top sits flush with — or up to 1/4 inch above — the finished floor.
That guarantees the wax ring compresses properly and prevents leaks. If the flange sits below the floor, use a flange extender or spacer; if it’s too high, trim or recess the toilet base slightly.
Check alignment before bolting.
How long does a toilet flange last?
How long will your toilet flange last?
Typically, a good-quality flange lasts 10–30 years depending on material, installation, and moisture exposure.
PVC and ABS can endure decades if installed right; brass or stainless offer longer life.
Corrosion, shifting subfloor, or wax ring failures shorten lifespan.
Inspect periodically and replace when you see cracks, wobble, or persistent leaks to avoid bigger damage.