How to Clean Wood Like Tile Floors Without Damage
You can keep wood‑look tile safe and shiny by dusting first with a microfiber pad, testing cleaners in a hidden spot, and using a pH‑neutral, water‑based cleaner applied sparingly from a low‑pressure spray. Wring mops well, mop along the grain in short strokes, rinse and dry each section, and use soft tools for crevices or sticky spots. Protect high‑traffic areas with mats and felt pads under furniture, and follow up with periodic deep cleaning to learn simple maintenance and repair tips.
How Wood Finishes Change Cleaning Results
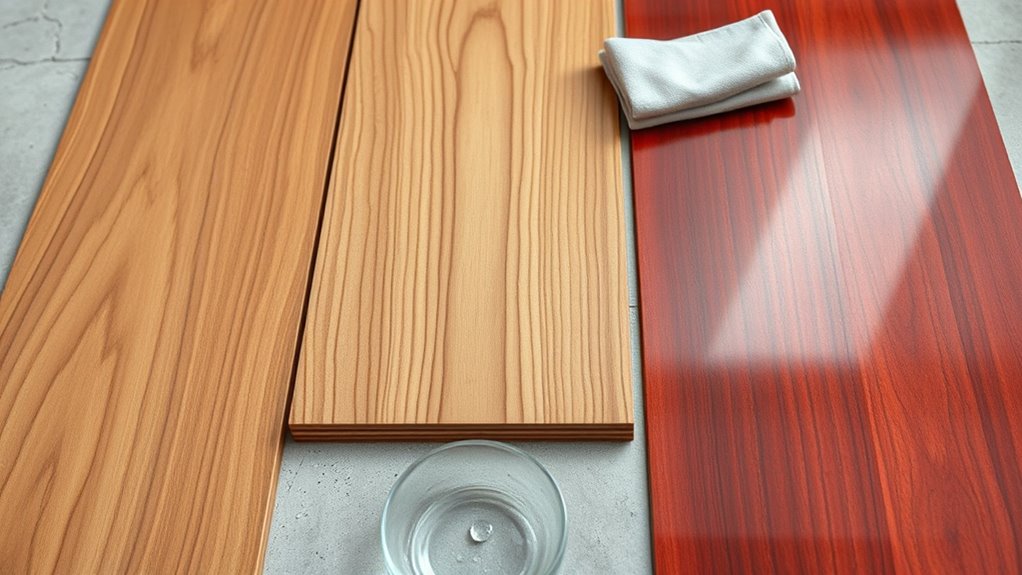
Because finishes sit between your cleaning products and the wood, they directly affect what methods and cleaners you can use. You’ll check the finish type first—oil, polyurethane, wax, or penetrating stain—because each responds differently to water, solvents, and agitation.
Match cleaners to finish durability: tougher polyurethanes tolerate stronger solutions; delicate waxes need mild soaps. Follow the wood grain when wiping to avoid pushing dirt into pores or causing micro-scratches.
Test any new product in an inconspicuous spot. By respecting finish limits and working with the grain, you’ll clean effectively without stripping protection or dulling the surface.
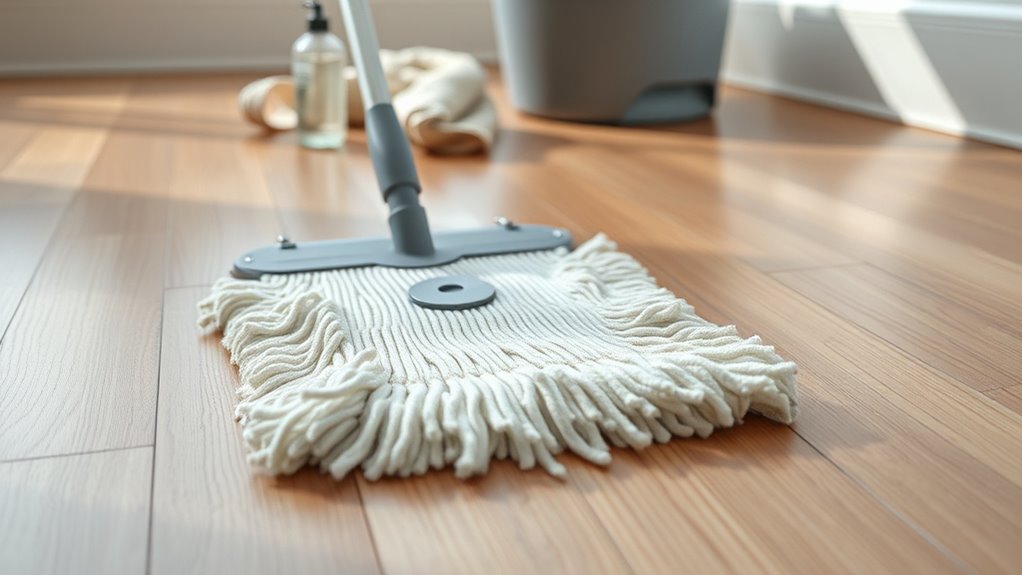
Which Tools Produce a Streak‑Free, Tile‑Like Look
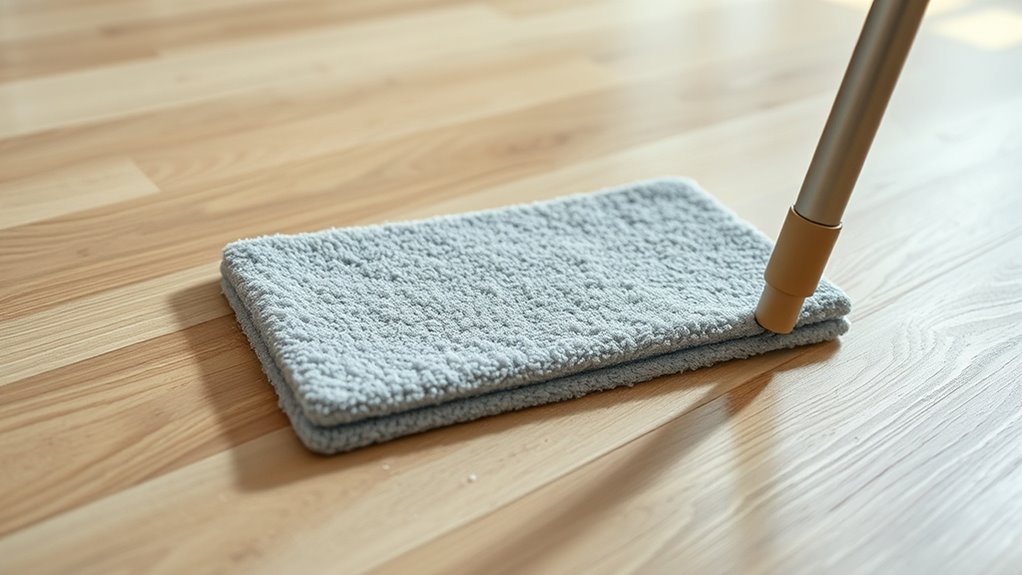
When you want wood to shine like tile, choosing the right tools matters as much as the cleaner. Use a microfiber mop for even pickup and minimal streaking; its fine fibers follow wood grain without abrasion.
When you want wood to shine like tile, pick tools as carefully as the cleaner — a microfiber mop glides without streaks.
Pair that with a soft, lint-free cloth for edges and touch-ups to avoid residue. A flat, low‑pressure spray bottle delivers solution evenly so you don’t over‑wet the finish.
For stubborn spots, a sponge with a nonabrasive pad works. Keep tools clean to protect finish durability—dirty pads scratch and dull surfaces.
Replace or wash covers regularly to maintain a consistent, tile‑like look.
Step‑By‑Step Routine for Tile‑Like Wood Floors
Start by clearing the floor of furniture, rugs, and loose debris so you can work uninterrupted; this makes each cleaning step more effective and prevents scratches. Next, plan around seasonal decorating and any temporary pieces so you won’t rework cleaned areas. Follow a consistent routine that protects finishes and optimizes appearance.
- Sweep or vacuum edges first
- Tackle spills with a damp cloth promptly
- Clean in small sections, working toward exit
- Rinse residue with clear water and dry immediately
- Return items using thoughtful furniture arrangement to avoid scuffs
Stick to this order for reliable, tile‑like results on wood.
Dust First: Microfiber Mopping Technique
Start by picking a high-quality microfiber mop head with dense, electrostatic fibers that trap dust without scratching the finish.
You’ll use gentle, overlapping strokes and work from the far corner toward the exit to avoid recontaminating cleaned areas.
Change or shake out the pad as soon as it looks loaded so you’re collecting dust, not spreading it.
Choose The Right Microfiber
Although microfiber looks simple, choosing the right type makes dusting far more effective and protects your wood finish. You’ll want a high-quality pad that balances microfiber durability with gentle fibers to avoid scratches.
Pick a low-lint, fine-weave cloth for daily dusting and a thicker, plush one for deeper pickup on scheduled cleaning.
Match pad size to your mop head and replace worn pads according to cleaning schedules to maintain performance.
Wash pads separately without fabric softener to preserve electrostatic charge.
- Low-lint, fine-weave for daily use
- Plush for heavy pickup
- Right size for mop head
- Replace per schedule
- Wash without softener
Proper Dusting Technique
Because dusting first prevents grit from scratching the finish, begin each cleaning session with a dry microfiber pass across the floor, working toward one exit so you don’t recontaminate cleaned areas.
Use a flat microfiber mop or handheld cloth, moving with the grain and covering overlapping strokes. Replace or shake out dusting cloths when they load, and wash them regularly to retain electrostatic pickup.
Keep a feather duster for quick touch-ups on baseboards and furniture, but don’t rely on it for floors.
Finish with a damp microfiber mop only after all loose debris is gone to avoid dragging grit.
Damp‑Mop Correctly: Water, Wring, and Motion
When you damp-mop hardwood like tile, use just enough water to loosen dirt without soaking the boards—excess liquid can swell seams and damage finish. You’ll protect wood grain and guarantee finish protection by wringing the mop thoroughly and working in short, overlapping strokes. Move with the grain when possible, and change water before it gets dirty.
- Wring until mop is barely damp
- Use a flat microfiber mop for even coverage
- Mop in small sections, drying immediately
- Rinse and wring mop frequently to avoid residue
- Finish with a dry pass to remove moisture
Safe Cleaners That Deliver Tile‑Like Results
Now that you’ve mastered damp‑mopping technique, pick cleaners that give tile‑like sparkle without harming wood. Choose pH‑neutral, water‑based solutions formulated for hardwood; they lift soil without raising the wood grain or dulling the finish sheen.
Dilute concentrated formulas per label, test a hidden spot, and apply sparingly with a microfiber mop to avoid saturation. For sticky spots, let cleaner sit briefly, then wipe—don’t scrub aggressively.
Avoid oil‑heavy polishes that build residue. You’ll preserve authentic wood grain while achieving a clean, reflective look similar to tile, without compromising long‑term protection.
Common Cleaners and Chemicals to Avoid
Don’t use harsh alkali cleaners on wood floors, because they can strip finishes and dry out the wood.
Avoid ammonia and straight vinegar mixes, since their acidity or alkalinity can dull or damage the finish over time.
Stick to pH‑balanced, wood‑safe products so you won’t compromise your floor while trying to mimic tile cleaning results.
Harsh Alkali Cleaners
Although alkaline cleaners can strip grime quickly, you should avoid harsh alkalis on wood-like tile because they can dull sealants, etch grout, and leave residues that attract dirt.
You’ll want to skip harsh chemicals that promise miracle results; cleaning myths often push strong alkalis as a shortcut. Instead, choose pH-neutral products designed for sealed tile and test in a hidden spot.
Rinse thoroughly and dry to prevent residue buildup. Watch for manufacturer guidance to protect finishes.
- Sodium hydroxide solutions
- Industrial degreasers
- Drain cleaners
- Oven cleaners used on floors
- High-pH laundry boosters
Ammonia And Vinegar
You might think common household cleaners like ammonia and vinegar are safe shortcuts after avoiding harsh alkalis, but they can damage wood-look tile and grout.
You should avoid ammonia because fumes can degrade sealants and harm grout; if you must use it, guarantee proper ammonia safety—ventilate, dilute, and never mix with bleach.
Vinegar’s acidity dulls tile finishes and breaks down grout sealers over time, so skip straight vinegar cleaning.
Instead, choose pH-neutral tile cleaners or mild soap solutions as vinegar alternatives.
Test any product in an inconspicuous spot and rinse thoroughly to protect finish and seams.
DIY Wood‑Safe Cleaner: Recipes and Ratios
When you mix cleaners for wood floors, stick to simple, gentle recipes and precise ratios so you won’t strip the finish or leave residue. You’ll care for wood grain and target mild stain removal using pH-neutral soap, diluted vinegar alternatives, or castile mixes.
Test any blend in an inconspicuous spot first.
- 1 cup warm water + 1 tsp pH-neutral dish soap
- 1 gallon water + 1/2 cup rubbing alcohol for quick drying
- 1 quart water + 1 tbsp castile soap
- 2 cups water + 1 tbsp white vinegar substitute
- 1 cup water + 1 tsp olive oil for conditioning touch-ups
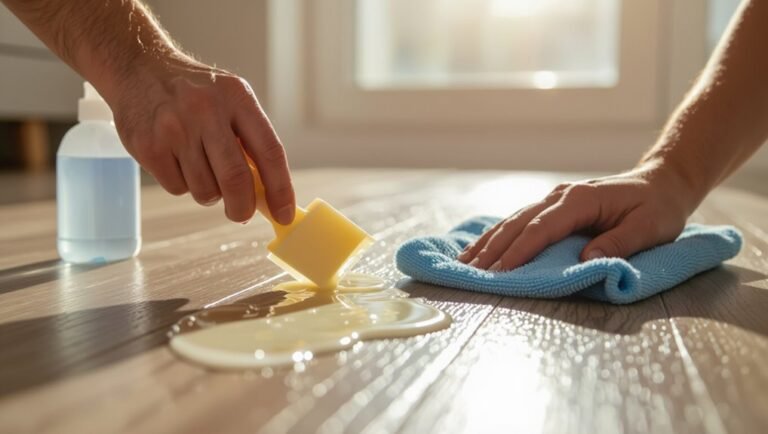
Remove Sticky Residue and Scuffs Without Damage
If sticky spots or scuff marks have been stubbornly clinging to your wood like they’d stick to tile, tackle them gently with the right tools and a careful touch so you don’t damage the finish.
Start with a soft cloth dampened with diluted wood-safe cleaner; rub along the grain.
For adhesive removal, use a small amount of mineral spirits or a commercial adhesive remover on a test spot, then wipe immediately and dry.
For scuffs, try a rubber eraser or a white nylon pad, applying light pressure.
Finish by rinsing, drying, and checking for discoloration to guarantee stain prevention.
Clean Dirt From Seams and Cracks in Wood Floors
You’ll need the right tools for tight spaces—soft-bristled toothbrushes, a vacuum crevice tool, and cotton swabs work well.
Use gentle techniques like sweeping debris toward the crevice or loosening it with a damp cloth before vacuuming.
Don’t force anything into the cracks or use harsh poking tools that could damage the wood.
Tools For Tight Spaces
Although those narrow seams seem small, dirt and grit can act like sandpaper and wear your finish unless you clean them with the right tools. You’ll protect finish durability and avoid uneven color staining by choosing precise, nonabrasive implements.
Use soft-bristle brushes, micro-cleaning picks, and thin foam tools to lift debris without scratching. For adhesive grit, try a wood-safe putty blade at a low angle.
Keep tools clean to prevent cross-contamination and test in an inconspicuous spot first.
- Soft nylon toothbrush
- Micro vacuum hose attachment
- Wooden toothpicks
- Thin foam wedges
- Flexible paint scraper
Gentle Debris Removal Techniques
When dirt settles into seams and cracks, it grinds away finish and traps moisture, so you should remove debris gently and regularly using nonabrasive methods.
Use a soft-bristled toothbrush or microfibre cloth to loosen grit, then vacuum with a crevice tool to lift particles.
For sticky residue, dampen a cloth with a mild, diluted cleaner—consider eco friendly options like diluted white vinegar or Castile soap for effective, pet safe solutions.
Avoid metal tools or harsh scrubbing.
Work along the grain, drying thoroughly to prevent swelling.
Repeat weekly in high-traffic zones and after pets or messy activities.
Polish and Buff to Enhance a Tile‑Like Finish
If you want that glossy, tile‑like sheen, polishing and buffing are the final steps that bring out depth and uniformity in wood floors without harming the finish. You’ll choose polish techniques suited to your finish—wax, oil, or water‑based polish—and apply sparingly with a soft pad.
Use buffing methods that protect grain: low RPM, clean microfiber bonnet, and light pressure. Work small areas, overlap passes, and check often for buildup. Finish with a microfiber cloth for hand‑buffing to remove haze.
Buff gently with a clean microfiber bonnet at low speed, working small overlapping areas; hand‑buff haze away.
- Select compatible polish
- Test in an inconspicuous spot
- Use proper pads
- Maintain low speed
- Wipe residue promptly
Protect Finishes: Mats, Pads, and Humidity Control
You’ll protect your finish best by placing quality door mats at every entry to trap grit and moisture.
Put felt pads under furniture legs so chairs and tables don’t scratch when they move.
Keep indoor humidity between about 35–55% to prevent gaps or cupping that can ruin a smooth, tile‑like look.
Use Quality Door Mats
Although it may seem minor, placing quality door mats at every entry keeps grit, moisture, and oils off your wood like tile floors and protects their finish. You’ll cut cleaning frequency, prevent scratches, and reduce wear with the right door mats that trap debris and wick moisture.
Choose low-abrasion surfaces, breathable backing, and washable materials to preserve finish protection. Empty and clean mats regularly so they don’t become sources of dirt.
Position mats both outside and inside high-traffic doors, and replace them when flattened.
- Dense weave to trap grit
- Absorbent material for moisture
- Low-tack backing
- Easy to wash
- Replace when worn
Felt Furniture Pads
When you slide chairs or move tables, felt furniture pads take the brunt of the abrasion and stop scratches before they happen. You’ll stick Felt pads to chair legs, table feet, and other contact points to protect finishes and extend their life.
Choose dense, non-marking pads sized for weight and movement; replace them when compressed or soiled. Clean both floor and furniture bases before application so adhesive bonds well.
For heavy pieces, use larger pads or combination glides. Regularly inspect pads during cleaning routines to guarantee ongoing furniture protection without trapping grit that could harm your wood floors.
Maintain Proper Humidity
Since wood expands and contracts with moisture, keeping indoor humidity steady prevents gaps, cupping, and finish damage to your wood-look tile and surrounding real-wood elements.
You should monitor humidity and use humidifiers or dehumidifiers to maintain 35–55% relative humidity. Combine Humidity control with proper Air circulation to avoid trapped moisture under mats or near windows.
Check seals, move rugs occasionally, and ventilate after showers or cooking. Simple steps protect finishes and extend flooring life.
- Use a hygrometer for weekly checks
- Run HVAC or fans for Air circulation
- Use dehumidifiers in basements
- Add humidifiers in winter
- Ventilate after wet tasks
Deep‑Clean vs. Professional Refinishing: When to Call Help
If your floors still look worn after a thorough deep clean, it’s time to weigh whether a professional refinishing is worth it. You can deep‑clean to remove grime, restore sheen, and assess surface damage, but flooring durability matters: soft, thin finishes and deep gouges often need pros.
Consider refinishing timing—don’t sand too soon after recent coats, and delay if humidity or temperature will affect drying. Call a professional when wear exposes raw wood, structural issues appear, or DIY sanding risks further harm.
A pro evaluates substrate, matches stains, and applies durable finishes for long‑term protection.
Quick Spot Fixes: Stains, Pet Messes, and Spills
Because accidents happen, you’ll want fast, targeted responses for stains, pet messes, and spills to prevent permanent damage. Act quickly: blot liquids, scoop solids, and avoid rubbing. Use gentle cleaners or cleaning innovations like enzyme sprays for organic messes, and choose Eco friendly solutions to protect finish and indoor air.
- Blot with microfiber, then dry thoroughly.
- Neutralize urine with enzyme cleaner, not ammonia.
- Scrape dried food gently, then wipe.
- Treat oil with talc or cornstarch, vacuum after.
- Test any product in an inconspicuous spot first.
Prompt, careful action stops stains from setting.
Routine Maintenance Checklist for Tile‑Like Shine
When you follow a simple routine, your wood can keep a tile-like shine without risking the finish—wipe up spills immediately, dust daily with a microfiber mop, and use a damp (not wet) microfiber cloth for weekly cleaning.
Check grout-like seams between planks for grit that scratches wood grain; vacuum with a soft-brush attachment or sweep gently.
Rotate rugs to prevent uneven wear and protect high-traffic paths with runners.
Match cleaning frequency to your floor color and finish—darker tones show dust faster.
Buff lightly after drying to restore sheen, and inspect finishes monthly for dull spots needing attention.
How to Test Products and Tools Safely First
Before you bring a new cleaner or tool onto your wood floors, test it in an inconspicuous spot so you don’t risk visible damage. You’ll verify product safety and tool durability before wider use.
Apply a small amount, wait the recommended dwell time, then inspect for finish dulling, staining, or warping. For tools, scrub gently and check bristles or pads for shedding.
- Choose an out-of-the-way test patch
- Follow manufacturer instructions precisely
- Use a microfiber cloth or soft pad
- Wait 24 hours to assess long-term effects
- Note results and label safe products/tools
Frequently Asked Questions
Can Wood-Look Vinyl Techniques Be Used on Real Wood Floors Safely?
Yes — you can adapt some wood-look vinyl techniques for real wood, but you’ll focus on wood preservation and finish protection; you’ll avoid harsh cleaners, use gentle scrubbing, pH-neutral products, and test finishes before broader application.
How Do Radiant Floor Heaters Affect Cleaning and Moisture Control?
Like a slow sunrise, radiant heating warms floors evenly and reduces moisture, so you’ll need vigilant moisture management: use damp (not wet) mops, monitor humidity, avoid standing water, and let floors acclimate to temperature changes.
Can Pet Nail Trimming Prevent Scratches Despite Cleaning Methods?
Yes — regular nail trimming reduces pet scratches and helps protect floors. You’ll still need protective measures like rugs, nail caps, and gentle cleaning, but trimming’s a simple, effective way to minimize damage and maintain finish.
Is It Safe to Use Steam Mops on Water-Resistant Wood Finishes?
You shouldn’t use steam cleaning on water resistant finishes regularly; steam can warp joints and lift coatings. If you do, use the lowest steam setting, keep mop moving quickly, and test a hidden spot first.
How Often Should Area Rugs Be Rotated to Avoid Uneven Wear?
You should rotate area rugs every 3–6 months to even out traffic exposure; this area rug maintenance prevents concentrated floor wear patterns, prolongs fibers, and keeps colors balanced so high-traffic zones don’t wear unevenly.
Conclusion
You can get wood floors to gleam like tile without risking damage by matching your cleaning to the finish, using soft microfiber tools, and wringing mops until they’re just damp. Follow gentle, consistent techniques for everyday dusting and damp-mopping, tackle spills and stains promptly, and bring in pros only for deep wear or refinish needs. With care and the right routine, your floors will shine like a mirror—steady, simple maintenance is the secret.