How to Get Tile Floors Really Clean (Pro Cleaning Tips)
You can get tile floors truly spotless by prepping, choosing the right cleaner for your tile and grout, and working methodically. Remove furniture, vacuum, and pretreat grout in high-traffic areas. Scrub with appropriate brushes, mop with a concentrated cleaner, rinse twice, and dry with microfiber towels to avoid water spots. Use pH-neutral products on stone, avoid bleach on colored grout, and seal porous surfaces. Keep going for step-by-step tools, timing, and troubleshooting to finish like a pro.
How This Guide Helps You Deep-Clean Tiles
Because deep-cleaning tile can be time-consuming and confusing, this guide breaks the process into clear, practical steps so you know exactly what to do and when. You’ll learn how to assess tile texture and choose cleaners that won’t dull or etch surfaces, plus methods to lift soil from porous grout without bleaching grout color.
You’ll get timing cues, tool recommendations, and safety tips so you work efficiently and avoid common mistakes. Follow the sequence for prepping, scrubbing, rinsing, and sealing; you’ll save effort, get consistent results, and maintain tiles longer with minimal rework.
Quick One-Day Deep-Clean Plan for Tile Floors
When you’ve got just one day to deep-clean tile floors, follow a tight, stage-by-stage plan that prioritizes prep, targeted scrubbing, and fast rinsing so you finish with time to spare.
Begin by removing furniture and vacuuming to expose grout and tile patterns.
Tackle high-traffic spots first: pretreat grout with a booster, let it sit, then scrub with a stiff brush.
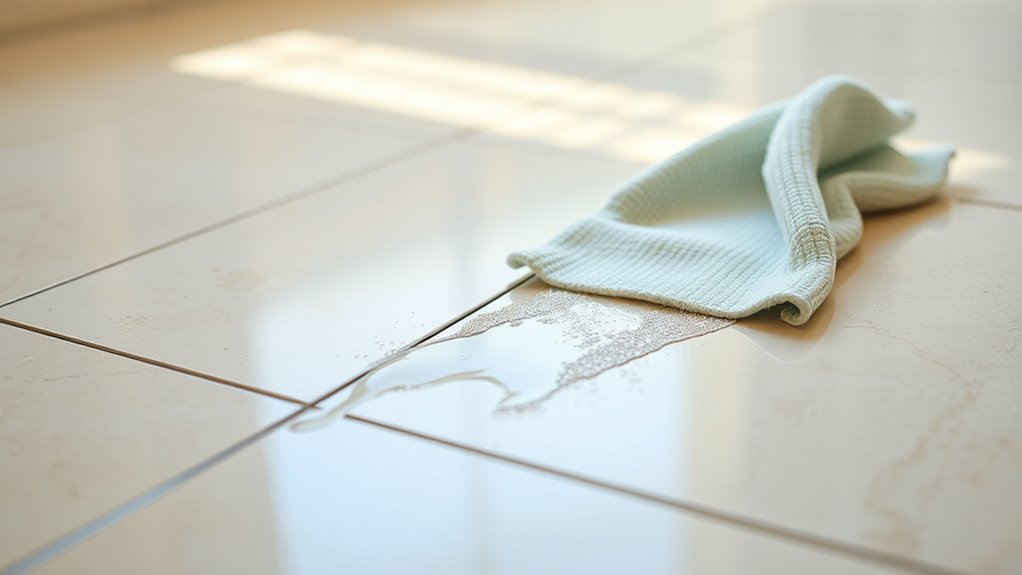
Mop with a concentrated cleaner, rinse twice, and wring thoroughly to avoid streaks.
Dry with microfiber towels to prevent water spots and protect any creative decor nearby.
Replace items, buff tiles, and inspect for missed streaks.
Which Tiles Need Special Care: Ceramic, Porcelain, and Natural Stone
If you want tile that lasts and looks its best, treat ceramic, porcelain, and natural stone differently. You’ll care for glazed ceramic gently, avoid harsh abrasives, and protect vibrant tile patterns with routine mopping. Porcelain’s density resists stains, but you should still use neutral cleaners and note grout color to avoid discoloration. Natural stone demands pH-neutral products, sealing, and prompt spill cleanup to preserve veining and finish.
| Tile Type | Best Cleaner | Notes |
|---|---|---|
| Ceramic | Mild detergent | Protect patterns, avoid bleach |
| Porcelain | Neutral cleaner | Durable, mind grout color |
Identify Your Tile and Grout Type Quickly
Start by identifying whether your tiles are ceramic, porcelain, or natural stone so you can choose the right cleaners and techniques.
Check the grout to see if it’s cement-based, epoxy, or polymer — that affects how it reacts to moisture and cleaners.
Before full cleaning, spot-test a chosen method in an inconspicuous area to confirm it won’t damage the tile or grout.
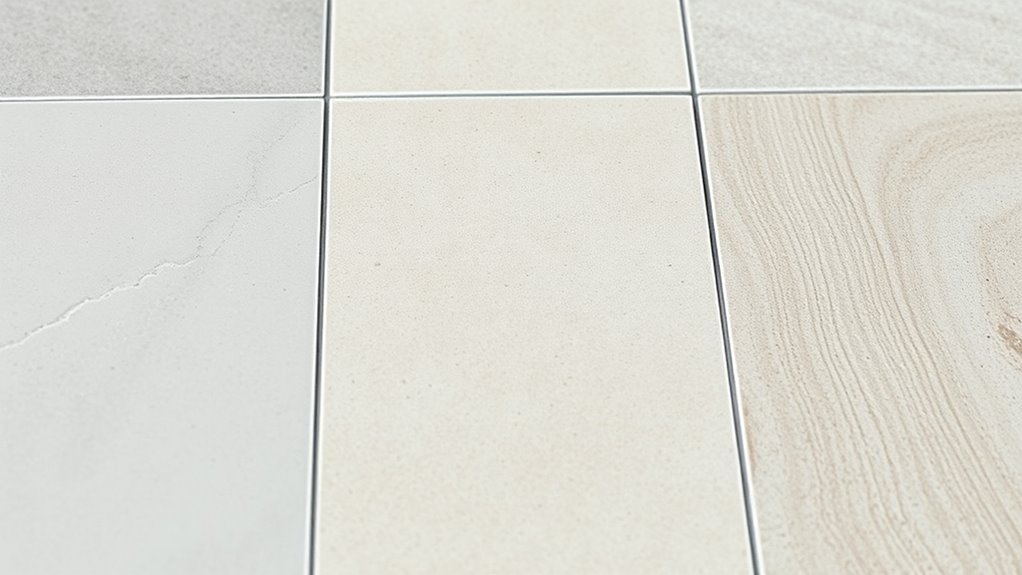
Determine Tile Material
Want to know what you’re dealing with before you grab a mop or cleaner? First, observe tile patterns and grout colors—they hint at material.
Porcelain and ceramic feel hard, cool, and often have a glazed surface; missing glaze shows raw clay.
Natural stone (marble, travertine, slate) has irregular veining and texture; it usually absorbs water.
Vinyl and linoleum flex slightly under pressure and have repeating printed patterns.
Perform a small water test: natural stone darkens, ceramic/porcelain resists.
If unsure, tap—ceramic sounds hollow; stone is solid.
Label tiles so you choose compatible cleaners and avoid damage.
Inspect Grout Composition
Because grout type affects which cleaners and tools you can safely use, inspect it before you begin cleaning. You’ll check grout porosity visually and by feel; porous grout soaks water and needs gentler agents. Do a quick composition analysis: cement-based, epoxy, or urethane, noting color, hardness, and texture. That tells you what scrubs and acids to avoid. Use a small probe or fingernail to test hardness; crumbly grout is cement. Record findings and plan products accordingly.
| Sample | Likely Type | Notes |
|---|---|---|
| White crumbly | Cement | High porosity |
| Smooth glossy | Epoxy | Low porosity |
| Flexible | Urethane | Chemical resistant |
| Aged dark | Cement | Stains easily |
Spot-Test Cleaning Methods
Now that you’ve identified your grout type and porosity, you’ll want to spot-test cleaners on an inconspicuous area of both tile and grout before treating the whole floor. Choose small sections near baseboards or under furniture.
Try water first, then a pH-appropriate cleaner, and finally a diluted commercial product. Wait the recommended dwell time, rinse, and inspect for color change, etching, or residue.
Note reactions and photograph results. Ignore cleaning myths and resist random DIY hacks that harm surfaces.
Record what worked so you can safely scale the method across the room without risking damage or uneven appearance.
Essential Safety: Protective Gear and Ventilation for Deep Cleaning
Before you start scrubbing or mixing cleaners, make sure you’ve got the right protective gear and proper ventilation in place — they’ll keep you safe from fumes, splashes, and dust. You should wear gloves, eye protection, and a mask rated for chemical fumes or dust depending on products used. Protective gear reduces skin irritation and accidental ingestion.
Open windows and run fans to promote Ventilation safety, directing airflow out of the room. If you’ll use stronger cleaners, consider a respirator and keep others, pets away.
Always read product labels for hazards and first-aid steps before you begin.
Tools That Make Deep Tile Cleaning Faster and Safer
When you gear up for a deep tile clean, pick tools that cut effort and exposure—stiff-bristled brushes, a long-handled grout brush, a mop with a detachable head, and a quality wet/dry vacuum will save time and keep contaminants off your skin.
Choose chemical-resistant gloves, splash goggles, and a respirator if you’ll use strong cleaners.
Use extension handles to avoid kneeling and an angled grout brush for stubborn lines.
Portable scrubbers speed work without harming tile aesthetics when used gently.
Don’t buy into cleaning myths promising instant miracles; proper tools plus technique deliver lasting results.
Best Mops and Microfiber Tools for Streak-Free Results
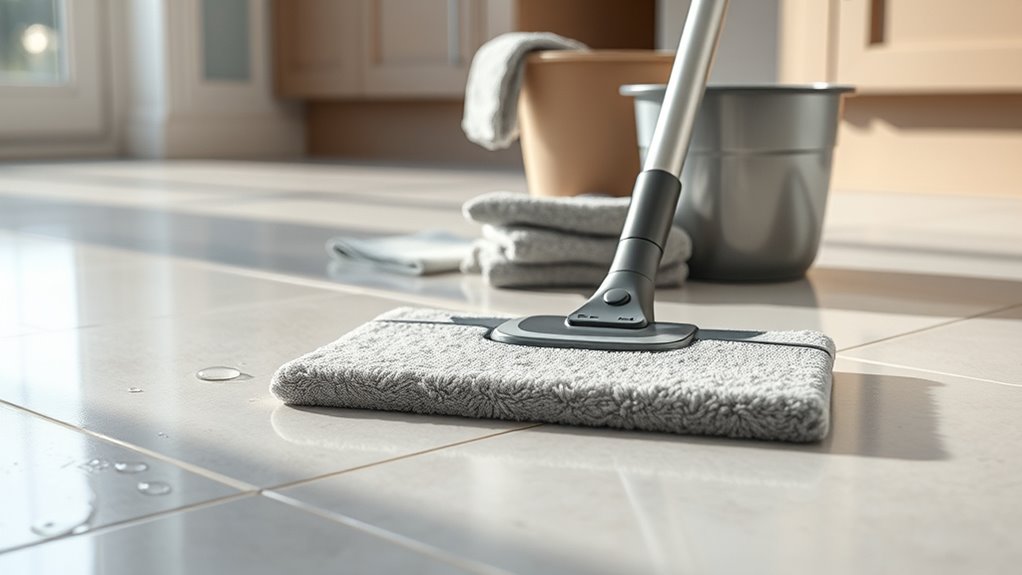
You’ll get the best streak-free results by choosing the right microfiber mop head—flat, looped, or string styles each suit different tile textures and messes.
Learn simple care techniques like rinsing thoroughly, washing with mild detergent, and air-drying to keep fibers effective.
With the proper type and maintenance, your mop will lift dirt without leaving residue.
Best Microfiber Mop Types
If you want streak-free tile with less effort, choosing the right microfiber mop matters: different head shapes, pile densities, and attachment systems change how well a mop lifts dirt, wrings out, and glides across grout.
Pick a flat microfiber pad for smooth tile and quick coverage; its low pile and wide head speed cleaning. For textured tile or grout, choose a looped or fringe-style pad with higher pile for agitation.
Consider swivel or pivoting heads to reach corners. Check microfiber durability so pads last; look for eco-friendly options like reusable, machine-washable pads to cut waste and costs.
Proper Mop Care Techniques
Although proper mop care often gets overlooked, keeping microfiber pads and mop heads clean and well-maintained is the quickest way to guarantee streak-free tile and extend tool life. You should rinse pads after each use, launder them without fabric softener, and air-dry fully. Empty and rinse mop buckets, and replace dirty solution. Set a cleaning frequency—light mopping twice weekly, deep pad wash monthly. For mop storage, hang handles upright and keep pads dry to prevent odor and mildew.
| Task | Tip |
|---|---|
| Rinse pads | Immediately after use |
| Dry & store | Hang to dry |
Choosing the Right Scrub Brushes for Grout Without Damage
When you’re tackling grout, pick a brush that balances stiffness and gentleness so you remove dirt without scratching or eroding the joint. For effective scrub brush selection and grout damage prevention, choose tools that match grout condition and tile finish. Consider these specifics:
- Nylon-bristle handheld for routine cleaning — firm but flexible.
- Soft brass or bronze for aged grout that resists nylon.
- Microfiber-tipped or foam for delicate or glazed tiles.
- Angled or narrow-head brushes for corners and deep lines.
Test any new brush in an inconspicuous spot, work gently, and replace worn brushes promptly to avoid harm.
Decide Whether to Use a Steam Cleaner?
Wondering whether a steam cleaner is right for your tile floors? You’ll weigh benefits: steam cleaning lifts grime and offers quick tile sterilization without chemicals, great for sealed ceramic or porcelain.
Wondering if a steam cleaner suits your tile? It lifts grime and sanitizes sealed ceramic or porcelain without chemicals.
Don’t use it on unsealed natural stone, damaged grout, or delicate tiles — moisture and heat can worsen issues. Test a hidden spot first, follow manufacturer guidance, and use low settings to avoid stripping sealant.
For routine upkeep, steam can reduce scrubbing time; for heavy stains or structural concerns, pair it with targeted manual care.
Decide based on tile type, grout condition, and sealing status.
Chemical Cleaners: What Works and What to Avoid on Each Tile Type
If you decide a steam cleaner isn’t right for your floors, you’ll still need safe, effective chemical options tailored to each tile type. Choose cleaners that avoid toxic ingredients and won’t trigger harmful chemical reactions with grout or sealers. Follow tile-specific guidance:
- Porcelain/ceramic: mild detergent, non-abrasive; avoid harsh acids.
- Natural stone (marble, travertine): pH-neutral, stone-safe formulas; skip acidic cleaners.
- Quarry/unglazed tiles: stronger degreasers okay; rinse thoroughly.
- Terracotta/sealed tiles: gentle cleaners and periodic resealing; test first.
Always spot-test and ventilate while cleaning.
Read Cleaner Labels and pH: What Matters
Because labels tell you what a product will actually do to your floors, read them closely before you buy or use a cleaner. You’ll check pH: acids (low pH) can dull or etch natural stone; alkaline cleaners remove grease but may harm some sealers.
Look for tile-type recommendations, dilution rates, safety warnings, and residue notes. Note ingredients that affect grout color or stain resistance if you plan color matching or grout tinting afterward.
Don’t assume “tile-safe” covers all surfaces—test in an inconspicuous spot. Follow label directions for dwell time, rinsing, and ventilation to avoid damage.
DIY Tile Cleaner Recipes That Actually Work
You can make effective tile cleaners at home with just a few ingredients. Try a vinegar-and-baking-soda paste for spot cleaning and a mild Castile soap solution for routine mopping.
Test any recipe on a small, inconspicuous area first to protect grout and finish.
Vinegar And Baking Soda
While vinegar and baking soda are often touted as a miracle combo for cleaning tile, they work best when you use them correctly and sparingly. Mixed into simple DIY solutions, they cut grease, lift grime, and refresh grout without harsh chemicals. You can clean a kitchen backsplash or brighten outdoor patios with care.
Try these quick methods:
- Sprinkle baking soda on grout, spray diluted vinegar, scrub gently, rinse.
- For greasy tile, mix 1 cup water, 1/4 cup vinegar, a teaspoon baking soda, mop and rinse.
- Use paste for stains, let sit 5–10 minutes, then scrub.
- Always test first on an inconspicuous spot.
Castile Soap Solutions
If vinegar and baking soda aren’t right for a surface or you want a gentler option, Castile soap offers a mild, plant-based alternative that cleans without leaving residue. You can mix 1 tablespoon Castile soap with a gallon of warm water for daily mopping, or add a few drops of essential oil for scent. This solution tackles dirt and grease while staying Eco friendly solutions-friendly and safe on grout when rinsed. Test a small area first. Use a microfiber mop and change water often to avoid redepositing grime.
| Use | Ratio |
|---|---|
| Daily mop | 1 tbsp/gal |
| Spot clean | 1 tsp/cup |
How to Test a Cleaner on a Hidden Tile Spot
Before applying any cleaner broadly, test it on a hidden tile spot to make sure it won’t damage the finish or grout. Pick an inconspicuous area like behind a cabinet or under a baseboard. Apply a small amount, wait the recommended time, then rinse and inspect for discoloration, etching, or residue.
You’ll prevent hidden stains and learn if the product is safe. Follow these steps for clean testing:
- Note tile type and grout color.
- Apply cleaner to a cotton swab, dab one tile.
- Wait manufacturer time, then rinse thoroughly.
- Check in good light for any change before full use.
Prepping the Room: Furniture, Dusting, and Debris Removal
Start by moving furniture out of the way so you can access the whole floor without dragging legs or leaving marks.
Sweep or vacuum to remove loose debris, then pick up any larger bits by hand.
Finish with thorough dust control—wipe baseboards and use a microfiber cloth or vacuum attachment to keep grit from scratching the tiles.
Move Furniture First
Although moving furniture may feel like extra work, getting it out of the way makes the rest of the job faster and more thorough. You’ll plan furniture rearrangement to protect pieces and expose every tile. Consider the room layout so you’ll move items logically, avoiding backtracking. Use sliders, a dolly, or help for heavy pieces. Tackle seating, tables, and rugs first, then smaller decor.
- Clear pathways before lifting.
- Protect wood and tile with pads.
- Group small items in labeled bins.
- Note placement for easy reset.
Now you can dust and clean unimpeded.
Remove Loose Debris
Once you’ve cleared the big pieces, sweep or vacuum the floor to remove dust, crumbs, and pet hair that can scratch tiles or clog your mop. Focus on edges, grout lines, and under cabinets where loose debris gathers. Use a soft-bristle broom or vacuum with a hard-floor setting to avoid scuffs.
Empty the vacuum or dustpan immediately so dust accumulation doesn’t resettle. Check high-traffic spots twice and spot-clean stubborn crumbs with a damp microfiber cloth.
Don’t forget entryways and thresholds—keeping those clear prevents tracked-in grit from undoing your work.
Thorough Dust Control
With loose debris out of the way, tackle finer dust that can settle into grout and scratch tile finishes—pull furniture into the center of the room or move lightweight pieces outside the area so you can reach baseboards and under sofas. You’ll improve air quality and reduce triggers for dust allergies by removing settled particles before wet cleaning.
Follow these steps:
- Vacuum with a HEPA filter using crevice and brush tools.
- Microfiber dust mop or cloth from walls toward center.
- Damp-wipe baseboards and legs of furniture, changing water often.
- Run an air purifier briefly to capture airborne dust before mopping.
Best Technique for Dry-Cleaning Tiles Before Wet Work
Before you pour any cleaner or mop solution, dry-clean the tile surface to remove grit and loose debris that could scratch or smear during wet work. You’ll start with a broom or vacuum, then use a microfiber dust mop to catch fine particles—this tile preparation prevents streaks and protects finishes. Work from farthest corner toward the exit. Pay special attention to grout lines and edges. Finish with a tack cloth or electrostatic pad for stubborn dust before wet cleaning.
| Tool | Purpose |
|---|---|
| Broom/vacuum | Large debris removal |
| Microfiber mop | Fine particle capture |
| Tack cloth | Final dust pick-up |
Deep-Clean Ceramic & Porcelain: Step-by-Step
Now that the floor’s been dry-cleaned, you’ll prep the area and remove any remaining loose soil before wet work.
Follow a clear sequence to deep-clean grout lines using an appropriate cleaner and brush, then rinse thoroughly.
Finish by applying a suitable sealer to grout and tile edges to protect your results.
Prep And Dry Soil Removal
Want cleaner tile without scrubbing forever? Start by removing loose debris so the real dirt comes up later. Focus on tile patterns and grout coloring to spot trouble areas.
- Sweep or vacuum edges and corners, following pattern lines.
- Use a stiff-bristled broom for textured tiles, a soft vacuum head for smooth surfaces.
- Dry-mop with a microfiber pad to lift fine dust without smearing.
- Inspect grout coloring for discoloration or trapped particles; mark spots for targeted cleaning.
This prep prevents grit grinding, speeds deep-clean steps, and guarantees your scrub work hits actual soil, not crumbs.
Deep Grout And Seal
With loose debris out of the way and trouble spots marked, tackle grout next to lift embedded soil and protect your tile. Scrub grout with a stiff brush and an appropriate cleaner, working small sections so solution doesn’t dry. Rinse thoroughly, blot dampness, and inspect grout color; repeat where staining persists.
Once grout’s clean and fully dry—wait at least 24–48 hours—apply a high-quality sealer evenly, following manufacturer directions to ensure proper penetration. Test a small area first.
Monitor sealant durability over months; reapply sooner in high-traffic areas. Proper deep cleaning and sealing preserves appearance and extends tile life.
Deep-Clean Natural Stone Tiles: Step-by-Step
Before you begin, clear the area and sweep or vacuum loose grit so you won’t scratch the stone while you work. You’ll need pH-neutral cleaner and soft tools for natural stone; avoid acids or harsh abrasives. Follow this compact routine:
- Test cleaner in an inconspicuous spot, then mop gently with warm water.
- Agitate stubborn spots with a soft brush, rinsing frequently to prevent residue.
- Dry thoroughly with microfiber towels to prevent water spots and mineral buildup.
- Once fully dry, inspect and perform grout sealing where grout contact could compromise stone or allow stains.
Maintain gentle care to protect stone longevity.
How to Deep-Clean Grout Lines Without Removing Grout
If your grout’s looking dingy but you don’t want to replace it, you can deep-clean the lines effectively using targeted agitation, appropriate cleaners, and controlled rinsing to lift embedded dirt without damaging the surrounding tile. Work small sections, test a cleaner on an inconspicuous area to protect grout color and tile patterns, scrub with a stiff nylon brush, then rinse thoroughly. For stubborn buildup, use a poultice or steam rather than harsh acids. Seal grout when dry to maintain results. Maintain with gentle mopping and spot-scrubbing to prevent recurrence.
| Step | Action |
|---|---|
| 1 | Test cleaner |
| 2 | Agitate |
| 3 | Rinse |
| 4 | Dry |
| 5 | Seal |
Targeted Stain Removal: Oil, Grease, and Food Spills
When oil, grease, or food lands on tile, act quickly to prevent stains from setting—blot excess, then sprinkle an absorbent like baking soda or cornstarch to lift fresh residue. You’ll follow targeted steps for oil stains and grease removal to avoid scrubbing damage.
- Let the powder sit 10–15 minutes, then sweep or vacuum.
- Apply a few drops of dish soap diluted in warm water; scrub with a soft brush.
- For stubborn spots, use a paste of baking soda and water; rinse thoroughly.
- Dry the area and repeat if a faint stain remains; avoid abrasive pads.
Removing Hard-Water Stains and Mineral Buildup on Tiles
Although mineral deposits can look stubborn, you can remove hard-water stains on tile with the right cleaners and a little elbow grease. Start by testing a small area with white vinegar or a commercial descaler safe for your tile; let it sit briefly to break up mineral deposits. Scrub with a nonabrasive brush, rinse thoroughly, and dry to prevent new water stains.
For persistent buildup, apply a paste of baking soda and water, scrub, then rinse. Protect grout by sealing after cleaning. Repeat as needed, and avoid harsh acids on natural stone to prevent damage.
How to Remove Soap Scum From Bathroom Tile Quickly
You can tackle soap scum fast with a few DIY cleaners like vinegar, baking soda, or a citrus-based spray.
For light buildup, spray, let sit a few minutes, then scrub with a nonabrasive brush.
For stubborn scum, use a paste of baking soda and water or a commercial bathroom cleaner and apply firmer scrubbing.
Rinse well and dry to prevent residue from coming back.
Quick DIY Cleaners
Looking for a fast, budget-friendly way to cut through soap scum on bathroom tile? Use quick DIY cleaners that are effective and safe. Try these simple options and techniques:
- Vinegar spray: mix equal parts white vinegar and water, spray, wait 5–10 minutes, then wipe.
- Baking soda paste: apply, scrub with a damp brush, rinse—great for grout.
- Lemon juice: apply to small areas for fresh scent and mild acid action.
- Castile soap blend: a gentle, eco friendly alternative you can dilute—pet safe solutions if rinsed well.
Test a hidden spot before wide use.
Stubborn Scum Removal
Those quick DIY cleaners will handle light buildup, but stubborn soap scum needs stronger tactics and a bit more elbow grease.
You’ll start by mixing equal parts white vinegar and water in a spray bottle, heat slightly, and soak the area for five to ten minutes. Scrub with a nonabrasive brush or nylon pad, rinse, and repeat on persistent patches.
For grout, apply a paste of baking soda and water, scrub, then seal grout when dry to aid mold prevention and reduce future staining.
Finish with a microfiber wipe to remove residue and minimize stain concealment, keeping tile bright.
Tackling Mold and Mildew Safely on Tile and Grout
When grout stays damp, mold and mildew can take hold quickly, but you can remove them effectively without damaging tile or risking your health by using the right cleaners, tools, and safety precautions. Use a diluted bleach or hydrogen peroxide solution, test a small area, and ventilate well. Scrub with a stiff nylon brush, not wire, and rinse thoroughly. Wear gloves and a mask.
- Remove loose grime first.
- Apply cleaner, let sit 5–10 minutes.
- Agitate grout lines, rinse and dry.
- Seal grout and choose Mildew resistant caulk for Mold prevention.
How to Lift Dye and Rust Stains From Grout and Tile
First, you’ll want to identify whether the stain is dye-based (like ink or food coloring) or iron-based rust, since each needs a different approach.
For dye stains, try a poultice or an oxygen-based cleaner.
For rust, use a commercial rust remover or a paste made from cream of tartar and hydrogen peroxide, testing a small area first.
Always follow product instructions, wear gloves, and rinse thoroughly to protect grout and tile.
Identifying Stain Types
Ever wonder why some stains just won’t budge from your grout or tile? You need to ID stain types before you attempt anything. Don’t fall for cleaning myths that say one product fixes all. Look, examine, and classify so you choose the right approach later.
- Dye: sudden, colored spills that soak into grout and porous tile.
- Rust: orange-brown spots from metal left on wet surfaces.
- Organic: food, coffee, or plant matter that often smells.
- Mineral: hard-water rings and white deposits that feel gritty.
Note observations: color, location, texture, and how the stain reacted when wet.
Safe Removal Methods
Although dye and rust look similar at a glance, you’ll treat them differently to avoid damaging grout or tile. For dye, blot, test an alcohol or peroxide spot, then gently scrub with a nylon brush. For rust, use a commercial rust remover or oxalic acid carefully. Always ventilate, wear gloves, and rinse thoroughly. If you prefer Chemical alternatives, try baking soda paste or lemon with salt for mild staining. Prioritize Safe removal by testing in an inconspicuous spot and avoiding acidic cleaners on porous grout.
| Stain | First test | Safe option |
|---|---|---|
| Dye | Alcohol | Peroxide |
| Rust | Oxalic test | Baking soda |
Using Poultices and Commercial Stain Removers Correctly
Need help removing a stubborn stain? You can tackle it with proper poultice preparation and targeted stain removal techniques. Follow these steps carefully:
- Clean the area, then mix an absorbent powder with a recommended solvent to form a paste.
- Apply the poultice 1/8–1/4 inch thick, cover with plastic, and tape edges to keep it moist.
- Let it sit per product instructions, then remove and rinse; repeat if residue remains.
- For commercial stain removers, test in an inconspicuous spot, follow label directions, and neutralize afterward.
Always wear gloves and ventilate the room.
When to Reseal Grout and How to Choose a Sealer
You’ll know it’s time to reseal grout when water no longer beads on the surface, stains soak in, or the grout looks dull and worn.
Pick a sealer based on your grout type and traffic level—penetrating sealers for porous stone and high-traffic areas, topical sealers for extra shine in low-traffic rooms.
Consider factors like room use, moisture exposure, and manufacturer recommendations to set a resealing schedule.
When To Reseal
When grout starts to darken, crumble, or absorb stains despite regular cleaning, it’s time to reseal to protect both appearance and durability. You should monitor Sealing frequency based on traffic, moisture, and cleaning products; resealing importance rises in kitchens, baths, and entryways. Test spots yearly by dripping water—if it darkens, reseal.
- Check high-traffic areas every 6–12 months.
- Inspect bathrooms and showers every 6 months.
- Note discoloration or crumbling immediately.
- Track sealant type and last application date.
Act promptly when tests fail; timely resealing stops damage and reduces deep cleaning.
Choosing The Right Sealer
Now that you know how to spot when grout needs resealing, pick a sealer that matches your tile’s use and exposure.
Choose penetrating sealers for porous stone and grout where you want invisible protection; use topical sealers on smooth tiles needing high gloss.
Evaluate sealer longevity—look for lab data and reviews showing years of performance under similar conditions.
Prioritize stain resistance for kitchens, bathrooms, and entryways.
Test a small area first to confirm appearance and compatibility.
Apply per manufacturer instructions, allow full cure before traffic, and keep records so future resealing stays consistent and effective.
Sealing Frequency Factors
Wondering how often to reseal grout? You’ll base sealing frequency on use, grout type, traffic, and exposure. Watch water beading and staining — they tell you it’s time. Plan maintenance scheduling into your yearly chores so resealing doesn’t get ignored.
- High-traffic/kitchen: test yearly.
- Low-traffic/bedroom: test every 2–3 years.
- Porous grout or outdoor tiles: test annually or before wet season.
- Commercial or stained grout: test at shorter intervals; consider professional advice.
Choose a penetrating or topical sealer by durability and appearance. Reapply when repellency drops.
Stone Sealers: What to Use on Marble, Travertine, and Slate
Because natural stone soaks up spills and stains, you’ll want to seal marble, travertine, and slate to protect their finish and color; the right sealer depends on the stone’s porosity and whether you want a natural or enhanced sheen. You’ll choose penetrating sealers for a matte, natural look or topical sealers for added gloss. For marble polishing use a compatible breathable product. For travertine sealing pick a pH-neutral, penetrating sealer. Slate favors impregnating sealers that resist moisture without darkening.
| Stone | Best Sealer |
|---|---|
| Marble | Breathable penetrating |
| Travertine | pH-neutral impregnator |
| Slate | Water-repellent impregnator |
| High-traffic | Durable penetrating |
How to Protect Tile Finish During and After Cleaning
When you clean tile, take steps that preserve its finish—use the right cleaners, soft tools, and gentle techniques to avoid scratches, dulling, or sealant removal.
You want Finish protection that lasts, so rinse cleaners completely and dry surfaces to prevent residue.
Use Tile polish sparingly and only on compatible tiles. Follow a simple routine:
- Sweep/vacuum to remove grit before mopping.
- Use pH-neutral cleaner and soft mop or microfiber.
- Rinse thoroughly, then blot dry to prevent streaks.
- Apply tile polish or sealer per manufacturer directions, testing a small area first.
Maintain light, regular care to protect the finish.
Avoiding Common Mistakes That Dull or Etch Tile Surfaces
Don’t use abrasive powders or rough pads, because they’ll wear away the glaze and leave your tile looking dull.
Never apply strong acids like muriatic acid or undiluted cleaners to decorative or glazed tiles, since they can etch and permanently damage the surface.
Instead, test mild, pH-neutral products on a hidden spot and use soft tools to protect the finish.
Abrasive Cleaners Damage Glaze
If you scrub with abrasive powders or scouring pads thinking you’re getting a deeper clean, you’ll probably end up scratching or dulling the glaze instead. You want glaze preservation, so use gentle methods and practice abrasive caution. Replace harsh scrubs with softer tools and proper cleaners to protect finish and color.
- Test cleaners on an inconspicuous tile first.
- Use a soft brush or microfiber mop for routine cleaning.
- Choose pH-neutral cleaners labeled safe for glazed tile.
- Rinse thoroughly to remove residues that attract grit.
Follow these steps and you’ll keep tile looking fresh without damage.
Wrong Acid Use Erodes Surface
How would you feel if a quick cleaning step actually ate away your tile’s finish? You’ll avoid Acid risks by never using strong acids on sensitive tile. Vinegar or muriatic cleaners can cause Surface erosion, dull glaze, and etch stone. Test cleaners in an inconspicuous spot, dilute properly, and use manufacturer‑recommended products. If grout needs acid, protect adjacent tile and neutralize afterward.
| Cleaner type | Safe on porcelain? | Risk level |
|---|---|---|
| Mild pH neutral | Yes | Low |
| Vinegar/acid | No | High |
| Manufacturer cleaner | Usually | Variable |
How to Fix Scratched or Etched Tile Surfaces at Home
When you notice scratches or dull etching on tile, you can often restore the surface yourself with the right tools and a careful approach. Start by identifying if it’s a shallow scratch repair or deeper etch. Then follow steps:
- Clean area with pH-neutral cleaner and dry.
- Buff minor scratches using a non-abrasive pad or polishing compound made for your tile type.
- For an etched surface, apply a color-matching tile polish or fill with a manufacturer-recommended repair kit; follow curing times.
- Seal glazed tiles lightly to protect finish, avoiding harsh acids.
Test in an inconspicuous spot first.
Repairing Cracked Grout and Regrouting Basics
Start by evaluating grout damage to see whether cracks are surface-level or need full replacement.
You’ll remove the old grout with a grout saw or rotary tool, taking care not to chip the tiles.
Then mix and apply new grout, wipe excess, and let it cure for a clean, long-lasting finish.
Assess Grout Damage
Before you decide to repair or replace grout, take a close look at the joints to determine the extent of damage and the right method for fixing them. You’ll perform a quick damage assessment to decide if spot repairs or full regrouting suit the job, and note grout color for matching.
- Inspect for cracks, crumbling, or gaps along joints.
- Press with a probe to test firmness and depth of deterioration.
- Check for stains, mold, or water penetration behind tiles.
- Photograph areas and note grout color, pattern, and tile condition.
Use this checklist to plan the correct repair approach.
Remove Old Grout
After documenting damage and matching grout color, you’ll remove the old material to prepare for repairs. Use a grout saw or oscillating tool with a grout blade, working along joints at a shallow angle to avoid chipping tiles. Vacuum debris as you go to keep lines clear.
For delicate or historic tiles, employ gentler historical techniques like hand tools and small chisels, respecting original finishes and cultural influences on pattern and materials.
Check substrate soundness once grout’s out. Stop if tiles rock—reinforce underlayment first.
Clean joints thoroughly and let them dry before you proceed with regrouting.
Apply New Grout
Ready to regrout? You’ll repair cracked grout and refresh tile with a few focused steps. Choose grout color to match or contrast, mix to the right consistency, and work in small sections. Use these steps:
- Pack grout into joints with a rubber float, pressing firmly.
- Wipe excess with a damp sponge, rinsing often for clean lines.
- Let grout cure per manufacturer instructions, avoiding foot traffic.
- Apply sealing techniques—seal grout after cure to repel stains and moisture.
You’ll improve appearance and durability by regrouting carefully and sealing properly for long-lasting results.
Replacing Individual Tiles: A Simple Step-by-Step Guide
When a cracked or loose tile catches your eye, you can replace it yourself with a few basic tools and steady steps to restore the floor’s look and safety.
First, remove grout around the tile, chip out the damaged piece, and clear debris.
Measure and dry-fit the replacement; matching tile preserves tile art patterns and overall floor aesthetics.
Spread thin-set mortar, press the tile level, and wipe excess.
Once set, grout joints, remove haze, and let cure.
Check alignment with surrounding tiles and trim any uneven edges.
You’ll regain a seamless, safe surface without calling a pro.
Routine Maintenance Schedule That Keeps Tiles Spotless Longer
If you stick to a simple routine—daily quick sweeps, weekly mopping with a pH-neutral cleaner, and monthly grout checks—you’ll keep tiles looking fresh and avoid tougher repairs later.
You’ll tailor care to traffic zones and respect tile patterns and grout colors when choosing cleaners and tools. Stick to this schedule:
- Daily: sweep or dry-mop high-traffic areas.
- Weekly: damp-mop with appropriate cleaner; spot-treat spills immediately.
- Monthly: inspect grout lines; reseal if dull or porous.
- Quarterly: deep-clean grout and address loose or chipped tiles promptly.
Consistency preserves appearance and reduces costly fixes.
Best Practices for Daily and Weekly Tile Care
Because small daily habits make a big difference, stick to quick sweeps and immediate spot-treats so dirt and spills never settle into grout or dull the surface. You’ll vacuum or sweep high-traffic areas daily, mop with pH-neutral cleaner weekly, and inspect grout lines for stains. Rotate cleaning direction to reveal grime hidden by tile patterns. Test cleaners on a scrap before use. Schedule grout sealing after deep cleans and as needed to protect joints. Keep a microfiber mop, soft brush, neutral cleaner, and a towel handy.
| Task | Frequency | Tool |
|---|---|---|
| Sweep/vacuum | Daily | Broom/vacuum |
| Spot-treat | As needed | Cloth/cleaner |
| Mop | Weekly | Microfiber mop |
| Inspect/seal | Periodic | Brush/sealer |
Monthly Deep-Clean Checklist for High-Traffic Floors
Though daily care keeps dirt at bay, a monthly deep clean restores grout, removes embedded grime, and prolongs tile life on high-traffic floors. You’ll tackle spots routine cleaning misses and protect decorative accents while prepping for long-term tile sealing. Follow this checklist:
- Vacuum and tack-mop to remove loose grit.
- Apply a pH-appropriate cleaner, scrub grout lines with a brush, rinse thoroughly.
- Clean edges, corners, and under furniture; dry completely to prevent residue.
- Inspect tiles and decorative accents for chips; note areas needing repair or future tile sealing.
Finish by airing the room and returning furniture carefully.
How to Maintain Grout Color and Prevent Discoloration
To keep grout looking fresh, you should seal it regularly to block stains and moisture.
Use pH-neutral cleaners to remove dirt without stripping the seal or discoloring the grout.
Also prevent moisture build-up by drying wet areas promptly and improving ventilation.
Seal Grout Regularly
Ever wondered why grout stains so quickly even after you clean the tiles? You need routine grout sealing to block dirt, moisture, and spills that discolor lines. Pair sealing with occasional tile polishing to keep surfaces uniform and reflective.
- Clean grout thoroughly before sealing to guarantee adhesion.
- Choose a penetrating sealer suited to your grout type.
- Apply evenly, wipe excess, and allow full cure time.
- Reapply every 1–3 years or after heavy use.
Do this, and you’ll preserve grout color, reduce staining, and extend time between deep cleanings.
Clean With pH-Neutral Solutions
If you want grout to keep its original color, stick with pH-neutral cleaners that won’t eat away sealers or pigments. You should dilute pH neutral products per label directions and test a small area first.
Use a soft brush and gentle agitation to remove dirt without scrubbing pigment loose. Rinse thoroughly with clean water so no residue attracts grime or alters color.
Avoid acidic or highly alkaline cleaning solutions; they can etch tiles and fade grout.
For routine maintenance, mop with mild pH neutral solutions and spot-clean spills promptly to preserve grout tone and prolong sealant life.
Prevent Moisture Build-Up
How can you keep grout from darkening and developing mildew? You control moisture with regular drying and quick spill cleanup. Focus on moisture control and humidity regulation to protect grout color.
- Run exhaust fans or open windows after showers to lower humidity regulation.
- Wipe tile and grout dry with a microfiber mop after cleaning.
- Seal grout annually to block water and stains.
- Fix leaks and improve ventilation; consider a dehumidifier in damp spaces.
Follow these steps consistently, and you’ll prevent discoloration, slow mildew growth, and keep grout looking fresh longer.
Eco-Friendly Cleaning Options That Still Disinfect
Although you might think eco-friendly cleaners can’t kill germs, several plant-based and low-toxicity options disinfect effectively when used correctly. You can choose Eco friendly disinfectants and sustainable cleaning methods that combine vinegar, hydrogen peroxide, and essential oils for tiled surfaces. Follow contact times and dilute per directions; test grout first.
| Cleaner | Best For | Note |
|---|---|---|
| Vinegar mix | Light soil | Avoid natural stone |
| Hydrogen peroxide | Grout | Oxidizes stains |
| Castile soap | Daily wash | Rinse well |
| Tea tree oil | Mold control | Use sparingly |
| Baking soda | Scouring paste | Gentle abrasiveness |
Cost vs. Performance: When to Hire a Pro for Tile & Grout Cleaning
You can handle routine tile cleaning and light grout scrubbing yourself to save money and keep things eco-friendly.
If grout is deeply stained, damaged, or you want a professional-grade seal, it’s worth getting quotes from pros who use power extraction and specialized cleaners.
Compare the cost of a one-time deep clean or repair against the time, tools, and risk of DIY mistakes to decide what’s best.
When To DIY
Thinking about whether to tackle tile and grout cleaning yourself or hire a pro comes down to weighing cost, time, and expected results—DIY saves money on labor but often can’t match a professional’s deep-cleaning equipment and stain-removal expertise.
You should DIY when you have manageable area, light staining, time, and basic supplies. Prioritize DIY safety and protect finishes to preserve tile aesthetics.
Consider:
- Small rooms or spot cleaning
- Mild grout discoloration
- You’ve got time and proper cleaners
- You can handle physical effort and ventilation
If needs exceed these, reassess before proceeding.
When To Hire Pro
When should you call a pro? If stains, deep-set grout discoloration, or uneven sealing resist DIY efforts, hire a pro. You’ll save time and get equipment that extracts soil, restores grout color, and applies durable sealers.
Choose a service that explains costs upfront and offers guarantees so you weigh price versus performance. Ask about cleaning agents safe for indoor plants and pet safety—professionals should use low-toxicity solutions and ventilate properly.
If you’re prepping for resale, handling large areas, or avoiding injury from scrubbing, the investment often pays off. Get estimates, check references, and schedule during mild weather.
What to Expect From Professional Tile and Grout Cleaning Services
Although results vary by condition and service, a professional tile and grout cleaning firm will assess your floors, explain the process, and give a clear estimate before any work begins. You’ll get transparent timing, methods, and expected outcomes so you can protect tile aesthetics and align with current flooring trends.
A professional tile and grout cleaning service will assess, explain the process, and provide a clear estimate before work begins.
Expect these steps:
- Inspection and spot testing to gauge grime, sealant, and damage.
- Pre-treatment and agitation to lift embedded dirt.
- Hot water extraction or steam cleaning plus specialized grout restoration.
- Sealing recommendation and maintenance tips to prolong results.
You’ll see cleaner grout, restored shine, and informed next steps.
How to Evaluate and Compare Cleaning Service Quotes
When you get several quotes, compare the scope of services so you know exactly what each company will clean and whether grout sealing or stain treatment is included.
Break prices down line by line—labor, materials, travel, and any extra fees—so you’re comparing apples to apples.
Check credentials, insurance, and guarantees to make sure a low price doesn’t cost you later.
Scope Of Services
Before you compare prices, map out exactly what each quote covers so you’re comparing apples to apples. Define the scope: surface cleaning, deep grout work, sealing, stain removal, and any tile patterns that need special care.
Note how they handle grout color restoration and whether colorant or dye is included. Ask about inspection, pre-treatment, and post-cleaning protection. Confirm supplies, equipment, and time estimates.
- Tasks included
- Materials provided
- Tile-specific methods
- Damage/liability terms
Use this checklist to spot omissions and guarantee each bid truly matches your needs.
Price Breakdown Comparison
How do the bids really stack up once you strip away jargon and extras? You compare line items: labor, materials, travel, and any one-time fees. Ask for unit prices and estimated hours so you can spot inflated assumptions.
Look for bundled offers and evaluate pricing strategies—are they hourly, flat-rate, or per-square-foot—and calculate which fits your space. Factor in frequency: a recurring plan often lowers per-visit cost.
Use budget planning to set a clear ceiling and reject add-ons that blow it. Get at least three written quotes, align scope, then pick the quote that gives transparent value for your needs.
Credentials And Guarantees
If you want reliable results, scrutinize credentials and guarantees so you know who’s doing the work and what happens if they don’t meet the mark. Verify certifications, insurance, and references focused on tile aesthetics and grout coloring. Ask about warranty terms and redo policies before hiring.
- Confirm licenses and industry training.
- Request proof of insurance and bonding.
- Get a written guarantee covering grout coloring and seal integrity.
- Compare cancellation, refund, and remedy clauses.
Choose services that document methods and outcomes. That clarity safeguards your floors and ensures any mistakes get fixed without surprise costs.
Tools and Products Pros Use That Homeowners Can Borrow or Rent
When tackling tough tile jobs, pros reach for specialty tools and stronger formulations you can often borrow or rent so you don’t have to buy them outright. Rent a floor scrubber or orbital buffer to restore grout and lift ground-in grime; you’ll finish faster than with a mop.
Borrow a steam cleaner for deep disinfection without harsh chemicals, or rent a pressure washer for durable exterior tile.
Pick grout saws and rotary grout cleaners for precise repairs.
Combine rented gear with DIY hacks like microfiber pads and eco-friendly options—vinegar-free cleaners and enzymatic solutions—for safe, effective results.
Kid- and Pet-Safe Cleaning Routines for Tiled Homes
Renting or borrowing pro-grade gear makes big tile jobs faster, but you’ll also want routines that keep kids and pets safe day to day. Use everyday steps that prevent messes, neutralize odors from pet accidents, and avoid harsh fumes.
- Swap strong chemicals for kid friendly cleaners with clear labels.
- Wipe spills immediately—set a quick schedule after meals and play.
- Use barrier rugs in high-traffic zones and near litter areas.
- Store products up high and lock cabinets; rinse mop heads thoroughly.
You’ll reduce stains and odors while keeping children and pets healthy and mobile.
How Humidity and Climate Affect Tile Cleaning Frequency
Because moisture and temperature shape how quickly dirt, mold, and grout stains develop, you’ll need to adjust your tile-cleaning schedule to match your climate.
Because moisture and temperature affect stain speed, tailor your tile-cleaning schedule to your local climate.
In humid regions, humidity effects speed mold and mildew growth, so mop and ventilate more often and dry grout lines thoroughly.
In arid zones, dust and grit accumulate faster; sweep daily and mop weekly to prevent scratches.
Coastal salt air can corrode grout, so rinse and inspect more frequently.
For mixed climates, increase cleaning after wet spells and during hot, stagnant periods.
Use Climate considerations to set realistic routines rather than fixed dates.
Seasonal Tips: Winter Salt, Summer Sand, and Outdoor Tile Care
If you live where winters bring salt and summers drag in sand, you’ll need season-specific routines to protect both indoor and outdoor tile. Treat grit and deicing chemicals as immediate threats and adjust cleaning frequency, tools, and sealants accordingly.
You should:
- Sweep daily in winter to remove winter salt before it abrades grout.
- Rinse entryways after storms to prevent chloride damage and seal annually.
- In summer, hose outdoor tile to clear summer sand and grit; avoid abrasive brushes.
- Use walk-off mats, re-seal high-traffic grout, and inspect outdoor drainage to stop buildup and freeze-thaw harm.
Quick Spot-Cleaning Hacks for Unexpected Messes
When a spill or stain shows up unexpectedly, act fast: blot liquids, scrape solids gently, and avoid rubbing which can push messes deeper into grout or textured tile.
For fresh food or drink, sprinkle baking soda to absorb moisture, wait a few minutes, then vacuum or sweep up.
Use a damp microfiber for sticky residues; it lifts grime without scratching.
Dampen a microfiber cloth to lift sticky residue gently—effective cleaning without scratching surfaces
For pet hair, use a rubber squeegee or slightly dampened mop to gather hairs before spot-cleaning.
For stubborn marks, apply a paste of baking soda and water, let sit briefly, then scrub gently.
Rinse and dry to complete stain removal.
How to Remove Chewing Gum, Paint, and Adhesive From Tile
Although these stubborn residues seem permanent, you can remove chewing gum, paint, and adhesive from tile with a few targeted techniques and common supplies. Work carefully to protect grout and finish.
- Freeze gum with ice in a bag, then chip it off with a plastic scraper; repeat until no residue remains.
- For paint removal, soften fresh spots with warm soapy water; for dried paint, use a plastic scraper or a small amount of acetone on a rag, testing first in a hidden area.
- Soak adhesive with cooking oil or commercial adhesive remover, then peel and wipe.
- Rinse and dry the tile.
Organizing Cleaning Supplies for Efficient Tile Care
Because having the right supplies at hand saves time and prevents damage, set up a compact, labeled kit for tile care that keeps tools, cleaners, and spot treatments separated by use. You’ll group microfiber cloths, grout brushes, a mop, pH-neutral cleaner, and sealant in clearly marked compartments so you grab what fits each task.
Build simple storage solutions: a caddy for daily use, a shelf for bulk supplies, and hooks for long-handled tools. Link supplies to cleaning routines—weekly sweeping, monthly deep clean—so you maintain consistency, avoid product misuse, and extend tile and grout life.
Tracking Results: Before-and-After Photos and Maintenance Logs
If you want to see real progress and catch small problems before they grow, start tracking tile care with before-and-after photos and a simple maintenance log. You’ll notice historical trends in wear patterns and how cleaning choices reflect cultural influences in finishes and grout styles. Use photos, dates, and short notes to build a useful record.
Try this four-step approach:
- Photograph area from fixed angles before cleaning.
- Note product, dilution, and time spent.
- Photograph after cleaning with same angles.
- Log frequency, observations, and any follow-up needed.
Review monthly to spot patterns and adjust routines.
Troubleshooting Checklist: Common Problems and Fixes
When something looks off with your tile—stains that won’t lift, grout that crumbles, or grout lines darkening—you can usually fix it with the right diagnosis and a targeted action. Check causes, test solutions, and note outcomes to protect Tile aesthetics and avoid cleaning myths. Use this quick checklist.
| Problem | Fix |
|---|---|
| Stubborn stain | Apply poultice or oxygen bleach; rinse |
| Crumbling grout | Remove loose grout; regrout with proper mix |
| Dark grout lines | Clean with pH-neutral cleaner; seal if porous |
If unsure, test a small area and repeat only if results improve.
Upgrade Choices: Grout Colorants, Anti-Slip Treatments, and Mats
While you might be satisfied with basic cleaning, upgrading grout colorants, anti-slip treatments, or mats can both refresh the look and improve safety in high-traffic or wet areas. You’ll choose upgrades that match style and function, prolonging clean appearance and reducing slips.
- Recolor grout with quality grout colorants to hide stains and seal pores.
- Apply anti slip treatments to glazed or smooth tiles; test in a small area first.
- Use washable, non-slip mats in entryways and baths to catch grit and water.
- Maintain upgrades by gentle cleaning and reapplying sealers per manufacturer instructions.
Final Checklist: One-Day Deep-Clean Plan You Can Follow
Because a focused, step-by-step plan keeps you efficient, follow this one-day deep-clean checklist to finish tile floors without wasting time.
Start by clearing the room and sweeping to remove grit that harms tile patterns.
Clear the room and sweep thoroughly to remove grit that can damage tile patterns.
Vacuum edges, then pre-treat grout with an appropriate cleaner; let dwell per instructions.
While grout works, mop with a pH-neutral solution, rinsing frequently.
Scrub grout lines with a stiff brush, rinse again, and dry with microfiber towels to prevent streaks.
Inspect for stains or damage, spot-treat, and allow full drying.
Finish with grout sealing where recommended and replace furniture using pads.
Frequently Asked Questions
Can I Use a Pressure Washer on Outdoor Tile Patios?
Yes — you can use a pressure washer on outdoor tile patios, but you’ll adjust pressure and nozzle for safe outdoor cleaning. You’ll avoid grout damage, test a small area, and use appropriate detergent and technique.
How Do I Sanitize Tiles After Illness Without Damaging Grout?
Like a warm blanket, you’ll gently disinfect tiles after illness: use diluted bleach or hydrogen peroxide, scrub grout with a soft brush for disinfecting grout and mold removal, rinse thoroughly, then dry to prevent damage and regrowth.
Are Heated Mop Systems Safe for All Tile Types?
Heated mop systems aren’t safe for all tiles; you’ll avoid high heat on delicate natural stone or aged grout. Don’t fall for tile cleaning myths—check manufacturer recommendations and test a small area for heated mop safety.
Can Wax or Polish Be Applied to Tile for Extra Shine?
You can’t safely wax most tiles long-term; you’ll want tile sealing for porous stone, and grout staining for uniform color. Don’t apply paste wax to ceramic or porcelain; use manufacturer-approved polishes and test first on inconspicuous area.
How to Prevent Efflorescence on Basement Tile Floors?
You can stop efflorescence by fixing moisture sources first—surprised? Seal cracks, improve drainage and ventilation, install a vapor barrier, and use a penetrating sealer. These Efflorescence prevention steps support long-term Basement tile maintenance efforts.
Conclusion
You’ve got this — treat your tile like a garden: a quick tidy keeps it pretty, but an annual deep-clean helps it thrive. I once spent a morning restoring mom’s 20-year-old kitchen tile; after a few steps from this guide, the grout looked three shades lighter and her smile said it all. Follow the one-day plan, track results with photos, and your floors will stay clean, safe, and welcoming for years.