How to Install Concrete Tile Roofing or Flooring: A Step-by-Step Breakdown
You can install concrete tile roofing or flooring if your structure can handle the weight and you follow proper prep, underlayment, and fastening methods. Clear and level the substrate, install code‑approved moisture barriers and starter courses, then lay tiles from the eave or edge with staggered joints, mortar or adhesive beds, and proper cuts for penetrations. Finish with grout, sealant, flashing, and routine inspections. Keep safety gear on and follow manufacturer specs—continue for step‑by‑step guidance.
Can You Install Concrete Tile Roofing or Flooring and When to Choose It?
You can use concrete tile for roofing when your structure can handle the weight and you want long-lasting, low-maintenance protection.
You can also use it for flooring in heavy-traffic outdoor or industrial areas where durability and slip resistance matter.
Short direct answer for roofing
Consider concrete tile when you need a durable, fire-resistant roofing option that also works for heavy-traffic flooring in some settings.
You can install concrete tile on roofs with adequate structural support, proper underlayment, and correct fastening or mortar techniques.
Learn how to install concrete tile by following manufacturer guidelines, checking local codes, and hiring pros for steep slopes or complex rooflines to guarantee watertight results.
Short direct answer for flooring
While concrete tile works well on roofs, it also makes a strong, low-maintenance flooring choice for areas that can handle its weight.
You can install it indoors or outdoors where structural support, moisture control, and slip resistance are addressed. Choose it for high-traffic, durable surfaces like patios, garages, or basements, but avoid lightweight or weak subfloors without reinforcement.
Summary of pros and cons in one snapshot
If you’re weighing concrete tile for a roof or floor, here’s a quick snapshot of the trade-offs to help you decide:
| Pros | Cons |
|---|---|
| Durable, long life | Heavy, needs strong structure |
| Fire and weather resistant | Higher upfront cost |
| Low maintenance | Can be brittle; careful installation needed |
| Aesthetic variety | Hard underfoot for flooring |
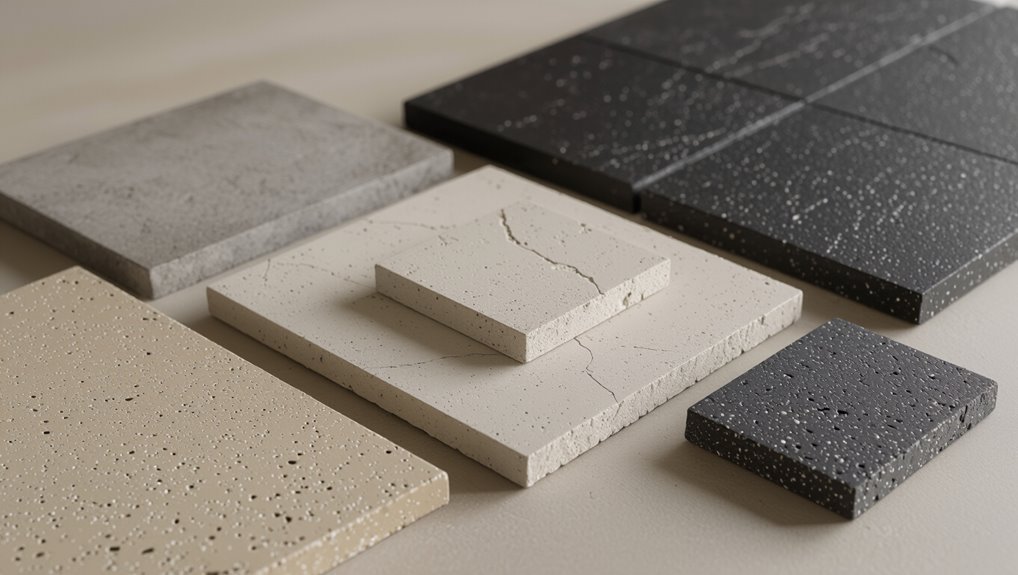
What Are Concrete Tiles? Basic Understanding
Concrete tiles are dense mixes of cement, sand, and pigments made in pressed, molded, or interlocking profiles, each affecting installation and durability.
You’ll see a wide range of finishes and colors—from smooth and glazed looks to textured or faux-stone surfaces—that influence appearance and slip resistance.
Typical tiles come in standard sizes and can be heavy, so you should consider weight, thickness, and performance specs like compressive strength and water absorption when planning.
Composition and types (pressed, molded, interlocking)
You’ll find three main types of concrete roof tiles—pressed, molded, and interlocking—each made from a mix of cement, sand, water, and pigments but formed differently to deliver distinct looks and performance.
Pressed tiles are compacted under high pressure for uniform density. Molded tiles are cast into shapes for curves and profiles. Interlocking tiles lock together for faster, watertight installation.
Visual variations and finishes
When selecting tiles, pay close attention to color, texture, and edge profiles since those visual choices shape your roof’s character and curb appeal.
You’ll pick smooth, sanded, or grained textures and matte, satin, or glazed finishes to match style. Color can be uniform, blended, or weathered.
Edge profiles—straight, rounded, or interlocking—define shadow lines and architectural tone.
Typical sizes, weights, and performance characteristics
A typical concrete roof tile comes in a handful of standard sizes—usually 12″, 14″, or 16″ widths with varying lengths depending on the profile—and knowing these dimensions helps you plan layout and calculate coverage. Tiles weigh 8–13 lbs each (modular) or 10–20 lbs (larger), offer Class A fire ratings, and resist freeze–thaw and high winds when properly installed.
| Size | Weight | Performance |
|---|---|---|
| 12″ | 8–12 lb | Class A |
| 16″ | 10–20 lb | Freeze/thaw resistant |
When to Use Concrete Tile Roofing vs Flooring Applications
You’ll choose concrete tile for roofs when your climate, roof slope, and structure can handle the extra weight and you want longer-lasting coverage compared with asphalt shingles or clay.
For flooring, concrete tile works best in exterior or high-traffic areas where durability and slip resistance matter, but you’ll weigh it against pavers or porcelain for interior aesthetics and comfort.
Next, we’ll compare load, maintenance, and cost trade-offs so you can decide which application fits your project.
Suitability for roofs: climate, slope, load-bearing considerations
Because concrete tile’s weight, profile, and weather resistance differ from other materials, you should match the product to your roof’s climate, pitch, and structure before deciding to use it.
Check local wind and freeze–thaw exposure, confirm roof slope meets tile profile requirements, and verify framing and rafters can handle dead and live loads.
Reinforce or redesign if capacity is marginal.
Suitability for floors: interior vs exterior, traffic levels
While concrete tiles excel on roofs, they’re not automatically the best choice for every floor; you should weigh interior versus exterior use and expected traffic when deciding.
For exterior patios, driveways, and high-traffic walkways, choose dense, slip-resistant, sealed tiles.
Indoors, use thinner, smoother tiles in low-traffic areas; avoid heavy tile in weak subfloors or where frequent impact occurs.
Comparison with alternative materials (clay tile, asphalt shingles, pavers)
Choosing the right surface means comparing concrete tile to other common options like clay tile, asphalt shingles, and pavers so you know where each performs best. You’ll pick concrete for durability, cost-effectiveness, and varied finishes. Clay offers tradition and color; shingles suit steep roofs; pavers handle heavy exterior traffic.
| Material | Strength | Best Use |
|---|---|---|
| Concrete | High | Roofs, patios |
| Clay | Medium | Historic roofs |
| Shingles | Low | Residential roofs |
Tools, Materials, and Safety Requirements
Before you start, make sure you’ve got the right tools for the job: roofing-specific hand tools, fasteners, and safety gear for working at height, and a different set of cutting and leveling tools for flooring.
Gather materials and consumables like underlayment, appropriate adhesives or mortar, and replacement tiles so you don’t stop mid-job.
Also inspect and set up fall protection, scaffolding or ladders, gloves, eye protection, and dust masks to keep the worksite safe.
Essential tools for roofing installation
You’ll need a concise set of reliable tools, quality materials, and strict safety gear to install concrete tile correctly; having these ready cuts installation time and prevents costly mistakes or injuries.
- Hammer, roofing nailer, pry bar
- Tile cutter or angle grinder with diamond blade
- Safety harness, hard hat, non-slip boots
- Chalk line, tape measure, level, chalk ridge gauge
Essential tools for flooring installation
Roofing tools and safety practices carry over to flooring work, but you’ll also need a distinct set of equipment and materials tailored to concrete tile floors.
You’ll want ergonomic hand tools, accurate cutting gear, and proper PPE to protect lungs and knees. Use mechanical aids for heavy lifting and a level surface guide to guarantee flatness.
- Tile cutter or wet saw
- Knee pads and respirator
- Masonry trowel and float
- Level and straightedge
Materials and consumables (underlayment, fasteners, adhesives, mortar)
Because the right underlayment, fasteners, adhesives, and mortar determine both performance and longevity, you should choose materials rated specifically for concrete tile systems and your substrate type.
Use waterproof, slip-resistant underlayment; corrosion-resistant nails or screws sized per manufacturer; polymer-modified thinset or mastics for floor tiles; and high-strength cement mortar for roof bedding.
Match warranties and local codes.
Safety equipment and scaffolding/ladder requirements
Start by equipping yourself with correctly rated personal protective equipment and a stable access system—hard hat, safety glasses, cut-resistant gloves, non-slip footwear, a full-body harness with a certified anchor, and a respirator when cutting dust will be present.
Use inspected scaffolding or extension ladders, secure footing, and fall-arrest systems. Follow local regulations and manufacturer specs.
- Inspect scaffolding before use
- Use tie-offs and guardrails
- Keep platforms clear
- Don’t exceed load limits
Preparing the Site Roof Deck and Floor Substrate Prep
Before you lay concrete tile, inspect the roof structure or floor framing to confirm it can handle the extra load and that sheathing is sound.
Remove any old roofing or flooring materials, then level the substrate, install necessary moisture barriers and underlayment.
Schedule work for dry weather and allow time for repairs and substrate conditioning before tiling.
Inspecting and reinforcing roof structure (load calculation, sheathing)
Inspect the roof structure carefully to validate it can carry the extra weight of concrete tile. You’ll need to evaluate framing, rafters or trusses, and existing sheathing for signs of stress, rot, or modification.
Calculate live and dead loads, consult local codes, and verify joist spacing. Reinforce as needed with sistered rafters, additional blocking, or upgraded sheathing to meet load requirements and guarantee long-term support.
Removing old roofing or flooring materials
Remove existing roofing or flooring materials carefully to expose the deck and assess underlying conditions; you’ll tear off old shingles, underlayment, and any compromised decking, working methodically from the ridge down (for roofs) or from one edge toward the opposite (for floors) to control debris and avoid further damage.
Wear PPE, use proper tools, bag and dispose waste, check for rot, and note repairs needed.
Preparing floor substrate (leveling, moisture barrier, underlayment)
Start by making certain the substrate is flat, dry, and structurally sound, because concrete tile needs a stable, level base to lock in place and avoid cracking or movement.
Shim or skimcoat low spots, sand high areas, and guarantee proper slope for drainage.
Install a vapor barrier where needed, then lay appropriate underlayment or backer board per manufacturer specs, fastening and sealing seams tightly.
Weather and timing considerations
Because concrete tile installation reacts to temperature and moisture, you’ll want to plan work for stable, moderate weather—avoiding freezing temperatures, heavy rain, or extreme heat that can prevent proper curing, adhesive bonding, and safe work conditions.
Schedule installation when forecasts predict several dry days. Start early to use cooler morning temperatures, and allow manufacturer-recommended curing times before foot traffic or sealing.
Step-by-Step Installation: Concrete Tile Roofing
Now you’ll plan and measure so you order the right number and pattern of tiles.
Next you’ll install the underlayment and drip edge, set any required battens or starter course, then lay tiles with correct alignment, overlap, and fastening.
Finally, you’ll cut tiles as needed for hips, ridges, valleys, and roof penetrations.
Step 1 Layout planning, measuring, and ordering tiles
Before you lift a single tile, measure the roof and plan a layout that balances cuts and starter courses to minimize waste and guarantee straight courses.
Mark ridgelines, hips, and eaves, note obstructions, and calculate field and edge tile counts.
Order 5–10% extra for breakage and matching batches.
Confirm delivery timing and storage to protect tiles until installation begins.
Step 2 Install underlayment and drip edge
With your layout set and tiles on site, you’ll prepare the roof deck by installing underlayment and drip edge to protect against moisture and direct water off the eaves.
Roll and fasten a code-approved underlayment, shingle overlaps toward the slope, and seal seams.
Install metal drip edge along eaves and rakes, nailing at recommended spacing and flashing vulnerable intersections to prevent leaks.
Step 3 Setting battens or starter course (if required)
Step 3 sets the foundation for your tile run: if your roof system requires battens or a starter course, you’ll fasten them to the deck at the manufacturer’s specified spacing and alignment so tiles sit level and lock together properly.
Measure and mark lines, install corrosion-resistant battens or a starter strip, verify straightness with a chalk line, and secure with appropriate fasteners at recommended intervals.
Step 4 Laying tiles: alignment, overlap, and fastening patterns
1. You’ll start at the eave, working upward in straight courses. Align each tile with the batten and neighboring tiles, maintaining consistent exposure and overlap per manufacturer specs.
Stagger joints for strength, check rows with a chalk line, and fasten using recommended nails or clips at prescribed points. Inspect alignment often to prevent cumulative drift.
Step 5 Cutting tiles for hips, ridges, valleys, and penetrations
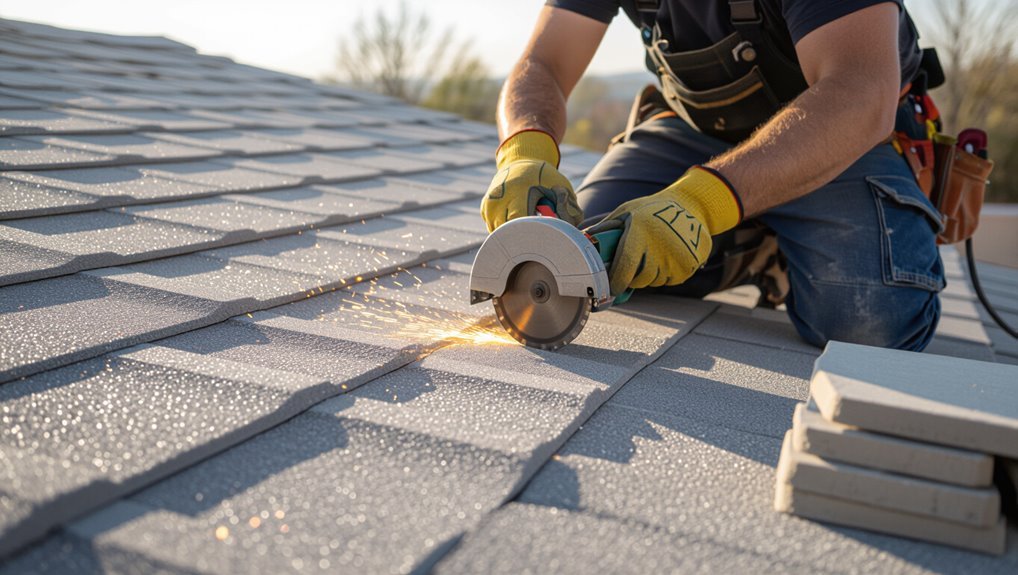
Prepare to cut tiles precisely for hips, ridges, valleys, and penetrations, because accurate cuts guarantee weather-tight changes and a professional finish.
Mark tiles using templates, measure twice, and score with a masonry saw or angle grinder with a diamond blade.
Wear PPE, clamp tiles, and cut slowly to prevent chipping.
Fit test each piece, trim for tight seams around vents, chimneys, and flashing.
Step 6 Installing ridge and hip tiles and sealants
Once the field tiles are set, you’ll install ridge and hip tiles to cap the roof’s peaks and changes and then seal those joints to keep water out.
Align hips and ridges, secure tiles with appropriate mortar or screws per manufacturer specs, overlap and interlock units, then apply compatible sealant along seams and fasteners.
Tool joints smooth, remove excess, and allow proper cure time.
Step 7 Flashing around chimneys, vents, and skylights
After you’ve capped the hips and ridges, you’ll need to address the areas where roof penetrations meet the tile — chimneys, vents, and skylights are common leak points that require careful flashing.
You’ll fit step flashings under tiles, counterflash chimneys, seal skylight perimeters with compatible flashing tape and mortar where needed, and install vent collars.
Test for proper water shedding.
Step 8 Final inspection and cleanup; addressing warranty registration
When you’ve finished installing and flashing every tile and penetration, walk the roof and gutters systematically to inspect for loose tiles, exposed underlayment, leftover nails, and mortar or flashing debris that could cause leaks or drainage issues.
Tighten or replace fasteners, seal gaps, clear debris, and verify drainage. Document the job with photos, keep receipts, and register the manufacturer’s warranty promptly to protect coverage.
Step-by-Step Installation: Concrete Tile Flooring
Now you’ll walk through the flooring steps, starting with layout, expansion joints, and allowing tiles to acclimate.
Prepare the subfloor and install the proper underlayment or membrane, then mix and apply the mortar or adhesive.
Lay the tiles with correct spacing and tapping, plan your pattern, and finish by cutting tiles at edges, doorways, and junctions.
Step 1 Layout, expansion joints, and tile acclimation
Start by plotting a clear layout so your tiles will sit square and your expansion joints will function properly; measure and snap chalk lines from the room’s center to establish a balanced field and mark where joints will fall at doorways, long runs, and perpendicular walls.
Let tiles acclimate flat in the installation environment for 48–72 hours, checking spacing and adjusting joint placement for fixtures.
Step 2 Subfloor preparation and underlayment/membrane installation
Prepare the subfloor so it’s flat, clean, dry, and structurally sound before you lay any underlayment or membrane.
Remove debris, repair dips or squeaks, and sand high spots.
Install a moisture barrier if required, then lay the chosen underlayment—cement board or suitable backer—fastening per manufacturer specs.
Tape seams and seal edges to guarantee a stable, waterproof base for your concrete tile.
Step 3 Mixing and applying mortar or adhesive
With your subfloor and underlayment secured, it’s time to mix and apply the mortar or adhesive that’ll hold each concrete tile in place.
Follow manufacturer ratios, mix to a creamy, trowelable consistency, and work in small batches.
Spread with the correct notch trowel, apply even beds, and remove excess.
Keep mortar moist per instructions before proceeding to tile placement.
Step 4 Laying tiles: spacing, tapping, and pattern considerations
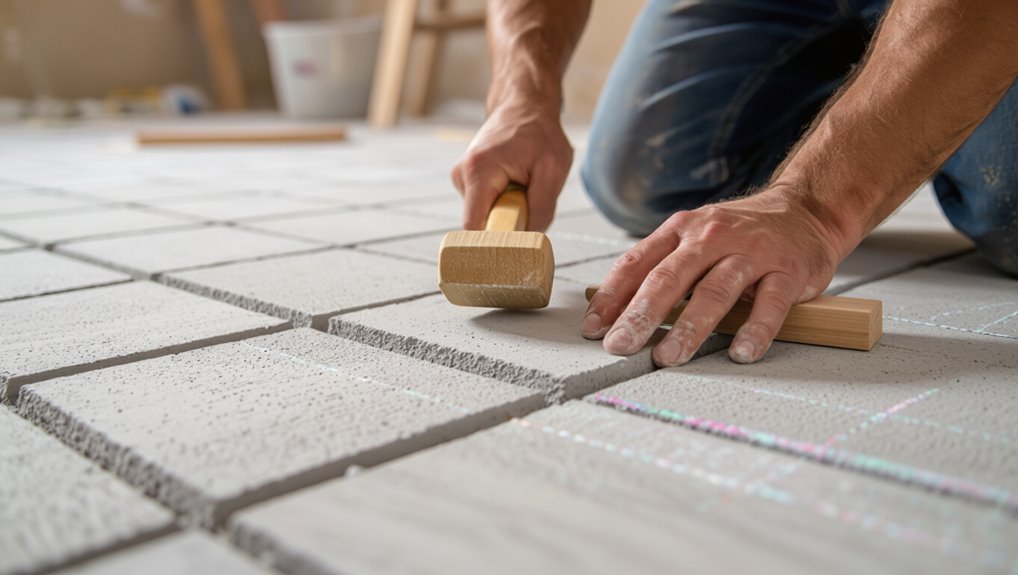
Begin by laying out a clear grid so you can keep consistent spacing and pattern orientation as you set tiles; use spacers, a chalk line, or a laser to mark reference lines and work out from the center or a chosen focal point.
Lay tiles gently into mortar, tapping with a rubber mallet to seat each. Maintain uniform grout joints, check alignment frequently, and stagger patterns for visual balance.
Step 5 Cutting tiles at edges, doorways, and transitions
Once you’ve set the field tiles, you’re going to need to cut the ones that meet walls, doorways, and thresholds so they fit snugly and line up with your grout joints.
Measure carefully, mark cut lines, and use a wet tile saw or angle grinder with a diamond blade.
Dry-fit pieces, trim for expansion gaps, and clean edges before setting.
Step 6 Grouting, sealing, and curing procedures
After you’ve cut and dry-fit the edge tiles, it’s time to finish the job by grouting, sealing, and allowing the installation to cure.
Mix grout to manufacturer specs, force it into joints, and tool flush. Wipe haze with a damp sponge.
Once grout sets, apply a breathable sealer evenly. Protect the floor from traffic and moisture, and let the full cure time elapse before use.
Step 7 Final inspection, cleaning, and protective treatments
Walk the entire floor slowly, inspecting grout lines, tiles, and edges for chips, lippage, or incomplete joints so you can catch issues before sealing or occupancy.
Address defects: replace or re-seat tiles, touch grout, and sand high spots.
Clean residues with manufacturer-approved cleaner, let dry, then apply protective sealer or topical finish per instructions.
Document results and advise occupants on cure time and care.
Common Problems and Installation Mistakes to Avoid
Don’t skip proper underlayment, fastening, and flashing on roofs, because those roofing mistakes lead to leaks and water damage.
On floors, check for an even substrate, use the correct mortar, and leave adequate joints to prevent cracking and delamination.
If tiles fail early, look for signs like leaks, cracks, or layers separating to diagnose whether the problem started with waterproofing, substrate prep, or materials.
Roofing mistakes (insufficient underlayment, improper fastening, poor flashing)
When you skip proper underlayment, use the wrong fasteners, or neglect flashing details, your concrete tile roof can fail long before its time. These common mistakes let water in, tiles loosen, and leaks start at vulnerable junctions.
Always install manufacturer-rated underlayment, choose corrosion-resistant, correctly sized fasteners, and detail flashing at valleys, chimneys, and eaves to prevent infiltration and wind uplift.
Flooring mistakes (uneven substrate, incorrect mortar choice, inadequate joints)
If your substrate isn’t level, you’ll see those imperfections reflected in every tile and grout line.
So always start by evaluating and correcting the floor plane before laying concrete tile.
Use the right mortar for concrete tile and substrate—don’t substitute thinset where a polymer-modified or mortar-bed is specified.
Maintain proper expansion and grout joints; inadequate spacing causes cracking, lippage, and premature failure.
How to diagnose premature failures (leaks, cracking, delamination)
Why does a concrete tile installation fail early, and how do you pinpoint the cause?
Inspect substrate, flashing, underlayment, and drainage first.
Recreate leak during rain or hose test.
Check for hairline versus structural cracks, bond failure signs, and delamination layers.
Measure movement, check mortar cure and joint spacing, and verify ventilation.
Document findings, then target repair: fix flashings, re-bond or replace tiles, correct drainage.
Best Practices, Maintenance, and Longevity Tips
You should follow a simple routine roof inspection and maintenance checklist to catch damage early and protect your tiles.
For floors, stick to recommended cleaning methods, sealing schedules, and stain-prevention steps to keep surfaces looking good and functional.
Adjust maintenance tasks seasonally and for your climate so small issues don’t turn into costly repairs.
Routine roof inspection and maintenance checklist
Because routine inspections catch small issues before they become costly failures, you should follow a concise, repeatable roof inspection and maintenance checklist that covers visual checks, seasonal tasks, and simple repairs.
Inspect tiles, flashings, and gutters monthly; clear debris; replace cracked tiles; check fasteners and sealants after storms.
- Look for cracks and displaced tiles
- Clean gutters and downspouts
- Tighten or replace fasteners
- Reseal flashings as needed
Floor care, sealing schedules, and stain prevention
After you’ve kept the roof in good shape, give similar attention to your concrete tile floors to protect their appearance and lifespan.
Clean regularly with pH-neutral cleaner, avoid harsh acids, and blot spills quickly.
Reseal per manufacturer intervals—usually every 2–5 years—and test a small area first.
Use mats in high-traffic zones and felt pads under furniture.
- Clean gently and often
- Blot spills immediately
- Reseal on schedule
- Use protective mats
Seasonal and climate-specific maintenance advice
When seasons shift and weather gets extreme, adjust your care routine to match—cold, heat, humidity, and sun each affect concrete tile differently.
In freezing climates, clear snow promptly and use non-corrosive deicers.
In hot, sunny areas, check for UV fading and reapply UV-stable sealant.
In humid regions, prevent mold with proper drainage and periodic cleaning.
Inspect after storms and repair cracks quickly.
Cost, Timeframe, and Permitting Considerations
You’ll want to budget for materials, labor, and disposal differently for roofing versus flooring concrete tile, since roofing often requires additional underlayment, flashing, and safety measures.
Expect installation timelines to vary with site access, weather, and complexity—roof jobs can be quicker per square foot but need more coordination and inspections.
Check local permitting, code requirements, and warranty conditions up front, because they can affect both cost and schedule.
Typical cost breakdown for roofing vs flooring (materials, labor, disposal)
One clear way to compare concrete tile for roofing and flooring is to break costs into three buckets—materials, labor, and disposal—since each plays a very different role in total price, timeline, and permit needs. You’ll see materials cost more per unit for roofing, labor is higher for roof access complexity, and disposal varies by volume and local rules.
| Item | Roofing vs Flooring |
|---|---|
| Materials | Roofing higher |
| Labor | Roofing higher |
| Disposal | Roofing often higher |
| Permits | Roofing likely required |
Expected installation timelines and factors that affect schedule
Because concrete tile projects hinge on several moving parts—materials delivery, crew availability, and local permitting, you should plan timelines conservatively and expect variability.
A simple flooring install can finish in a day or two, while a full roof replacement often takes several days to a week plus permit wait times.
Account for weather delays, substrate prep, structural reinforcement needs, and inspection scheduling when estimating completion.
Building permits, code compliance, and warranty implications
When planning your concrete tile project, factor in building permits, code compliance, and warranty rules early so they don’t derail cost or schedule estimates.
Check local codes for load, fire, and seismic requirements. Obtain permits before work starts to avoid fines and delays.
Follow manufacturer installation specs to keep warranties valid, document inspections, and keep receipts and photos for future claims or resale disclosures.
When to DIY vs Hire a Professional
You can tackle concrete tile yourself if you have the right skills, tools, and patience, but roofing or large-floor projects raise the technical bar.
Watch for red flags—structural issues, complex rooflines, or existing moisture damage—that mean you should call a pro.
If you do hire someone, ask about licenses, certifications, insurance, warranties, and get references and written estimates before signing.
Skill and equipment threshold for DIY roofing and flooring
If you’re comfortable working at height, reading plans, and using power tools, you can handle many concrete tile projects yourself; otherwise, bring in a pro.
You’ll need proper PPE, scaffolding or secure ladders, a wet saw, hammer, nailer, levels, chalk lines, and mixing tools.
Basic carpentry, layout, and waterproofing skills are essential—know your limits and practice on small sections first.
Red flags that require a professional contractor
Even with the right tools and basic skills, some situations mean you should call a pro—don’t risk costly mistakes or safety hazards.
Hire a contractor if structural framing is compromised, roof pitch or drainage is complex, electrical or plumbing runs interfere, load calculations exceed limits, local code or permit issues arise, or you lack safe access for steep or high work.
How to vet and hire a qualified installer (questions, certifications, references)
How do you find an installer who’ll do the job right the first time? You’ll vet candidates by asking targeted questions, confirming certifications, checking references, and comparing written bids.
Don’t hire on price alone.
- Ask about experience with concrete tile and warranty.
- Verify licensing and insurance.
- Request recent project photos and references.
- Get a detailed, itemized contract.
Frequently Asked Questions
You probably have practical questions about lifespan, weight, and whether concrete tiles can go over existing roofs or floors.
You’ll also want to know about energy performance, structural reinforcement needs, and typical warranties and maintenance.
Below we answer those points so you can decide with confidence.
How long do concrete tile roofs and floors last?
Curious about lifespan, concrete tile roofs and floors typically last decades — often 50 years or more with proper installation and maintenance.
You’ll extend life by ensuring correct underlayment, proper flashing, and secure fastening.
Routine inspections, prompt repairs of cracked or displaced tiles, and cleaning to prevent moss and debris buildup keep performance high.
Expect long-term durability when you maintain them.
Can concrete tiles be installed over existing roofing or flooring?
Can concrete tiles go over your existing roof or floor? You can in some cases, but you must assess structure, weight capacity, and substrate condition first.
For roofs, verify framing supports heavier tiles and remove damaged underlayment.
For floors, check subfloor strength, levelness, and moisture barriers.
Always follow local codes and consult a structural or roofing professional before overlaying tiles.
Are concrete tiles energy-efficient and do they affect insulation?
After checking structure and substrate for overlays, you’ll likely wonder how concrete tiles affect a building’s thermal performance.
Concrete tiles have good thermal mass, moderating indoor temperature swings by absorbing daytime heat and releasing it at night.
They don’t provide significant R-value alone, so you’ll still need proper insulation beneath or within assemblies to meet energy-efficiency goals and local codes.
How heavy are concrete tiles and will they require structural reinforcement?
How much do concrete tiles weigh and will your roof need extra support?
Concrete tiles typically weigh 850–1,100 pounds per square (100 sq ft) — far heavier than asphalt.
You’ll need to verify your roof’s load capacity; an inspector or structural engineer can determine if rafters, trusses, or sheathing require reinforcement.
Reinforcement may include sistering rafters, adding collars, or upgrading supports to meet local codes.
What warranty and maintenance should I expect?
Knowing whether your roof needs reinforcement affects long-term care and the kinds of warranties you can expect, so it’s worth asking about both before installation.
Expect manufacturer warranties for tiles (color fade, cracking) and installer warranties for workmanship.
You should perform simple maintenance: clear debris, inspect flashings, replace broken tiles, and check for moss.
Keep records and follow warranty terms to avoid voiding coverage.