
How to Clean Epoxy Painted Floors and Maintain Their Finish Long-Term
Keep epoxy floors like new by sweeping or vacuuming daily, mopping weekly with a pH‑neutral cleaner and microfiber mop, and wiping spills immediately to avoid stains. Spot‑treat grease with a degreaser, use a soft brush for spots, and cautiously deep‑clean with a machine scrubber or low‑pressure washer (500–1200 psi). Inspect monthly, repair chips promptly, and recoat or topcoat every 6–12 months as needed for gloss. Continue below to learn practical tips and product picks.
How to Clean Epoxy Painted Floors and Maintain Their Finish
You’ll want to sweep or vacuum daily and mop weekly with a pH-neutral cleaner to keep grit and spills from damaging the epoxy.
Wipe up oil, chemicals, and stains immediately and use soft tools to avoid scratches.
For long-term shine, apply a recommended topcoat every few years and repair chips promptly to prevent further wear.
One-paragraph direct summary of recommended routine cleaning and long-term maintenance
Whether you wipe up spills immediately or sweep daily, keep epoxy floors clean by removing grit and liquids quickly. Mop weekly with a pH-neutral cleaner and microfiber mop, and spot-treat stains with a soft brush and gentle cleaner.
For long-term care, buff occasionally, use protective mats at entryways, avoid harsh chemicals and metal shovels, and reseal or recoat when shine diminishes to preserve finish.
Understanding Epoxy Painted Floors
Epoxy paint is a resin-and-hardener system that chemically bonds to properly prepared concrete, creating a tough, impermeable layer.
You’ll find several formulations and finishes—gloss, matte, and self-leveling coatings each offer different looks and performance.
Proper cleaning keeps that bond intact and preserves both durability and appearance over time.
What is epoxy paint and how it bonds to concrete
Because it forms a tough, seamless surface when applied correctly, epoxy paint is a popular choice for concrete floors in garages, workshops, and commercial spaces.
You mix resin and hardener; they chemically cure into a hard polymer that locks to concrete by penetrating pores and bonding to prepared, clean surfaces.
Proper primer and concrete profiling guarantee adhesion and long-lasting performance.
Common types of epoxy coatings and finishes (gloss, matte, self-leveling)
After you’ve prepared and bonded the epoxy to the concrete, you’ll pick a coating and finish that matches how the floor will be used and looked after.
Gloss epoxy gives a shiny, easy-to-clean surface and highlights color. Matte reduces glare and hides imperfections.
Self-leveling epoxy fills minor unevenness for a seamless, durable floor. Choose based on traffic, aesthetics, and maintenance preferences.
Why proper cleaning matters for durability and appearance
When you keep your epoxy-painted floor clean, you preserve both its look and structural integrity—dirt, oils, and grit act like sandpaper and dull the finish while chemical spills can etch or weaken the coating over time.
Regular, gentle cleaning prevents premature wear, maintains slip resistance, and reveals damage early so you can spot-treat chips or cracks before they spread, extending the coating’s lifespan.
Safety and Preparation Before Cleaning
Before you start cleaning, put on gloves, eye protection, and maintain good ventilation to avoid fumes and skin contact.
Gather your tools and supplies—broom, mop, pH-neutral cleaner, microfiber cloths, and a bucket—so you’re not searching mid-job.
Test any cleaning solution on a small, inconspicuous patch to check for discoloration or finish damage before treating the whole floor.
Personal protective equipment and ventilation
One or two key pieces of personal protective equipment (PPE) — chemical-resistant gloves and eye protection — will keep you safe while cleaning epoxy floors.
You should also guarantee good ventilation to avoid breathing cleaning fumes; add a respirator with organic-vapor cartridges if you’re using strong solvents or stripping agents.
Also wear long sleeves, non-slip shoes, and consider disposable coveralls to protect skin and clothing.
Tools and supplies checklist
Gathering the right tools and supplies will make cleaning your epoxy floor faster and prevent damage; you’ll need non-abrasive microfiber mops or soft-bristle brooms, a pH-neutral cleaner, a bucket, a low-speed floor scrubber or soft scrub brush for stubborn spots, chemical-resistant gloves and eye protection, clean microfiber towels, and optional items like a wet/dry vacuum, mop wringer, and floor squeegee.
- Microfiber mop
- pH-neutral cleaner
- Soft scrub brush
- Chemical-resistant gloves
How to test a cleaning solution on a small area
While you prepare your cleaning solution, pick a discreet corner or hidden spot and apply a small amount to check for discoloration, lift, or finish damage.
Wait the recommended dwell time, blot with a clean cloth, then rinse and let dry.
Inspect for changes in gloss, texture, or adhesion. If anything looks off, stop and try a milder solution or consult the coating manufacturer.
Routine Cleaning Daily and Weekly Steps
For everyday care, you’ll want to sweep or use a dust mop to remove grit and debris before it scratches the epoxy.
Once a week, mop with a microfiber mop and a mild, pH-neutral cleaner or a simple DIY mix of warm water and a few drops of dish soap.
Avoid harsh chemicals or acidic cleaners that can dull or damage the finish.
Daily quick-clean methods (sweeping, dust mopping)
1–2 minutes a day can keep epoxy floors looking great: sweep or use a microfiber dust mop to remove grit, dirt, and loose debris before it scratches the surface or becomes ground in.
Move deliberately across high-traffic zones, reaching corners and under furniture.
Empty the dustpan or shake out the mop outdoors to avoid reintroducing particles, and store tools clean and dry.
Weekly wet-clean routine (mopping techniques and recommended solutions)
Because a deeper clean once a week removes grime that daily dusting misses, mop your epoxy floors with a gentle, pH-neutral cleaner and warm water to restore shine without dulling the finish.
Use a microfiber mop, change water when cloudy, and wring thoroughly to avoid excess moisture.
Rinse with clean water, let air-dry, and spot-treat stubborn marks with a soft brush.
Best cleaning products and DIY solutions (pH-neutral cleaners vs harsh chemicals)
Choose gentle, pH-neutral cleaners for routine daily and weekly care since they remove dirt without stripping or dulling epoxy finishes; you can also make effective DIY mixes—like a few drops of dish soap in warm water—for regular mopping, while reserving stronger, specially labeled solvents only for rare, targeted stains.
| Product type | When to use |
|---|---|
| pH-neutral cleaner | Daily/weekly |
| Dish soap mix | Light soil |
| Solvent (labelled) | Tough spots only |
| Vinegar/bleach | Avoid on epoxy |
Deep Cleaning Procedures
When you need more than routine care, start by clearing loose debris and treating visible stains so the surface’s ready for deeper work.
Use a degreaser for oil, grease, and automotive spots, then address scuffs and scratches with appropriate cleaners and gentle abrasion.
Save power washing or machine scrubbing for heavy buildup—pick the right settings and brushes to avoid damaging the epoxy.
Step 1: Remove surface debris and stains
Start by sweeping and vacuuming the floor to remove loose dirt, dust, and grit that can scratch the epoxy during deeper cleaning.
Next, spot-treat dried spills with a damp microfiber mop and gentle pH-neutral cleaner, blotting rather than scrubbing. Rinse and dry thoroughly to prevent residue.
- Use a soft broom or vacuum attachment
- Pick up debris promptly
- Blot stains gently
- Dry completely
Step 2: Degreasing oil, grease, and automotive stains (products and technique)
Step 2 tackles tough oil, grease, and automotive stains that regular sweeping can’t lift; you’ll need the right degreaser, a stiff-bristled brush or nylon scrub pad, and plenty of microfiber cloths or disposable rags.
Apply a pH-balanced, low-odor degreaser per label, let dwell briefly, agitate gently in one direction, blot lifted residue, rinse with clean water, and dry to prevent slipping and residue.
Step 3: Removing scuff marks and scraches safely
After degreasing stubborn oil and grease, you’ll often still see scuff marks and light scratches that need a gentler, targeted approach.
Use a soft microfiber mop and a non-abrasive cleaner or isopropyl alcohol for scuffs.
For light scratches, rub gently with a magnesium or nylon scuff pad in circular motions.
Wipe dry, inspect, and apply a thin coat of maintenance polish if needed.
Step 4: Power washing and machine scrubbing (when to use, settings, brushes)
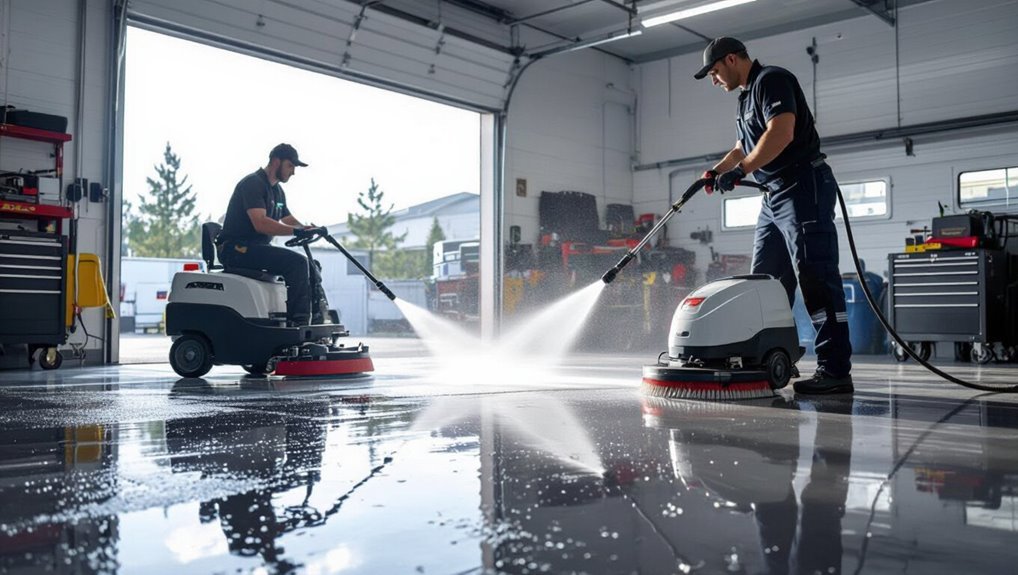
For heavy-duty grime, oil stains, or large-area maintenance you’ll want to bring in power washing or a floor-scrubbing machine—these tools save time and restore finish when hand methods won’t cut it.
Use low-pressure settings (500–1200 psi) with fan nozzles, or slow-speed scrubbers (175–300 rpm). Choose non-abrasive nylon brushes, cold water, and mild detergent.
Test a small area first and dry thoroughly.
Dealing with Specific Problems and Stains
You’ll often face specific issues like rust and metal marks, paint spills or adhesive residue, and stubborn epoxy drips that need different treatments.
You’ll also want to spot-check for discoloration, yellowing from UV exposure, and signs of mold, mildew, or water damage.
In the following section, you’ll get targeted fixes and safe product recommendations for each problem.
Rust stains and metal marks
When metal sits on epoxy-painted floors or water carries iron particles across the surface, rust stains and dark metal marks can appear quickly.
You’ll want to tackle them promptly to avoid permanent discoloration. Use a gentle acid-free rust remover or a diluted white vinegar solution.
Test a hidden area, blot—don’t scrub aggressively—then rinse thoroughly and dry.
Repeat if needed.
Paint spills, adhesive residue, and epoxy drips
Rust and metal marks need quick attention, but paint spills, adhesive residue, and stray epoxy drips require a different approach because they often sit on the surface and can bond if left too long.
Scrape gently with a plastic scraper, soften stubborn spots with a recommended solvent (test first), wipe with a microfiber cloth, then rinse.
Repeat as needed and reseal damaged areas promptly.
Discoloration, yellowing, and UV-related fading
Sunlight and heat can slowly yellow or fade epoxy finishes, especially lighter or clear coats.
You should address UV-related discoloration early to prevent deeper degradation. Inspect regularly for dull, ambering areas.
Use a gentle cleaner and nonabrasive pad; avoid harsh chemicals that worsen damage.
For mild yellowing, try a UV-stable polish or clearcoat; for severe fading, consider professional recoating with UV-resistant epoxy.
Mold, mildew, and water damage signs
If UV exposure can yellow or soften an epoxy finish, moisture introduces a different set of threats: mold, mildew, and water-induced damage.
You’ll spot dark spots, musty odors, soft or bubbling areas, and peeling edges where water sat.
Clean with a mild bleach solution, dry thoroughly, and fix leaks or drainage.
For severe damage, sand and recoat or consult a pro to prevent recurrence.
Mistakes to Avoid When Cleaning Epoxy Floors
Don’t use acidic or highly alkaline cleaners, because they can dull or etch the epoxy finish.
Avoid abrasive brushes, harsh pads, or machine settings that spin too fast, and don’t over-wet the floor or leave puddles that can seep under the coating.
Also respect the manufacturer’s cure times and recoating instructions to prevent damage and adhesion problems.
Using acidic or high-alkaline cleaners
Although strong acids and high-alkaline cleaners can seem like a quick fix for tough grime, they’ll etch, dull, or even strip epoxy coatings and shorten the floor’s lifespan.
You should use pH-neutral cleaners formulated for epoxy, dilute concentrates per instructions, rinse thoroughly, and spot-test first.
Avoid vinegar, bleach mixes, and muriatic-type products to preserve gloss and protective properties.
Abrasive tools and improper machine settings
When you reach for steel wool, wire brushes, or overly aggressive pads, you risk scratching and dulling the epoxy surface; those micro-abrasions catch dirt and accelerate wear.
Use soft microfiber pads and non-abrasive brushes.
If you use machines, pick low-speed, compatible pads and test a small area first.
Excess pressure or wrong pads gouge the coating and shorten its lifespan.
Over-wetting or leaving puddles that can seep under coating
One common mistake is letting water or cleaning solution pool on the surface, because excess moisture can creep under seams or tiny defects in the epoxy and cause lifting or discoloration.
You should use damp mops, wring cloths thoroughly, and remove puddles immediately.
Spot-dry seams and edges, ventilate the area, and avoid pressure-washing depressions that trap liquid beneath the coating.
Ignoring manufacturer’s cure times and recoating needs
If you skip the manufacturer’s recommended cure times or ignore their guidance on recoating, you’ll risk damaging the finish and shortening the floor’s lifespan.
Don’t walk on, clean aggressively, or apply sealers before full cure; you’ll trap solvents or cause uneven adhesion.
Follow specified wait periods, surface prep, and recoat windows so your epoxy bonds properly and stays durable for years.
Long-Term Maintenance and Protection Strategies
To keep your epoxy floor looking and performing its best, start with a simple inspection checklist and a regular maintenance schedule you can actually follow.
You’ll also need to know when to reapply topcoat, sealer, or wax and how to do it properly, plus use preventative items like mats, furniture pads, and quality wheel casters.
Finally, control humidity, temperature, and sunlight to prevent warping, yellowing, or premature wear.
Regular inspection checklist and maintenance schedule
Because regular inspections catch small problems before they escalate, you should follow a concise checklist and schedule for epoxy-painted floors; this keeps the surface durable, safe, and attractive over the long term.
Inspect monthly, spot-clean, and log findings. Address issues promptly.
- Check for chips, cracks, and wear
- Inspect slip resistance and cleanliness
- Look for chemical staining or residue
- Verify drain and joint integrity
Reapplying topcoat, sealers, or waxes when and how
1 key step in long-term epoxy floor care is knowing when and how to reapply topcoats, sealers, or waxes, since timely recoating restores protection and slip resistance without unnecessary work.
Check for dullness, scratches, or water beading failure every 6–12 months. Clean thoroughly, scuff-sand if needed, then apply manufacturer-recommended product in thin, even coats, allowing full cure between layers.
Preventative measures: mats, wheel casters, and furniture pads
Reapplying protectives will extend your floor’s life, but routine prevention cuts down on how often you need to do that work.
Use entrance mats to trap grit, anti-fatigue mats in work zones, and soft casters or wheel covers on chairs and carts.
Fit felt or rubber pads under furniture legs, inspect pads often, and replace worn pieces to prevent scratches and gouges.
Environmental controls: humidity, temperature, and sunlight management
While epoxy is durable, controlling humidity, temperature, and sunlight will keep finishes looking their best and prevent long-term problems like bubbling, discoloration, or premature wear.
You should maintain stable indoor humidity (35–55%), avoid rapid temperature swings, and keep floors out of direct sunlight with curtains or UV-blocking films.
Use dehumidifiers or HVAC adjustments to protect the coating and prolong its life.
Cost, Lifespan, and When to Recoat or Replace
You can expect a well-applied epoxy floor to last 5–10 years, though heavy traffic, UV exposure, and poor prep will shorten that.
Watch for peeling, extensive cracking, or widespread dulling to know when a full recoat or replacement is due, while isolated chips or stains usually only need spot repair.
Budget roughly $1–3 per sq ft for DIY maintenance, $2–6 for spot repairs, and $3–12+ for professional recoating or replacement depending on prep and materials.
Typical lifespan expectations and factors that shorten life
Although epoxy floors are built to last, their real lifespan depends on how they’re used and maintained.
You can expect 5–15 years for garage or light residential use, longer for well-maintained industrial coatings.
Heavy traffic, UV exposure, chemical spills, poor surface prep, and impact or abrasion shorten life.
Regular cleaning, prompt spill cleanup, and protective mats extend durability and delay replacement.
Signs you need spot repair vs full recoating
Knowing how wear, spills, and poor prep shorten an epoxy floor’s life helps you spot whether a simple repair will do or if a full recoating is needed.
If damage is localized—chips, stains, or minor delamination—you can sand, clean, and patch that area.
Choose full recoating when widespread gloss loss, extensive peeling, or substrate issues compromise adhesion across large sections.
Rough cost estimates for maintenance, repairs, and professional services
When planning epoxy floor upkeep, expect a wide price range depending on scope and whether you DIY or hire pros. You’ll budget for routine cleaning, occasional spot repair, and full recoats. Expect DIY savings but weigh time and skill. Use the table to compare typical costs.
| Service | Typical cost |
|---|---|
| Cleaning supplies | $20–$100 |
| Spot repair | $50–$300 |
| Recoat/professional | $500–$5,000 |
Product Recommendations and Buying Guide
You’ll want specific cleaners for daily maintenance, greasy spots, and heavy stains, plus the right tools—mops, scrubbers, and squeegees—to use them effectively.
Choose products labeled safe for epoxy and match cleaner strength to the job to avoid damage.
If stains are extensive or the finish is compromised, consider hiring a professional instead of risking a DIY fix.
Recommended cleaners by use-case (daily, degreaser, heavy stain remover)
Choosing the right cleaner makes routine maintenance quick and protects your epoxy finish, so match products to the job: a mild pH-neutral cleaner for daily mopping, a water-based degreaser for greasy work areas, and a stronger stain remover for oil, rust, or paint spots.
Use diluted neutral cleaner daily, a citrus or biodegradable water-based degreaser for grime, and a targeted solvent or rust remover sparingly, testing first.
Recommended tools and equipment (mops, scrubbers, squeegees)
Although epoxy’s smooth, low-porosity surface makes cleaning easier, the right tools still matter—you’ll want mops, scrubbers, and squeegees that lift dirt without scratching or leaving residue.
Choose microfiber flat mops for daily use, soft-bristle scrub brushes or cordless floor scrubbers for stubborn grime, and rubber-blade squeegees to remove water.
Pick chemical-resistant handles and easy-rinse heads for longevity.
When to hire a professional vs DIY
Now that you’ve got the right mops, scrubbers, and squeegees, decide whether to tackle maintenance yourself or call a pro based on the floor’s condition, your time, and the products you’ll need.
DIY works for routine cleaning and minor stains if you’re comfortable with recommended cleaners and techniques.
Hire a pro for large repairs, heavy abrasion, warranty concerns, or when you need specialized equipment and guaranteed results.
FAQs
You probably have a few quick questions about care and spots — like how often to deep clean, whether bleach or vinegar are safe, and how to lift permanent marker or paint.
You’ll also want to know if commercial epoxy cleaners will harm the garage finish and whether waxing helps longevity.
Read on for concise answers and practical tips.
How often should I deep clean epoxy floors?
How often should you deep clean epoxy floors?
Deep clean every 3–6 months for garages and high-traffic areas, and every 6–12 months for light-use spaces.
Increase frequency after spills, oil leaks, or abrasive grit buildup.
Regular weekly sweeping and monthly mopping reduce deep-cleaning needs.
Always follow manufacturer guidance and spot-treat stains promptly to preserve the finish and prevent long-term damage.
Can I use bleach or vinegar on epoxy?
Besides scheduling regular deep cleans, you’ll want to know which cleaners are safe for epoxy—especially common household options like bleach and vinegar.
You can use diluted bleach sparingly to disinfect, rinse thoroughly, and avoid prolonged contact.
Vinegar’s acidity can dull epoxy over time, so skip regular vinegar use.
Stick to pH-neutral cleaners for routine maintenance and spot-disinfect with diluted bleach only when needed.
How do I remove permanent marker or paint from epoxy?
Want to get permanent marker or paint off epoxy without damaging the finish?
Start with isopropyl alcohol or a dedicated graffiti remover applied to a soft cloth; rub gently.
For stubborn spots, use a plastic scraper and repeat alcohol treatment.
Rinse with water and mild detergent, then dry.
Test any solvent in an inconspicuous area first to guarantee it won’t dull the epoxy.
Will epoxy floor cleaners damage garage floor finish?
Curious whether epoxy floor cleaners will harm your garage’s finish?
Use pH-neutral, non-abrasive cleaners made for epoxy; they’ll clean without dulling or etching.
Avoid harsh solvents, acidic detergents, and scouring pads that can strip the topcoat.
Test any new product in an inconspicuous spot first.
Rinse thoroughly and dry to prevent residue or water spots that could mar the finish.
Can I wax epoxy floors and does it help longevity?
Since you already know which cleaners won’t damage an epoxy finish, you might wonder whether adding wax offers extra protection.
You can wax epoxy, but it’s usually unnecessary. Wax adds temporary gloss and minor scratch resistance yet may yellow, trap dirt, and complicate recoat.
Prefer proper maintenance and occasional recoat for longevity.
- Temporary shine
- Minor scratch masking
- Yellowing risk
- Recoat interference