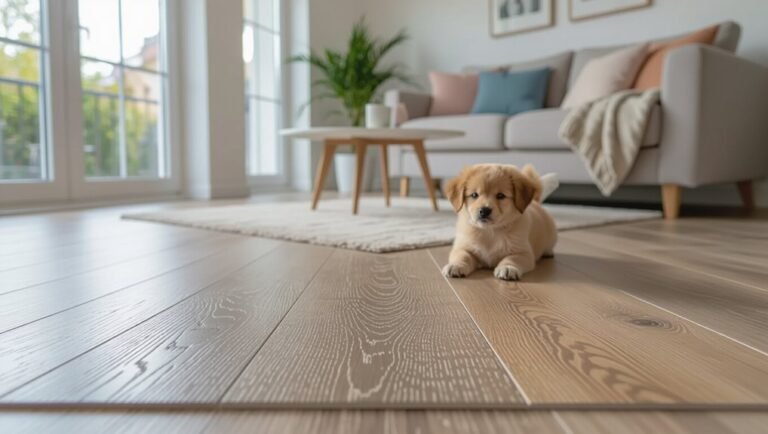
How to Clean LVP Flooring Without Streaks or Damage
You can keep LVP floors streak-free and intact by sweeping or vacuuming grit often, spot-cleaning spills promptly, and damp-mopping with a microfiber pad and a pH-neutral cleaner. Wring the mop well to avoid excess water, rinse pads frequently, and dry any leftover moisture with a soft towel. Avoid steam cleaners, abrasive tools, oil soaps, and waxes that can dull or warp the surface. Follow these basics and you’ll find simple weekly and seasonal steps that help preserve your floors.
Best Way to Clean LVP Flooring Without Streaks or Damage
Start by sweeping or vacuuming loose dirt.
Then mop with a damp microfiber and a pH-neutral LVP cleaner to avoid streaks and damage.
Use a gentle back-and-forth motion, rinse the mop frequently, and dry any excess moisture with a soft towel.
Clean high-traffic areas weekly and do a full light cleaning monthly, avoiding harsh chemicals or abrasive tools.
Short, actionable summary of steps
Grab a microfiber mop, a gentle pH-neutral cleaner, and a bucket of warm water, and follow these quick steps to get streak-free LVP:
Sweep or vacuum first, spot-treat sticky areas, dilute cleaner per instructions, mop in thin passes with minimal water, rinse mop often, dry promptly with a clean microfiber cloth, and avoid harsh chemicals or abrasive tools—this answers how do you clean lvp flooring efficiently.
Recommended cleaning frequency and products
For everyday upkeep, you should sweep or vacuum LVP 2–3 times a week and do a damp-mop with a pH-neutral cleaner about once every 1–2 weeks (more often in high-traffic areas); use spot-cleaning for spills immediately to prevent stains or residue.
- Use a microfiber mop and pH-neutral cleaner.
- Avoid oil-based soaps, waxes, or steam cleaners.
- Blot spills, rinse residue, dry promptly to prevent streaks.
Basic Understanding What Is LVP and Why It Needs Special Care
You’re working with Luxury Vinyl Plank (LVP), a layered synthetic flooring that mimics wood and relies on wear layers and protective coatings for durability.
Those surface characteristics—printed design layer, clear wear layer, and sometimes a urethane or ceramic coat—determine how it responds to cleaning.
Use the right products and methods, or you’ll risk streaks, dulling, or even surface damage.
What is Luxury Vinyl Plank (LVP)?
Luxury vinyl plank (LVP) is a durable, water-resistant flooring made of layered synthetic materials that mimic wood or stone. It needs special care because its wear layer and seams can be damaged by harsh cleaners, excess moisture, or abrasive tools.
You’ll find planks that click or glue down; they resist scratches and stains but rely on proper cleaning to preserve appearance and lifespan.
Common surface characteristics and coatings
Since LVP relies on layered construction to look and perform like real wood or stone, its top surface and coatings determine how it wears, shines, and resists stains.
You’ll find wear layers of varied thickness, clear protective urethane or aluminum oxide finishes, embossed textures, and gloss levels.
Knowing these lets you choose gentle cleaners and proper tools that preserve finish and appearance.
Why improper cleaning causes streaks, dulling, or damage
Although LVP looks tough, its thin wear layer and clear coatings react differently than real wood or tile, so using the wrong cleaners or tools can leave streaks, strip finishes, or cause surface abrasion.
You’ll damage seals with harsh chemicals, leave residue from oily or waxy products, and scratch with abrasive pads.
Use pH-neutral cleaners, microfiber mops, and minimal water to protect appearance.
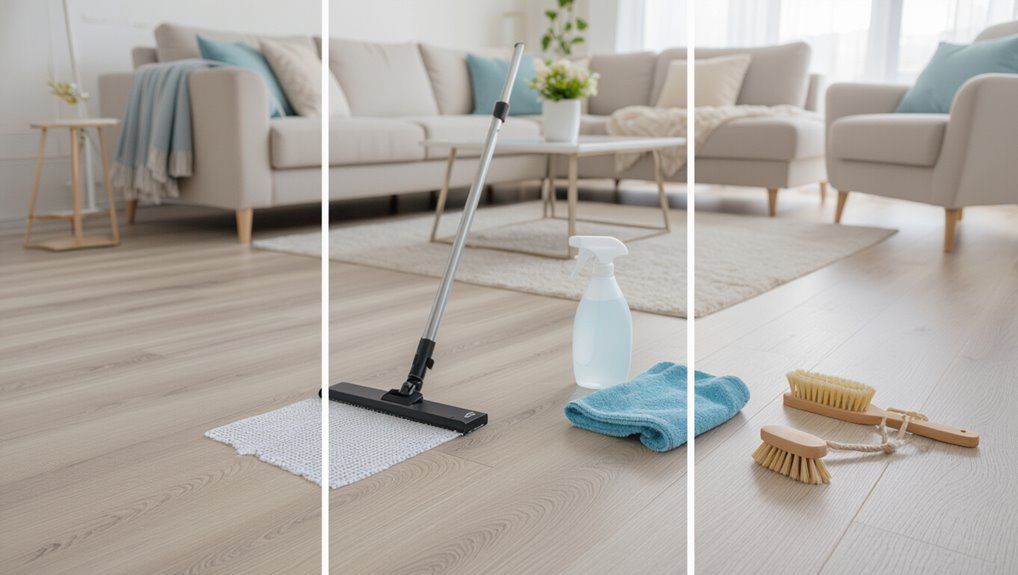
Tools and Supplies You Should Use and Avoid
When cleaning LVP, you’ll get the best results with gentle tools like a microfiber mop, soft-bristle broom, and a pH-neutral cleaner.
Avoid harsh chemicals, steam mops, and abrasive scrubbers that can warp or dull the surface.
Always check product labels for LVP compatibility—look for “safe for vinyl” or manufacturer recommendations before using anything new.
Recommended tools (microfiber mop, soft-bristle broom, pH-neutral cleaner)
A few simple tools will keep your LVP looking new: a microfiber mop for dust and wet cleaning, a soft-bristle broom for sweeping up grit without scratching, and a pH-neutral cleaner formulated for vinyl to remove grime without damaging the wear layer.
- Microfiber mop — traps dirt, won’t streak.
- Soft-bristle broom — protects finish.
- pH-neutral cleaner — safe, effective.
Products and tools to avoid (harsh chemicals, steam mops, abrasive scrubbers)
You’ve got the right tools listed, but you’ll also want to steer clear of certain products and equipment that can harm LVP.
Avoid harsh cleaners and DIY acids that strip protective layers. Don’t use high-heat steam mops or wax-based polishes. Skip abrasive pads or brushes that scratch finish.
- Harsh chemicals
- Steam mops
- Abrasive scrubbers
How to read product labels for LVP compatibility
1 clear way to check if a cleaner’s safe for LVP is to scan the label for explicit mentions of “vinyl,” “LVP,” “luxury vinyl,” or “resilient flooring” and any statements about being non-abrasive and pH-neutral. Verify warnings, dilution, and recommended surfaces; avoid ammonia, bleach, or solvent-based claims.
| Claim | Safe? | Notes |
|---|---|---|
| pH-neutral | Yes | Gentle |
| Non-abrasive | Yes | No scrubbing |
| Solvent | No | Damaging |
| Bleach | No | Discoloration |
Step-by-Step Cleaning Routine (Daily to Deep Clean)
Start with quick daily spot-cleaning to wipe spills and grit before they scratch the surface.
Once a week you’ll do a light mop with a mild cleaner diluted per the label (usually a few capfuls in a gallon of water).
Monthly, perform a deeper scrub with recommended tools and thorough drying, and use targeted, safe solutions for stubborn stains like ink, grease, or pet accidents.
Step 1 Daily/spot cleaning: quick tips and techniques
Daily spot cleaning takes just a few minutes and keeps LVP looking fresh between deeper cleans.
Keep a soft broom or microfiber dust mop handy, and sweep crumbs and grit daily.
For spills, blot immediately with a microfiber cloth and warm water.
Use a pH-neutral spray for stubborn spots, avoid abrasive tools, and dry the area to prevent streaks or water damage.
Step 2 Weekly light clean: exact process and dilution ratios
Once a week, give your LVP a light, methodical clean to remove settled dirt and restore shine without over-wetting the floor.
Sweep or vacuum first.
Mix a neutral pH cleaner with warm water at manufacturer ratio (commonly 1:100 or 1/4 cup per gallon).
Damp-mop with a microfiber pad, rinsing and wringing often.
Dry with a clean microfiber towel to prevent streaks.
Step 3 Monthly/deep clean: method, tools, and drying
For your monthly deep clean, plan on a systematic, slightly more intensive process that lifts ground-in grime and refreshes the floor finish without damaging the vinyl.
Start by sweeping/vacuuming, then mop with a manufacturer-safe pH-neutral cleaner using a microfiber flat mop.
Rinse with clean water, change solution as needed, and dry thoroughly with clean microfiber cloths or fans to prevent moisture buildup and streaks.
Step 4 Handling stubborn stains (ink, grease, pet accidents) with safe solutions
After your monthly deep clean, you’ll still encounter stubborn spots that need targeted care—ink, grease, and pet accidents each demand a different approach to avoid damaging LVP.
Treat stains promptly, test cleaners, and blot rather than scrub.
- Ink: use isopropyl alcohol on a soft cloth, dab gently.
- Grease: apply mild dish soap, rinse.
- Pet accidents: neutralize with enzymatic cleaner, dry thoroughly.
Exact Cleaning Solutions and DIY Recipes
You’ll want cleaners that’re labeled safe for luxury vinyl plank—look for pH-neutral formulas or reputable brands like Bona, Rejuvenate, and Method.
I’ll give simple DIY recipes (e.g., 1/2 cup white vinegar per gallon of water or 1 teaspoon castile soap per gallon) and note when to avoid each.
Always spot-test a new cleaner on an inconspicuous area for 24 hours to check for color change or finish dulling.
Best commercial cleaners for LVP (brands/types to look for)
Choosing the right commercial cleaner makes keeping LVP floors looking new much easier, and you’ll want products formulated specifically for resilient vinyl that don’t leave residue or dull the wear layer.
Look for pH-neutral, nonabrasive formulas and trusted brands. Consider:
- pH-neutral spray cleaners from specialty floor brands
- No-wax, residue-free maintenance solutions
- Manufacturer-recommended maintenance kits for LVP
Safe DIY cleaners and precise recipes (vinegar option, castile soap option) with proportions
When you need a safe, budget-friendly cleaner for LVP, two reliable DIY options are a diluted vinegar solution and a Castile soap mix—both use simple, measured proportions to clean without harming the wear layer. Use 1 cup white vinegar per gallon water for routine mopping; or 1 tsp Castile soap per gallon with warm water for greasy spots.
| Cleaner | Ratio | Use |
|---|---|---|
| Vinegar | 1 cup/gal | Routine |
| Castile | 1 tsp/gal | Grease |
How to test any new cleaner on LVP (spot test protocol)
Before using any cleaner across your whole LVP floor, test it in an inconspicuous spot to make sure it won’t dull, stain, or soften the wear layer.
Apply a small amount, wait 10–15 minutes, blot dry, then inspect for discoloration, cloudiness, or softening.
Repeat after 24 hours. If no change, proceed with a larger area using the recommended dilution and rinse thoroughly.
Preventing Streaks Techniques and Pro Tips
When you mop, use a microfiber pad, apply gentle even pressure, and move with the grain to cut down on streaks.
Use warm (not hot) water, stick to recommended dilution ratios, and wipe or air-dry quickly so residue doesn’t mark the surface.
To keep shine consistent, use manufacturer‑approved protective products sparingly and reapply on the schedule they recommend.
Mopping technique that minimizes streaking (pressure, direction, microfiber use)
Although LVP’s low porosity makes it easy to clean, you’ll still need the right mopping technique to avoid streaks:
Use a flat microfiber mop, apply light even pressure, and push in straight lines toward one exit. Rinse or change the pad when it gets dirty, overlap passes slightly, and avoid scrubbing hard.
Finish with a dry microfiber to lift residue and guarantee uniform sheen.
Water temperature, dilution, and drying practices
If you want streak-free LVP, use warm—not hot—water and a properly diluted cleaner so residue doesn’t dry too quickly or leave a film; mix according to the label (usually a capful per gallon) and test a small area first.
Wring mops well, work in small sections, and dry promptly with a microfiber pad or towel to prevent water spots and streaking.
Managing shine and preserving finish (protective products and frequency)
Because LVP’s factory finish is delicate, you’ll want to use gentle, compatible products and a light touch to maintain shine without building residue; choose a manufacturer-recommended polish or restorative product, apply it sparingly according to directions (usually every few months or as traffic dictates), and avoid waxes or silicone-based dressings that can attract dirt and cause streaks.
Use microfiber pads, test first in a hidden area, and reapply only when sheen noticeably dulls.
Common Problems and Mistakes to Avoid
Watch for common causes of streaks and cloudy residue—hard water, too much cleaner, and dirty mop heads can all leave a film.
Don’t use steam mops or abrasive cleaners, since they can lift seams, warp planks, and strip the wear layer.
And avoid waxing LVP or using harsh waxing products, because they build up, attract dirt, and cause long-term wear.
Causes of streaks and cloudy residue
When streaks or a cloudy film show up on your LVP, it usually comes down to residue from cleaning products, hard water deposits, or not rinsing well enough after mopping.
These leave behind soap, minerals, or dirt that scatter light and dull the finish. Overusing cleaners, using waxy or oily products, or letting dirty mop water sit will all worsen the haze.
How steam mops and abrasive cleaners damage LVP
Although steam mops and abrasive cleaners promise quick results, they can strip the wear layer, warp planks, and scratch the textured surface of LVP if you use them improperly.
You risk loosening plank seams with excess heat and moisture, and abrasive pads or powders gouge the protective finish.
Stick to damp mopping and manufacturer-approved cleaners to avoid irreversible surface damage.
Mistakes that cause long-term wear (waxing over LVP, harsh waxing products)
Beyond steam mops and abrasive cleaners, another frequent misstep is treating LVP like traditional hardwood or vinyl by applying wax or heavy polish.
You shouldn’t wax LVP—residue builds, attracts dirt, and creates uneven sheen that needs stripping. Harsh waxing products can degrade the wear layer, causing premature dulling and peeling.
Use manufacturer-approved cleaners and avoid any polish meant for porous floors.
Maintenance Strategies for Longevity
You can extend your LVP’s life with simple protective measures like entry mats, furniture pads, and keeping indoor humidity stable.
Check your floor regularly and make quick repairs for scratches or any boards that start to lift.
Try basic DIY fixes for small issues, but call a professional when damage is extensive or the floor’s installation looks compromised.
Protective measures (entry mats, furniture pads, humidity control)
When you protect luxury vinyl plank (LVP) with simple measures like entry mats, furniture pads, and humidity control, you’ll cut down on scratches, stains, and warping and extend the floor’s life.
- Place washable entry mats to trap grit and moisture.
- Fit soft felt pads under legs and replace them periodically.
- Keep indoor humidity between 35–55% to prevent expansion or gaps.
Routine inspection and quick repairs for scratches or lifting
Although scratches and lifting may seem minor at first, catching them early prevents bigger damage and keeps your LVP flooring looking and performing its best.
Inspect weekly, focusing on high-traffic areas and seams. Wipe debris, press edges back into place, and use a matching vinyl repair kit or floor polish for minor scratches.
Note progress and recheck to stop issues from worsening.
When to call a professional vs. DIY fixes
Wondering whether a problem is DIY or needs a pro? You can handle minor scratches, small chips, loose planks, and routine cleaning with patch kits, adhesive, or trim tools.
Call a professional for large areas of lifting, moisture damage, extensive buckling, or uncertain subfloor issues. If repairs require subfloor work, prolonged moisture, or warranty concerns, get an expert to avoid costly mistakes.
Quick Care Checklists
Keep two simple checklists handy so you don’t waste time: a daily/weekly checklist for quick tasks like sweeping, spot-mopping, and wiping spills, and a seasonal deep-clean checklist for rinsing, gentle scrubbing, and inspecting seams.
Follow the quick checklist during busy weeks to prevent buildup. Use the deep-clean checklist a few times a year to refresh the floor and catch any maintenance needs early.
Daily/weekly checklist for busy homeowners
If you’re short on time but want your LVP floors to stay like-new, a simple daily and weekly checklist will save you effort down the road.
Follow quick, targeted actions to prevent grit, spills, and dulling.
- Sweep/vacuum high-traffic areas daily.
- Spot-clean spills immediately with a damp microfiber.
- Weekly: damp-mop with manufacturer-approved cleaner, dry thoroughly.
Deep-clean checklist for seasonal maintenance
Once or twice a year, give your LVP floors a thorough deep clean to remove embedded grit, restore shine, and catch issues before they worsen.
Follow this seasonal checklist to protect finish and extend life:
- Strip debris, vacuum edges, and mop with manufacturer-safe cleaner.
- Buff lightly or use a microfiber pad for scuffs.
- Inspect seams, grout lines, and junctions; repair or reseal as needed.
FAQ Common Questions About Cleaning LVP
You’ve probably got a few specific questions about caring for LVP—like whether vinegar or a steam mop is safe, how to remove sticky residue without harm, and if frequent mopping can cause fading or warping.
You’ll also want to know how to restore shine on dull planks without risking damage. Below are clear answers to each concern.
Can I use vinegar on LVP?
Wondering whether vinegar’s safe for your LVP? You can use diluted white vinegar (about 1/4 cup per gallon of water) for occasional cleaning—it’s effective at cutting grime without stripping finish.
Avoid full-strength vinegar, abrasive scrubs, and prolonged soaking. Test a hidden spot first, mop with a damp (not wet) microfiber, and dry promptly to prevent edge swelling or dulling.
Is a steam mop safe for LVP?
How safe is a steam mop for LVP? You shouldn’t use high-heat steam on LVP; excessive heat and moisture can warp seams, loosen adhesive, or damage the wear layer.
If the manufacturer explicitly approves low-temperature steam, use minimal steam, move quickly, and dry the floor immediately.
Otherwise, stick to damp mops and approved cleaners to protect your flooring’s finish and warranty.
How do I remove sticky residue without damaging the floor?
If you avoid steam mops to protect your LVP, you’ll still occasionally face sticky spills from tape, gum, or adhesive that need careful removal.
Gently lift solids with a plastic scraper, then apply a small amount of isopropyl alcohol or a manufacturer-approved adhesive remover on a soft cloth.
Rub lightly, rinse with warm water, and dry.
Test in an inconspicuous spot first.
Will frequent mopping cause fading or warping?
Although regular mopping won’t by itself fade or warp quality LVP, using the wrong techniques can cause problems—excess water, harsh chemicals, or abrasive tools can dull the wear layer and seep into seams.
Mop with a damp, well‑wrung microfiber pad, use pH-neutral cleaners, avoid soaking, and dry any puddles promptly.
Follow manufacturer guidelines to prevent long-term issues.
How to restore shine on dull LVP?
When your LVP looks dull, you can usually bring back its luster without stripping the floor—start with a gentle clean using a damp microfiber mop and a pH‑neutral cleaner to remove surface grime.
Then try a manufacturer‑approved polish or restorer designed for vinyl to enhance shine; avoid waxes or oil‑based products unless your flooring specifically allows them.
After polishing, buff with a soft cloth and protect high‑traffic areas.
Visual Guide and Troubleshooting
You’ll see clear before-and-after examples to show what proper cleaning should look like and what results to expect.
If you run into streaks, stubborn stains, or signs of damage, follow the troubleshooting flowchart to identify the cause and the right fix.
Keep the photos and flowchart handy so you can quickly match your floor’s issue to the recommended steps.
Before-and-after cleaning examples
Seeing side-by-side before-and-after photos makes it easy to judge how well your LVP cleaning method worked.
It helps you spot common trouble spots like grout lines, pet stains, or dull finish areas that need a different approach.
Use close-ups, consistent lighting, and date-stamped images.
Note what product and technique you used, so you can repeat successes or tweak methods for stubborn spots.
Troubleshooting flowchart for streaks, stains, and damage
Want a quick way to diagnose streaks, stains, or damage on your LVP? Use this simple flowchart: test cleaner, inspect finish, and act fast. Follow steps: blot stains, rinse, dry, or consult pro for scratches.
| Problem | Quick Check | Action |
|---|---|---|
| Streaks | Cleaner residue? | Rinse, microfiber dry |
| Stains | Fresh or set? | Blot, mild cleaner |
| Damage | Scratch or peel? | Repair kit or pro |