How to Install a Tile Countertop: A Complete DIY Guide
You can install a durable, custom tile countertop yourself with careful planning, the right tools, and patience. Measure and prep the substrate, choose tile type and layout, then dry-fit tiles and cut as needed with a wet saw. Apply thinset, set tiles with spacers, let mortar cure, grout, wipe haze, and seal tiles and grout. Protect surfaces and reseal annually. Follow step-by-step guidance below to handle tricky cuts, edges, and finishing details.
How to Install a Tile Countertop and Project Overview
Yes—you can often install a tile countertop yourself, but practicality depends on the project scope, your skill level, and the tools you have.
Expect a weekend for a small countertop or several days for full demo, prep, tiling, grout, and sealing; difficulty ranges from moderate to advanced and requires basics like a wet saw, trowel, level, and grout float.
Hire a pro if you’re uncomfortable with precise cuts, plumbing work, or want a guaranteed waterproof finish.
Quick Answer: Can you install a tile countertop yourself?
Wondering if you can tackle a tile countertop yourself? Yes—you can. With patience, basic skills, and attention to detail, you’ll learn how to install tile countertop surfaces safely and effectively.
Small kitchens and straightforward layouts are friendly for DIYers. Expect careful measuring, cutting, and proper adhesion; mistakes can be fixed but take time. You’ll gain satisfaction and savings by doing it yourself.
Project scope, time estimate, difficulty level, and tools overview
A straightforward tile countertop project typically takes a weekend for a small run (6–8 linear feet) but can stretch to several days for full kitchens or complex shapes.
You’ll assess scope, prep, tiling, grout, and sealing. Expect moderate difficulty if you’re handy; precision matters.
- Scope: size, edges, cut complexity
- Time: realistic buffer
- Difficulty: moderate
- Tools: wet saw, trowel, level, spacers
When to hire a pro vs. DIY
Having scoped your project and gathered tools, decide whether to tackle the build yourself or call a pro.
Choose DIY if you have steady skills, time, patience for cutting, grout, and precise layout, and want to save money.
Hire a pro if counters are complex, plumbing or electrical’s involved, tolerances are tight, or you need a perfect, durable finish without risking costly mistakes.
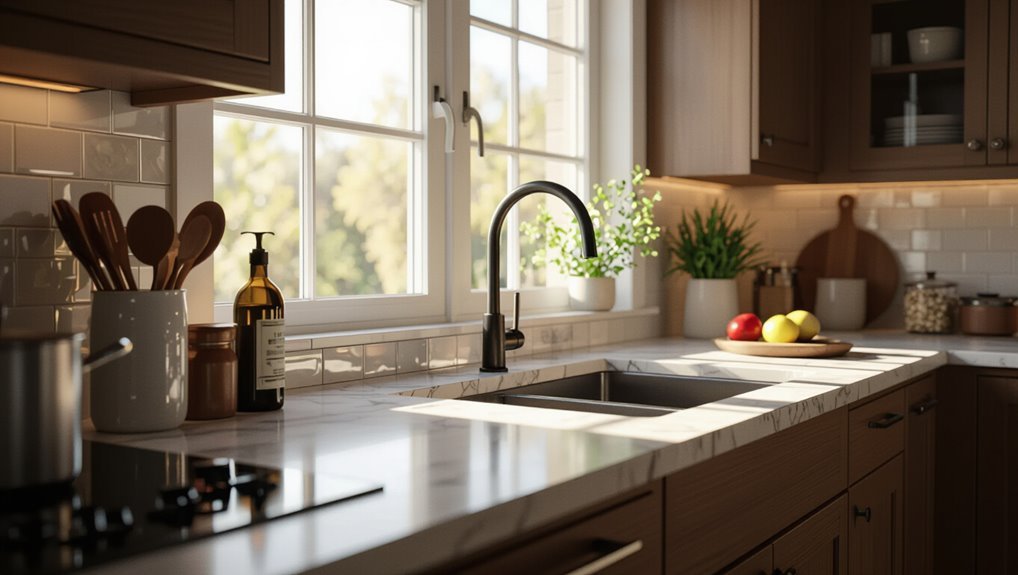
Basic Understanding Materials, Tile Types, and Costs
A tile countertop is a durable, customizable surface that you can compare to laminate, solid surface, and stone by weighing appearance, maintenance, and heat resistance.
You’ll look at common tile options—ceramic, porcelain, natural stone, and glass—each with clear pros and cons for cost, durability, and upkeep.
Finally, you’ll want a simple cost breakdown covering materials, essential tools (or rental), a labor-equivalent if you’re DIYing, and a contingency for mistakes or extra grout.
What is a tile countertop and how it compares to other surfaces
Though tile countertops might seem old-fashioned at first glance, they offer a practical, budget-friendly alternative to stone and solid-surface options: you get customizable looks, easier DIY installation, and repairable sections. Consider durability, maintenance, and cost against other surfaces to match your needs.
| Feel | Look | Cost |
|---|---|---|
| Warm | Varied | Affordable |
| Homey | Timeless | Practical |
Common tile materials (ceramic, porcelain, natural stone, glass) and pros/cons
Materials matter when you pick tiles for a countertop, because each—ceramic, porcelain, natural stone, and glass—brings different looks, durability, maintenance needs, and price points you’ll want to weigh.
Ceramic is affordable and easy to cut but chips easier.
Porcelain resists stains and wear.
Natural stone looks luxe but needs sealing.
Glass gleams and resists stains yet scratches and chips more readily.
Cost breakdown: materials, tools, labor-equivalent, and contingency
1 key step in planning a tile countertop is breaking down costs up front so you know what you’ll actually pay for materials, tools, a labor-equivalent if you’re paying someone (or valuing your own time), and a contingency for surprises.
List tile, adhesive, grout, backing, sealant; include tool purchases or rentals.
Estimate hours, set a 10–20% contingency, and compare total to alternatives.
Pre-Installation Planning and Preparation
Before you start, measure your countertop precisely and calculate tile, grout, and a waste factor so you order the right amount.
Decide on tile size, layout pattern, edge profiles, and whether you’ll include a backsplash.
Then inspect the substrate—plywood, existing laminate, or cement board—to determine what underlayment you’ll need.
Check local permits and codes and set up a clean, well-lit workspace with tools and materials organized.
Measuring the countertop: calculating tile and grout needs (waste factor)
Measure your countertop carefully so you can calculate how many tiles, how much grout, and how much extra waste you’ll need for cuts and breakage.
Measure length and depth of each section, subtract openings and sinks, then compute square footage.
Divide by tile area, add 10–15% waste for straight tiles (15–20% for mosaics or diagonal cuts).
Estimate grout by joint width and total area.
Design choices: tile size, layout patterns, edge profiles, backsplashes
Choosing the right tile size, layout, edge profile, and backsplash style will determine both the look and functionality of your countertop, so decide now how you want the finished space to perform and feel.
Pick larger tiles for fewer grout lines, smaller tiles for curves. Choose a straight, diagonal, or herringbone pattern.
Select beveled, bullnose, or mitered edges and a matching or contrasting backsplash.
Substrate assessment: plywood, existing laminate, cement board which to use
Once you’ve settled on tile size, layout, and edge details, evaluate what’s underneath the countertop—your substrate will dictate longevity and how the tile adheres.
Inspect plywood for stiffness and screw spacing; 3/4″ exterior-grade or 1-1/8″ over cabinets is best.
Remove loose laminate; bond tile underlayment or cement board over it.
Use cement board on water-prone areas and for best long-term stability.
Permits, local code considerations, and workspace setup
Before you cut or demo anything, check local building codes and whether a permit’s required—municipal rules can affect structural changes, plumbing or electrical work, ventilation, and even countertop heights.
Contact your building department, get permits if needed, and schedule inspections.
Clear and protect the workspace, arrange lighting, ventilation, and debris disposal, and secure tools and materials to keep the job safe and efficient.
Tools and Materials Checklist
Before you start, make a checklist of the essential tools—wet saw, notched trowel, level, spacers, grout float, and the like—so you don’t run into surprises mid-project.
Add materials such as tile, thinset mortar, grout, sealer, underlayment, screws, and caulk.
Don’t forget safety gear and cleanup supplies so you can work safely and finish clean.
Essential tools (wet saw, notched trowel, level, spacers, grout float, etc.)
Tools make the job predictable and much quicker, so gather the essentials you’ll need: a wet saw for clean tile cuts, a notched trowel sized to your thin-set and tile, a reliable level, tile spacers, a grout float, and buckets and mixing tools for thin-set and grout.
Keep safety gear handy, and choose quality tools for consistent results.
- Wet saw
- Notched trowel
- Level
- Grout float
Materials list (tile, thinset mortar, grout, sealer, underlayment, screws, caulk)
Materials matter as much as skill, so gather the right items: tile chosen for durability and style, polymer-modified thinset mortar matched to your tile and substrate, grout in the color and joint width you want, a penetrating sealer if using natural stone or porous tile, a suitable underlayment (cement board or uncoupling membrane), corrosion-resistant screws or fasteners, and silicone caulk for perimeter joints.
- Tile samples
- Thinset & grout
- Underlayment & screws
- Sealer & caulk
Safety equipment and cleanup supplies
While you’re laying tile and mixing thinset, wear protective gear and have cleanup supplies within reach so you stay safe and work efficiently.
Use safety glasses, a dust mask or respirator, nitrile gloves, knee pads, and ear protection.
Keep a bucket, sponges, rags, a grout float, a margin trowel, a wet/dry vacuum, and disposable bags nearby to remove waste and clean tools promptly.
Step-by-Step Installation Guide
Start by removing the old countertop and prepping the base so you’ve got a solid, level surface.
Then install or repair the substrate and supports, dry-fit a cutting layout to plan full tiles, borders, and focal points, and cut tiles as needed with a wet saw, nippers, or scoring tools.
Finally, mix and apply thinset with the proper trowel technique, set the tiles with consistent spacing, and let the mortar cure.
Step 1 Remove old countertop and prepare the base
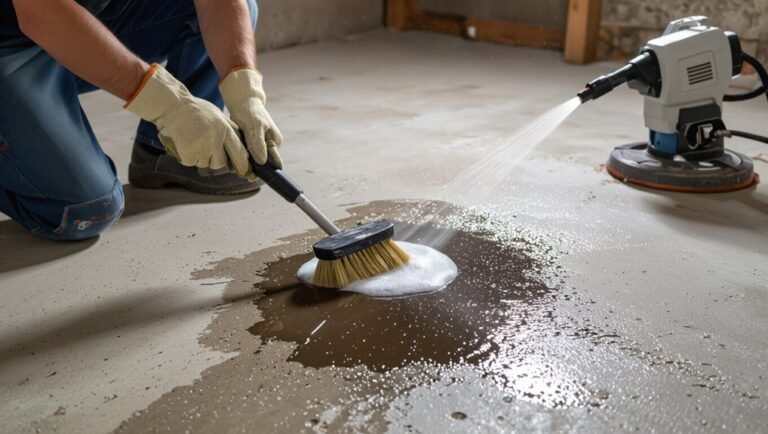
Before you install tile, remove the old countertop and get the base flat, clean, and solid so your new surface will sit perfectly and last.
Turn off water and power, disconnect plumbing and appliances, then pry off the old top.
Clear debris, scrape adhesive, and check for rot.
Repair or replace any damaged framing so the base is stable and level.
Step 2 Install or repair substrate (plywood or cement board) and secure supports
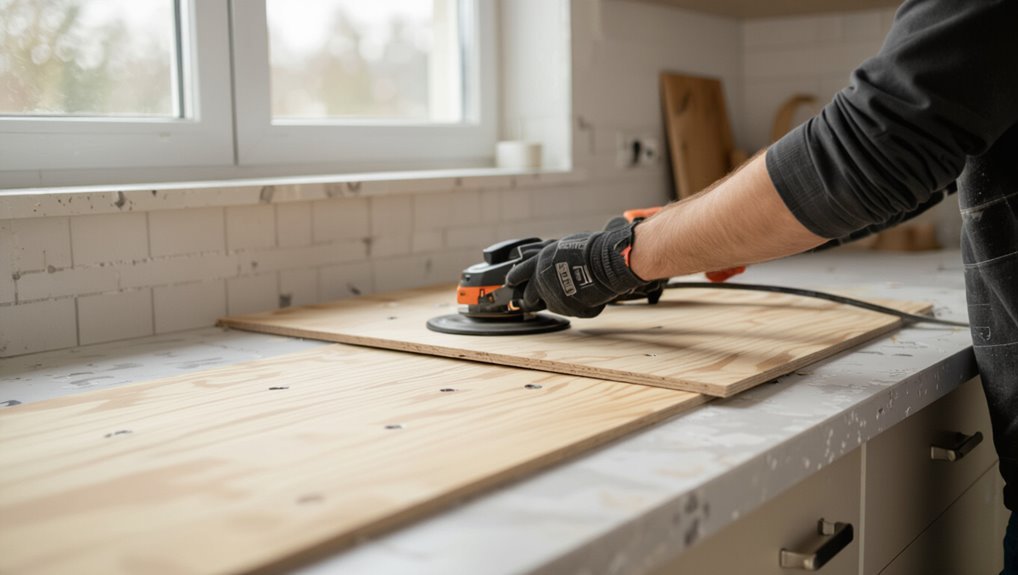
Install a solid, smooth substrate—either exterior-grade plywood or cement backerboard—so your tile has a stable, water-resistant surface to adhere to.
Check and reinforce framing; add blocking where overhangs or seams will be.
Cut and fasten plywood or backerboard with recommended screws and thinset, stagger seams, tape joints with alkali-resistant mesh, and seal edges to prevent moisture intrusion.
Step 3 Dry layout and cutting plan (full tiles, borders, and focal points)
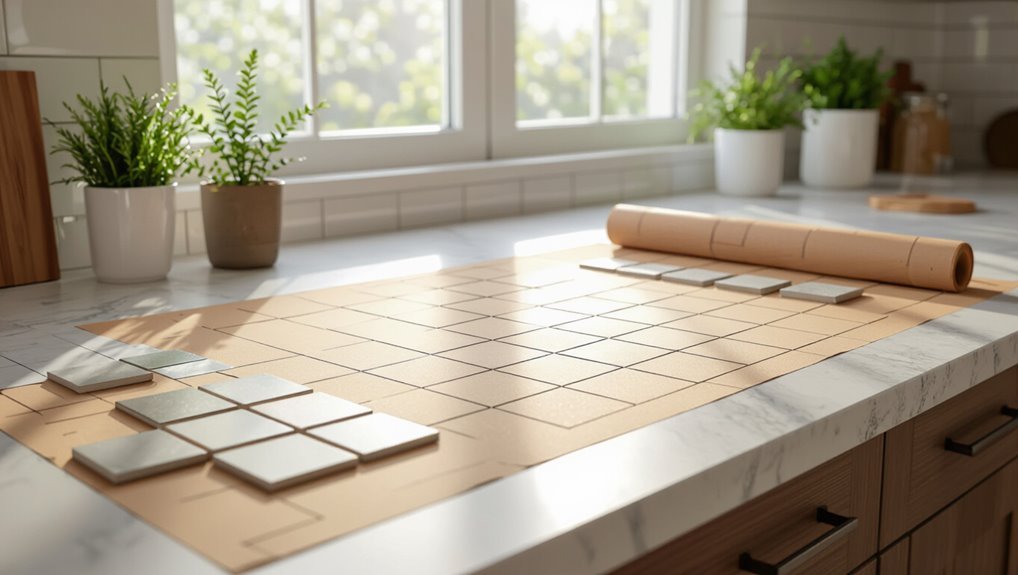
1. You’ll dry-fit tiles across the countertop to find the best layout: center focal points, minimize tiny edge cuts, and align grout lines with cabinets.
Mark full tile locations, border widths, and any necessary special pieces.
Sketch a cutting plan noting measurements and orientation.
Reposition until symmetry and flow satisfy you before proceeding to actual cutting and installation.
Step 4 Cutting tiles: using a wet saw, tile nipper, and scoring tools
With your dry layout locked in, it’s time to cut the tiles to match that plan.
Use a wet saw for straight, clean cuts and slow feed for porcelain. For curves or small adjustments, score and snap thinner tiles or use a tile nipper for irregular shapes.
Wear eye and ear protection, clamp tiles, and dry-fit pieces before proceeding.
Step 5 Apply thinset and set tiles (mixing, trowel technique, spacing)
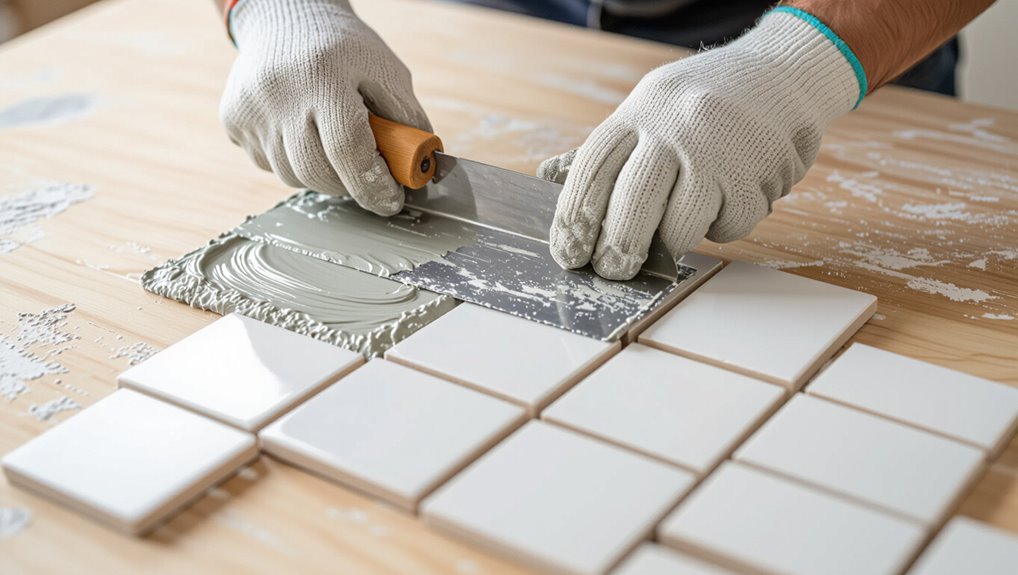
Mix the thinset to a peanut-butter consistency and spread it with a notched trowel, pressing each tile firmly into place while keeping consistent spacing with spacers so your layout stays true and your grout lines end up even.
Work in small sections, combing adhesive evenly, back-buttering large tiles, tapping with a rubber mallet, checking level and alignment, and wiping squeeze-out promptly.
Step 6 Working around sinks, faucets, and outlets (template and cutouts)
After you’ve set the field tiles and checked your alignment, you’ll need to tackle cutouts for sinks, faucets, and outlets—those details make or break the finished look.
Measure and mark openings, make a cardboard or paper template, transfer it to tile, score and snap or use a wet saw/diamond bit for curves.
Dry-fit pieces, adjust, then set with thinset and spacers.
Step 7 Allowing thinset to cure and interim care
Once your tiles are set and spacers are in place, let the thinset cure undisturbed so it reaches full strength; typically that means keeping traffic and weight off the countertop for at least 24 hours and avoiding water for 48–72 hours depending on the manufacturer’s instructions and humidity.
During cure, keep area ventilated, control temperature, avoid leaning or placing tools, and protect edges with soft barriers.
Step 8 Grouting: mixing, application, joint finishing, and cleaning
With the thinset fully cured and your tiles firmly in place, you’ll move on to grouting the joints to lock everything together and waterproof the surface.
Mix grout to a smooth, peanut-butter consistency. Spread with a rubber float, forcing grout diagonally across joints.
After 10–20 minutes, wipe haze with a damp sponge, rinsing often. Finish joints with a rounded tool for neat edges.
Step 9 Sealing tiles and grout (timing, types of sealers, application)
1. After grout cures (usually 48–72 hours), you’ll seal both tiles and grout to protect from stains and moisture.
Choose a penetrating sealer for porous stone or a surface sealer for glazed tiles; use a grout-specific sealer for joints.
Apply evenly with a brush or applicator, wipe excess, let dry per instructions, and recoat if recommended for high-use countertops.
Step 10 Installing backsplash and finishing edges (bullnose, metal trim, caulk)
Attach the backsplash and finish the countertop edges to protect seams and give your project a polished look.
Measure and dry-fit backsplash tiles, apply thinset, and press tiles level.
Trim tile edges with a bullnose or install metal edge trim for durability.
Once set, grout edges, wipe clean, and run a bead of silicone caulk where countertop meets backsplash to seal and flex with movement.
Step 11 Reinstalling sink, faucet, and final plumbing/electrical reconnections
After the backsplash and edges are set, you’re ready to put the sink, faucet, and all utilities back in place.
Lower the sink into the cutout, secure clips or adhesive, then reconnect the drain, trap, and supply lines using new gaskets or plumber’s tape.
Reattach the faucet, test for leaks, restore power to disposals or outlets, and verify proper function before final cleanup.
Common Problems and Mistakes to Avoid
You’ll want to watch for uneven tiles and lippage, know how to prevent and fix cracked tiles or grout, and recognize the signs of adhesion failures and moisture damage so you can remedy them quickly.
Pay attention to edge and seam finishing, since poor detailing is often an easy but visible fix.
In the next section we’ll cover causes, quick diagnostics, and practical repairs for each of these common problems.
Uneven tiles and lippage causes and fixes
Frequently, uneven tiles and lippage show up because the substrate, mortar bed, or tile placement wasn’t properly prepared or leveled. That causes high edges that catch light and snag items.
To fix it, remove affected tiles, level the substrate or thinset, shim or tamp tiles for uniform height, and use a straightedge during installation.
Prevent recurrence by checking level frequently.
Cracked tiles or grout prevention and repair
If your tiles or grout start cracking, it’s usually a sign of movement, improper support, or wrong materials — and you can prevent most of it with the right techniques.
Use a rigid, well-supported substrate, proper backer board, and correct mortar/buffer joints.
Allow expansion gaps, use flexible grout or caulk at corners, and replace cracked tiles promptly to avoid spreading damage.
Adhesion failures and moisture damage diagnosis and remediation
When tile delaminates or grout softens, it’s usually because water reached the adhesive or the substrate wasn’t prepared right.
You can spot the problem by looking for discoloration, hollow-sounding tiles, or loose edges.
Remove damaged tiles, dry and inspect the substrate, replace ruined backerboard or seal gaps, use proper thinset and waterproof membrane, then re-tile ensuring joints are sealed.
Poor edge and seam finishing fixes and cosmetic corrections
Though edges and seams are small details, they define the countertop’s durability and appearance, and you’ll want to get them right.
Trim uneven grout, re-cut or replace chipped tiles, and sand cured grout for smoothness.
Recaulk gaps with color-matched silicone, use metal or wood edge trim where needed, and touch up chips with epoxy tint to restore a clean, professional finish.
Best Practices, Tips, and Optimization Strategies
Choose tiles and patterns that mask chips and uneven grout lines, and pick layouts that make cutting and fitting faster.
Use time-saving steps—like assembling tools and pre-mixing thinset—and follow simple maintenance routines to prevent stains and extend life.
Consider eco-friendly materials and budget alternatives that keep costs down without sacrificing durability.
Tile selection and pattern tips to hide imperfections
Texture and grout color can do more to disguise uneven edges or slight substrate flaws than perfectly matched tiles, so pick tiles and layout strategies that work with—not against—your countertop’s quirks.
Choose textured, patterned, or mottled tiles and contrast grout to mask joints. Use offsets and diagonal layouts to divert the eye.
- textured or variegated tiles
- contrasting grout
- staggered/offset pattern
- diagonal or herringbone layouts
Time-saving techniques and efficient workflow
When you plan the job in stages and group similar tasks—cutting, dry-fitting, adhesive application, and grouting—you’ll shave hours off the project and reduce mistakes.
Prep materials and tools beforehand, label tiles, and create a mock layout. Use spacers and a single-mix adhesive batch for consistency.
Work from back to front, keep a clean workspace, and schedule cure times to avoid idle waits.
Maintenance tips for longevity and stain prevention
Although tile countertops are durable, you’ll maximize their lifespan and resist stains by following a few simple, regular habits.
Wipe spills promptly with mild detergent, avoid harsh acids or abrasive pads, and use cutting boards and trivets.
Reseal grout and any porous tiles annually, inspect for cracks, repair grout joints quickly, and clean with pH-neutral cleaners to prevent buildup and discoloration.
Eco-friendly and budget-saving alternatives
If you want a greener, more budget-friendly tile countertop, focus on materials and techniques that cut waste and long-term costs: choose reclaimed or sustainably sourced tiles, use low-VOC adhesives and sealers, and opt for durable grout blends that need less frequent resealing.
Salvage pieces, trim tiles yourself to reduce waste, compare local reclaimed sources, and prioritize longevity to save money over time.
Cost Comparison and When to Upgrade
You’ll want to compare DIY costs—materials and your time—against hiring a pro to see which fits your budget.
If your counters are heavily damaged or you want a low-maintenance upgrade, consider solid surface or quartz; choose laminate if you need a cheaper, temporary option.
We’ll walk through typical price ranges and decision points to help you pick the right route.
DIY cost vs. professional installation
When weighing tile countertop costs, you’ll find DIY saves on labor but can eat into savings through mistakes, tool purchases, and extra time; hiring a pro raises upfront cost but buys expertise, warranty, and faster completion. Decide based on skill, schedule, and budget. Compare scenarios:
| Option | Cost Factor | Risk |
|---|---|---|
| DIY | Low labor | Higher |
| Pro | High labor | Lower |
| Hybrid | Moderate | Moderate |
When to choose different countertop replacements (solid surface, quartz, laminate)
Choosing the right replacement countertop—whether solid surface, quartz, or laminate—comes down to your budget, how you use the kitchen, and how long you want the surface to last.
If you need durability and low maintenance, choose quartz; for seamless repairable surfaces and moderate cost, pick solid surface; for tight budgets or temporary updates, opt for laminate.
Consider resale value too.
Tools, Materials, and Product Recommendations
You’ll want to choose tiles based on room use—porcelain or natural stone for kitchens and ceramic or smaller-format porcelain for bathrooms.
Pick a polymer-modified thinset, a stain-resistant grout, and a penetrating sealer, and plan for edge trim, backerboard screws, and tile spacers.
Rent big-ticket specialty tools like a wet tile saw or a floor-standing grinder unless you’ll use them often, and buy hand tools you’ll reuse.
Recommended tile types for countertops by use-case (kitchen, bathroom)
Although both kitchen and bathroom counters need durable surfaces, they require different tile characteristics to handle moisture, heat, and wear.
Choose tiles based on use: kitchens need heat- and stain-resistant, bathrooms need water-resistant, non-slip options. Consider maintenance and edge durability when selecting.
- Porcelain: dense, heat- and water-resistant
- Ceramic: budget-friendly, glazed surface
- Natural stone: high-end, needs sealer
- Glass mosaic: waterproof, decorative
Recommended thinset, grout, sealer, and trimming products
Start with products that match your tile and countertop use: pick a polymer-modified thinset for porcelain and natural stone, an epoxy thinset for glass or areas needing extra water resistance, and a standard thinset for basic ceramic installations.
Choose color-matched sanded or unsanded grout, a penetrating sealer for stone, and stainless steel or PVC edge trim.
Buy premixed grout only for small repairs.
Rental vs. purchase decisions for specialty tools
When weighing whether to rent or buy specialty tools for a tile countertop, consider how often you’ll need them, the tool’s cost and maintenance, and the learning curve involved.
Renting makes sense for one-off tasks like a wet saw or large polishing wheel, while buying pays off if you plan on more projects or professional work.
Rent for occasional use to save money; buy for frequent use to build skill and resale value.
Project Checklist and Timeline
Before you start, make a checklist of materials, permits, and accurate templates so nothing slows you down mid-job.
Lay out a day-by-day timeline—demolition and prep, tile setting and grouting, then sealing and cleanup—so you know how long each step will take.
Stick to the plan and adjust for setbacks to keep the project on schedule.
Pre-project checklist (materials, permits, templates)
Gathering the right materials, permits, and templates up front will save you time and headaches once demolition and installation begin.
Measure counters, order tiles, grout, thinset, backerboard, screws, sealant, and edge trim.
Check local permit requirements for structural or plumbing changes.
Create cardboard templates of cutouts (sink, faucet, outlets).
Pack safety gear and rental tool reservations before you start.
Day-by-day timeline for a typical kitchen countertop install
A typical kitchen countertop install runs about three to five days, and this day-by-day timeline helps you plan tasks, tool rentals, and helpers so the job moves smoothly.
Day 1: remove old countertop, check substrate, prep and measure.
Day 2: build/repair base, dry-fit tiles.
Day 3: set tiles.
Day 4: grout and clean.
Day 5: seal and reinstall fixtures.
FAQ
You probably have a few quick questions about timing, materials, and care—like how long the install takes and whether regular grout is okay for countertops.
You’ll also want to know how to waterproof around sinks and seams, whether tile stands up to heat and wear, and how to fix a chipped or cracked tile.
We’ll answer each of those so you can finish the job confidently.
How long does a tile countertop installation take?
How long will a tile countertop take to install?
Expect a typical DIY installation to take 2–4 days for demolition, substrate prep, tile setting, and grout curing.
Simple projects lean toward the shorter end; complex layouts, numerous cutouts, or larger areas add time.
Plan for adhesive and grout cure times—avoid heavy use until fully set—and schedule cleanup and sealing afterward.
Can you use regular grout on a countertop?
Wondering if regular grout will hold up on your countertop? You can use standard cement grout, but it’s less ideal.
Countertops need stain-, water-, and crack-resistant grout. Choose epoxy or sanded grout with a sealer for durability, especially near food prep.
Regular grout may stain and deteriorate faster, so upgrade for longevity and easier maintenance.
How do you waterproof around sinks and seams?
While sealing tile near sinks and seams takes extra care, doing it right prevents water damage and keeps grout looking good.
Clean and dry areas, apply waterproof membrane or liquid-applied membrane under tiles, use flexible silicone or urethane sealant at sink perimeters and seams, and backer rod where gaps are deep.
Reseal grout and caulk annually, checking for cracks or deterioration.
Are tile countertops heat-resistant and durable?
Good waterproofing around sinks and seams protects the countertop from moisture damage, but you’ll also want to know how tile stands up to heat and daily wear.
Ceramic and porcelain resist heat and scratches well; avoid placing hot pans directly on grout.
Durable when properly installed and maintained, tiles can chip under heavy impact and grout may stain, so seal grout and use trivets to prolong life.
How do you repair a chipped or cracked tile?
If a tile chips or cracks, you can often fix it yourself without replacing the whole countertop: clean the area, remove loose fragments, and sand edges.
Fill hairline cracks with epoxy or clear nail polish; for chips, use colored epoxy or a porcelain repair kit, sculpt to match, let cure, then sand and polish.
Seal the repair and grout if needed for durability.