How to Clean a Floor With Bleach Safely and Without Damage
You can safely clean many hard floors with a properly diluted bleach solution if you take precautions: ventilate the area, wear gloves and eye protection, and test a small hidden spot first. Use the right ratio for the task (milder for routine cleaning, stronger for heavy disinfection), avoid mixing with other cleaners, and rinse and dry thoroughly to prevent residue or damage. Follow precautions and tips below to learn more about safe techniques and alternatives.
Quick Answer Can You Clean a Floor with Bleach Safely?
Yes — you can safely clean many hard floors with diluted bleach if you follow instructions and ventilate the area.
Use bleach for strong disinfection (mold, blood spills, or confirmed pathogens) and stick to milder cleaners for daily cleaning or for surfaces that bleach can damage, like wood or some sealed stone.
Always test a small spot, wear gloves, and never mix bleach with ammonia or other cleaners.
Short, direct recommendation and when to use bleach vs alternatives
You can clean most hard, nonporous floors with a diluted bleach solution, but only when you need strong disinfection (e.g., blood spills, COVID-19 exposure, or mold).
For routine cleaning, use mild detergent, vinegar (not on stone), or commercial cleaners.
Learn how to clean a floor with bleach for targeted disinfection: ventilate, dilute per label, spot-test, rinse, and avoid mixing with other cleaners.
Basic Understanding What Bleach Is and How It Works on Floors
You’ll want to know that household bleach usually means sodium hypochlorite, while oxygen bleaches use peroxide-based compounds and work differently.
Bleach kills germs by breaking down cell walls and can also remove stains and whiten surfaces.
Remember that non-porous floors tolerate bleach better, while porous materials can stain, fade, or trap chemicals.
Types of bleach (sodium hypochlorite, oxygen bleach)
Bleach comes in two main forms for floor cleaning: sodium hypochlorite (the common household bleach) and oxygen-based bleaches (peroxide or percarbonate formulas), and each works differently on stains and microbes. You’ll choose based on surface sensitivity and odor tolerance; test first.
| Type | Feeling |
|---|---|
| Sodium hypochlorite | Sharp, decisive |
| Oxygen bleach | Gentle, reassuring |
| Dilution | Controlled, safe |
How bleach disinfects and whitens surfaces
Having picked a bleach type, it helps to know what’s happening chemically when it disinfects and whitens your floors.
Bleach releases reactive chlorine or oxygen species that break cell walls, inactivate proteins and enzymes, and destroy microbes. Those same reactions break colored organic molecules, removing stains and brightening surfaces.
You’ll see rapid microbial kill and noticeable whitening with proper dilution and contact time.
Surfaces that react differently to bleach (porous vs non-porous)
1 key factor when using bleach is whether a floor is porous or non-porous, because each absorbs and reacts with bleach differently.
You’ll find porous materials like unsealed wood, grout, and natural stone soak bleach, causing staining, discoloration, or damage.
Non-porous surfaces—glazed tile, sealed vinyl, and sealed concrete—resist penetration, so diluted bleach disinfects without deep harm when rinsed promptly.
When to Use Bleach on Floors Appropriate Situations and When to Avoid It
Use bleach when you need strong disinfection, to remove mold, or to tackle heavy, stubborn stains on nonporous surfaces.
Don’t use it on sealed hardwood, colored grout, or vinyl with printed patterns, since it can strip finishes and fade color.
Always check manufacturer care labels and local regulations before using bleach so you don’t void warranties or violate guidelines.
Best-use scenarios (mold, heavy staining, disinfection)
When you’re facing stubborn mold, deep-set stains, or a need for serious disinfection, bleach can be an effective tool—but only in the right situations.
Use diluted bleach for mold remediation on nonporous tile or sealed concrete, for whitening grout, and for sanitizing heavily soiled utility areas.
Always ventilate, test a small patch, and follow recommended dilution to avoid damage and health risks.
Situations to avoid (sealed hardwood, colored grout, vinyl with printing)
Although bleach can tackle tough jobs, you shouldn’t apply it to every floor surface—it’s too harsh for sealed hardwood, colored grout, and vinyl with printed patterns because it can strip finishes, fade dyes, and damage the material.
Instead, spot-test inconspicuous areas, use pH-neutral cleaners for delicate surfaces, and choose non-bleach disinfectants for colored grout or printed vinyl to avoid irreversible harm.
Legal/regulatory or manufacturer care-label considerations
Before you reach for bleach, check manufacturer care labels, local regulations, and any warranty terms—these sources often spell out allowed cleaners and concentrations, and violating them can void warranties or breach facility disinfection rules.
If labels forbid chlorine or specify dilution limits, follow them.
For public facilities, comply with occupational safety and environmental discharge rules.
When in doubt, contact the manufacturer.
Safety Precautions Before You Start
Before you start, put on gloves and eye protection, open windows or run a fan, and make sure you’re breathing fresh air.
Never mix bleach with ammonia or acids, since those combinations create deadly gases.
Test the solution on an inconspicuous spot first to check for discoloration or damage.
Personal protective equipment and ventilation
1 essential step is putting on the right protective gear and making sure the room is well ventilated before you handle bleach.
You should protect skin, eyes, and lungs, and keep windows and fans running. Follow these basics:
- Wear chemical-resistant gloves and closed shoes.
- Use splash goggles and long sleeves.
- Open windows and run an exhaust fan for continuous airflow.
Chemical interaction warnings (never mix with ammonia or acids)
If you mix bleach with ammonia or acidic cleaners, you’ll create dangerous gases—chloramine or chlorine—that can cause coughing, chest pain, eye irritation, and even respiratory failure.
So never combine them or use them in quick succession.
Read labels, stop if you smell harsh fumes, leave the area, and ventilate.
Store chemicals separately and use only one product at a time.
Patch testing procedure on an inconspicuous area
Always test a small, hidden spot first to make sure the bleach won’t discolor, damage, or weaken your floor finish.
Dampen a cloth with your diluted solution, apply to the spot, wait 10–15 minutes, then blot and dry. Inspect for color change, softening, or residue before treating the rest of the floor.
- Use the same dilution you’ll clean with
- Test near a seam or baseboard
- Photograph results for reference
Materials and Tools You’ll Need
You’ll want to choose the right bleach or an approved alternative and have a clear list of tools and PPE ready.
Gather measuring cups, a bucket and a stir stick for accurate dilution, plus gloves, eye protection and a mask.
I’ll list recommended products, a concise tools checklist, and exact mixing ratios next.
Recommended bleach products and alternatives
Before you start, gather the right bleach and alternatives so you can work efficiently and safely: choose diluted household sodium hypochlorite (1:10 for heavy disinfecting), oxygen bleach for gentler whitening, or vinegar-based cleaners for sealed floors.
| Product | Use | Note |
|---|---|---|
| Sodium hypochlorite | Disinfecting | Strong, dilute |
| Oxygen bleach | Whitening | Gentler |
| Vinegar cleaner | Light cleaning | Avoid on stone |
Tools and PPE checklist
Gather a sturdy bucket, mop, scrub brush, and the right personal protective equipment so you can work efficiently and protect yourself from fumes and splashes.
You’ll also want microfiber cloths, a squeegee, and a ventilation fan.
Wear chemical-resistant gloves, eye protection, and a mask rated for vapors.
- Gloves, goggles, respirator
- Sturdy mop and scrub brush
- Microfiber cloths and squeegee
Dilution measurements and mixing tools
Now that you’ve got your tools and PPE in place, focus on measuring and mixing the bleach safely.
Use a labeled measuring cup or graduated container and a sturdy plastic or glass mixing bucket.
Follow the recommended ratio (typically 1/2 cup bleach per gallon of water for disinfecting), add bleach to water—not water to bleach—stir gently, and mark mixed solution with date and concentration.
Step-by-Step: How to Clean Floors with Bleach Safely
Start by preparing the area: clear furniture, sweep debris, and open windows for ventilation.
Next, dilute bleach to the right strength for the job, then apply the solution with a mop, spray, or cloth while following safe techniques.
Let it sit and agitate for stains or mold, then rinse thoroughly and dry to remove residue.
Step 1 Prepare the area (clear, sweep, ventilate)
Before you mix or mop, clear the room so you can work safely and efficiently: pick up toys, move rugs and furniture, and sweep thoroughly to remove dust and grit that could scratch the floor.
Open windows and doors for ventilation, seal off pets and nonessential people, and keep cleaning supplies handy.
- Remove obstacles and trip hazards
- Sweep or vacuum corners
- Open windows for airflow
Step 2 Dilute bleach properly (ratios for common tasks)
1 cup of household bleach per gallon of water makes a common disinfecting solution, but you’ll want different ratios for light cleaning, heavy disinfecting, or sanitizing after illness.
| Task | Ratio |
|---|---|
| Light cleaning | 1/4 cup per gallon |
| Regular disinfecting | 1 cup per gallon |
| After illness | 1.5–2 cups per gallon |
Measure carefully, mix in cool water, and label the container.
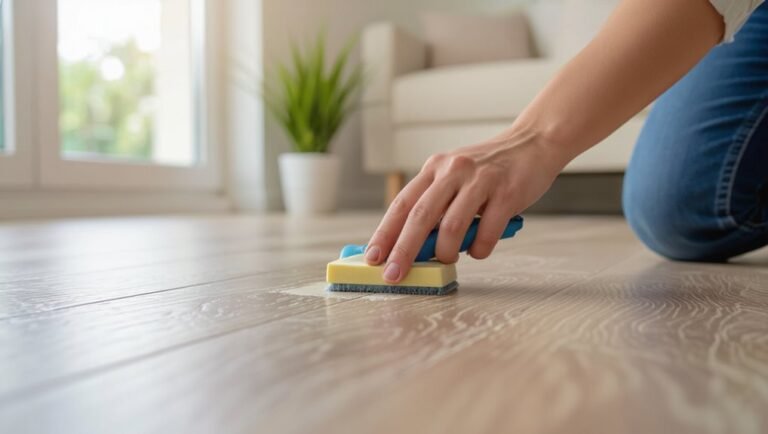
Step 3 Apply bleach solution safely (methods: mop, spray, cloth)
Choose the application method that fits your floor type and the size of the job—mopping for large areas, a spray bottle for spot treatments, or a cloth for edges and grout—and work methodically so you cover every surface without over-wetting.
Wear gloves and ventilate, apply diluted bleach evenly, rinse mop or cloth frequently, avoid puddles, protect baseboards and nearby surfaces, and never mix with other cleaners.
Step 4 Dwell time and agitation for stains or mold
Let the bleach solution sit long enough to kill mold and lift stains—typically 5–10 minutes for mild soiling and up to 15 minutes for stubborn spots—while keeping the surface visibly wet and avoiding puddles.
For stubborn areas, gently agitate with a soft brush or microfiber pad, working in one direction.
Reapply briefly if stains persist, but don’t over-saturate grout.
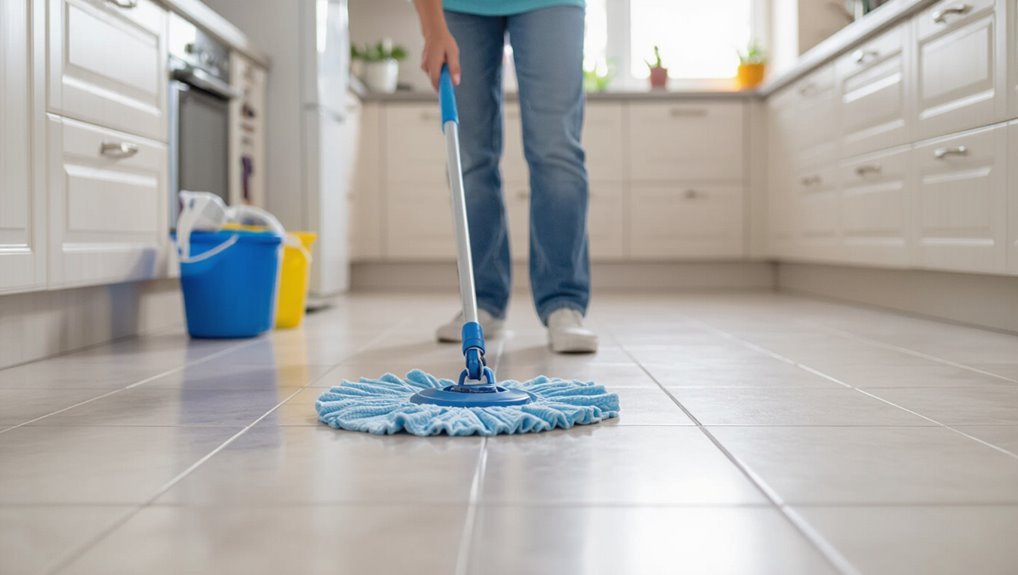
Step 5 Rinse thoroughly and dry to prevent residue
After the dwell time, don’t leave bleach on the floor — rinse it thoroughly with clean water to remove residue that can dull finishes, irritate skin, or damage grout over time.
Use a mop or sponge with fresh water, change rinse water often, then dry with clean towels or a microfiber mop.
Make certain surfaces are completely dry before walking or replacing rugs.
Special Instructions by Floor Type
Different floors need different approaches, so you’ll want to follow specific guidance for each type—tile and grout (including grout-whitening tips), sealed versus unsealed concrete, vinyl and linoleum (what to avoid), laminate and engineered hardwood (safer alternatives), and natural stone (why bleach’s not usually recommended).
Read the warnings and alternatives for each surface before you start. That way you’ll protect finishes and avoid damage.
Tile and grout (including whitening grout tips)
Tile and grout need different care than wood or vinyl, so you’ll want to target the porous grout lines while protecting the tile surface. Bleach can brighten grout but should be used sparingly and safely.
Rinse thoroughly, test a hidden area, and ventilate. Use diluted bleach, short contact time, and avoid colored tiles.
- Dilute 1:10 bleach to water
- Scrub grout with a soft brush
- Rinse immediately and dry
Sealed vs unsealed concrete
If your home has concrete floors, you’ll need to treat sealed and unsealed surfaces very differently when using bleach.
On sealed concrete, you can use a diluted bleach solution sparingly, rinse thoroughly, and avoid harsh scrubbing that damages the sealer.
On unsealed concrete, skip concentrated bleach—use milder cleaners or spot-treat, then neutralize and rinse well to prevent discoloration and surface etching.
Vinyl and linoleum (what to avoid)
When cleaning vinyl or linoleum, avoid strong bleach solutions and abrasive scrubbing that can strip finish, lift seams, or dull the surface; instead use a very diluted bleach mix only for stubborn mold, apply it sparingly, rinse immediately, and test a hidden spot first.
Don’t soak seams, use undiluted bleach, or scrub with steel wool; blot, ventilate, and dry thoroughly to prevent damage.
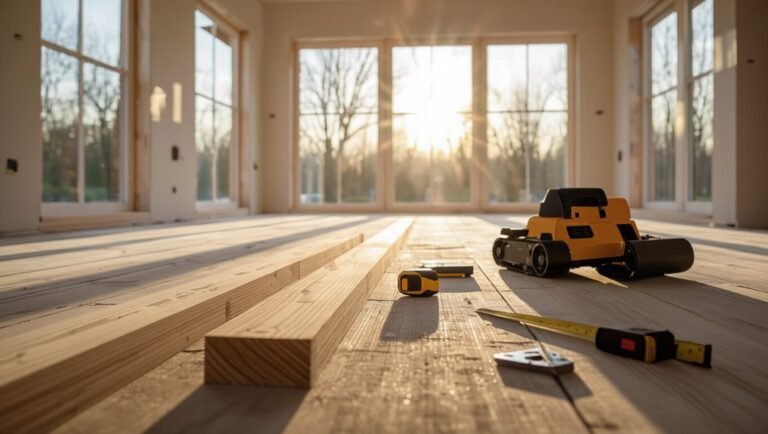
Laminate and engineered hardwood (recommended alternatives)
Because laminate and engineered hardwood have thin wear layers and sensitive joints, you should avoid bleach altogether and choose gentler cleaners designed for these floors.
Use pH-neutral, manufacturer-approved sprays or diluted wood floor cleaners. Apply sparingly with a damp (not wet) microfiber mop, and dry quickly to prevent swelling.
Test any product in an inconspicuous spot first to guarantee finish compatibility and avoid long-term damage.
Natural stone (why bleach is usually not recommended)
Although natural stone can look deceptively durable, you should avoid bleach on surfaces like marble, travertine, limestone, and some granites because the harsh chemicals can etch, discolor, or weaken the stone and damage sealants.
Instead, use pH-neutral stone cleaner, warm water, and a soft mop or cloth; test cleaners in an inconspicuous spot and reseal periodically to protect the surface.
Common Problems and How to Fix Them
If you spot bleach-related issues like fading, yellowing, or corrosion, act quickly to limit damage and protect health.
You’ll learn immediate fixes and longer-term repair options for discolored finishes, residue buildup, and damaged baseboards or metal trim.
If anyone’s exposed or has a reaction, follow simple first-aid steps and seek medical help when needed.
Bleach discoloration or fading immediate fixes and long-term repair
When bleach lightens or strips your floor’s finish, act fast to limit visible damage and plan for repairs that restore color and protection.
Immediate steps—neutralizing the bleach, rinsing thoroughly, and drying the area—can stop further fading, while longer-term fixes like stain blending, refinishing, or replacing affected planks will address permanent discoloration.
Assess damage, test stains in an inconspicuous spot, then refinish or replace as needed.
Residue or yellowing after use cleaning/remediation steps
After you’ve dealt with immediate fading or refinishing needs, you may still notice a yellow tint or sticky residue left behind by bleach or cleaning products.
Rinse thoroughly with clean water, then mop with a neutral pH cleaner to remove residues.
For persistent yellowing, try a diluted vinegar rinse or baking soda paste spot-treatment, then neutralize and dry.
Repeat if needed.
Corrosion or damage to baseboards/metal containment and repair
Because bleach can eat away paint and metal finishes, you’ll often spot bubbling, flaking, or rust at the baseboards and metal containment after heavy use.
Stop using bleach, rinse surfaces thoroughly, and dry.
Sand flaking paint or rust, apply rust converter to metal, prime with a compatible primer, then repaint or reseal with bleach-resistant trim paint or metal coating to restore protection.
Health reactions or accidental exposure first aid steps
Damage to finishes can mean more than cosmetic repair—you and others can be exposed to bleach splashes, fumes, or residue during cleanup.
If exposure occurs, rinse skin or eyes with plenty of water for 15 minutes, move to fresh air, and remove contaminated clothing. Seek medical help for burns or persistent breathing trouble.
- Flush with water immediately
- Ventilate the area
- Call poison control or emergency services
Best Practices and Prevention to Minimize Bleach Use
Keep up a regular cleaning routine so you won’t need bleach as often.
Use safer disinfectants and targeted stain removers for routine maintenance, and re-seal or repair grout, sealants, and finishes so surfaces resist mold and stains.
These steps cut bleach use while keeping floors healthy and looking good.
Regular cleaning routines to reduce need for bleach
When you stick to simple daily and weekly cleaning tasks—like sweeping, mopping with a mild detergent, and wiping up spills right away—you’ll prevent grime and germs from building up so you rarely need bleach.
Keep routines consistent, tackle high-traffic zones, and address stains promptly.
- Set short daily tasks (5–10 minutes)
- Deep-clean weekly targeted areas
- Use doormats and remove shoes to cut dirt
Safer alternative disinfectants and stain removers
Think of everyday cleaners as your first line of defense: you can use EPA-approved disinfectant sprays, hydrogen peroxide solutions, or alcohol-based wipes to kill germs without resorting to bleach. You’ll also try enzyme cleaners for organic stains and oxygen-based powders for lifting color. Test surfaces first, follow labels, and dilute properly to protect finishes.
| Product | Use |
|---|---|
| EPA spray | Quick disinfection |
| Hydrogen peroxide | Stain spot treatment |
| Enzyme cleaner | Organic stains |
| Oxygen powder | Brightening |
How to maintain grout, sealants, and finishes to resist mold/stains
Although grout, sealants, and finishes might seem low-maintenance, you can greatly reduce mold and staining by routinely inspecting, cleaning, and promptly repairing damaged areas.
Wipe spills quickly, scrub grout monthly with a pH-neutral cleaner, reapply grout sealer yearly, and refresh caulk where gaps form.
Use breathable floor finishes and guarantee good ventilation to keep surfaces dry and minimize bleach reliance.
Eco and Disposal Considerations
Think about how bleach and its runoff can harm plants, aquatic life, and septic systems, and try to minimize how much you use.
When you have leftover bleach or rinse water, dilute it heavily and pour it down a sanitary sewer drain (not onto soil or storm drains), or follow local hazardous-waste guidelines for disposal.
Store bleach in a cool, dark place, keep the bottle sealed, and note the manufacture date so you replace it once it loses potency.
Environmental impact of bleach and runoff
Because household bleach contains chlorine compounds that react with organic matter, its runoff can harm waterways and aquatic life if you rinse it down drains or pour leftover solution outdoors.
You should minimize usage, avoid excess rinsing that sends chemicals to storm drains, and be aware that byproducts can disrupt ecosystems and contaminate drinking sources.
Proper disposal of leftover bleach and rinse water
Since runoff can carry harmful chlorine compounds into waterways, you should handle leftover bleach and rinse water with care to avoid environmental damage.
Neutralize small amounts with diluted sodium thiosulfate or plenty of fresh water before disposing down drains. For larger volumes, contact local hazardous waste services.
- Never pour concentrated bleach outside
- Avoid storm drains
- Use designated disposal sites
Storage and shelf-life tips
When you store bleach correctly—sealed, upright, and away from heat and sunlight—you’ll keep it effective longer and reduce the chance of hazardous leaks or fumes.
Label containers with purchase date, use within six months for strongest potency, and never mix with other cleaners.
Keep it locked away from children and pets, in a ventilated area.
Dispose of degraded bleach responsibly.
Frequently Asked Questions
You probably have specific questions about using bleach safely and effectively, like whether it’s okay on hardwood, how strong a solution must be to kill mold, or if it can lift grout stains.
You’ll also want to know whether it’s safe to mix bleach with detergent for mopping and how long fumes last and how to ventilate.
We’ll answer each of these clearly so you can clean with confidence.
Can I use bleach on hardwood floors?
Although bleach can disinfect and remove stains, you shouldn’t use it on hardwood floors because it can strip finish, discolor wood, and cause long-term damage.
Instead, use manufacturer-approved cleaners or a mild solution of water and pH-neutral hardwood cleaner.
Test any product in an inconspicuous spot first, avoid saturated mopping, dry promptly, and refinish if the surface shows wear or discoloration.
How strong should a bleach solution be to kill mold?
Many experts recommend a 1:10 bleach-to-water ratio (about one cup of household bleach per gallon of water) for killing mold on nonporous surfaces, but effectiveness depends on concentration, contact time, and the surface type.
Use that dilution for routine mold removal, let it sit 10–15 minutes, scrub gently, then rinse.
Don’t use on porous materials; it won’t penetrate.
Will bleach remove stubborn stains from grout?
If bleach removed surface mold, you might wonder whether it’ll also tackle stubborn grout stains.
Bleach can lighten organic stains and disinfect grout, but it won’t restore deeply set or pigment-based discoloration.
Use a paste of baking soda and water or a grout cleaner and scrub with a brush for best results.
Rinse thoroughly and test a hidden area first.
Is it safe to mix bleach with detergent for mopping?
When you’re mopping, don’t mix bleach with regular detergent unless the product label explicitly says it’s safe, because some detergents contain ammonia or acids that can create dangerous fumes or reduce bleach’s effectiveness.
Instead, use bleach with plain water or a manufacturer-approved cleaner. Always follow dilution instructions, test a small area first, and rinse thoroughly afterward to avoid residue or surface damage.
How long do fumes last and how can I ventilate safely?
Although bleach fumes usually dissipate within 30 minutes to a few hours, the exact time depends on room size, ventilation, concentration, and temperature.
So plan to air the area for at least an hour after mopping. Open windows and doors, run fans toward outdoors, and use exhaust or HVAC on fresh-air mode.
Leave the room until odor fades and avoid reentry with vulnerable people or pets.