Can You Install Flooring Over Tile? What Works and What Doesn’t
You can often install new flooring over existing tile if the tile is solid, level, and well bonded, so you’ll skip demolition and save time and money. Floating floors like LVP, LVT, engineered hardwood, laminate, and carpet tiles usually work, while nail-down solid hardwood and some stone require removal. Prep matters: clean, level, and address deflection and door clearances. Do it right to avoid failures, and keep going to learn practical checks and tips.
Quick Answer Can You Install Flooring Over Tile?
Yes — you can often install new flooring over existing tile, but it depends on the condition, height, and type of both the tile and the new material.
It’s a good option when the tile is flat, well-bonded, and the added height won’t cause door or threshold problems.
Avoid it if the tile is loose, uneven, or if moisture and changes will create installation or warranty issues.
Short summary of what works and what doesn’t
If the tile is sound, level, and firmly bonded, you can usually install new flooring over it; if it’s cracked, loose, or uneven, you’ll need to repair or remove it first.
You can install flooring over tile with thin, floating, or engineered options: luxury vinyl, laminate, engineered hardwood, or thin porcelain.
Avoid thick hardwood without underlayment or uneven substrates.
When it’s a good idea and when to avoid it
When your existing tile is stable, level, and bonded, installing new flooring over it can save time, money, and mess by eliminating demolition.
But when tile is cracked, loose, or uneven, you should repair or remove it first to avoid future failures.
Choose floating floors, engineered wood, or luxury vinyl over good tile; avoid glue-down products unless you prep the surface or remove problematic tiles.
Basic Understanding Why Consider Installing Over Tile?
You might choose to install new flooring over tile to save money, cut project time, and avoid messy demolition.
Be aware of risks like added floor height, adhesion challenges, and potential warranty issues that can affect the final result.
Also check what type of existing tile you have—ceramic, porcelain, natural stone, or mosaic—as each substrate affects prep and suitability.
Benefits (cost, time, less demolition)
Because tearing out tile adds labor, time, and disposal costs, installing new flooring over existing tile often saves you money and gets the job done faster.
- Faster installation: you skip demolition and subfloor repairs.
- Lower cost: you avoid removal fees and waste hauling.
- Less disruption: rooms stay usable sooner, with reduced dust and noise.
Risks and limitations (height buildup, adhesion, warranties)
Although installing new flooring over existing tile can save time and money, it also creates trade-offs you should weigh: added height at doorways and thresholds, potential adhesion problems on glossy or uneven tile, and possible voiding of manufacturer warranties if you don’t follow their substrate requirements.
- Measure openings to avoid trip hazards.
- Prep glossy or uneven tile for proper bonding.
- Check warranties; manufacturers may require tile removal.
Types of existing tile substrates (ceramic, porcelain, natural stone, mosaic)
When deciding whether to install new flooring over existing tile, start by identifying the tile type—ceramic, porcelain, natural stone, or mosaic—because each substrate behaves differently and affects preparation, adhesive choice, and long-term performance.
Ceramic and porcelain are stable but glaze varies; natural stone absorbs and may need sealing; mosaic sheets can flex and have many grout lines.
Match underlayment and adhesives accordingly.
Which New Flooring Types Work Over Tile
You can install several popular floor types directly over existing tile, but each has its own prep and thickness considerations.
Luxury vinyl plank or tile, engineered hardwood, laminate, thin-set or floating porcelain/ceramic, and carpet or carpet tile are all viable options depending on your subfloor and changeover needs.
We’ll cover what each option requires so you can pick the right one for your space.
Luxury Vinyl Plank (LVP) and Luxury Vinyl Tile (LVT)
Luxury vinyl plank (LVP) and luxury vinyl tile (LVT) let you update a tiled floor quickly and affordably without a full tear-out, since they’re designed to float over existing substrates and tolerate minor irregularities.
You’ll prep by cleaning, leveling high grout lines, and adding underlayment if recommended.
Click-lock or loose-lay systems install fast, resist moisture, and provide durable, low-maintenance surfaces for most rooms.
Engineered Hardwood
If you like the look of real wood but want a flooring option that can often go over existing tile, engineered hardwood is a strong choice.
You can float or glue it over a smooth, level tile surface using recommended underlayment. Check thickness, moisture levels, and elevation changes.
Avoid installations over uneven or loose tile without prepping; follow manufacturer guidelines for warranties.
Laminate Flooring
Because laminate locks together and sits atop an underlayment, it’s one of the easiest new floors to install over existing tile.
You’ll need a level, clean surface; fill grout gaps and remove loose tiles. Use a quality underlayment for moisture and sound control, and leave proper expansion gaps at walls.
Laminate tolerates minor tile imperfections but won’t hide severe height or structural issues.
Thin-set or Floating Tile Options (porcelain/ceramic) when possible
After laminate, you might prefer the look and durability of tile—either thin-set porcelain/ceramic applied directly over existing tile, or floating tile systems designed for quicker installs.
You’ll need sound, level substrate for thin-set; remove loose grout and prime.
Floating tiles clip or click over underlayment, reducing height buildup.
Both require proper expansion joints and substrate prep to avoid cracking or lippage.
Carpet and Carpet Tile
When you want warmth and sound absorption over existing tile, carpet and carpet tile are practical choices that tolerate modest subfloor imperfections and add insulation underfoot.
You can glue carpet tile directly to a clean, level tile or use a low-profile pad and stretch-in carpet where shifts permit.
Watch for moisture, seal grout lines, and guarantee door clearances and thresholds are adjusted.
Which Flooring Types Usually Do NOT Work Over Tile
You’ll usually want to avoid solid nail-down hardwood because it needs a plywood subfloor and can’t be nailed through tile.
Natural stone installations often require a mortar bed and exact flatness that existing tile won’t reliably provide.
Large-format tile that needs thin-set is also problematic since it demands a stable, flat substrate you rarely get over an old tiled surface.
Solid Nail-Down Hardwood
Solid nail-down hardwood generally won’t work over tile because it needs a stable, flat wood subfloor to accept nails, and ceramic or porcelain tile doesn’t provide that.
Trying to nail through tile risks cracking the tile and leaves the planks unsupported. You’d have to remove tile or install a proper plywood subfloor above it, so avoid attempting direct nail-down installation.
Some Natural Stone Installations
Although natural stone can look stunning, you shouldn’t expect most stone types to be installed directly over tile because they need a rigid, flat substrate and specialized mortars that tile rarely provides.
You’ll usually avoid thin or highly irregular stones—marble, limestone, travertine—over existing tile. They crack, shift, or delaminate without proper backerboard, bonding agent, or full mortar bed preparation beneath.
Large-format tile with thin-set requirements
When you try to install large-format tile over existing tile, the thin-set mortar often can’t bridge uneven grout lines or provide the continuous, rigid support those big panels need.
That mismatch leads to hollow spots, cracking, or tile failure. You shouldn’t bond oversized tiles over a lippage-prone substrate—you’ll need a leveled, stiff underlayer or full tile removal to guarantee proper adhesion and long-term performance.
Preconditions When Installing Over Tile Is Feasible
Before you decide to install new flooring over existing tile, you’ll need to confirm the subfloor is level and stiff enough to avoid deflection.
Check the tile for cracks, loose pieces, and poor grout, and measure door clearances and junction heights so thresholds still work.
Also assess moisture risks and whether additional waterproofing or a vapor barrier is required.
Structural and subfloor considerations (levelness, deflection)
Since proper support matters more than surface appearance, you’ll need to verify the subfloor and framing can handle a new finish over existing tile.
Check floor level with a long straightedge; high spots or dips over 1/8″ in 6′ need correction.
Test for deflection—floors that bounce can delaminate glued or floating installations.
Reinforce joists or replace subfloor if necessary.
Tile condition checklist (cracked tiles, loose tiles, grout condition)
After confirming the floor’s level and stiffness, turn your attention to the tile itself — its condition will determine whether you can cover it or must remove it.
- Check for cracked or broken tiles; replace or remove any that flex or crumble.
- Tap for hollow sounds; loose tiles need re-bedding or removal.
- Inspect grout: clean, fill wide gaps, and verify joints are stable before covering.
Height and threshold constraints (door clearances, transitions)
When you’re planning to lay new flooring over tile, check door clearances and changeover heights first to make sure trim, doors, and adjoining floors will work with the added thickness.
Measure thresholds, undercut door jams if needed, and evaluate junction strips for smooth ramps.
Consider plumbing fixture clearances and cabinet toe-kicks; excessive buildup may force door trimming or threshold replacement.
Moisture and waterproofing concerns
Although tile itself is water-resistant, you’ll still need to assess moisture sources and waterproofing before installing new flooring over it.
Check for active leaks, efflorescence, or a damp subfloor; unresolved moisture will ruin adhesives and underlayment.
Use a moisture meter, fix plumbing or drainage, and apply a proper vapor barrier or waterproof membrane when required.
Don’t cover persistent dampness—address it first.
How-To Step-by-Step Preparation and Installation (Generalized)
Start by inspecting the existing tile and substrate, repairing loose or damaged areas so you have a solid base.
Clean and degrease the surface, then level any high or low spots with a skim coat or self-leveling compound as needed.
Finally, choose and install the proper underlayment or decoupling membrane and lay the new flooring following the manufacturer’s instructions.
Step 1: Inspect and repair existing tile and substrate
1st, give the tiled floor a careful inspection to identify loose, cracked, or hollow-sounding tiles and any signs of substrate damage like soft spots, mold, or water stains.
- Remove and replace any loose or cracked tiles; check adhesive bond.
- Repair substrate: patch soft spots, replace rotted sections, treat mold.
- Level and reinforce the floor to guarantee a stable, even base before proceeding.
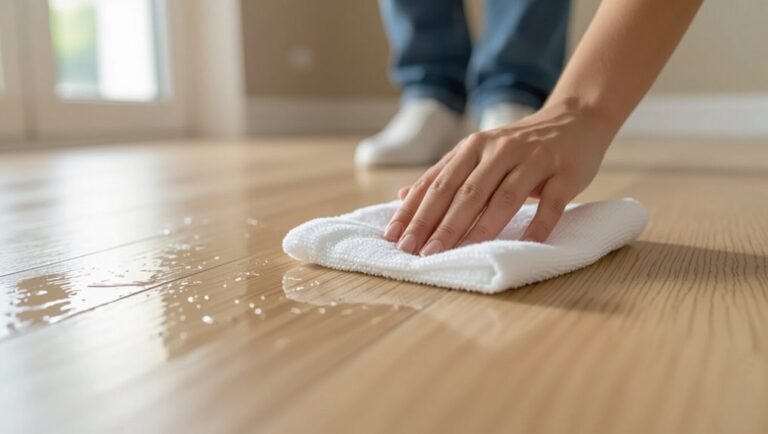
Step 2: Clean and degrease the tile surface
With the substrate repaired and tiles firmly set, you’re ready to clean and degrease the surface so new flooring will bond properly.
Sweep and vacuum to remove debris, then scrub grout and tile with a degreasing cleaner or trisodium phosphate solution.
Rinse thoroughly, neutralize per product instructions, and let the floor dry completely.
Check for remaining residue before proceeding.
Step 3: Level or skim-coat uneven tiles (self-leveling compound)
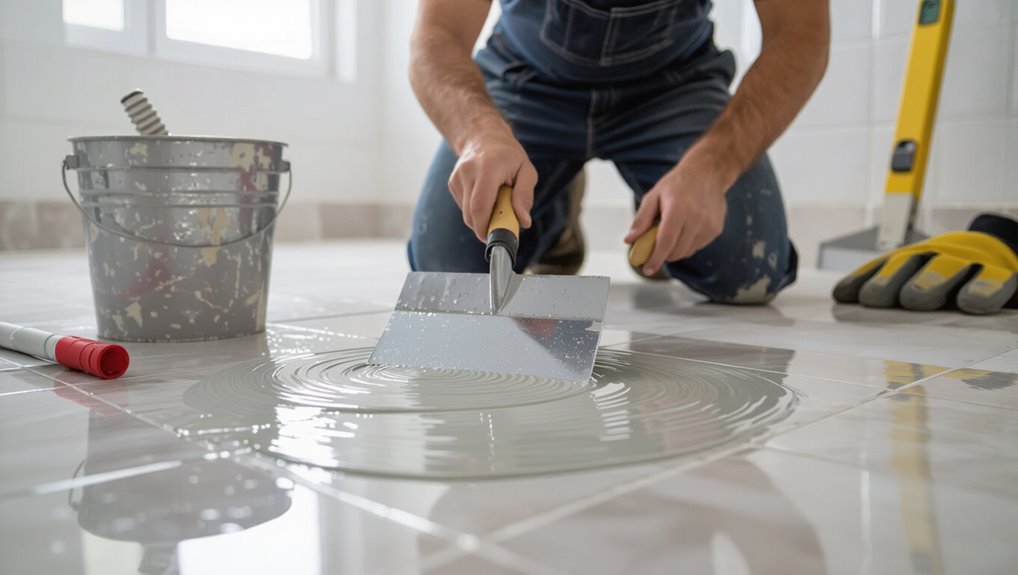
Level low spots and smooth high ones so your new flooring sits flat and bonds evenly—use a polymer-modified self-leveling compound for significant variations or a thin skim coat for minor imperfections.
Measure levelness with a straightedge and 6-foot level. Mix per manufacturer instructions, pour or trowel, and feather edges into tile.
Allow full cure time, then sand any high ridges before proceeding.
Step 4: Apply recommended underlayment or decoupling membrane (types and when to use)
After your skim coat or self-leveler has fully cured and any ridges are sanded smooth, you’ll install an underlayment or decoupling membrane to protect the new floor and guarantee a stable bond.
Choose cork or foam underlayment for sound reduction and minor height adjustments; use plywood for nail-down installations; select an uncoupling membrane like Schluter Ditra for tile-to-tile movement and moisture control.
Step 5: Install new flooring according to manufacturer guidelines
Begin by laying out the manufacturer’s installation guide and gathering all required tools and materials so you can follow each step exactly as specified; doing so prevents voiding warranties and guarantees proper performance.
Then work methodically: measure and acclimate planks, maintain recommended expansion gaps, follow adhesive or click‑lock procedures, stagger joints per pattern, check alignment frequently, and clean as you go to guarantee a durable, warranty‑compliant install.
Step 6: Finish transitions, thresholds, and trim
1 final step ties the project together: installing changes, thresholds, and trim so your new floor looks finished and functions properly.
Fit connector strips at doorways, allow movement gaps, and screw or adhesive per product instructions.
Install thresholds where floor heights differ.
Replace or reinstall baseboards and quarter round, nailing into the wall, not the flooring.
Caulk and touch up paint for a clean, professional finish.
Product-Specific Installation Notes and Best Practices
When choosing a product, pay close attention to installation type—LVP/LVT can be glue-down or click-lock (each has different underlayment needs), while engineered hardwood may be floated or glued.
Make sure materials are properly acclimated and that laminate gets a reliable moisture barrier and correct tapping-system technique.
For carpet, pick padding suited to tile and plan how tackless strips will be secured over the existing surface.
LVP/LVT glue-down vs click-lock and underlayment choices
Although both glue-down and click-lock LVP/LVT can cover tile, your choice affects prep, acoustics, and long-term performance.
Glue-down needs a flat, primed surface and resists telegraphing grout lines; click-lock tolerates minor irregularities and installs faster.
Choose underlayment for click systems to cushion, reduce noise, and add moisture protection.
Follow manufacturer specs for adhesive, seam treatment, and warranty compliance.
Engineered hardwood floating vs glue, acclimation needs
If you’re deciding between floating and glue-down engineered hardwood over tile, weigh how much subfloor prep, movement control, and long-term stability you’ll accept:
Floating installations need a flat, clean surface and underlayment to reduce noise and minor movement; they’re quicker and reversible.
Glue-down gives better stability and transfer of tile warmth but requires more prep and permanent adhesive.
Acclimate boards per manufacturer guidance.
Laminate moisture barriers and tapping-systems
Since engineered hardwood options raised points about underlayment and movement, let’s cover laminate specifics next:
Laminate flooring relies on proper moisture barriers and correct tapping-system use to protect joints and keep installations tight over tile. You’ll install a vapor barrier or quality underlayment, avoid gaps, and use a tapping block gently to lock seams without splitting edges.
Check manufacturer guidelines.
Carpet padding selection and tackless strips over tile
Carpet performance starts with choosing the right padding: pick density and thickness that match your carpet type and traffic levels—higher-density (6–8 lb/ft³) pads for heavy use or berber, and softer, thicker pads for plush carpets—while ensuring the pad has a moisture-resistant or breathable face to sit over tile without trapping moisture.
Use low-profile pad under thresholds, glue down tackless strips or fasten them into thin-set, and seam edges carefully.
Comparison Table Flooring Options Over Tile
Now you’ll compare flooring options over tile across five key factors: performance, cost, height added, ease of installation, and typical lifespan.
Use this table to weigh trade-offs for your specific room and budget.
That way you can pick the option that best fits how you live and how long you want it to last.
Performance, Cost, Height Added, Ease of Installation, Typical Lifespan
When choosing a floor to install over tile, you’ll want to weigh four practical factors—how it performs underfoot, what it costs, how much height it adds, and how easy it is to fit—because each option balances them differently and affects your final look and function. Consider durability, budget, elevation change, and DIY friendliness to match room use and lifespan.
| Option | Quick notes |
|---|---|
| Vinyl plank | Durable, low cost, low height |
| Engineered wood | Mid cost, moderate height, longer life |
Common Problems and How to Avoid Them
You’ll want to watch for common issues like adhesive failures and bubbling—proper surface prep and the right adhesive fix most problems.
Plan for height differences and changes to prevent trip hazards, and stiffen or repair the subfloor to stop movement and squeaks.
Also document existing conditions and follow manufacturer guidelines so you don’t void warranties.
Adhesion failures and bubbling causes and fixes
If adhesion fails or bubbles appear after you install flooring over tile, it usually traces back to surface contamination, improper priming, or trapped moisture; spotting the cause quickly lets you choose the right fix and prevents bigger damage.
Clean and degrease, roughen glossy tile, apply recommended primer or adhesive, and allow substrate to dry.
For bubbles, roll, reapply adhesive, or replace affected planks promptly.
Height and trip hazards planning transitions
Because even small height differences catch feet and wheel casters, plan changes carefully to keep walkways safe and compliant.
Measure floor heights, account for underlayment and tile thickness, and choose tapered joining strips or thresholds that meet local code.
Slope ramps gently where needed, secure edges to prevent lifting, and align connections with doorways or room lines to minimize unexpected steps and tripping.
Movement and squeaks subfloor rigidity solutions
When subfloors flex or joists move, you’ll notice gaps, creaks, and loosened flooring fast — and those problems only get worse after you cover tile.
You should stiffen the assembly: sister or brace joists, add blocking, and fasten a suitable plywood or cement backer over tile with proper adhesive and screws.
Use construction adhesive, ring-shank nails, and correct fastener layout to stop movement.
Warranty and manufacturer rejection risks documenting and complying
Stiffening the subfloor and properly fastening a backer over tile helps prevent movement-related failures, but it won’t protect you from warranty denial if you haven’t followed the flooring maker’s installation requirements and recorded what you did.
Always read specs, use approved underlayment and adhesives, keep receipts, photos, and signed installer notes.
Noncompliance or missing documentation can void coverage—don’t gamble.
Cost and Time Considerations
You’ll want to weigh the cost of ripping out tile versus installing new flooring directly over it, since removal raises labor and disposal fees while over-tiling can save money upfront.
Also consider time and disruption: removing tile usually takes longer and creates more dust and noise, whereas laying over tile is quicker and less intrusive.
If you’re unsure about substrate condition, connections, or warranty needs, hire a pro—it’s often faster and avoids costly mistakes.
Cost comparison: removing tile vs installing over tile
Although removing tile can seem like the safer long-term choice, installing new flooring over existing tile often saves you significant time and money up front.
You’ll avoid demolition costs, debris disposal, and subfloor repairs in many cases. Paying for leveling or underlayment might still be needed, but overall material and labor expenses usually run lower when you go over tile versus full removal.
Time and disruption differences
Cost savings often come with a trade-off in time and disruption, so it helps to weigh how each approach will affect your schedule and daily life.
Leaving tile and prepping for an overlay usually finishes faster, with less dust and shorter downtime.
Removing tile adds days for demo, cleanup, subfloor repairs and possible moisture mitigation, extending disruption and requiring more contingency in your timeline.
When professional installation is recommended
When projects involve extensive tile removal, uneven subfloors, or complex changes, hire a pro to avoid costly mistakes and delays.
You’ll save time when they assess structural issues, match materials, and handle moisture barriers or shifts.
Professionals offer accurate estimates, warranty work, and efficient crews.
If budget allows and the scope is uncertain, hiring a qualified installer is usually the smarter, faster choice.
Real-World Scenarios and Recommendations
When you’re choosing how to install over tile, think about how each room’s use and moisture will affect the flooring.
For bathrooms and basements pick waterproof, flexible systems; for kitchens and high-traffic areas choose durable, scratch-resistant surfaces; and consider changes and pattern direction differently for small rooms versus open plans.
I’ll walk through specific recommendations and trade-offs for each scenario so you can match the method to the space.
Best approaches for bathrooms and wet areas
Bathrooms and other wet areas demand waterproof solutions, so you’ll need to choose materials and installation methods that keep moisture out of the substrate and prevent slips or mold.
Consider fully waterproof floating vinyl or glued luxury vinyl plank, or remove tile and install cement backer board with waterproof membrane for tile or stone.
Guarantee proper slope, sealed seams, and non-slip finishes for safety.
Kitchen and high-traffic areas
Because kitchens see constant foot traffic, spills, and heavy appliances, you’ll want a floor that’s durable, easy to clean, and tolerant of point loads and occasional moisture.
Consider luxury vinyl plank, engineered hardwood with strong finish, or thin porcelain over tile with proper underlayment.
Make certain connections are level, appliances rest on solid substrate, and seams are sealed.
Prioritize longevity and repairability.
Basements and moisture-prone spaces
If your basement or another moisture-prone space tends to get damp or experiences occasional seepage, choose flooring and installation methods that prioritize water resistance and a breathable assembly.
Use waterproof vinyl plank or tile, ceramic over a decoupling membrane, or sealed concrete overlay.
Elevate wood products with moisture barriers and guarantee proper drainage, sump pumps, and perimeter sealing before installing new flooring.
Small rooms vs open-plan spaces
When you’re choosing flooring for small rooms versus open-plan spaces, think about scale, visual continuity, and how seams or connections will affect flow—narrow planks or smaller tiles can make tight rooms feel proportionate, while wider planks and continuous runs unify open layouts and reduce visual breaks.
Match material changes to sightlines, use consistent grout or trim, and plan plank direction to guide movement and hide minor unevenness.
Maintenance and Long-Term Care After Installation
After your new floor goes down over tile, you’ll want to follow cleaning routines recommended for that material to avoid scratches, moisture damage, or grout issues beneath.
Check seams, junctions, and any adhesive lines regularly so you can spot lifting, gaps, or soft spots early.
Promptly addressing minor problems will keep the floor stable and extend its lifespan.
Cleaning and care specific to new flooring over tile
Proper cleaning and care will keep your new floor looking great and extend its life, so establish a simple routine right away.
Sweep or vacuum regularly to remove grit that can scratch surfaces. Use manufacturer-recommended cleaners for your specific over-tile material, avoid harsh chemicals and steam on vulnerable layers, and place mats at entries.
Wipe spills promptly to prevent staining or warping.
Monitoring and addressing issues early
Keeping up with regular cleaning will catch many minor problems, but you should also keep an eye out for signs that need faster attention.
Check seams, shifts, and grout lines monthly for movement, gaps, or moisture.
Address lifting planks, soft spots, or persistent stains immediately to prevent bigger damage.
Document issues, tighten loose trims, and call a pro when repairs exceed simple fixes.
Common Mistakes to Avoid
Before you start, inspect the existing tile and fix any loose or damaged areas so the new floor has a solid substrate.
Don’t use adhesives or underlayments that aren’t rated for your chosen material, and plan for height differences and thresholds to avoid trip hazards.
Always follow the flooring manufacturer’s installation requirements to keep warranties valid and guarantee a lasting result.
Skipping substrate inspection or repairs
If you skip inspecting and repairing the tile substrate, you’ll be rolling the dice on every square foot of new flooring: hidden cracks, loose tiles, or moisture issues can cause squeaks, tiles to pop through, or premature failure of the new surface.
You should check for level, adhesion, and moisture, fix loose or damaged tiles, and address subfloor defects before proceeding.
Using incompatible adhesives or underlayments
Because adhesives and underlayments vary widely in composition and performance, using the wrong ones can void warranties, cause bonding failures, or let moisture ruin both the tile and new floor.
You should match adhesive type to both tile and new material, follow manufacturer specs, and use moisture barriers when required.
Test small areas, avoid solvent-based products on moisture-sensitive floors, and document choices for warranty claims.
Ignoring height/threshold planning
Adhesive and underlayment choices matter, but so does planning how the new floor will meet surrounding rooms.
If you ignore height differences, door clearance, and connector strips, you’ll get gaps, trip hazards, or stuck doors.
Measure existing thresholds, factor in added underlayment plus flooring thickness, and choose connectors that provide smooth, code-compliant changes between surfaces for safety and aesthetics.
Not following manufacturer installation requirements
When you skip the manufacturer’s installation guidelines, you’re inviting problems like voided warranties, premature failure, and mismatched materials that won’t perform as designed.
You must follow substrate prep, adhesive type, acclimation, expansion gaps, and fastening instructions precisely. Ignoring specs risks warping, cupping, delamination, and denied claims.
If you’re unsure, contact the manufacturer or a certified installer before proceeding.
Tips and Best Practices
When you’re ready to move forward, pick an installer with proven experience on tile-to-floor projects and check references.
Ask manufacturers specific questions about compatibility, warranties, and recommended adhesives or underlayments.
Before work begins, run through a concise checklist—surface prep, moisture testing, and timeline—so nothing gets missed.
How to choose the right installer or contractor
Who’ll install your new floor matters as much as the materials you pick.
Vet contractors by checking licenses, insurance, and local reviews. Ask for references and photos of similar tile-over installs.
Confirm warranties, timelines, and cleanup procedures in writing.
Get at least three bids, compare scope and materials, and trust your gut about communication and professionalism before you commit.
Questions to ask product manufacturers
Why not get clear answers from the source? Ask manufacturers about product compatibility with existing tile, recommended underlayment, moisture and temperature limits, adhesive types, and warranty conditions when installed over tile.
Request installation guides, required surface prep, and approved installer certifications.
Get written confirmation for any nonstandard situation to avoid voided warranties and unexpected failures.
Checklist before starting the project
Before you lift a hammer or order materials, run through a concise pre-install checklist that confirms substrate soundness, accurate measurements, product compatibility, permits (if required), and a clear timeline for acclimation and contractor availability.
- Inspect tile for cracks, loose grout, slope, and moisture.
- Verify floor height changes and door clearances.
- Confirm manufacturer warranties, underlayment needs, and acclimation window.
Frequently Asked Questions
You probably have a few quick questions before you start, like whether you can glue luxury vinyl directly over ceramic tile or if cracked tiles are safe to cover.
You’ll also want to know if installing over tile voids warranties, how much extra height it adds, and whether a vapor barrier is needed.
Below we’ll answer each concern so you can choose the right approach.
Can you glue luxury vinyl directly over ceramic tile?
Wondering if you can glue luxury vinyl directly over ceramic tile? Yes, you can in many cases if the tile is sound, level, clean, and free of wax or sealer.
Roughen glossy surfaces and fill grout lines to create a flat substrate. Use manufacturer-approved adhesive and follow installation guidelines to guarantee warranty compliance and long-term performance; consult product specs first.
Will installing new flooring over tile void the old floor’s warranty?
If you cover existing tile with new flooring, it usually won’t void the tile’s manufacturer warranty—but it can if the original warranty has specific conditions about alterations or requires removal for inspection.
Check the paperwork, contact the manufacturer, and document the tile’s condition before installation.
Also confirm installer credentials and any adhesive or underlayment choices, since improper methods might trigger warranty disputes.
How much extra height will flooring over tile add?
Besides warranty questions, a practical concern is how much height you’ll add by installing new flooring over tile.
Expect added thickness from both the new material and any underlayment: about 3/16″–3/4″ for thin vinyl or laminate, 1/2″–3/4″ for engineered wood, and more if you add plywood or soundproofing.
Measure thresholds, doors, and changes before you commit.
Is it safe to install flooring over cracked tiles?
Can you install new flooring over cracked tiles? You can, but it’s risky.
Cracked tiles indicate movement or substrate issues; they can transfer cracks to the new floor and create an uneven surface. You should repair or replace damaged tiles, stabilize the substrate, and level the area before installing.
Skipping repairs may void warranties and shorten the lifespan of your new flooring.
Do I need a vapor barrier when installing over tile?
Wondering whether you need a vapor barrier when installing new flooring over existing tile?
It depends on flooring type, subfloor, and moisture risk. Floating floors and wood products often benefit from a vapor barrier to prevent moisture migration and adhesive failure.
Porcelain or ceramic tile below typically resists moisture, but check slab moisture, room humidity, and manufacturer instructions before skipping the barrier.