What You Should Never Clean Vinyl Plank Flooring With (And What to Use Instead)
Never clean vinyl plank flooring with bleach, ammonia, wax, oil soaps, solvents, abrasive pads, or high‑heat steam, because they’ll strip finishes, dull or discolor planks, and can warp or loosen adhesives. Instead, use a pH‑neutral vinyl cleaner or a mild dish soap solution, soft microfiber tools, and damp mopping followed by prompt drying. Sweep or vacuum regularly and spot‑treat stains gently; keep mats and felt pads under furniture for protection. Keep reading for detailed steps and product suggestions.
Quick Answer What You Should Never Clean Vinyl Plank Flooring With
Don’t use harsh chemicals on vinyl plank flooring — they can strip the wear layer and cause discoloration.
Avoid bleach, ammonia, abrasive powders or scrubbers, and solvent-based degreasers.
If you’re unsure, stick to manufacturer-recommended cleaners or mild, pH-neutral solutions.
One-sentence direct answer
If you want to protect your vinyl plank flooring, never use harsh cleaners like bleach, ammonia, abrasive scrubbers, or steam mops, as they can strip the wear layer, discolor the surface, and warp the planks.
In short: what should you not clean vinyl plank flooring with?
Avoid bleach, ammonia, oil‑based soaps, abrasive pads, strong solvents, and high‑heat steam to keep floors intact.
Short list of top harmful cleaners
Here are the top offenders you should never use on vinyl plank floors: Avoid these to keep finish and seams intact.
- Bleach and ammonia-based cleaners — they strip and discolor.
- Wax or oil soaps — they leave residue and make floors slippery.
- Abrasive scrubbing powders or pads — they scratch and dull the wear layer; instead, use pH-neutral vinyl cleaners and microfiber.
Basic Understanding What Vinyl Plank Flooring Is and Why Cleaning Matters
Vinyl plank flooring is made of layered PVC with a printed design and a protective wear layer or finish. You’ll see variations like embossed or high-gloss coatings.
How cleaning products interact with that PVC and finish matters because harsh chemicals can strip, swell, or chemically react with the layers.
Watch for signs of cleaner-caused damage—dulling, discoloration, swelling, or seam lifting—so you can stop the wrong products before they worsen the problem.
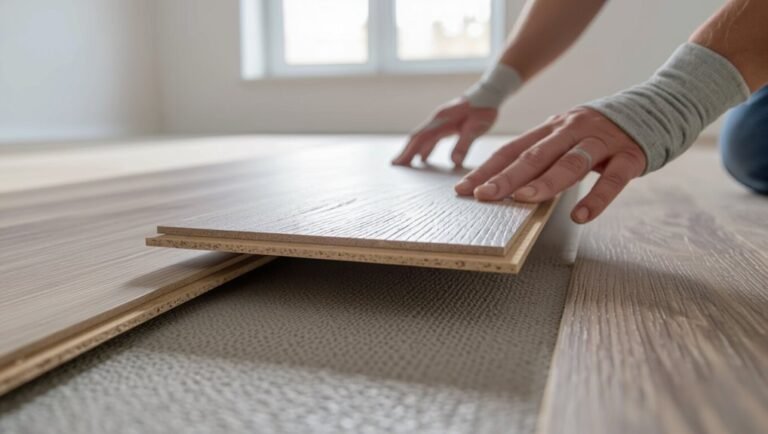
What vinyl plank flooring is (composition and common finishes)
Think of vinyl plank flooring as a layered, engineered product: a wear layer protects a printed design film that sits over a durable vinyl core.
Manufacturers often finish planks with UV-cured coatings, embossed textures, or commercial-grade urethane to boost scratch and stain resistance.
You should know plank thickness, wear-layer mil rating, and finish type affect durability, appearance, and maintenance needs.
How cleaning products interact with vinyl (chemistry and finish damage)
Because cleaning agents react with the wear layer and finish, you can easily damage vinyl plank flooring if you use the wrong chemicals or concentrations.
Acids, alkalis, solvents and abrasives alter binders and plasticizers, breaking polymers or stripping protective coatings. Strong cleaners can soften, swell or craze the surface; residues attract dirt and accelerate wear.
Use pH-neutral, manufacturer-approved products and dilute accurately.
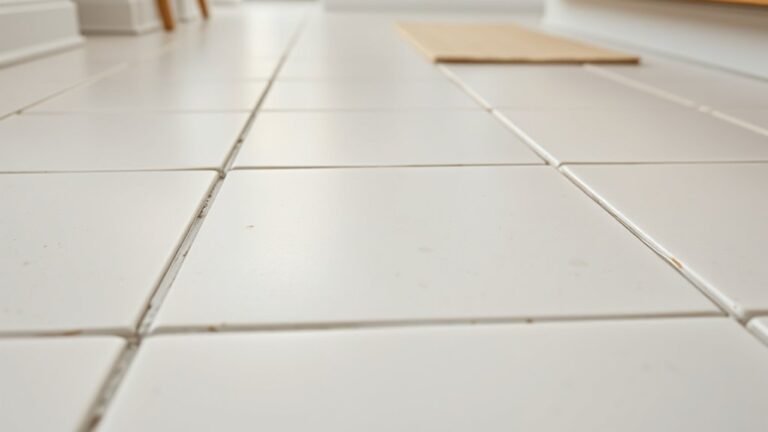
Common signs of cleaner-caused damage (dulling, swelling, discoloration, seam lifting)
When cleaners attack the wear layer or edges, you’ll notice clear, telltale changes: the finish can dull, planks may swell or warp, colors can fade or stain, and seams can lift as adhesives break down.
You’ll spot cloudy patches, cupping along edges, sticky residue that won’t rinse, uneven color or white bloom, and gaps where seams separate—signs to stop using that product immediately.
Problem-Solution Harmful Cleaners and Safe Alternatives
Don’t use bleach, ammonia, waxes, abrasive powders, or high-heat steam on vinyl plank floors — they can strip finishes, warp planks, or leave permanent damage.
Instead, you’ll want mild, pH-neutral cleaners and soft microfiber tools to protect the wear layer.
Below, we’ll go through each harmful product and offer safe alternatives you can use.
Bleach and chlorine-based cleaners
Although bleach and chlorine-based cleaners can strip stubborn stains and disinfect effectively, they’re a poor choice for vinyl plank flooring — they can discolor the finish, weaken the wear layer, and cause the planks to become brittle over time.
Don’t use them. Instead, opt for a pH-neutral vinyl cleaner or a mild dish soap solution, rinse well, and dry promptly to protect appearance and longevity.
Ammonia and alkaline cleaners
Ammonia and other high-alkaline cleaners can quickly dull vinyl plank finishes, strip protective coatings, and cause seams to lift or edges to warp if you use them regularly.
Don’t reach for ammonia-based solutions; they’re too harsh. Instead, wipe with a damp microfiber mop and a pH-neutral cleaner formulated for vinyl, or use a simple mix of warm water and mild dish soap for safe, effective maintenance.
Wax, polish, and oil-based products
Avoid waxing or polishing vinyl plank flooring; those products can leave a greasy residue, build up over time, and make floors look cloudy or feel slippery.
Don’t use oil-based cleaners or restorative polishes—they attract dirt and can damage the wear layer.
Instead, clean with a pH-neutral vinyl floor cleaner or a mild dish soap solution, and dry thoroughly to prevent slipping and residue.
Abrasive powders and scouring pads
Those liquid products can leave a film, but abrasive powders and scouring pads cause a different kind of damage: they scratch and wear away the vinyl’s protective layer.
Don’t scrub with gritty cleaners or steel wool; they create dull spots and accelerate deterioration.
Instead, use a soft microfiber mop, mild pH-neutral cleaner, and nonabrasive pad for stains to preserve finish and extend flooring life.
Steam cleaners and high heat
While steam seems like a quick way to sanitize, high heat and moisture can warp vinyl planks and loosen the adhesive beneath them.
Don’t use steam cleaners or hot water extraction. Instead, mop with a damp microfiber pad and a pH-neutral cleaner, dry promptly, and use fans for faster drying.
That prevents swelling, lifting, and long-term damage.
Acetone, nail polish remover, and strong solvents
After keeping heat and steam off your vinyl planks, you also want to steer clear of solvents like acetone and nail polish remover.
These harsh chemicals can dissolve the wear layer, dull finish, and cause discoloration. Instead, use a pH-neutral vinyl cleaner or mild dish soap diluted in water.
Blot spills promptly, test cleaners in an inconspicuous spot, and rinse thoroughly.
DIY “natural” mixtures to avoid (e.g., vinegar at high concentration)
Because they seem harmless, you might reach for DIY “natural” mixtures like straight vinegar or concentrated citrus cleaners—but these acids can etch and dull vinyl’s wear layer, strip protective coatings, and leave sticky residues that attract dirt. Don’t use them. Rinse immediately if used accidentally and switch to pH-neutral cleaners.
| Cleaner | Risk | Action |
|---|---|---|
| Vinegar | Etching | Rinse |
| Citrus | Coating loss | Avoid |
| Baking soda | Abrasive | Spot test |
| Rubbing alcohol | Drying | Dilute |
| Bleach | Discolor | Never |
Safe alternative cleaners (commercial options)
If you want an easy, safe solution, choose a commercial cleaner made for vinyl or luxury vinyl plank (LVP): they’re pH-neutral, formulated to protect wear layers, and won’t leave residues that attract dirt.
Look for products labeled “vinyl” or “LVP,” no-wax formulas, and residue-free rinses.
Test a small area first, follow manufacturer directions, and avoid abrasive pads.
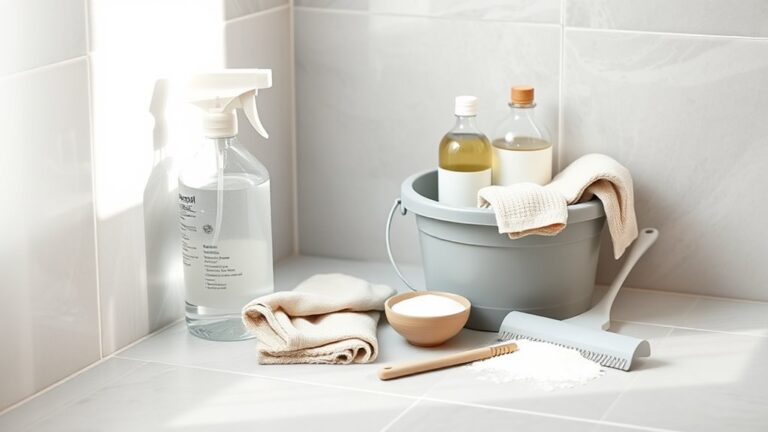
Safe homemade solutions (ratios and ingredients)
Commercial LVP cleaners are convenient, but you can also make gentle, effective solutions at home using simple ingredients and correct ratios.
Mix 1 cup warm water, 1/4 cup white vinegar, and a few drops of mild dish soap for routine mopping.
For tougher spots, use 1 cup warm water with 1 tablespoon baking soda paste applied locally, then wipe clean.
pH considerations and what to look for on labels
While vinyl plank flooring resists everyday wear, harsh cleaners with extreme pH levels can strip the wear layer or discolor seams.
So you should check product labels for acidity or alkalinity before use. Look for neutral-pH cleaners (around 7) or labels stating “safe for vinyl.”
Avoid high-alkaline or acidic formulas, bleach, and ammonia. When unsure, dilute or test in a hidden spot.
How-To Step-by-Step Proper Cleaning Routine for Vinyl Plank Flooring
You’ll start with simple daily maintenance—sweep or vacuum loose dirt to prevent scratches.
Once a week wet-clean with a recommended mop and a gentle vinyl-safe solution, and spot-treat stubborn stains with approved methods.
Schedule deeper cleanings less often using the right products and tools, and avoid abrasive mops, stiff brushes, or vacuums with beater bars.
Step 1: Daily/regular maintenance (sweeping, vacuuming)
For daily care, sweep or vacuum your vinyl plank floor to remove grit and dust before it can scratch the surface; doing this a few times a week keeps dirt from building up and makes deeper cleanings easier.
You should:
- Use a soft-bristle broom or vacuum with a hard-floor setting.
- Clear spills promptly to avoid residue.
- Move furniture pads to prevent scuffing.
Step 2: Weekly wet cleaning (recommended mops and solutions)
1 good weekly wet clean keeps your vinyl plank floors looking their best and removes grime that sweeping misses.
Use a microfiber flat mop or a well-wrung sponge mop to avoid excess water. Mix warm water with a few drops of pH-neutral cleaner or a manufacturer-recommended solution.
Mop in the plank direction, rinse the mop frequently, and dry any remaining dampness to prevent damage.
Step 3: Spot cleaning stubborn stains (approved methods)
When a spill won’t lift with your weekly mop, tackle it quickly using approved spot‑cleaning methods to protect the finish and seams.
Blot liquids immediately with a microfiber cloth.
For sticky residue, dampen the cloth with warm water and a few drops of dish soap.
For ink or oil, use a manufacturer‑approved vinyl cleaner or isopropyl alcohol sparingly, then rinse and dry.
Step 4: Deep cleaning schedule and method (frequency, product choice)
Although you keep up with weekly mopping and quick spot treatments, schedule a gentle deep clean every 1–3 months depending on foot traffic and pets.
Use a pH-neutral vinyl cleaner diluted per label; avoid bleach, ammonia, or abrasive powders.
Work in small sections, let solution sit briefly, then rinse with clean water.
Dry thoroughly to prevent water seeping into seams.
Tools and equipment to use and avoid (mops, brushes, vacuums)
Pick the right tools and you’ll make cleaning vinyl plank floors faster and safer; pick the wrong ones and you can scratch, dull, or warp the surface.
Use a soft microfiber mop, gentle-bristle broom, and vacuum with hard-floor setting or soft brush attachment.
Avoid steam mops, abrasive brushes, and vacuums with beater bars.
Rinse tools and replace dirty water frequently to prevent grime buildup.
Comparison Products to Avoid vs. Recommended Products
Now you’ll see a side-by-side look at common cleaners to avoid and the safe options to use.
The table will compare cost, effectiveness, and safety for each category so you can choose what’s best for your floors.
Use it to quickly weigh trade-offs and pick a cleaner that protects both your vinyl and your budget.
Side-by-side comparison table of common cleaners
A clear side-by-side table makes it easy to spot which common cleaners you should avoid and which ones are safe for vinyl plank flooring; below you’ll find quick comparisons that highlight why some products cause damage while others protect the finish.
| Avoid (harsh) | Why harmful | Recommended (safe) |
|---|---|---|
| Bleach | Discolors, weakens | pH-neutral vinyl cleaner |
| Ammonia | Dulls sheen | Mild dish soap solution |
| Oil-based | Slippery, stains | Water + microfiber mop |
Cost, effectiveness, and safety summary for each category
You’ve seen the quick comparisons; next we’ll look at cost, effectiveness, and safety so you can weigh trade-offs between products to avoid and the safer alternatives.
Cheap abrasives and ammonia clean fast but damage finish and off-gas; avoid them.
Recommended pH-neutral cleaners cost a bit more, clean effectively, and’re safe for pets and finish when used as directed.
Common Mistakes and How to Fix Them
You’ll see common problems like buckling from too much water, cloudy buildup from wax or polish, solvent damage from wrong stain removers, and scratches from abrasive scrubbing.
I’ll show how to spot each issue and the specific steps to fix or mitigate it, from drying and cupping repair to safe wax removal and solvent-neutral treatments.
Then we’ll cover repair options for surface abrasion and when to call a pro.
Using too much water symptoms and remediation
If water’s left pooling or you’re mopping with a soaked cloth, vinyl plank floors can warp, swell at the seams, or develop cupping and adhesive failure—signs you’ll want to spot and address quickly.
Blot standing water, dry with fans, and lift boards to air subfloor if adhesive loosens.
Reduce future moisture by using damp, not wet, mops and quick spot-drying after spills.
Applying wax or polish how to remove and restore finish
When wax or polish builds up on vinyl plank flooring, it dulls the factory finish and attracts dirt.
However, you can remove it and restore the surface without damaging the planks.
Start by sweeping, then mop with a manufacturer-approved cleaner.
Use a microfiber pad and gentle circular motions to lift residue.
Rinse thoroughly, dry, and avoid future waxes—vinyl needs no polish to look good.
Treating stains with solvents corrective steps
Removing wax or polish is a good start, but stubborn stains often need spot treatment with solvents—and that’s where many people go wrong.
You should test any solvent in an inconspicuous area first, blot gently instead of rubbing, and limit contact time.
Neutralize with water, dry thoroughly, and repeat only if needed. If finish dulls, stop and consult a pro.
Over-scrubbing with abrasive tools repair options
Scrubbed too hard and see fine scratches or a dull, worn patch on your vinyl planks? Don’t panic.
Light scratches buff out with a microfiber cloth and vinyl polish; deeper gouges may need a color-matched repair kit or replacement plank. Sanding isn’t recommended.
After repair, switch to soft brushes or mop pads and test cleaners on an inconspicuous spot to prevent repeat damage.
Prevention and Best Practices
Set a simple routine care schedule and checklist so you know when to sweep, mop with a manufacturer-approved cleaner, and inspect for damage.
Protect entryways and furniture with mats and felt pads, and act immediately after spills by blotting and rinsing to prevent staining or warping.
Follow long-term maintenance guidelines to preserve the finish and keep your warranty valid.
Routine care schedule and checklist
A simple weekly routine will keep your vinyl plank floors looking great and prevent damage from dirt, spills, and abrasive grit.
Tidy daily, mop gently, and tackle spills fast. Follow this checklist to stay on track:
- Sweep or vacuum high-traffic zones every other day.
- Damp-mop with a manufacturer-approved cleaner once weekly.
- Spot-treat spills immediately with a soft cloth and mild solution.
Entryway and furniture protection (mats, felt pads)
One simple change—placing a durable mat at every entrance and felt pads under furniture legs—can prevent most scratches and grit-related wear on vinyl plank flooring.
Choose low‑abrasion, non‑rubber backing mats and replace them when worn. Use high‑quality felt pads, check them quarterly, and avoid dragging heavy items.
These small steps extend finish life and cut maintenance time without harsh cleaners.
What to do immediately after spills
Keeping mats and felt pads in place helps prevent spills from tracking grit onto your vinyl, but accidents still happen—here’s what to do right away to protect the floor.
Blot liquids with a microfiber cloth, don’t rub. Scoop solids with a soft spatula. Rinse the area with warm water, then dry thoroughly.
For sticky residue, use a mild vinegar solution and test first.
Long-term maintenance to preserve warranty and finish
If you want your vinyl plank flooring to stay protected and remain eligible for warranty coverage, follow a regular care routine and avoid common pitfalls that cause premature wear.
Use manufacturer-approved cleaners, avoid harsh chemicals and steam cleaners, place felt pads under furniture, use entrance mats, control indoor humidity, fix leaks promptly, and document maintenance to support any future warranty claims.
When to Call a Professional
If your vinyl planks show warping, deep gouges, persistent stains, or spreading seams, you’ll want to call a pro.
A flooring specialist can assess whether cleaning, spot repair, or plank replacement is needed and will explain the expected process and costs.
Ask about their experience with vinyl plank, warranty coverage, the repair timeline, and whether they’ll provide a detailed estimate.
Signs professional help is needed
When damage goes beyond routine stains or warping that small-scale repairs can fix, call a professional so the problem doesn’t get worse and cost you more.
Call when you see widespread buckling, persistent odors from trapped moisture, shifting seams separating, large gouges or deep scratches, or signs of mold.
If multiple planks lift or subfloor issues appear, get expert assessment promptly.
What to expect from professional cleaning or repair
Because professionals have tools and training you probably don’t, expect a faster, more thorough assessment and targeted repairs that stop problems from coming back.
They’ll identify underlying issues like moisture, subfloor damage, or adhesive failure, then recommend cleaning, spot repairs, plank replacement, or refinishing.
You’ll get a clear scope, timeline, and cost estimate so you can decide confidently without guesswork.
Questions to ask a flooring pro
Wondering what to ask a flooring pro before they start work?
Ask about their experience with vinyl plank, licensing and insurance, and whether they’ll use manufacturer-approved cleaners and repair methods.
Request a written estimate, timeline, and warranty details.
Ask how they’ll protect baseboards and furniture, and get references or photos of recent jobs.
Confirm cleanup and disposal procedures.
FAQ
You probably have specific questions about vinegar, steam cleaning, bleach, deep-cleaning frequency, and disposable mops for vinyl plank floors.
I’ll answer whether vinegar or steam can harm the finish, if bleach is safe for mold, how often to deep clean, and whether Swiffers are okay.
Read on for clear, practical guidance.
Can I use vinegar to clean vinyl plank flooring?
Although vinegar’s a popular natural cleaner, you should use it cautiously on vinyl plank flooring because its acidity can dull or damage the protective finish over time; dilute white vinegar heavily (about 1/4 cup per gallon of water) and spot-test first.
Use a pH-neutral cleaner recommended by your flooring manufacturer for routine cleaning, and avoid undiluted vinegar or frequent use to preserve the finish.
Is steam cleaning safe for vinyl planks?
Can steam cleaners be used on vinyl plank flooring?
You should avoid high-heat steam on luxury vinyl planks—steam can warp planks, loosen adhesives, or damage the wear layer over time.
If your manufacturer explicitly approves low-heat steam, use caution: test a small area, keep moving, and use minimal moisture.
Otherwise, stick to damp mopping with manufacturer-recommended cleaners to protect the floor.
Will bleach remove mold on vinyl floors?
If mold has appeared on your vinyl plank floor, bleach can kill surface mold but won’t always remove stains or address mold growing beneath seams or under the planks.
You can use diluted bleach for visible surface patches, rinse thoroughly, and dry completely.
For persistent or hidden mold, remove affected planks or call a professional to prevent recurrence and protect indoor air quality.
How often should I deep clean vinyl plank floors?
Aim to deep clean your vinyl plank floors every 3 to 6 months, depending on traffic and household conditions.
If you have pets, kids, or heavy foot traffic, deep clean closer to every 3 months. For low-traffic homes, every 4–6 months is fine.
Spot-clean spills immediately and maintain weekly light cleaning to extend time between deep cleans.
Can I use a Swiffer or similar disposable mop on vinyl?
You can use a Swiffer or similar disposable mop on vinyl plank floors, but pick the right pad and technique to avoid damage.
Use dry or lightly damp disposable pads—never soaking wet—and choose nonabrasive, residue-free cleaning solutions. Change pads often to avoid grit scratches.
Test any wetting spray on an inconspicuous area first, and avoid steam or harsh chemicals that can lift or dull the planks.