How to Clean Laminate Floors Without Leaving a Film or Streaks
You can get streak-free laminate by sweeping first, then misting a 1:10 white vinegar‑to‑water mix or a pH‑neutral cleaner onto the floor and wiping with a barely damp microfiber mop, following the plank grain. Rinse and wring the mop often to avoid spreading residue, and buff each area immediately with a dry microfiber pad to remove any film. Avoid excess water or steam mops. Keep going for tips on stubborn film, tools, and prevention.
How to Clean Laminate Floors Without Leaving a Film or Streaks
Want a quick, no-fuss way to avoid film and streaks? Use a microfiber mop, a spray bottle with a 1:10 mix of white vinegar and water (or a commercial streak-free laminate cleaner), and dry each small section right after wiping.
Stick to light moisture and clean, lint-free tools for the best results.
Quick Answer Best Simple Method
Even if you’re short on time, you can clean laminate floors so they look streak-free: wipe loose dirt with a dry microfiber mop, then lightly mist a dilute cleaner and glide the mop in straight lines.
Don’t oversaturate or scrub hard. Rinse mop frequently and buff with a dry microfiber pad to remove any remaining film.
This is the simplest way to learn how to clean laminate floors without leaving a film.
One-sentence summary of tools and solution that work best
Use a dry microfiber mop, a spray bottle with a 1:10 mix of white vinegar and water (or a commercial laminate cleaner), and a second clean microfiber pad for buffing to remove streaks without overwetting.
You’ll also want a soft-bristled broom or vacuum with a hard-floor setting and a lint-free cloth for edges so you clean gently, control moisture, and finish with a streak-free shine.
Basic Understanding: Why Laminate Floors Get Film and Streaks
Laminate has a plasticized wear layer over a fiberboard core, so it reacts differently to cleaners than real wood and can trap residues on its surface.
You’ll often see film and streaks from leftover soap, wax buildup, mineral deposits in hard water, or too much moisture that doesn’t evaporate quickly.
Understanding those common causes helps you choose the right cleaner and amount of water to prevent streaking.
What laminate flooring is and why it reacts to cleaners
Flooring made from layers of compressed wood and a protective wear layer won’t absorb water like hardwood, but it still reacts to cleaners because that wear layer is a thin, sealed surface that shows residue and streaks when oils, soap scum, or improperly diluted solutions dry on it.
You should treat it like a sealed, nonporous surface: cleaners sit on top, so pH, solvent strength, and residue determine visible film.
Common causes of residue, film, and streaking
Because the wear layer sits on top instead of absorbing liquids, anything that dries on it will show up as streaks or a filmy haze.
You’ll notice residue from improper cleaners, overdiluted solutions, leftover detergent, and oily soils.
Poor rinsing, dirty mop heads, and uneven drying spread deposits.
Even fine dust and pet dander trap grime, making streaks more visible.
How water, soap, wax, and hard water contribute to streaks
If you use plain water, soap, wax, or hard-water-tainted water without the right technique, you’ll often leave a visible film: water can evaporate unevenly, depositing minerals; soap and cleaners can leave residue if overused or not rinsed; wax creates a cloudy buildup on laminate’s finish; hard water spots dry as streaks.
Use minimal, well-wrung damp mops and a clean microfiber to prevent deposits.
Essential Tools and Safe Cleaning Products
To clean laminate well, you’ll want the right tools—microfiber mops or pads, a flat mop or spray mop, a bucket, and a spray bottle for spot treatments.
Use mild, pH-neutral cleaners or simple DIY mixes like water with a little vinegar or dish soap, and avoid harsh, acidic, or alkaline solutions.
Never use wax, oil-based cleaners, abrasive pads, or steam mops, as they can damage the finish.
Recommended tools (mop types, microfiber, bucket, spray bottle)
Choose a few reliable tools and you’ll make laminate cleaning faster and safer: a flat microfiber mop for daily use, a slightly damp string or sponge mop for tougher spots, a spray bottle for spot treatment or diluted cleaner, and a sturdy bucket for rinsing or mixing solution.
- Microfiber flat mop
- Damp string or sponge mop
- Spray bottle (fine mist)
- Sturdy bucket with handle
- Soft microfiber cloths
Best cleaning solutions (commercial and DIY) pH considerations
Pick cleaners that protect the laminate’s wear layer and avoid excess water, and you’ll keep floors looking new longer.
Use neutral to slightly alkaline cleaners (pH 7–9) and dilute concentrated commercial products.
For DIY, mix water with a few drops of mild dish soap or white vinegar sparingly.
Avoid acidic or harsh alkaline solutions.
- pH 7–9 preferred
- Dilute concentrates
- Mild dish soap option
- Minimal vinegar
- Rinse sparingly
Products and ingredients to avoid (wax, oil-based cleaners, abrasive pads)
While it might seem harmless, avoid waxes, oil-based cleaners, and abrasive pads on laminate floors because they can damage the wear layer, leave slippery residues, or create scratches that are hard to fix.
Don’t use products that trap dirt or strip seals. Choose mild, pH-neutral cleaners and soft microfiber tools.
- Wax and polish
- Oil-based cleaners
- Steel wool/abrasive pads
- Bleach or harsh acids
- Steam cleaners
Step-by-Step Cleaning Method That Prevents Film and Streaks
Before you mop, make sure you sweep or vacuum and spot-treat any stuck-on debris so dirt doesn’t turn into streaks.
Mix the right cleaner at the proper dilution, then use a damp — not soaking — mop or a spray-mop and wring well to avoid film.
Finish by drying and gently buffing high-traffic areas and working carefully into corners, grout lines, and textured laminate for a streak-free shine.
Step 1 Preparation: sweep, vacuum, and spot-treat debris
Start by clearing loose dirt and grit so you won’t grind it into the laminate during mopping.
Sweep with a soft-bristle broom, then vacuum using a hard-floor setting or felt attachment to lift fine particles.
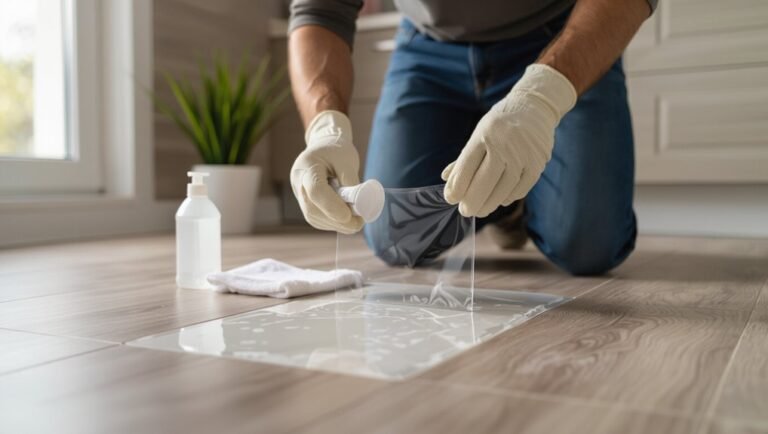
Inspect for sticky spots or gum and spot-treat with a damp microfiber cloth and gentle cleaner.
Let treated areas dry before you proceed to wet cleaning.
Step 2 Choose and mix the correct cleaner (dilution ratios for DIY solutions)
Since the wrong solution leaves a dull film, choose cleaners that dissolve grime without leaving residue and mix them at proper dilutions—typically 1/4 cup white vinegar to 1 gallon of warm water for a gentle DIY option, or follow label directions for commercial laminate cleaners (usually 1:10 to 1:20 concentrate-to-water).
Test any mix in an inconspicuous spot, label containers, and prepare only what you’ll use.
Step 3 Mopping technique: damp vs. wet, wringing, and spray-mopping
One key to streak-free laminate is controlling how much moisture you put down: use a barely damp mop or a spray-mop that delivers fine, evenly distributed mist rather than soaking the floor.
Wring microfiber mops thoroughly, work in small sections, and follow wood-grain lines. Change dirty water often, avoid abrasive scrubbing, and spot-spray for sticky areas to prevent residue buildup.
Step 4 Drying and buffing to eliminate remaining streaks
Pat the floor dry immediately after mopping and then buff with a clean, dry microfiber cloth or pad to lift any lingering streaks or film.
Work in small sections, using overlapping strokes with light pressure following the grain. Replace or shake the cloth when damp.
For stubborn spots, re-dampen a corner lightly, then dry and buff again until the surface looks uniformly matte and streak-free.
Step 5 Handling corners, grout lines, and textured laminate
Corners, grout lines, and textured laminate trap dirt and cleaning solution differently, so you’ll need to adjust your technique to avoid streaks and residue.
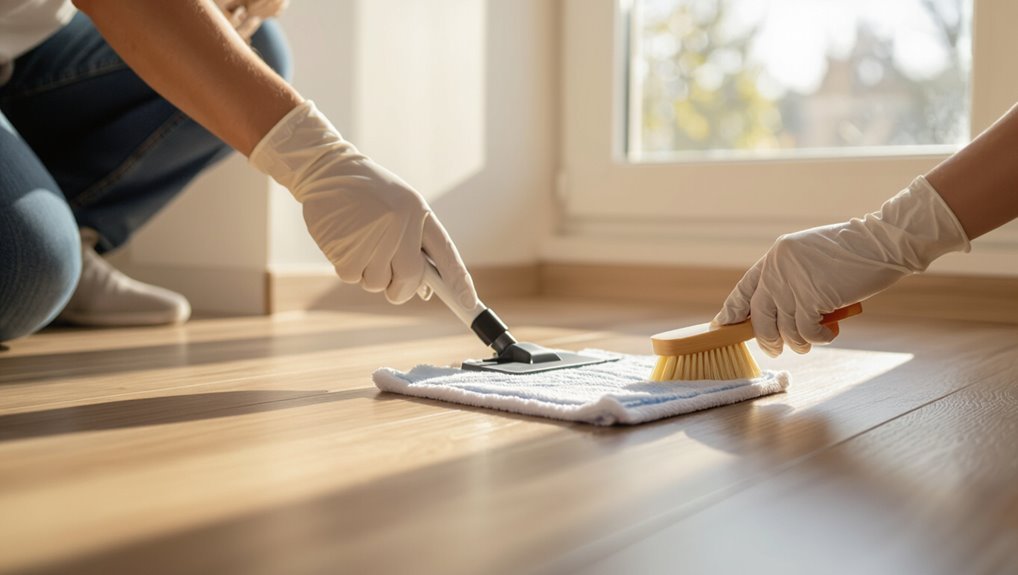
Use a soft-bristled brush or old toothbrush with diluted cleaner for grout, agitate gently, then blot with a microfiber cloth.
For textured laminate, follow the grain with a damp microfiber mop and dry immediately to prevent pooling and streaks.
Alternative Methods and Comparison
You’ll weigh options like steam cleaning—useful for grime but risky on warped or unsealed edges—and know when to avoid it.
Compare commercial laminate cleaners to simple homemade mixes for cost, residue, and scent.
For high-traffic spots, learn quick-touch spot-cleaning routines that keep floors looking fresh between full cleanings.
Steam cleaning pros, cons, and when to avoid
Steam cleaning can be tempting because it kills germs and lifts grime without chemical detergents, but it isn’t always the best choice for laminate floors; the high heat and moisture can warp seams, delaminate boards, or damage the protective wear layer if you’re not careful. You should weigh benefits, risks, and manufacturer guidance before using steam.
| Pros | Cons | When to Avoid |
|---|---|---|
| No chemicals | Moisture damage | Older laminate |
| Sanitizes | Heat risk | Unsealed edges |
| Quick clean | Warranty void | Warped areas |
Commercial laminate cleaners vs. homemade solutions
While commercial laminate cleaners promise convenience and formulations made for your floor, homemade solutions give you control over ingredients and cost. You’ll weigh ease, residue risk, fragrance, and price. Test any cleaner on a hidden spot first, and use microfiber mops with minimal moisture to prevent streaks.
| Option | Pros | Cons |
|---|---|---|
| Commercial | Easy, formulated | Can leave residue |
| Homemade | Cheap, customizable | Requires mixing |
| Vinegar mix | No film if diluted | Strong scent |
Quick-touch methods for high-traffic areas (spot-cleaning routines)
Because high-traffic spots demand fast fixes, keep a simple spot-cleaning kit handy so you can tackle spills and scuffs before they set in.
Use quick, gentle actions to avoid residue and abrasion.
- Microfiber cloths for blotting
- Spray bottle with diluted cleaner
- Soft-bristle brush for grit
- Cotton swabs for edges
- Dry towel to finish
Common Mistakes That Cause Film or Streaks and How to Fix Them
If your laminate looks cloudy or streaked, you’re probably using too much cleaner or water—watch for hazy patches and sticky spots and switch to a diluted solution.
Check your mop: a worn or dirty mop will leave streaks, so use a clean, microfiber flat mop and launder pads often.
For old product buildup or hard-water minerals, deep-clean with a manufacturer-safe stripping solution or a vinegar-water rinse and follow with thorough rinsing to remove residue.
Using too much cleaner or water symptoms and correction
When you pour on too much cleaner or leave water sitting on laminate, you’ll notice a filmy haze, streaks, or sticky residue as the floor dries.
Blot excess liquid immediately with a clean, dry towel. Rinse the area with a lightly damp mop and clear water, then dry thoroughly.
Use the manufacturer’s dilution instructions next time to prevent buildup and repeated residue.
Wrong mop type or dirty mop detection and remedy
Although a too-heavy cleaner can leave residue, the wrong mop or a grimy mop head will also streak and spread film across your laminate; check both type and cleanliness before you mop.
Use a microfiber flat mop or well-wrung sponge mop, avoid string mops that trap dirt, launder or replace mop heads regularly, and rinse frequently during cleaning to prevent redepositing grime.
Residue from previous products deep-clean and strip methods
Because previous cleaners and polishers can leave a thin, waxy film that attracts dirt and causes streaks, you’ll often need to deep-clean or strip the surface before regular mopping will look right.
Test a small area, then use a manufacturer-safe laminate stripper or diluted ammonia-free degreaser, scrub with a microfiber pad, rinse thoroughly, and dry.
Repeat until residue is gone.
Hard water mineral deposits removal techniques
Anyone who’s dealt with white, chalky rings on laminate knows hard water minerals can cling and leave streaks or a filmy haze.
You can dissolve deposits by mopping with a 1:1 vinegar and water solution, spot-treating with undiluted vinegar on stubborn areas, then rinsing with clean water.
Dry promptly with a microfiber cloth to prevent new mineral films forming.
Prevention and Best Practices for Long-Term Clear Finish
To keep your laminate clear and lasting, set a regular maintenance schedule and adopt small daily habits like sweeping and wiping spills immediately.
Use protective measures—door mats, felt pads on furniture, and a humidifier or dehumidifier—to prevent scratches and warping.
Once a season, follow a deep-clean checklist (vacuum edges, mop with manufacturer-approved cleaner, and inspect seals) to catch issues early.
Regular maintenance schedule and daily small habits
Keep a simple, consistent routine and your laminate floors will stay clear and damage-free for years.
- Sweep or vacuum daily to remove grit.
- Spot-clean spills immediately with a damp microfiber.
- Mop weekly with a manufacturer-approved cleaner.
- Dry floors promptly to prevent streaks.
- Inspect high-traffic areas monthly and address scuffs fast to maintain finish.
Protective measures (mats, felt pads, humidity control)
When you pair simple protections—door mats, felt pads under furniture, and consistent humidity control—with your cleaning routine, your laminate’s finish stays clear far longer.
Use absorbent mats at entrances, wipe spills promptly, and tack-proof chair casters.
Attach felt pads to legs and lift before moving heavy items.
Keep indoor humidity around 35–55% to prevent cupping or gaps and reduce wear.
Seasonal deep-clean checklist
Once each season, set aside an hour to do a focused deep clean that prevents buildup and preserves your laminate’s finish for years.
Clear furniture, vacuum edges and grooves, and mop with a manufacturer-safe cleaner.
Wipe baseboards, inspect for scratches or moisture damage, replace worn felt pads, and buff dry with a microfiber cloth.
Finish by checking humidity and door mats.
Troubleshooting Guide: Specific Problems and Solutions
If your floor has a dull film, follow a step-by-step recovery to restore the finish without damage.
For localized streaks, sticky spots, or soap build-up, try quick fixes and targeted removal methods before re-cleaning the area.
If you notice discoloration or structural damage, stop DIY repairs and consult a pro.
Dull film covering entire floor step-by-step recovery
Because a dull, hazy film usually comes from residue left by cleaners, hard water, or polish buildup, you’ll want to restore the finish with a focused, step-by-step approach that avoids damaging the laminate.
Start by dry dusting, mop with a 1:1 vinegar-water solution, rinse with clean water, and dry immediately.
If film remains, use a manufacturer-approved laminate cleaner and repeat rinsing, drying, and inspection.
Localized streaks after cleaning quick fixes
Frequently, streaks show up only in spots after you clean, and you can usually fix them quickly without redoing the whole floor.
Lightly mist affected areas with clean water, then wipe with a microfiber cloth in the plank direction. If streaks persist, buff dry with a second dry microfiber.
For stubborn marks, use a few drops of vinegar diluted in water and repeat.
Sticky spots or soap build-up targeted removal
Sticky spots and soap buildup are common after using too much cleaner or not rinsing properly, but you can remove them without stripping your floor’s finish.
Lightly dampen a microfiber cloth with warm water and a few drops of white vinegar, gently rub the tacky areas, then wipe dry.
For stubborn residue, use a diluted isopropyl alcohol spot-clean, then rinse and dry immediately.
Discoloration or damage concerns when to consult a pro
When should you call a professional?
If discoloration, warping, deep scratches, or bubbling appear after cleaning, stop DIY fixes. You might’ve moisture damage, adhesive failure, or finish loss needing specialist assessment.
A pro can diagnose cause, recommend repair or replacement, and prevent spread.
Call before attempting sanding, heavy chemicals, or refinishing to avoid worsening the problem.
Cost, Time, and Frequency Recommendations
For routine care, expect about 5–10 minutes daily for sweeping.
Plan for 15–20 minutes weekly for a damp mop, and 30–60 minutes for an occasional deep clean.
You can keep costs low by using a microfiber mop, a soft-bristle broom, and budget cleaners like diluted vinegar (or an inexpensive commercial laminate cleaner).
Below we’ll compare time estimates and list affordable tools and solutions so you can pick what fits your schedule and budget.
Estimated time per cleaning type (daily, weekly, deep)
Estimate about 5–15 minutes for daily touch-ups, 20–40 minutes for a weekly light clean, and 45–90 minutes for a thorough deep clean, depending on room size and clutter. You’ll plan shorter daily sweeps, longer weekly mopping, and occasional deep jobs for grout edges and stubborn spots. Pace yourself to avoid rushing and causing streaks.
| Task | Typical time |
|---|---|
| Daily sweep | 5–15 min |
| Weekly mop | 20–40 min |
| Deep clean | 45–90 min |
| Spot treatment | 5–20 min |
Budget-friendly product and tool suggestions
A few low-cost tools and homemade solutions will keep your laminate floors spotless without breaking the bank:
- Microfiber mop: $15–30, quick daily use.
- Spray bottle with water+vinegar: near free, weekly spot cleaning.
- Soft broom: $10, daily.
- Rubbing alcohol for sticky spots: inexpensive, occasional.
- Reusable mop pads: $8–20, replace every 6–12 months.
FAQ
You probably have a few quick questions about what’s safe and effective for laminate.
Can you use vinegar, how often should you deep-clean, will steam mops hurt the floor, what mop head avoids streaks, and how do you remove a persistent film from past cleaners?
Read on for clear, practical answers.
Can I use vinegar on laminate floors?
Wondering whether vinegar’s a safe, effective cleaner for your laminate floors?
You can use diluted white vinegar (about 1/4 cup per gallon of water) for spot cleaning or light mopping.
Avoid undiluted vinegar and excessive moisture—wring the mop well.
Test a small hidden area first to verify no dulling.
Finish with a dry microfiber cloth to prevent streaks.
How often should I deep-clean laminate to avoid buildup?
How often should you deep-clean laminate to prevent grime buildup?
Deep-clean every 1–3 months depending on traffic: monthly for high-traffic areas, every 2–3 months for average use, and seasonally for low-traffic rooms.
Spot-clean spills immediately and sweep or dry-mop daily or every few days.
Regular light maintenance reduces the need for frequent deep-cleaning and preserves the finish.
Will steam mops damage my laminate?
Although steam mops can seem like a quick way to sanitize floors, they can damage laminate by forcing moisture into the seams and warping the core; you should avoid using them unless the manufacturer explicitly says the floor is steam-mop safe.
If you do use one, keep steam low, limit exposure, wipe up moisture immediately, and test a hidden area first to prevent irreversible damage.
What’s the best mop head for streak-free cleaning?
A microfiber flat mop head is your best bet for streak-free laminate cleaning because its fine fibers lift dirt and hold moisture without leaving residue.
Choose a low-lint, tightly woven pad and pair it with plain water or a manufacturer‑approved cleaner to avoid streaks.
Swap pads when dirty, wring until damp, work in straight lines, and rinse pads often to keep results spotless.
How do I remove a persistent film left by previous cleaners?
Why does the floor feel dull or sticky even after you’ve cleaned it?
Old cleaners leave residue you can remove by rinsing with warm water, then mopping with a solution of white vinegar (¼ cup) in a gallon of warm water.
For stubborn film, use a microfiber mop and repeat, or scrub gently with a soft cloth.
Rinse thoroughly and dry to prevent streaks.