How to Retile a Bathroom Floor Without Hiring a Contractor
You can retile a bathroom floor yourself if you’ve got basic DIY skills, patience, and the right tools. Start by inspecting and repairing the subfloor, install cement backer board, apply a waterproof membrane in wet areas, then spread thinset, set tiles with spacers, let them cure, and grout. Expect 2–4 days for a small bathroom and $200–$1,200 in materials. Follow clear steps and tips below to avoid common mistakes and get professional-looking results.
Quick Answer Can You Retile a Bathroom Floor Without a Contractor?
Yes—you can retile a bathroom floor yourself if you’re reasonably handy, but it takes careful prep and patience.
Expect a weekend to a week of work depending on room size and problems, and budget roughly $200–$1,000 for materials for a typical small to medium bathroom.
The job ranges from moderate to advanced skill, so plan on learning a few techniques or hiring help for tricky subfloor or waterproofing issues.
Short summary of feasibility, time, cost range, and skill level
If you’re reasonably handy, retiling a small to medium bathroom is definitely doable without a contractor: expect 1–3 days for prep and demolition, 1–2 days for setting and grouting tile, plus 24–48 hours of curing time.
You’ll learn how to retile a bathroom floor; costs range $200–$1,200 depending on tile and tools.
Skill: basic DIY to intermediate.
- Time
- Cost
- Skill
Basic Understanding What Retiling Involves and Why Do It Yourself
You’ll start by getting familiar with key materials—underlayment, thinset, grout, tile spacers, and waterproofing—since each affects durability and method.
You can handle retiling yourself for small, level floors and simple layouts, saving money and learning a skill.
Hire a pro if the subfloor is damaged, plumbing or drain moves are needed, or the layout is complex.
Key terms: underlayment, thinset, grout, tile spacers, waterproofing
Before you start tearing up the old floor, get familiar with a few key terms you’ll use the whole project:
- Underlayment: the stable, often water-resistant layer beneath tiles;
- Thinset: the cement adhesive you trowel on.
- Grout: fills joints and seals edges;
- Waterproofing: membrane or coating that prevents moisture damage.
- Tile spacers: guarantee consistent gaps for grout and alignment.
When DIY is appropriate vs when to hire a pro
Those basic terms set the stage for deciding whether to tackle retiling yourself or call in a pro. You should DIY if you have basic tools, time, and a simple, level subfloor.
Hire a pro for structural issues, complex layouts, or extensive waterproofing. Be realistic about skills, safety, and warranty needs.
- DIY: simple, small jobs
- Pro: structural/wet areas
- Hybrid: prep yourself
Tools and Materials You Need Before Starting
Before you start, gather the essential tools for removing old tile and installing new—sledge or pry bar, hammer, tile cutter or wet saw, notched trowel, and spacers.
Make a materials checklist with estimated quantities for tile, thinset mortar, grout, and backer board based on your square footage.
Don’t forget safety gear (gloves, eye protection, dust mask) and floor protection to keep the site safe and clean.
Essential tools for tearing out and installing tile
A sturdy hammer and a clear plan will get you through the demolition and installation phases. You’ll need safe, effective tools to remove old tile, prep the subfloor, set new tile, and finish grout lines.
Bring quality hand and power tools, protective gear, and measuring aids so work’s accurate and fast.
- Pry bar, hammer, chisel
- Wet saw or tile cutter
- Trowels, spacers, grout float
Materials checklist and estimated quantities (tile, mortar, grout, backer board)
When you’re planning your retiling project, gather exact quantities of tile, thinset mortar, grout, and backer board so you don’t stop mid-job to run to the store. Measure floor area, add 10% waste, calculate thinset by trowel size, grout by joint width, and backer board sheets. Plan deliveries and stash spares.
| Item | Quantity | Emotion |
|---|---|---|
| Tile | ✓ | Calm |
| Thinset | ✓ | Confident |
| Grout | ✓ | Ready |
| Backer board | ✓ | Secure |
Safety gear and site protection
1 piece of protective gear you’ll want within arm’s reach is a good pair of safety goggles — you’ll also need a respirator, knee pads, work gloves, and sturdy shoes, plus tarps and rosin paper to shield fixtures and adjoining rooms from dust and dropped tile.
You’ll set up barriers, ventilate, and keep a tidy work zone to prevent trips, inhalation, and damage.
- Goggles and respirator
- Knee pads and gloves
- Tarps, rosin paper, and tape
Preparation Inspecting and Preparing the Existing Floor
Before you lay new tile, inspect the subfloor for rot, soft spots, or sagging joists so you can spot structural issues early.
Remove old tile, thinset, and threshold strips carefully with the right tools to avoid damaging the subfloor.
If the subfloor or joists are compromised, repair or replace them before tiling to guarantee a stable, long-lasting floor.
How to assess subfloor condition and structural issues
A solid subfloor is the foundation of any lasting tile job, so you’ll need to check it carefully for rot, soft spots, and movement before you lay a single tile.
Inspect joists from below, walk the floor to find bounce, and probe suspect areas with a screwdriver. Repair or replace damaged plywood or framing before proceeding.
- Check for rot and moisture.
- Test for deflection.
- Verify secure fasteners.
Removing old tile, adhesive, and transition strips safely
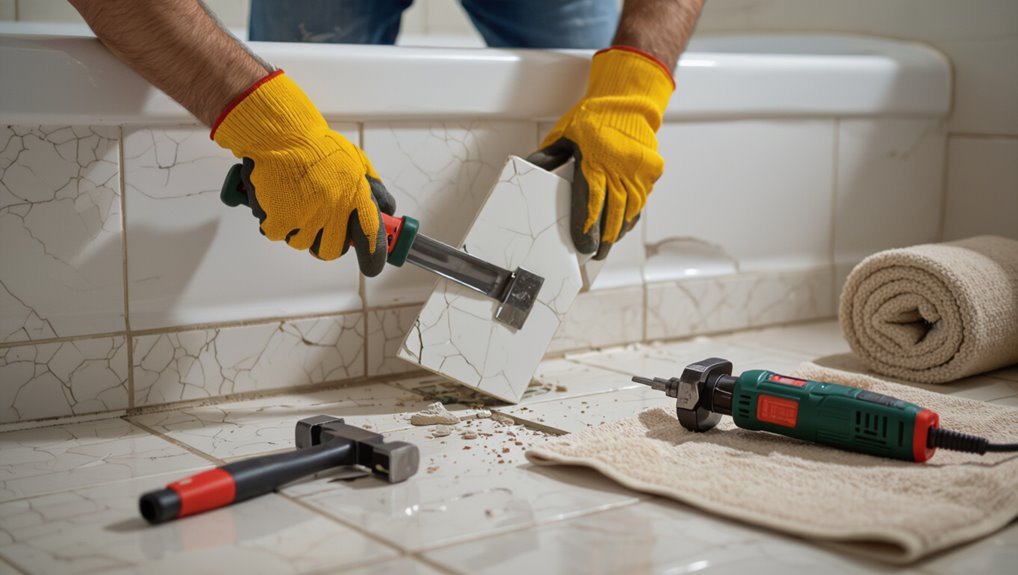
Start by clearing the area and protecting nearby surfaces. Then plan your removal method based on the tile type and substrate.
Wear eye, hand, and respiratory protection.
Score grout, pry tiles with a chisel or oscillating tool, and remove adhesive with a scraper or heat.
Dispose debris safely and vacuum dust before proceeding.
- Tools and PPE
- Tile and grout removal
- Adhesive cleanup
When to repair or replace subfloor / joists
Once you’ve cleared tiles, adhesive, and dust, inspect the subfloor and joists for sagging, rot, or water damage—these problems will determine whether you can repair or must replace structural members.
- Replace: widespread rot, soft spots, or joist failures.
- Repair: isolated damaged boards or small rot sections with sistering or patching.
- Reinforce: sagging without decay—sister joists, add blocking, and level before tiling.
Step-by-Step Retiling Process
Now you’ll follow a clear sequence: plan your tile layout and quantities, install the right underlayment or cement board, and add waterproofing where needed.
Then mix and apply thinset mortar correctly before setting tiles, keeping straight lines and using spacers.
These steps will keep your floor level, sealed, and ready for grouting.
Step 1 Plan layout and calculate tile quantity
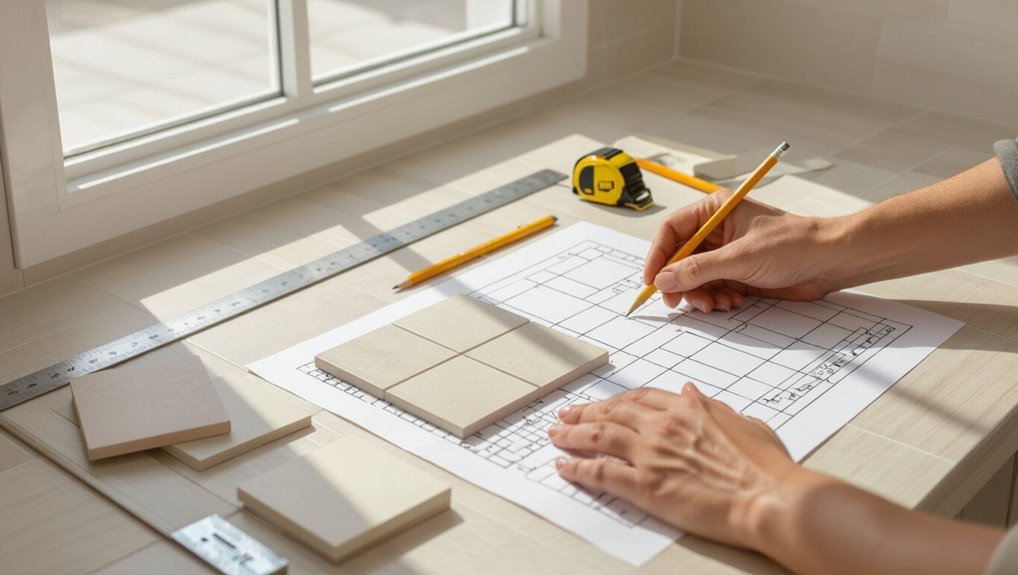
Before you lift a single tile, map out the layout and calculate how many tiles you’ll need so you can avoid costly mistakes and awkward cuts.
Measure room dimensions, note fixtures and door swings, and choose a starting point (center or straight edge).
Sketch layout, include grout lines, and add 10–15% extra for cuts and breakage.
- Measure and sketch
- Choose start line
- Add waste allowance
Step 2 Install appropriate underlayment or cement backer board
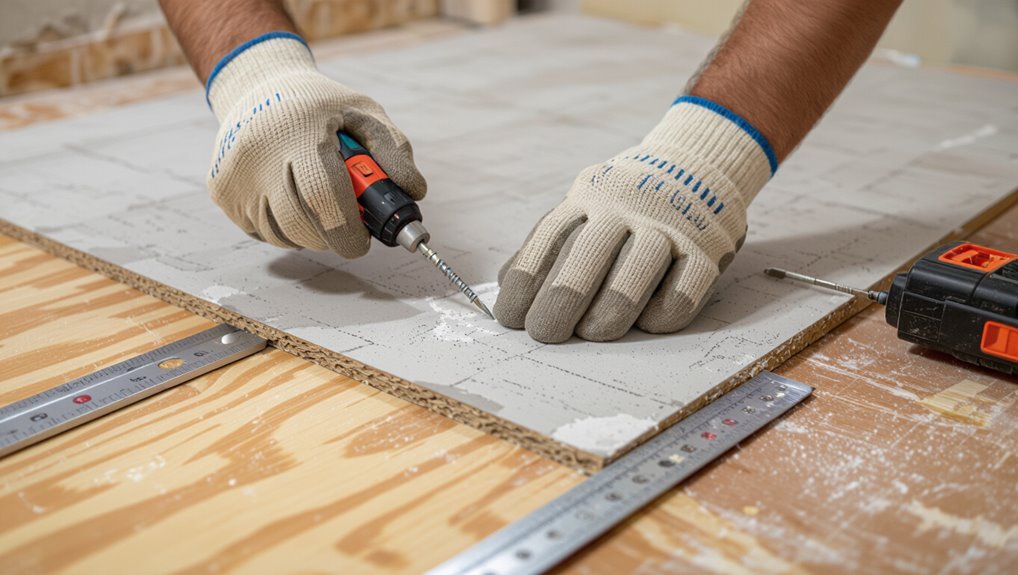
2. You’ll remove old flooring, clean the subfloor, and check for level and damage before installing cement backer board or an appropriate underlayment.
Cut boards to fit, stagger seams, and fasten with corrosion-resistant screws.
Seal joints with thinset and alkali-resistant tape if required.
Follow manufacturer spacing and screw patterns for a stable, tile-ready surface.
- Prep subfloor
- Cut and fit boards
- Fasten and tape seams
Step 3 Apply waterproofing and membrane for wet areas
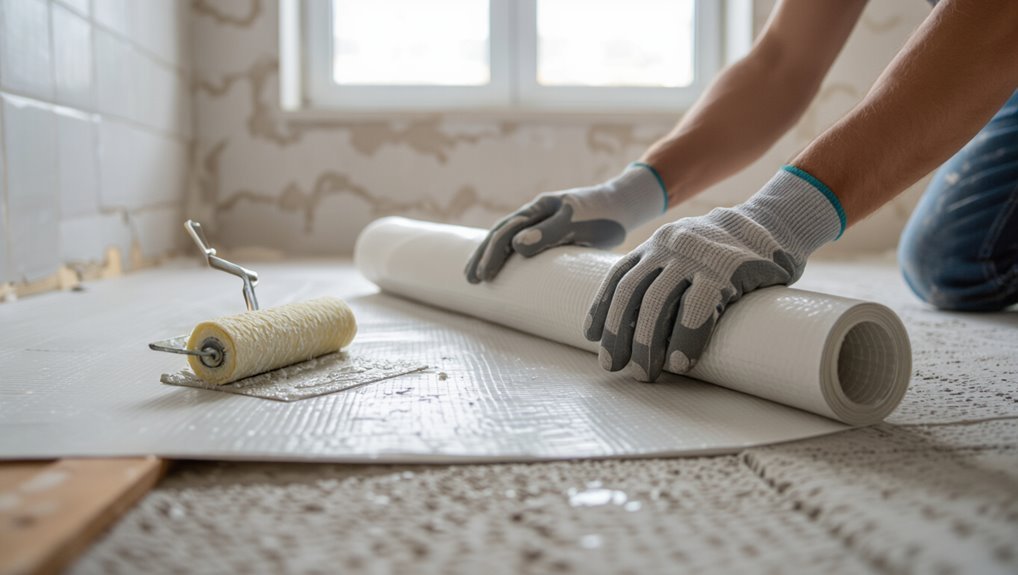
Waterproofing is essential in wet areas—so you’ll apply a continuous membrane over the backer board and seams to keep moisture from reaching the subfloor and framing.
Clean, prime, and let dry. Roll or brush the membrane, covering corners and penetrations. Seal with waterproof tape at joints.
- Prime surfaces
- Apply membrane evenly
- Reinforce seams and penetrations
Step 4 Mix and apply thinset mortar correctly
Mix the thinset to a creamy, lump-free consistency and apply it promptly so it stays workable—this guarantees good bond and consistent coverage across the backer board.
You should trowel in one direction, comb with the correct notch size, and press tiles into fresh mortar for full contact. Clean excess before it skins over.
- Choose correct thinset and notch size
- Comb consistently
- Remove excess promptly
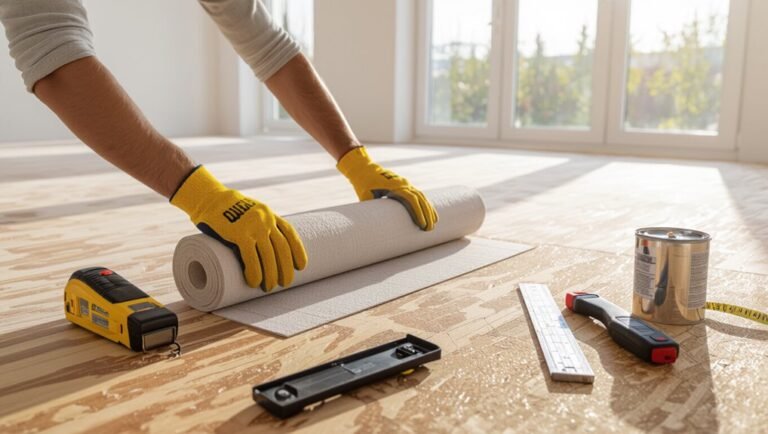
Step 5 Set tiles, maintain straight lines, and use spacers
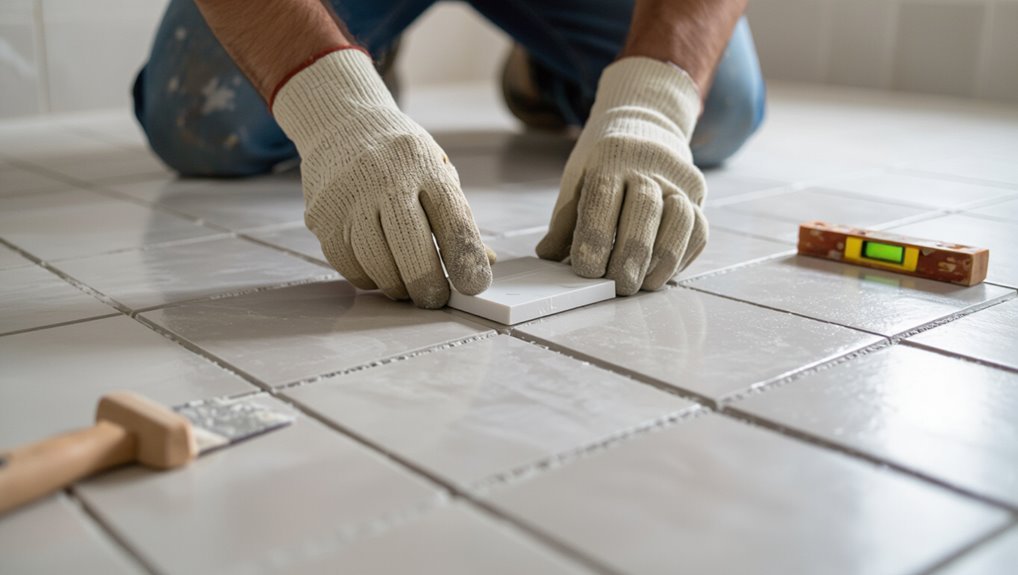
Begin laying tiles from your established reference lines, working outward so you can keep rows straight and spot any alignment issues early.
Press each tile into thinset, twist slightly, and tap with a rubber mallet for full contact. Use consistent spacers at every corner to maintain grout joints.
- Check alignment frequently
- Adjust before thinset skins over
- Keep spacers flush
Step 6 Allow proper cure time and remove spacers
Once your tiles are set and aligned, let the thinset cure undisturbed so it reaches full strength before you remove spacers or walk on the floor.
Wait the manufacturer’s recommended time—usually 24–48 hours—keep traffic off, and protect from moisture.
Remove spacers gently, checking for loose tiles. If any shift, press tiles back and allow more cure time.
- Wait recommended cure time
- Protect area from traffic/moisture
- Remove spacers gently and inspect
Step 7 Grouting: choose type, apply, clean, and seal
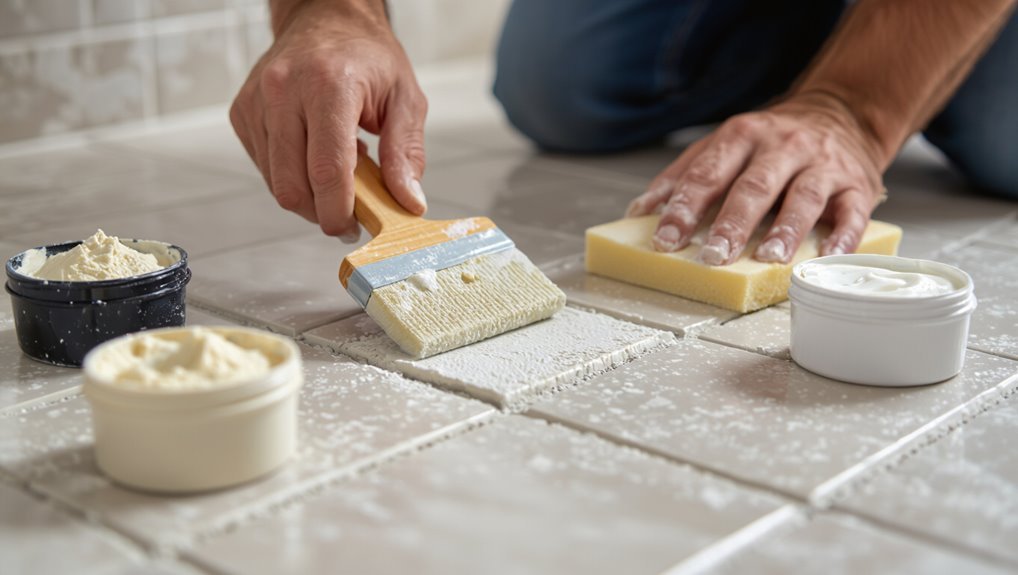
Now you’ll grout: pick the right grout for your tile and joint width (sanded for wider joints, unsanded for narrow or delicate surfaces).
Mix per instructions, spread with a rubber float at 45°, force grout into joints, then wipe excess with a damp sponge.
After cure, buff haze and apply a penetrating sealer.
- Mix & apply
- Clean & shape joints
- Seal after cure
Step 8 Install trim, transitions, and finish plumbing fixtures
1 final phase ties the job together: installing trim, connections, and your finished plumbing fixtures.
You’ll fit baseboard or quarter-round, add joining strips at thresholds, and reconnect sinks and toilets.
Check clearances, caulk edges, and test for leaks.
Finish hardware and cover plates make the floor look professional.
- Trim and joinings
- Reconnect and seal fixtures
- Final inspection and cleanup
Timeframe and Cost Breakdown
You can usually finish a standard bathroom retiling in 2–4 days, accounting for demolition, underlayment, tile setting, and grout curing.
Costs vary widely based on materials and labor—expect economy jobs around $500–$1,200, mid-range $1,200–$3,000, and premium $3,000+ for high-end tile and professional installers.
Next, we’ll break down the factors that drive time and price so you can pick the right plan for your budget.
Typical project timeline for a standard bathroom
A typical bathroom retile takes about 2–4 days for a standard 5’×8′ room when you include demo, substrate prep, tile installation, grouting, and drying time; you’ll work in stages to avoid rushed finishes.
Plan tasks, allow full cure times, and schedule time for cleanup.
- Day 1: demo and substrate prep
- Day 2: layout and tile set
- Day 3–4: grout, cure, and final cleanup
Cost factors and sample budget scenarios (economy, mid-range, premium)
Because materials, labor, scope, and unforeseen issues all affect the final bill, it’s smart to break costs into clear components so you can plan an accurate budget and timeline. Estimate: economy $200–$600, mid-range $600–$1,500, premium $1,500+. Allocate for tile, underlayment, adhesive, tools, and contingency. Choose based on look, durability, and patience.
| Tier | Cost | Feeling |
|---|---|---|
| Economy | $200–$600 | Relief |
| Mid | $600–$1,500 | Confidence |
Common Problems and How to Fix Them
You’ll run into a few common issues like uneven tiles and lippage, but you can fix them with proper leveling compounds and adjustment techniques.
Cracked tiles or grout often point to substrate movement or improper adhesive, and replacing affected pieces or regrouting usually remedies the problem.
Watch for waterproofing failures by testing for soft spots or stains, then repair membranes or sealant and trace leaks before retiling.
Uneven tiles, lippage, and leveling solutions
When tiles sit at different heights they create lippage—those annoying ridges you can feel underfoot—so you’ll want to address unevenness before grouting to guarantee a safe, long-lasting floor.
Use these fixes:
- Remove high tiles, clean substrate, and re-bed with fresh thinset using a notched trowel.
- Use tile leveling clips or wedges during setting.
- Fill low spots with patching compound and feather to adjacent tiles.
Cracking tiles or grout causes and remedies
If tiles or grout start cracking, it’s usually a sign of movement, improper substrate prep, or incompatible materials—and you should tackle the cause before patching the damage.
- Remove cracked tiles, inspect and repair substrate, use appropriate thinset and backerboard.
- Replace grout with flexible, polymer-modified grout; control joints where movement occurs.
- Reinstall tiles with correct spacing, proper adhesive coverage, and allow full cure before use.
Waterproofing failures and how to detect/fix leaks
Cracking tiles or grout often lets water find its way into the substrate, so it’s important to check waterproofing whenever you repair cracked areas.
Inspect for soft spots, mold, or stains; perform a flood test.
Repair by replacing damaged membrane, resealing seams, and using proper thinset and waterproofing before retiling.
- Inspect
- Test
- Repair
Mistakes to Avoid When Retiling a Bathroom Floor
Don’t rush substrate prep—skipping leveling or patching will bite you later.
Make sure you use proper waterproofing and the right thinset and grout for your tile type.
Plan a smart layout to minimize awkward cuts and material waste.
Rushing substrate prep, improper waterproofing, wrong thinset/grout
Because you’re enthusiastic to see new tile, it’s tempting to skim substrate prep and waterproofing—but cutting corners here invites costly failures.
You need a solid, level substrate, proper membrane or sealant, and manufacturer-matched thinset and grout.
- Check and repair substrate; verify flatness and rigidity.
- Install proper waterproofing at seams and junctions.
- Use recommended thinset/grout and correct mixing/application.
Poor layout choices that increase cuts and waste
Once your substrate and waterproofing are solid, bad layout choices can still wreck the job by creating excess tile cuts, wasted material, and a lop-sided look.
Plan tile lines from the room’s focal point, center main runs, and dry-fit before cutting. Avoid tiny edge slivers and off-center patterns.
- Align from center
- Dry-fit full tiles
- Shift to minimize slivers
Best Practices and Pro Tips for a Lasting Tile Floor
Plan your layout to hide small cuts and keep symmetry, and you’ll save time and get a cleaner look.
Follow manufacturer guidelines for mixing and curing adhesives and grout, and work within recommended temperature and humidity ranges to prevent failures.
Seal grout, clean spills promptly, and establish a regular maintenance routine to keep tiles looking and performing their best.
Layout strategies to minimize visible cuts and ensure symmetry
When you lay out tiles with symmetry and intentional starting lines, you’ll hide awkward cuts and give the room a balanced, professional look.
Plan a centered focal line, dry-fit rows, and shift joints to avoid tiny edge slivers. Use spacers and chalk lines to maintain alignment.
Start from the most visible wall or doorway and work outward.
- Center focal line
- Dry-fit rows
- Shift joints
Mixing, curing, and environmental considerations (temperature/humidity)
Although mixing and curing are straightforward tasks, getting them right depends on attention to ratios, working times, and the room’s temperature and humidity.
You’ll measure water precisely, mix only what you’ll use before set, and control conditions for full cure.
Follow these steps:
- Mix: use manufacturer ratio, avoid overwater.
- Cure: protect from foot traffic per cure time.
- Environment: keep 50–70°F, moderate humidity.
Maintenance tips to keep grout and tile in good condition
Because grout and tile last best with a little regular care, set up a simple routine you can stick to:
- Sweep or vacuum daily and mop weekly with pH-neutral cleaner to avoid residue and etching.
- Reseal grout annually (or per manufacturer) and touch damaged spots immediately to prevent moisture penetration.
- Use soft brushes for grout, avoid harsh chemicals, and place mats at entries to reduce wear.
Tools and Materials Comparison Cheat Sheet
Now that you’ve got the pro tips, let’s compare the key materials you’ll choose: mortar types, grout types, and underlayment options.
You’ll learn which mortar suits your tile and substrate, which grout balances appearance and durability, and which underlayment prevents movement and moisture problems.
Use this cheat sheet to pick the right combos for a long-lasting floor.
Mortar types, grout types, and underlayment options compared
When you pick mortar, grout, and underlayment, you’re choosing the foundation for tile performance and longevity, so it’s worth matching each product to your bathroom’s moisture, traffic, and subfloor conditions; the cheat sheet that follows will strip down options to the practical pros, cons, and best-use cases so you can decide quickly and confidently.
| Item | Best Use |
|---|---|
| Thinset | Most tiles, wet areas |
| Epoxy grout | High durability, stains |
| Cement board | Wet subfloors, stability |
When to Call a Professional Red Flags and Complex Scenarios
If you find structural rot, extensive plumbing or electrical changes, or you’re planning to use very large or heavy tile, call a professional.
These issues can compromise safety and require specialized repairs or supports you may not be equipped to handle.
Don’t gamble on shortcuts—getting expert help can save time, money, and future headaches.
Structural rot, extensive plumbing/electrical changes, large/heavy tile
Because structural rot, major plumbing or electrical relocations, and installing very large or heavy tile all affect more than the surface, you should consider calling a professional when these issues appear.
You’ll face safety, structural, and code challenges beyond DIY skill.
Consider hiring pros for:
- Subfloor rot or joist damage
- Rerouting plumbing or moving wiring
- Setting very large/extra-heavy tile systems
FAQ Common Questions About DIY Bathroom Retiling
You’ll want quick, practical answers to common concerns like when the bathroom’s usable, whether you can tile over existing ceramic, and which tile size suits a small space.
Ask about moisture protection and whether a vapor barrier’s needed, plus how long thinset and grout must cure before heavy use.
I’ll cover those points so you can plan timing, materials, and proper curing.
How long does it take before you can use the bathroom after retiling?
Wondering how long before you can use the bathroom after retiling?
You’ll typically wait 24–48 hours for thinset to set and 24–72 hours more for grout to cure enough for light use.
Full grout strength and sealant cure can take up to 7 days.
Avoid heavy traffic, showers, or rugs until grout and sealer fully cure to prevent damage.
Can I lay new tile directly over ceramic tile?
Can you lay new tile directly over existing ceramic? Yes, in many cases you can, but inspect the substrate: tiles must be solid, level, and well-bonded.
Clean, scuff, and use a suitable thinset or bonding membrane. Address height changes and door clearances.
Remove loose, cracked, or uneven tiles first. Follow manufacturer recommendations for adhesion and load limits to guarantee a durable, safe floor.
What tile size is best for small bathrooms?
Which tile size works best in a small bathroom depends on the look and layout you want: smaller tiles like 2×2 or 4×4 inch mosaics offer more grout lines, improving slip resistance and conforming to slopes.
In contrast, larger tiles (12×12 or 24×24) create a more open, modern feel with fewer grout lines.
Choose grout color and pattern to enhance perceived space.
Do I need a vapor barrier for a bathroom floor?
Do you need a vapor barrier under your bathroom floor?
Usually you don’t need one under tile over cement backerboard or concrete slab; these substrates are moisture-tolerant.
Use a vapor barrier when installing over plywood subfloor in moisture-prone areas or if local code requires it.
Instead consider waterproofing membranes, proper underlayment, and sealing joints to prevent moisture damage and mold.
How long should grout and thinset cure before heavy use?
Most tile jobs need at least 24–48 hours for thinset to set enough for light foot traffic and 72 hours for grout to reach a safe, hard cure before heavy use.
Temperatures, humidity, and product specs change cure times, so follow manufacturer directions.
Don’t move fixtures, heavy furniture, or rugs onto the floor until full cure.
Test a small area gently before normal use.
Visual Guides and Templates
You’ll find layout template examples for common bathroom shapes to help plan where full and cut tiles will sit.
Use cutting patterns and tile placement diagrams to mark exact cuts and visualize grout lines before you start.
These visual guides save time and reduce mistakes during installation.
Layout template examples for common bathroom shapes

Whether your bathroom is a compact powder room, an L-shaped ensuite, or a long narrow galley, clear layout templates make planning tile runs, cuts, and focal lines far easier.
Use simple scaled sketches: square grid for small rooms, split-template for L-shapes showing two reference axes, and center-run or brick-bond guides for galley layouts.
Label dimensions, fixtures, and threshold lines.
Cutting patterns and tile placement diagrams
When you’re ready to translate your layout into real cuts, clear cutting patterns and placement diagrams keep mistakes—and wasted tile—to a minimum.
You’ll draft full-scale patterns for edges, corners, and fixtures, mark cut lines and tile orientation, and note grout widths.
Use tracing paper or cardboard templates, label each piece, and test-fit before cutting to guarantee consistent joints and a professional finish.