How to Clean Tile Floors Without Leaving Streaks or Residue Behind
You can get streak-free tile by sweeping first, using a pH-neutral cleaner or diluted white vinegar in warm water, and mopping with a clean microfiber pad in small W-pattern sections. Rinse the mop often, change rinse water when it’s dirty, and remove excess water with a rubber squeegee or dry towel so tiles dry clear. Guarantee good airflow to speed drying and protect grout with regular maintenance, and keep going to learn specific tips for different tile types and tough residue.
How to Clean Tile Floors Without Leaving Streaks or Residue (Quick Answer & Hook)
Want a quick routine that leaves tile spotless every time? Start with a dry sweep, a mild cleaner you dilute correctly, and a microfiber mop to avoid streaks and residue.
That matters because streak-free cleaning preserves your tile’s look and prevents grime buildup that can damage grout over time.
Quick Answer The simple routine that works every time
Quick routine: sweep or vacuum thoroughly, mop with a mild, pH-neutral cleaner in warm water, and rinse with clean water to avoid soap film—dry or buff with a microfiber pad to prevent streaks.
To learn how to clean tile floors without leaving residue, work in small sections, change rinse water often, wring the mop well, and finish by drying immediately so tiles stay clear and residue-free.
Why this matters streaks, residue, and long-term tile health
One clear reason to avoid streaks and residue is they don’t just look bad—they trap dirt, dull grout, and shorten the life of your finish.
If you don’t remove buildup, bacteria and grime accumulate, making cleaning harder and increasing wear.
Basic Understanding: Tile Types, Grout, and Why Streaks Happen
Different tiles—ceramic, porcelain, natural stone, and vinyl—react differently to cleaners, so you’ll want to match your product to the material.
Grout can be porous or sealed and often needs gentler or specialized treatments to avoid damage.
Streaks and residue usually come from hard water, soap buildup, using the wrong product, or letting floors dry improperly, and knowing these causes helps you prevent them.
Common tile materials and how they react to cleaners
Although tile looks uniform at a glance, materials like ceramic, porcelain, natural stone, and vinyl each react differently to cleaners, and knowing which you have will prevent damage and streaks. You’ll choose pH-safe cleaners for stone, milder solutions for vinyl, and stronger cleaners for glazed ceramic sparingly to avoid residue.
| Tile | Cleaner | Feeling |
|---|---|---|
| Ceramic | Mild | Relief |
| Porcelain | Stronger | Confidence |
| Stone | pH-neutral | Caution |
| Vinyl | Gentle | Ease |
Grout differences and sensitivity
Because grout absorbs and reacts to cleaners more readily than tile, you need to treat it as a separate material when cleaning.
Test cleaners in an inconspicuous spot, dilute acids and alkalines, and avoid prolonged contact.
Use a soft brush, blot spills promptly, and consider sealing porous grout to reduce staining.
Adjust technique and product choice based on grout color and composition.
Causes of streaks and residue (hard water, soap build-up, wrong products, drying errors)
Grout can hide problems you’ll see on tile surfaces, and understanding what leaves streaks and residue helps you fix them fast.
Hard water deposits mineral films, soap and detergent build-up leaves cloudy films, and wrong cleaners or waxes react poorly with sealers.
Letting floors air-dry or using dirty mop water also causes streaks.
Use appropriate cleaners, rinse, and dry with a clean microfiber.
Tools and Cleaning Agents You Need
You’ll want a few essential tools—microfiber mops, squeegees, and stiff brushes—for loosening dirt and wiping up without scratching.
Use neutral pH cleaners or a diluted vinegar solution for most tiles, and consider gentle commercial products when needed.
Avoid waxes, oil-based cleaners, and ammonia because they leave residue, damage grout, or dull the finish.
Essential tools (mops, microfiber, squeegees, brushes)
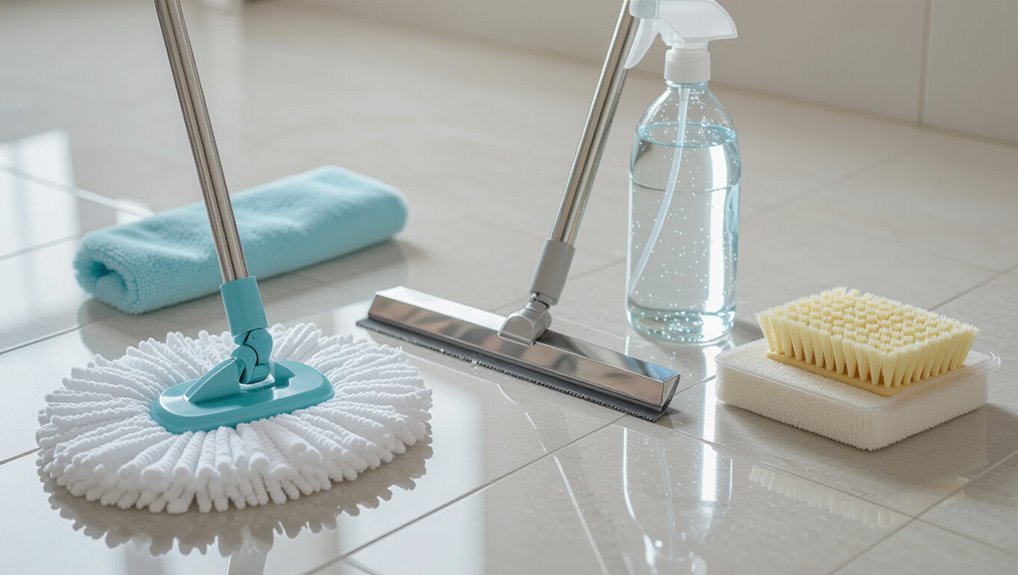
Good tools make tile cleaning faster and more effective, so gather a few basics: a quality mop (flat microfiber or a spin mop), a microfiber cloth or pad for scrubbing and drying, a rubber squeegee for removing excess water on large porous tiles, and a selection of brushes—soft-bristled for sealed tile and stiffer grout brushes for dirty joints.
- Microfiber mop
- Dry microfiber cloth
- Rubber squeegee
- Grout and soft brushes
Recommended cleaning agents (neutral pH cleaners, vinegar, commercial products)
When choosing cleaners, pick products that match your tile type and finish to avoid damage and cut cleaning time.
You’ll want gentle, effective options that rinse clear and won’t dull grout.
- Neutral pH floor cleaner — safe for most tiles.
- Diluted white vinegar — great for ceramic/porcelain, not stone.
- Mild dish soap solution for spot cleaning.
- Tile-specific commercial cleaner for tough grime.
Products to avoid and why (wax, oil-based cleaners, ammonia)
After picking the right cleaner for your tile, also learn what to avoid so you don’t damage surfaces or make future cleaning harder.
Don’t use products that leave film, etch, or attract dirt.
- Wax — gums up grout and tiles.
- Oil-based cleaners — trap grime, cause buildup.
- Ammonia — dulls sealants and can etch certain tiles.
- Bleach concentrates — weaken grout and discolor tiles.
Step-by-Step Cleaning Process (Best Practice Routine)
Start by preparing the area: sweep or vacuum thoroughly and do a spot test on your cleaner.
Pre-treat stains and grout, then mix the cleaning solution at the right ratio and temperature.
Mop using a microfiber and W-pattern with minimal water, then rinse once or twice to remove any residue.
Step 1 Preparation: sweep, vacuum, and spot test
Before you mop, clear loose debris by sweeping or vacuuming thoroughly and do a quick spot test with your cleaner on an inconspicuous tile to make sure it won’t damage the finish.
Remove furniture and rugs, sweep corners and edges, then vacuum with a hard-floor setting.
If the spot test’s fine, proceed; if not, choose a gentler product.
Step 2 Pre-treating stains and grout lines

1. You’ll tackle stains and grout before mopping. Apply a pH-neutral or mild bleach-free grout cleaner to stained areas, let it sit per label instructions, then scrub grout lines with a stiff brush.
For grease or organic spots, use a small amount of dish soap or enzyme cleaner. Rinse treated zones thoroughly and blot dry so the floor’s ready for general cleaning.
Step 3 Mixing the right cleaning solution (ratios and water temperature)
Now that stained spots and grout are pre-treated and rinsed, you’ll mix the cleaning solution that will actually mop the floor.
Use warm—not hot—water to dissolve detergent without warping grout.
For tile, mix a mild pH-neutral cleaner at the manufacturer’s ratio (usually 1–2 tablespoons per gallon).
Avoid concentrated bleach or vinegar mixes that can dull grout or finish.
Step 4 Mopping technique to avoid streaks (microfiber method, W-pattern, minimal water)
Start by fitting a flat microfiber mop head and dampening it—don’t soak it—so the pad’s just tidy, not dripping; then work in overlapping W-patterns across each tile to lift dirt without leaving streaks, rinsing or swapping pads as they collect grime so you always mop with a clean, barely-wet surface.
Move steadily, avoid scrubbing in circles, and change direction on edges for even coverage.
Step 5 Rinsing properly to remove residue (single vs. double rinse)
After mopping, you’ll need to rinse to remove any leftover cleaning solution that can attract dirt or leave a film; whether you use a single or double rinse depends on your cleaner’s strength and how dirty the floor was.
Use clean water with a fresh mop or bucket: single rinse for mild, neutral cleaners; double rinse for concentrated solutions or heavily soiled tile to guarantee no residue remains.
Step 6 Drying and buffing for a streak-free finish (squeegee, towel, airflow)
1. After rinsing, pull a rubber squeegee toward you in overlapping passes to remove excess water.
Then dry with a clean microfiber or cotton towel, working small sections and changing towels as they saturate.
Finish with good airflow—open windows, run a fan, or use a dehumidifier—to speed evaporation and prevent streaks.
Buff lightly with a dry towel for a polished, streak-free shine.
Alternative Methods and Natural Solutions
You can use simple, natural options like a vinegar-and-water mix (with proper dilution) to cut grease, though it’s acidic so avoid it on natural stone.
For grout and stubborn spots, a baking soda paste gives gentle scrubbing power without harsh chemicals.
Steam cleaning can sanitize and lift grime quickly, but use it cautiously on older grout or heat-sensitive tiles and follow manufacturer guidelines.
Vinegar and water pros, cons, and safe dilution
While vinegar and water make a cheap, readily available cleaner for many tile types, you should know both its strengths and limits before using it on your floors.
You can cut grease, deodorize, and remove light grime with a 1:4 to 1:8 vinegar-to-water mix.
Don’t use it on natural stone, waxed floors, or sealed grout repeatedly, and always spot-test first.
Baking soda paste for grout and stubborn spots
Because baking soda’s mild abrasiveness and alkaline pH tackle grout grime without harsh chemicals, it’s a go-to for stubborn spots: mix into a thick paste with water (or hydrogen peroxide for whitening), apply to grout lines or stains, let it sit 5–15 minutes, then scrub with a stiff brush and rinse.
You can repeat for persistent stains and seal grout afterward to protect results.
Steam cleaning: when it helps and precautions
Steam cleaning can be a powerful, chemical-free way to lift dirt and sanitize many types of tile and grout, but it’s most effective on glazed ceramic, porcelain, and well-sealed natural stone.
You should test a hidden spot first, avoid unsealed stone or damaged grout, use moderate steam settings, move slowly for deep cleaning, and dry surfaces afterward to prevent moisture damage or mold.
Comparison: DIY vs. Commercial Cleaners for Streak Prevention
When you’re choosing between DIY and commercial cleaners for streak prevention, consider performance, cost, and whether the product suits your tile type.
You’ll also want to weigh environmental and health impacts, since some commercial formulas can be harsher than simple homemade mixes.
Testing a small area first will help you judge streaking, safety, and value before committing.
Performance, cost, and tile-type suitability
If you want streak-free tile without wasting time or money, compare how DIY mixes and commercial cleaners perform across different tile types, costs, and application needs. You’ll weigh effectiveness, per-use cost, and suitability: DIY is cheap and gentle on matte or porous tile but less consistent; commercial cleaners score on speed and streak prevention for glazed surfaces, albeit at higher cost.
| Factor | Summary |
|---|---|
| Cost | DIY low, commercial higher |
| Suitability | DIY porous/matte, commercial glazed/high-traffic |
Environmental and health considerations
Because you’re balancing streak-free results with safety and sustainability, consider what’s in each cleaner and how you use it:
DIY mixes (vinegar, baking soda, mild soap) reduce toxins and packaging but need proper dilution to avoid film;
commercial cleaners offer convenience and targeted formulas but can contain VOCs, fragrances, or residues.
Choose low-VOC, biodegradable options, ventilate, wear gloves, and follow label directions.
Common Mistakes That Cause Streaks or Residue
You’ll often get streaks or residue when you use too much cleaner or soap, mop with the wrong tool or dirty water, or skip rinsing and drying afterward.
Applying waxes or sealants incorrectly can leave a filmy buildup, too.
Watch these common mistakes so your tiles actually look clean instead of cloudy.
Overusing cleaning solution or soap
Although a little soap helps lift dirt, using too much cleaning solution leaves behind a film that attracts grime and causes streaks.
So dilute products exactly as the label directs and rinse or mop with clean water to remove any residue.
You should measure concentrate, avoid double-dosing stubborn spots, and limit scented additives.
Finish with a plain-water pass to guarantee a clear, nonsticky surface.
Using the wrong mop or dirty water
Even with the right dilution, the tools you use can undo your effort: a frayed or overly absorbent mop holds dirty water and spreads residue instead of removing it.
Use a clean, appropriate mop head—microfiber or a flat mop with removable pads—and change water frequently.
Rinse the mop often, wring it properly, and replace stained or worn heads to prevent streaking and redepositing grime.
Skipping the rinse or drying step
If you skip rinsing or don’t dry the floor properly, cleaning solution and loosened dirt sit on the surface and leave streaks or a filmy residue.
You should rinse with clean water after mopping, then remove excess moisture with a microfiber mop or towel.
That final step prevents residue buildup, restores shine, and keeps grout from trapping detergent that dulls tile over time.
Applying waxes or sealants incorrectly
1 common mistake that leaves tiles dull or sticky is applying waxes or sealants incorrectly. You might use too much product, skip proper cleaning, or apply over incompatible finishes.
That traps dirt, causes haze, and attracts residue. Follow manufacturer instructions, test a small area, apply thin even coats, and buff between layers.
Remove buildup with a recommended stripper before resealing.
Maintenance Plan and Prevention Strategies
To keep tiles looking their best, you’ll want simple daily and weekly habits that prevent buildup and make deeper cleaning easier.
Once a month follow a short deep-clean checklist to tackle grout lines and stubborn residues.
Check grout annually (or sooner in high-traffic areas) and reseal when it looks worn to reduce staining and residue.
Daily and weekly habits to minimize buildup
While small messes are easiest to handle right away, developing a few simple daily and weekly habits keeps dirt and grime from ever getting stubborn—sweep or dry-mop high-traffic areas each day, spot-clean spills as they happen, and set a weekly routine for damp-mopping with a mild cleaner suited for your tile and grout.
- Wipe shoe marks and crumbs daily.
- Rinse sticky spots immediately.
- Change mop water each session.
- Keep entry mats clean.
Monthly deep-clean checklist
Once a month, tackle a focused deep-clean that goes beyond your weekly routine. Move furniture, vacuum grout lines, and mop with a pH-neutral cleaner.
Scrub stubborn grout with a soft brush, rinse thoroughly, and dry to prevent streaks. Check caulk and hardware for grime, clean baseboards, and replace mop pads.
Store cleaners properly and note any needed repairs.
When to reseal grout and how that affects residue
After you finish your monthly deep-clean and note any grout wear, plan when to reseal grout so you prevent staining and buildup.
Check grout every 6–12 months, sooner in high-traffic or wet areas.
Resealing creates a protective barrier that repels dirt and cleaning residues, so you’ll use less detergent and get streak-free results.
Reapply sealant as manufacturer recommends.
Troubleshooting: Fixing Existing Streaks, Film, and Residue
If you’re seeing soap haze, streaks, or a cloudy film, start with quick fixes like a diluted vinegar rinse or a microfiber mop to lift mild residue without overwetting the floor.
For stubborn hard-water spots and mineral buildup you’ll need a gentle acidic cleaner or a targeted descaler and some light scrubbing with a nonabrasive pad.
To restore shine without leaving streaks, rinse thoroughly, dry with a clean microfiber towel, and buff in small sections until the tile looks even.
Quick fixes for mild soap film or haze
A quick, targeted rinse often clears mild soap film or haze without scrubbing hard:
Wet a microfiber mop or cloth with warm water and a splash of white vinegar (about 1 tablespoon per quart).
Wipe the affected area, then rinse with clean water to remove vinegar.
Dry with a clean microfiber towel to prevent new streaks.
Repeat if needed.
Removing hard water spots and mineral deposits
When mild soap haze won’t budge with a quick vinegar rinse, hard water spots and mineral deposits may be the culprit and need stronger, targeted treatment.
Mix equal parts white vinegar and water, apply to spots, let sit a few minutes, then scrub with a nonabrasive pad.
Rinse thoroughly, neutralize with water, and dry.
Repeat for stubborn buildup, avoiding acid on sensitive grout or stone.
Restoring shine to dull tiles without streaking {step-by-step}
Sometimes dull tiles just need the right cleaning steps to bring back their shine without leaving streaks or film.
Start by rinsing with clean water, then use a pH-neutral cleaner diluted per label. Buff with a microfiber mop while floors are slightly damp.
For stubborn haze, try a vinegar rinse on ceramic or a manufacturer-approved polish on natural stone, then dry thoroughly to prevent streaks.
Tools, Products, and Recipes Cheat Sheet
You’ll get quick recommendations for ready-to-use cleaners matched to common tile types so you can pick the safest, most effective product.
You’ll also find simple DIY recipes with exact ratios for everything from daily mopping to grout brightening.
Keep these options handy so you can choose professional products or mix your own with confidence.
Ready-to-use product recommendations by tile type
Anyone can simplify tile care by keeping a small set of ready-to-use cleaners matched to your tile type; these go-to products save time and prevent damage from using the wrong formulas. Pick pH-appropriate, nonabrasive sprays for ceramic, neutral cleaners for stone, and mild disinfecting mops for vinyl.
| Tile | Recommended Type | Example |
|---|---|---|
| Ceramic | Mild acidic spray | Tile cleaner |
| Stone | pH-neutral | Stone soap |
| Vinyl | Gentle disinfectant | Floor mop solution |
DIY cleaning solution recipes with exact ratios
Below are simple, exact DIY recipes you can mix at home for different tile types, with the tools and precautions you’ll need so each solution cleans effectively without harming grout or finishes.
1. For glazed ceramic:
1 gallon warm water + ¼ cup white vinegar; microfiber mop; spot test.
2. For natural stone:
1 gallon water + 1 tsp pH-neutral cleaner; soft mop.
3. For vinyl:
1 gallon water + 2 tbsp castile soap.
4. Grout booster:
½ cup baking soda paste.
Frequently Asked Questions
You’ll find answers to common concerns about tile care here, like whether vinegar is safe for every tile type and how often to deep-clean grout.
We’ll also cover steam-mop effects, how to strip stubborn wax or polish residue, and which mops give streak-free results.
Use these FAQs to pick the right methods and avoid damage.
Can I use vinegar on all tile floors?
Curious whether vinegar is safe for every tile floor? You can use diluted white vinegar on glazed ceramic and porcelain—it’s effective and won’t harm the finish.
Avoid vinegar on natural stone (marble, travertine, limestone) and unsealed grout; its acidity etches and dulls.
When unsure, test a small hidden spot or use a pH-neutral cleaner recommended for your specific tile.
How often should I deep-clean my tile and grout?
How often you should deep-clean tile and grout depends on foot traffic, location, and visible buildup.
For low-traffic rooms, clean every 6–12 months; kitchens, entryways, and bathrooms need deep cleaning every 1–3 months.
If grout looks stained or feels gritty, clean sooner.
Regular light cleaning helps extend intervals, and spot-treat spills immediately to prevent permanent discoloration.
Will steam mops leave residue or cause streaks?
Wondering if a steam mop will leave residue or streaks on your tile? It usually won’t if you use distilled water, a clean microfiber pad, and avoid oversteaming.
Work in small sections, wipe up excess moisture promptly, and let tiles air-dry fully.
Avoid using detergent in the reservoir—detergent can leave film—so stick to water for best streak-free results.
How do I remove stubborn wax or polish residue?
If steam cleaning and plain water didn’t clear up older buildup, wax or polish residue can be removed with a few targeted steps.
Test a small area first.
Use a recommended stripping solution or a mix of warm water and a few drops of ammonia (well-ventilated).
Scrub gently with a soft brush, rinse thoroughly, then neutralize and dry.
Repeat if needed.
What’s the best mop for streak-free tile cleaning?
Want a streak-free shine every time? Choose a microfiber mop with a flat head — it traps dirt and holds water evenly.
Use a low-residue cleaning solution and wring the mop so it’s damp, not dripping. Avoid sponge mops and harsh soaps that leave film.
Replace or wash pads regularly, and rinse the mop frequently to prevent redepositing grime.