Can You Lay Vinyl Plank Flooring Over Linoleum? Here’s What You Need to Know
Yes — you can lay vinyl plank flooring over linoleum if the old floor is clean, flat, and firmly adhered. You’ll need to inspect for damage, repair seams or bubbles, and guarantee the subfloor is dry and level. Floating click-lock planks are easiest for overlays, while glue-down products need a smoother surface. Expect a slight height increase and check manufacturer warranty requirements. Keep going to learn prep steps, installation tips, and when to remove the linoleum instead.
Can You Lay Vinyl Plank Flooring Over Linoleum? Quick Answer
Yes — you can lay vinyl plank flooring over linoleum if the existing floor is flat, securely attached, and free of damage or excessive seams.
You’ll want to assess and possibly level the surface first, so this option often suits confident DIYers for simple rooms but pros are better for large areas or tricky subfloors.
If you’re unsure about adhesion or moisture issues, call a professional.
Short direct answer (yes/no and key conditions)
You can lay vinyl plank flooring over linoleum, provided the existing linoleum is firmly bonded, flat, and free of damage or excessive texture; otherwise you’ll need to repair, level, or remove it first.
Yes — can you lay vinyl plank flooring over linoleum? — if it’s stable, clean, and smooth.
If not, fix issues or remove the old floor before installing.
Who should consider this option (DIYers vs professionals)
Who’s a good fit for laying vinyl plank over linoleum depends on your skill level and the condition of the existing floor.
If the linoleum is smooth, level, and firmly attached, you can handle it as a confident DIYer with basic tools.
Hire a pro if the substrate needs repairs, moisture testing, complex changes, or you want a flawless finish and warranty-backed installation.
How Vinyl Plank and Linoleum Differ: Basic Understanding
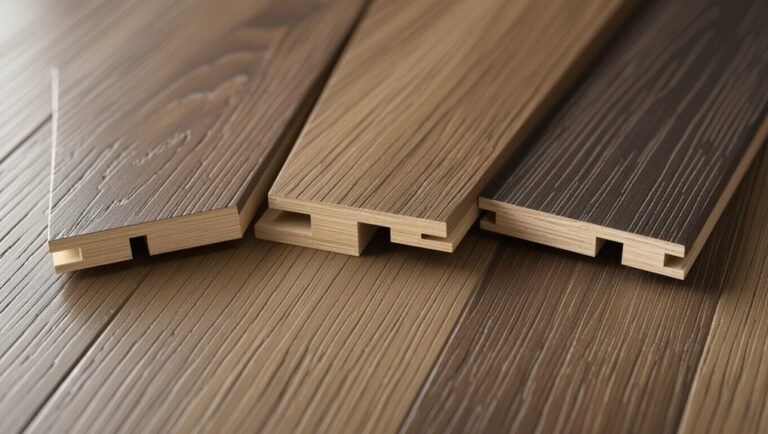
Vinyl plank flooring is a multi-layered, often click-lock product made from PVC that’s thicker and more flexible than traditional sheet goods.
Linoleum is a dense, linseed-oil–based sheet material that’s glued down and less forgiving to subfloor movement.
You’ll want to compare thickness, flexibility, adhesive methods, and moisture resistance because those differences affect installation and long-term performance.
What is vinyl plank flooring?
Think of vinyl plank flooring as a durable, waterproof alternative to traditional sheet materials. You’ll get realistic wood or stone looks on rigid or flexible planks that click together or glue down.
It resists scratches, stains, and moisture, and installs faster than many options.
- Realistic photographic wear layer
- Waterproof core options
- Click-lock or glue-down systems
- Durable wear layer thicknesses
- Easy DIY installation
What is linoleum?
Linoleum is a resilient flooring made from natural materials—linseed oil, cork dust, wood flour, and pigments—pressed onto a jute backing to create a durable, somewhat springy sheet.
You’ll recognize it by its matte finish and long lifespan; it feels firmer than vinyl sheet. It’s eco-friendly and often found in older homes.
- Matte, uniform appearance
- Natural scent when new
- Seamed sheets
- Wear-resistant surface
- Available in many colors
Key material and performance differences (thickness, flexibility, adhesives, moisture resistance)
Because they’re built for different purposes, you’ll notice clear differences in thickness, flexibility, adhesive needs, and moisture resistance between vinyl plank and linoleum. You’ll find vinyl thicker, more flexible, often click-lock or adhesive-backed, and highly water-resistant; linoleum is thinner, stiffer, needs sheet-floor adhesive, and tolerates moisture less.
| Feature | Vinyl Plank | Linoleum |
|---|---|---|
| Thickness | Thicker | Thinner |
| Flexibility | High | Low |
| Moisture Resistance | High | Moderate |
When It’s Appropriate to Install Vinyl Plank Over Linoleum
You can install vinyl plank over linoleum when the existing floor is stable, level, and securely adhered so it won’t telegraph imperfections or come loose.
Choose the right plank—floating click-lock systems work well for overlays, while some glue-down vinyls can be used if the substrate meets manufacturer specs.
Also consider the room: moisture-prone areas like basements, bathrooms, and kitchens need waterproof or water-resistant planks and proper subfloor preparation.
Conditions that make it feasible (stable, level, well-adhered linoleum)
If the existing linoleum is flat, firmly glued down, and free of soft spots or major damage, you can often install vinyl plank right over it.
Check for levelness with a straightedge, repair minor seams or bubbles, and verify adhesive residues are removed.
The subfloor beneath must be stable and dry.
If all criteria are met, overlaying is a practical, time-saving option.
Types of vinyl plank suitable for over-lay installations (floating click-lock vs glue-down)
When choosing vinyl plank for an overlay, pick a product designed for floating installation unless the linoleum is perfectly smooth and permanently bonded to the subfloor.
Click-lock (floating) planks are forgiving over minor imperfections and let the existing floor act as a stable underlayment, while glue-down planks demand a cleaner, flatter surface and stronger adhesion to the substrate.
You’ll prefer click-lock for ease, repairability, and tolerance; use glue-down only when surface prep and bonding are excellent.
Room types and environmental considerations (basements, bathrooms, kitchens)
Although vinyl plank can go over linoleum in many rooms, you’ll need to match the product and prep to each space’s moisture, traffic, and temperature conditions.
In basements choose waterproof, vapor-resistant products and level concrete; in bathrooms use sealed or glue-down planks and guarantee subfloor dryness; in kitchens pick durable, scratch-resistant options and allow expansion gaps near appliances and heat sources.
Step-by-Step Guide: How to Install Vinyl Plank Over Linoleum
Before you start, you’ll inspect and test the linoleum to confirm it’s sound and firmly adhered.
Then you’ll clean, degrease, repair seams or bumps, and address moisture and humidity to guarantee a stable substrate.
Finally, decide on underlayment and whether you’ll float or glue the vinyl planks based on those conditions.
Step 1 Inspect and test the existing linoleum surface
Start by thoroughly inspecting the linoleum to make sure it’s a suitable base for vinyl planks: look for loose edges, bubbling, seams, deep gouges, or areas where the linoleum is lifting from the subfloor.
Then test and note problem spots so you can repair or remove them before installation.
- Loose or lifting edges
- Blistering or bubbles
- Split or open seams
- Deep gouges or tears
- Soft or spongy areas
Step 2 Clean and prepare the floor (deep cleaning, degreasing)
Clean the linoleum thoroughly so the new vinyl planks will bond properly and lie flat. You’ll remove dirt, grease, and residues so adhesive adheres and seams stay invisible.
Work systematically across the room, rinsing and drying completely before installation.
- Sweep and vacuum debris
- Degrease with recommended cleaner
- Scrub stubborn spots with a nylon brush
- Rinse with clean water
- Dry thoroughly with towels and fans
Step 3 Repair and level the substrate (fill seams, remove bumps)
Once the floor’s dry and free of debris, you’ll inspect the linoleum for seams, bumps, and depressions and repair them so the vinyl planks sit flat and lock correctly.
You’ll fill seams, sand high spots, and level low areas with patching compound so the substrate is smooth and stable before installation.
- Clean seam gaps
- Apply floor patch
- Feather edges
- Sand bumps flush
- Vacuum thoroughly
Step 4 Moisture testing and humidity control
With the substrate smoothed and seams filled, check for moisture and control room humidity before laying any planks to prevent warping or adhesive failure.
Use these steps to test and manage conditions:
- Use a moisture meter across multiple spots.
- Conduct an RH or calcium chloride test if unsure.
- Keep humidity between 30–50%.
- Allow acclimation 48–72 hours.
- Fix high moisture before installing.
Step 5 Choose underlayment and installation method (when to use underlayment or adhesive)
Although your old linoleum can act as a suitable base, you’ll now decide whether to add an underlayment or bond the planks directly with adhesive—this choice depends on the vinyl type, subfloor flatness, sound control needs, and manufacturer instructions.
- Floating click-lock with foam underlayment for cushioning
- Cork for superior sound reduction
- Thin plywood or rosin paper to stabilize uneven spots
- Full-spread adhesive for rigid or glue-down vinyl
- Pressure-sensitive adhesive for semi-permanent installs
Step 6 Layout planning and acclimation of planks
- You’ll plan plank layout and let bundles acclimate 48–72 hours in the room. Measure, dry-fit rows, and decide starting wall for balanced end pieces. Keep gaps for expansion per manufacturer.
- Open boxes and stack planks flat
- Keep room temperature stable
- Arrange staggered seams
- Mark junction locations
- Check plank faces for defects
Step 7 Installation process (locking planks, cutting, transitions)
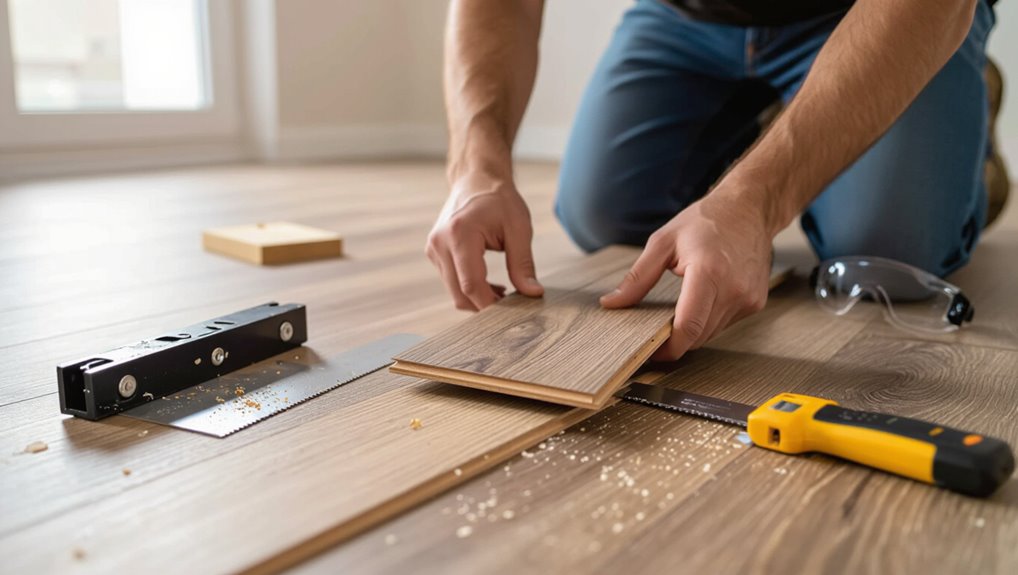
Start by locking your first row into place along the starting wall, working left to right (or right to left if that suits your dominant hand) so each plank clicks snugly into the previous one; use spacers to maintain the manufacturer’s expansion gap and a tapping block to seat joints without damaging edges.
Stagger end joints, cut planks with a utility knife or saw, dry-fit connections, and continue row by row.
Step 8 Finishing touches (trim, transitions, sealing thresholds)
Now that your planks are down, finish by installing baseboards, junction strips, and threshold seals to give the floor a clean, professional look; tidy gaps, secure trim, and caulk where needed.
You’ll want consistent changes and sealed edges for durability.
- Install quarter round or baseboard
- Fit transition strips at doorways
- Secure thresholds with screws
- Use silicone caulk where moisture possible
- Touch up cuts and gaps
Tools, Materials, and Cost Considerations
Before you start, you’ll want a clear checklist of the essential tools and materials—tapping block, pull bar, underlayment, adhesive (if needed), and a good utility knife.
Compare typical costs for overlaying over linoleum versus full removal, including materials and disposal, so you know where savings occur.
Also factor in time and labor: DIY installs take longer but save money, while pros will be faster but cost more.
Essential tools and materials checklist
A clear checklist helps you work efficiently and avoid costly trips to the store.
Gather these basics before you start so you won’t pause mid-project.
- Vinyl planks and threshold strips
- Underlayment or moisture barrier
- Utility knife, vinyl cutter, and straightedge
- Tapping block, pull bar, spacers
- Measuring tape, pencil, and floor scraper
Typical cost comparison: overlay vs full removal
Choosing between overlaying vinyl planks over existing linoleum and doing a full removal comes down to weighing upfront costs, labor, and potential hidden expenses so you can pick the option that fits your budget and timeline. Overlay usually saves money and mess; removal costs more but avoids future issues. Compare:
| Option | Cost vibe | Risk |
|---|---|---|
| Overlay | Relief | Moderate |
| Removal | Sting | Lower |
| Hybrid | Cautious | Balanced |
Time and labor estimates for DIY and professional installs
Expect a weekend project for a small room and several days for larger areas—DIY installs typically take longer than professionals because you’ll handle prep, layout, cutting, and acclimation yourself.
Plan extra time for adhesive curing or floating seam adjustments.
Budget tools (underlayment, spacers, saw, adhesive), cleanup, and unexpected subfloor repairs.
Pros charge faster labor but add travel and disposal fees; weigh time versus cost.
Pros and Cons of Installing Over Existing Linoleum
You can save time, money, and cleanup by installing vinyl plank right over existing linoleum when the surface is sound.
But watch for added floor height that can affect connections and doors, and for hidden issues like moisture or damaged subfloor that the linoleum may be masking.
We’ll weigh these advantages and limitations so you can decide if the shortcut makes sense for your project.
Advantages (time, cost, less mess)
Because you can skip demo and subfloor prep, installing vinyl plank over existing linoleum often saves significant time and labor, letting projects finish in a day or two instead of several.
You’ll spend less on disposal, labor, and materials, and avoid major dust.
- Faster install timeline
- Lower labor cost
- Reduced disposal fees
- Minimal dust and debris
- Less disruption to home
Disadvantages and limitations (height buildup, hidden damage)
While skipping demo sounds great, installing vinyl plank over existing linoleum can create notable drawbacks you should weigh first.
- Raises floor height, causing trim and threshold issues.
- Masks water damage, mold, or adhesive failures underneath.
- Limits warranty if manufacturer requires clean subfloor.
- Can cause uneven seams and telegraph imperfections.
- Makes future inspections or repairs harder and more costly.
Common Problems and Mistakes to Avoid
Before you start, watch for a few common mistakes that can ruin a new vinyl plank installation.
Don’t install over loose or unstable linoleum, ignore moisture or subfloor problems, or use the wrong vinyl or skip underlayment.
Proper surface preparation and leveling are essential to avoid gaps, ridges, and premature failure.
Mistake 1 Installing over unstable or loose linoleum
If you lay vinyl planks over linoleum that’s loose, peeling, or coming up at the seams, the new floor won’t stay flat or locked and will show gaps, squeaks, and premature wear.
You should remove or firmly reattach unstable linoleum, clean and level the subfloor, and verify a rigid, even base so planks click properly and the warranty or performance won’t be compromised.
Mistake 2 Ignoring moisture or subfloor issues
Because moisture and a compromised subfloor can ruin a new vinyl plank install, don’t skip testing and repairs: wetness from below or hidden rot will cause planks to warp, bubble, or separate, and it’ll void many warranties.
Check for dampness with a moisture meter, dry and remediate leaks, replace soft or rotted sections, and guarantee the substrate is flat and permanently dry before installing.
Mistake 3 Using wrong vinyl type or skipping underlayment
When you pick the wrong vinyl plank or skip a proper underlayment, you’ll pay for it with a noisy, unstable, or prematurely failing floor.
Choose planks rated for floating installation or glue-down as appropriate, and use underlayment that matches thickness and sound isolation needs.
Don’t assume all vinyl works over linoleum—follow manufacturer specs to guarantee warranty and long-term performance.
Mistake 4 Poor surface preparation and leveling
Although it may seem quick to lay vinyl planks over linoleum, you’ll pay for shortcuts if the surface isn’t clean, firmly bonded, and level.
You must remove loose sections, fill gouges and seams, and sand glossy finishes. Use a self-leveling compound for dips, check flatness with a straightedge, and allow proper curing.
Poor prep causes telegraphing, gaps, and premature failure.
Best Practices and Pro Tips for a Durable Installation
Start by preparing the subfloor and linoleum so moisture, bumps, and old adhesives won’t shorten the life of your new planks.
Pay attention to junctions, thresholds, and door clearances to guarantee smooth movement and a finished look.
If you hit uneven floors, complex door trims, or uncertain moisture readings, call a professional to avoid costly mistakes.
Preparation tips for long-term performance
Because a solid prep makes the difference between a floor that lasts and one that fails, focus on surface condition, moisture control, and acclimation before you install vinyl planks over linoleum.
You should clean, repair, test, and level so the planks sit flat and remain stable.
- Clean thoroughly; remove wax and adhesives
- Repair seams and loose linoleum
- Test moisture with a meter
- Level dips and high spots
- Acclimate planks per manufacturer instructions
How to handle transitions, thresholds, and door clearances
With the subfloor prepped and planks acclimated, you’ll next address how the new flooring meets other surfaces, doorways, and level changes so it performs and looks right over time.
Use proper transition strips between dissimilar heights, leave recommended expansion gaps at thresholds, trim door bottoms for clearance, and secure thresholds with adhesive or screws.
Test door swings before final fastening.
When to call a professional
If you’re unsure about subfloor condition, moisture levels, or complex door and threshold adjustments, call a pro—those issues can compromise the whole installation if missed.
Hire a pro when linoleum is glued, uneven, or damaged, when moisture readings are borderline, or when trim, stairs, or plumbing penetrations complicate layout.
Professionals diagnose, prep, and guarantee results, saving time and costly repairs later.
When You Should Remove Linoleum First
You should remove linoleum if you find mold, pervasive adhesive residue, or soft spots that signal a compromised subfloor.
We’ll briefly cover safe removal methods, disposal rules, and how to prep the subfloor afterward with sanding, patching, and priming.
Knowing when to strip it first will save you time and prevent problems under your new vinyl planks.
Signs that removal is necessary (mold, adhesive contamination, soft spots)
Before laying vinyl planks over existing linoleum, inspect the subfloor and the old floor covering for clear signs that removal is necessary: visible mold, dark adhesive bleed-through, or soft, spongy spots where the linoleum no longer bonds to the substrate.
If you spot mold, extensive adhesive contamination, or localized soft areas, don’t cover them—address the compromised sections to avoid moisture, odors, and installation failures.
Removal methods overview and disposal considerations
When the old linoleum shows extensive damage, adhesive residue, or moisture problems, you’ll need to remove it rather than cover it.
Removal methods range from simple peeling and scraping to mechanical grinding or chemical softeners, and each choice affects labor, cost, and disposal.
- Peel and scrape for small, loose sections
- Heat gun softens stubborn adhesive
- Chemical solvent for glued layers
- Floor grinder for large areas
- Bagging and hauling to proper disposal site
Preparing the subfloor after removal (sanding, patching, priming)
Start by evaluating and cleaning the subfloor thoroughly so you can see every blemish and determine the work ahead.
Sand high spots, remove adhesive residue, and vacuum dust.
Patch holes and cracks with a suitable compound, let it cure, then sand smooth.
Prime porous areas or patched spots with a recommended primer to guarantee proper vinyl adhesion and a flat, stable surface.
Comparison: Overlay vs Removal vs Glue-Down Options
Although each method can work, choosing between overlaying, removing the old linoleum, or glue‑down installation comes down to your budget, timeline, and the subfloor’s condition. You’ll weigh cost, time, and durability: overlay is fastest, removal reveals problems, glue‑down gives permanence. Pick based on subfloor flatness, moisture, and how long you want the floor to last.
| Method | Best when |
|---|---|
| Overlay | Subfloor flat |
| Removal | Hidden damage |
| Glue‑down | High traffic |
Maintenance and Care After Installation
Once your vinyl planks are in place over the linoleum, you’ll keep them looking good by using gentle cleaning methods—sweep or vacuum regularly and mop with a manufacturer-approved cleaner.
Protect the surface from scratches with felt pads under furniture and avoid dragging heavy items across the floor.
Control humidity and clean up spills quickly to prevent warping and extend the lifespan.
Cleaning methods safe for vinyl over linoleum
When you clean vinyl plank flooring installed over linoleum, pick gentle methods and products so you won’t damage the new surface or the old substrate beneath it.
Use soft tools, mild cleaners, and minimal water. Avoid harsh chemicals and abrasive pads.
- Damp mop with pH-neutral cleaner
- Soft-bristled broom for dust
- Microfiber mop for spills
- Spot-clean with diluted dish soap
- Blot wet areas immediately
Preventing damage and extending lifespan (furniture protectors, humidity control)
Keeping your vinyl plank flooring clean helps, but you also need habits that prevent everyday wear and moisture damage to extend its life.
Use felt pads under furniture, wide casters on chairs, and protective mats at entryways.
Wipe spills immediately, maintain indoor humidity between 30–50%, and avoid steam cleaners.
Regularly check seams and edges for lifting so you can repair issues promptly.
FAQ
You’ll have practical questions like whether bathrooms or basements are suitable, if the overlay will void your warranty, and how much height the new floor will add.
You’ll also want to know about installing over glued-down linoleum and how to check for asbestos or other hazards.
Let’s answer these so you can decide safely and confidently.
Can I install vinyl plank over linoleum in bathrooms or basements?
Curious if you can lay vinyl plank over linoleum in a bathroom or basement? Yes, but you must guarantee the linoleum is firmly bonded, level, and dry.
In bathrooms and basements, moisture and subfloor condition matter most. Use moisture barriers where recommended, repair any damage, and choose waterproof vinyl designed for those spaces to prevent warping, mold, or adhesive failure.
Will laying vinyl over linoleum void the warranty?
Will installing vinyl plank over existing linoleum void your warranty? It can—many manufacturers require removal of old flooring or specific substrates before installation.
Check the vinyl plank warranty and installation instructions: some allow overlays if the subfloor is sound, level, and the linoleum is well-adhered and non-cushioned.
Document conditions and follow guidelines; when in doubt, contact manufacturer for written confirmation.
How much additional floor height will overlay add?
Adding vinyl plank over existing linoleum typically raises the floor by about 1/8 to 3/8 inch for most rigid and luxury vinyl planks.
Though thicker engineered or click-lock systems can add up to 1/2 inch or more; measure your chosen product’s thickness and any underlayment to get an exact figure and check door clearances, alterations, and threshold requirements before installing.
Account for alterations and appliance fit.
Can I install vinyl plank over linoleum that’s glued down?
Yes — you can usually install vinyl plank over linoleum that’s glued down, as long as the old floor is firmly bonded, flat, and free of major damage or moisture issues.
Inspect for loose areas, deep gouges, or uneven seams; repair or level as needed.
Clean thoroughly, let it dry, and follow manufacturer guidelines about underlayment and adhesive to guarantee a long-lasting installation.
How do I know if my linoleum has asbestos or other hazards?
How can you tell if your linoleum contains asbestos or other hazards? You can’t reliably identify it by sight.
If your home was built before the 1980s, assume risk. Hire a certified inspector to take samples and test them.
Also watch for adhesive mastic, lead, or mold. If tests are positive, use licensed abatement professionals rather than DIY removal to protect your health.