How to Deep Clean Kitchen Floor Tiles Fast
You can deep-clean kitchen floor tiles fast by clearing the area, sweeping, pre-treating grout, and mopping in a set sequence to finish in 30–60 minutes. Use a microfiber mop, soft grout brush, and a pH-neutral or oxygen-based cleaner for most tiles; avoid acids on natural stone. Spot-scrub trouble zones, rinse, and dry toward exits to prevent streaks. Follow tile ID and safety tips below to speed the job and protect finishes.
Who This Guide Is For (Time, Tile, Skill)
Whether you’ve got a busy weeknight schedule or a free weekend, this guide helps you deep clean tile floors quickly and effectively. You’re reading this if you want practical steps that match your time, tile type, and skill level.
Whether you’re short on time or free all weekend, this guide helps you deep-clean tile floors quickly and effectively.
If you have simple ceramic or porcelain, basic supplies and 30–60 minutes work. Textured or natural stone needs gentler cleaners and more care.
Complex tile patterns or contrasting grout color demand attention to edges and seams.
Beginners will follow step-by-step instructions. Experienced cleaners can skip basics and tackle stubborn stains or resealing.
This suits most kitchens and schedules.
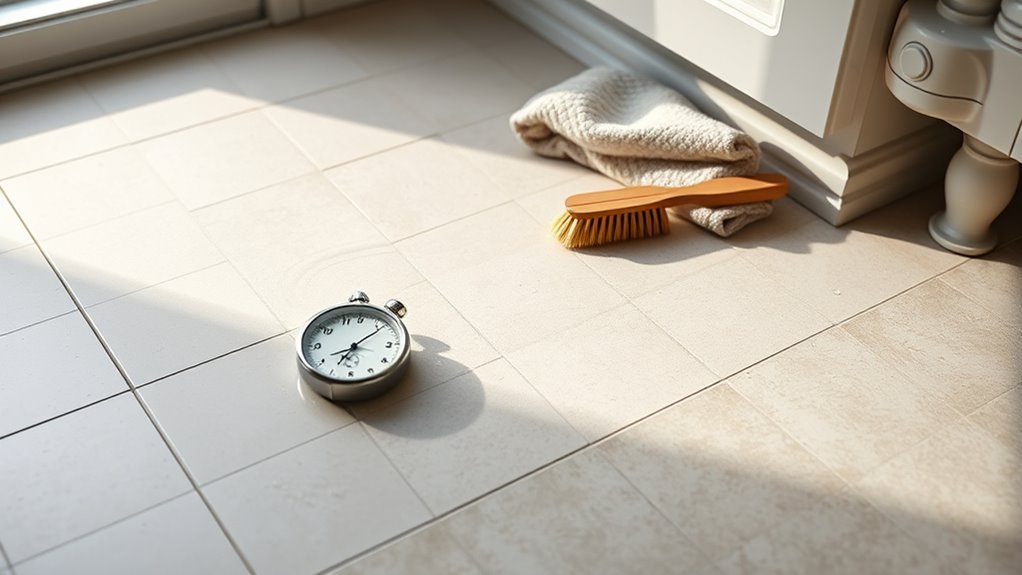
What a 30-Minute Deep-Clean Looks Like
Wonder how much you can get done in half an hour? You’ll move fast: sweep, pre-treat grout, mop with hot solution, spot-scrub stubborn areas, then rinse and dry. Focus on trouble zones and follow tile patterns to work efficiently. Watch color variation—damp grout and tiles show differently—so you know when it’s truly clean.
| Task | Time | Tip |
|---|---|---|
| Sweep | 3 min | Work edges first |
| Pre-treat grout | 7 min | Use brush |
| Mop | 10 min | Small sections |
| Spot-scrub | 7 min | Target stains |
| Rinse & dry | 3 min | Check color variation |
You’ll finish confident and quick.
How to Identify Tile: Ceramic, Porcelain, or Stone
You can usually tell ceramic, porcelain, or stone by looking at the surface: ceramics often have a glossy glaze. Porcelain is denser with a finer texture. Natural stone shows irregular veining and variation.
Do a quick porosity check by dropping a few drops of water—if it soaks in, it’s likely stone. If it beads, it’s probably porcelain or glazed ceramic.
Finally, inspect the tile edge and thickness: porcelain is typically thinner and harder. Ceramic has a softer body, and stone feels heavier.
Visual Texture And Glaze
How can you tell at a glance if a tile is ceramic, porcelain, or natural stone? Look closely at surface cues: ceramic often shows pronounced texture contrast between patterned glaze and body, while porcelain tends to be smoother with subtler texture changes.
Glaze effects—shine, crazing, or printed patterns—usually indicate a glazed ceramic or porcelain; unglazed tile and stone display more uniform, natural texture.
Natural stone has irregular veining, pits, and a tactile grain you can feel. Run your hand gently; glazed surfaces feel slick, unglazed or stone feels matte or gritty.
Use these visual and tactile signs to identify your floor quickly.
Porosity And Water Test
Because porosity controls how a tile absorbs moisture, a simple water test quickly tells you whether you’re dealing with ceramic, porcelain, or natural stone.
Place a few drops on an inconspicuous spot and time how long it soaks in. If water beads and stays, porosity testing indicates porcelain (very low water absorption).
If it soaks slowly, you likely have glazed ceramic (moderate porosity).
If it disappears quickly and darkens the surface, that’s natural stone with high porosity and needs sealing.
Record results and repeat on a grout line for comparison.
Use those findings to choose cleaners and sealing steps.
Edge And Thickness Clues
After the water test, check the tile edges and thickness to confirm what you’ve got. Turn up a loose tile or inspect a cut edge: ceramic often shows a single colored body, porcelain has a dense, uniform body, and natural stone reveals layered or grainy structures.
Use a caliper for Thickness measurement—porcelain is usually thicker and denser than ceramic; stone varies.
Look for edge trimming marks from manufacturing; sharper, precise edges suggest porcelain, while softer, irregular edges hint at stone or cheaper ceramic.
These clues help you pick appropriate cleaners and sealers for safe, effective deep cleaning.
Why Tile Type Changes Your Cleaning Choices
When you’re choosing cleaners and tools, the tile material makes a big difference—porcelain, ceramic, natural stone, and glazed finishes all react differently to acids, abrasives, and moisture. You’ll consider wear, slip resistance, tile patterns, and grout color when picking safe methods. Match cleaner strength to material and avoid etching or discoloration.
- Porcelain: tough, can take stronger cleaners sparingly.
- Ceramic: glazed surfaces resist stains; unglazed need gentler care.
- Natural stone: avoid acids; use pH-neutral products.
- Grout color: darker grout hides stains; sealed grout resists moisture.
- Glazed finishes: gentle cleaners prevent shine loss.
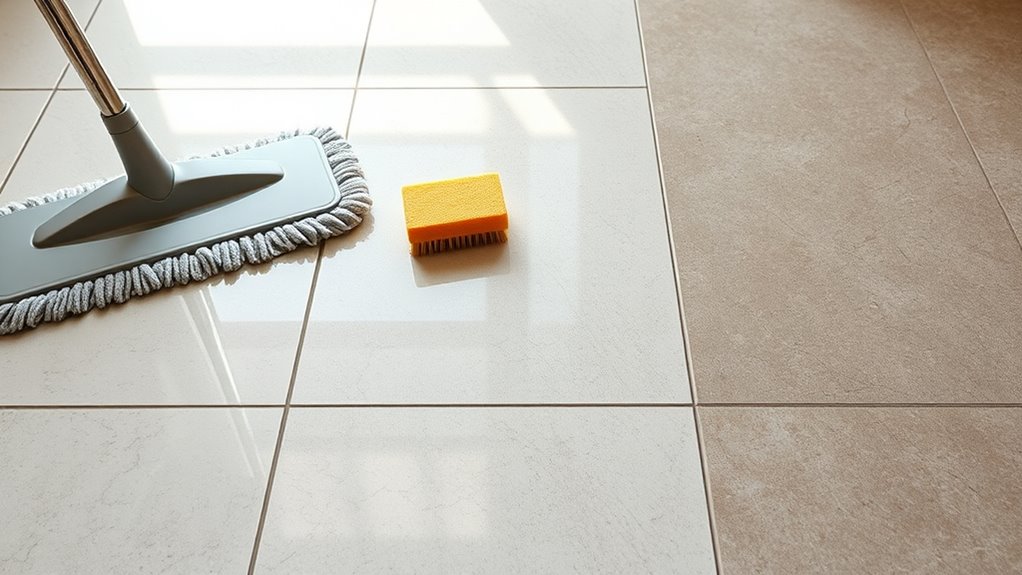
Fast Tile-Cleaning Tools You Need
Now that you’ve matched cleaners to your tile type, pick tools that speed the job without risking damage.
Once cleaners match your tile, choose tools that speed cleaning while protecting surfaces—microfiber, soft-bristled brushes, and gentle mops.
You’ll want a microfiber mop for daily lift, a scrub brush with soft nylon bristles for grout lines, and a compact grout brush for stubborn spots.
Use a flat mop head to follow tile patterns and avoid gouging textured surfaces.
A handheld steam cleaner can sanitize without chemicals if your tiles and grout color tolerate heat.
Keep a rubber squeegee for water removal and a lightweight bucket with a wringer to control moisture.
Replace pads often to avoid re-depositing dirt.
Quick Cleaners That Work on Tile and Grout
If you’re short on time, pick cleaners that cut grease and lift grout grime without harming tile finishes. You want fast-acting sprays or foams that suit glazed, matte, and textured tiles, respecting color variation and texture patterns so tiles don’t look uneven after cleaning. Test a small area first.
Reach into grout lines with a stiff brush and rinse residue quickly. Consider these quick options:
- pH-neutral spray for sealed tiles
- Oxygen-based grout booster for stained lines
- Foam degreaser for cooktop spills on floor tiles
- Microfiber mop solution for surface lift
- Instant stain remover gel for spot treatment
Safe Homemade Tile Cleaners That Work Fast
You can tackle tough tile grime using simple, safe mixes you make at home. Try a 1:1 vinegar-and-water spray for routine cleaning.
A baking-soda paste can be used to scrub stubborn spots.
Or, use a hydrogen-peroxide mix for whitening grout.
I’ll show how to use each quickly and safely so you get fast results.
Vinegar And Water
Because vinegar cuts grease and dissolves mineral deposits without harsh fumes, mixing it with water makes a fast, safe tile cleaner you can use across most kitchen floors.
You’ll debunk vinegar myths by using it correctly: dilute, test a hidden spot, and mind water temperature—warm water speeds cleaning but avoid boiling.
Spray or mop, let sit a few minutes, then rinse to prevent residue.
- Mix 1 cup white vinegar to 1 gallon warm water
- Test on grout and tiles first
- Use a microfiber mop or soft brush
- Rinse with clean water afterward
- Dry to prevent streaks and soap film
Baking Soda Paste
When grout or sticky spots won’t budge, make a quick baking soda paste to lift grime without harsh chemicals. Mix baking soda with enough water to form a spreadable paste, apply it to stained areas and along grout lines, and let it sit 10–15 minutes.
Scrub with a stiff brush following tile patterns so you don’t miss edges, then rinse with warm water and wipe dry.
Test first on a small area to guarantee the paste won’t alter grout color or matte finishes. Repeat on stubborn spots, then seal grout if needed to slow future buildup.
Hydrogen Peroxide Mix
A simple hydrogen peroxide mix—equal parts 3% hydrogen peroxide and warm water with a splash of dish soap—kills mold, lifts stains, and brightens grout without harsh fumes. You’ll spray, wait five minutes, then scrub grout lines with a brush for effective stain removal. Rinse and mop to avoid residue.
- Safe for sealed tiles when used diluted
- Works fast on organic stains and mildew
- Good for spot treating grout discoloration
- Non-toxic compared with bleach fumes
Use gloves and test a hidden area first.
Store in a labeled spray bottle away from sunlight.
Cleaners to Avoid on Natural Stone
If you’ve got natural stone floors, steer clear of acidic, abrasive, or oil-based cleaners that can etch, dull, or stain the surface. You shouldn’t use vinegar, lemon, ammonia, or generic bathroom cleaners on natural stone; their acidity reacts with calcium in marble, travertine, and limestone.
Avoid scrubbing with steel wool or harsh scrubbing powders labeled as cleaning abrasive, which scratch and remove sealers. Oil-based degreasers can leave residues that darken porosity and attract dirt.
Instead, choose pH-neutral, stone-safe products and rinse thoroughly. When in doubt, consult manufacturer guidance or a stone professional for recommendations.
How to Test a Cleaner on a Spare Tile
Before using a new cleaner on your floor, grab an unused spare tile to test it first.
Apply a small amount of the cleaner to the tile and let it sit briefly—don’t drench the surface.
Check carefully for any color change or finish damage before treating the rest of your floor.
Choose An Unused Tile
Once you’ve gathered your cleaner and tools, find an unused tile—like a spare from a repair kit or a hidden one under the fridge—and test the solution there first so you can see how it reacts without risking visible damage.
Choose a tile near similar decorative accents so color, glaze, and texture match your main floor. Check for reaction, staining, or dulling, and note drying time.
Follow these quick checks:
- Inspect for color change
- Feel for surface texture alteration
- Time how long residue remains
- Smell for chemical intensity
- Try a small grout edge too
Record results before treating visible tiles.
Apply Cleaner Sparingly
When you’re ready to test, apply the cleaner sparingly to the spare tile so you can gauge its effect without overdoing it; a few drops or a small swab with a cotton ball is usually enough. Dab a tiny area, let the product sit for the manufacturer’s recommended time, then blot it up. You’re checking texture, residue, and immediate reaction.
Apply cleaner sparingly to avoid saturating grout or adjacent tiles. If nothing unusual appears, you can proceed cautiously. Avoid overuse to prevent damage and unnecessary waste.
Record the product and results so you can replicate safe, effective cleaning later.
Inspect For Color Change
If the test area didn’t react visibly, you still need to inspect for subtle color change—check the spare tile and surrounding grout in good light after the cleaner’s dwell time and again after it dries. You want to catch early color fading or hidden damage before using the cleaner across the floor.
Use these checks:
- Compare with an untouched tile under natural light.
- Run a damp white cloth to reveal residue or lifted stain detection.
- Photograph immediately and after 24 hours for differences.
- Smell for chemical linger indicating breakdown.
- Note grout contrast shifts that signal fading.
If you see issues, stop and choose a milder product.
Prep Steps to Speed Your Kitchen Deep Clean
Before you start scrubbing, clear the area and gather your tools so each step flows without interruption. You’ll move faster if you pre-sort supplies: bucket, mop, brush, cleaners, and replacement pads. Check mosaic patterns for loose tiles and note grout sealing needs; mark spots to avoid overworking. Remove small obstacles, protect nearby cabinets with towels, and open windows for ventilation. Set a timer for focused 15-minute bursts per zone. Keep a spray bottle of cleaner handy for touch-ups. Use the table below to assign tasks and tools so you won’t backtrack.
| Task | Tool | Time |
|---|---|---|
| Zone prep | Broom | 5 min |
| Tile check | Flashlight | 3 min |
| Stain spot | Spray bottle | 4 min |
| Protective setup | Towels | 2 min |
| Final sweep | Dustpan | 1 min |
Removing Loose Debris Before Wet Cleaning
Now that you’ve prepped the space and sorted supplies, start by removing loose debris so your wet cleaning works on grime, not dust. Sweep or vacuum thoroughly to cut down dust accumulation and reveal spots where grout discoloration hides. Focus on edges and under appliances; debris there interferes with cleaning solutions.
Use this quick checklist before mopping:
- Sweep with a soft-bristle broom
- Vacuum corners and under cabinets
- Use a dustpan and flexible brush
- Remove larger crumbs by hand or with a brush
- Inspect for pet hair and food particles
Once debris is gone, you’ll get better results from wet cleaning.
Fast Degreasing for Heavily Soiled Tile
Since greasy buildup blocks cleaning solutions, start degreasing with a targeted approach that loosens oil and food residues fast.
Mix a warm-water solution with a few drops of dish soap and a splash of white vinegar for eco-friendly solutions that cut grease without harsh fumes.
Apply to stained areas, let sit two to five minutes, then agitate with a stiff brush.
For persistent spots, sprinkle baking soda, spray the solution, and scrub—classic DIY stain removal that lifts oil.
Rinse thoroughly and dry.
Repeat only where needed to avoid residue; ventilate while cleaning.
Lifting Baked-On Food Without Endless Scrubbing
When baked-on food won’t loosen with a sponge, loosen it quickly by softening the crust first. You’ll protect mosaic patterns and avoid damaging grout sealing when you use gentle, targeted methods. Heat, moisture, and the right tools lift debris without endless scrubbing.
- Cover spots with a damp microfiber and a hot cloth for 10 minutes.
- Apply baking soda paste to stubborn areas, let sit, then wipe.
- Use a plastic scraper at a low angle to pry softened residue.
- Try a steam cleaner for tougher buildups, keeping nozzle moving.
- Rinse and dry to prevent residue settling back in.
Quick Methods to Fix Grout Discoloration
If your grout’s lost its original color, you can restore it quickly with a few targeted fixes that don’t require regrouting.
Start by sweeping and vacuuming, then scrub stained grout with a paste of baking soda and hydrogen peroxide; let it sit five minutes, scrub with a stiff brush, rinse.
Sweep and vacuum, then scrub stains with a baking soda and hydrogen peroxide paste, wait five minutes, rinse.
For mildew, apply diluted bleach or a commercial mildew remover briefly, then ventilate and rinse.
Use a grout pen or colorant for uniform results on faded lines—apply carefully and wipe excess.
Seal cured grout to prevent future grout discoloration.
These quick fixes save time and avoid major repairs.
Cleaning Textured or Slip-Resistant Tile Fast
When you tackle textured or slip-resistant tile, pick a stiff nylon brush or a grout brush that can reach into grooves without damaging the surface.
Apply a degreasing cleaner first to break down oil and grime that hides in the texture.
Work the cleaner in with short, firm strokes and rinse thoroughly to prevent residue.
Choose The Right Brush
Pick a brush that matches your tile’s texture and grout depth so you’ll scrub effectively without damaging the surface. You’ll want a tool that reaches textured ridges and won’t strip grout coloring or harm Tile patterns. Consider bristle stiffness, head shape, and handle length.
- Stiff nylon for deep grooves
- Soft brush for glossy or delicate tiles
- Narrow head for tight grout lines
- Angled brush for edges and corners
- Long handle for back-and-kitchen reach
Test a small inconspicuous area first. Match brush size to grout depth and tile relief, so you clean thoroughly without causing scratches or fading.
Use A Degreasing Cleaner
Because textured and slip-resistant tiles trap grease in tiny ridges, you’ll want a degreasing cleaner that cuts oil without dulling the surface. Choose a product labeled for textured tile and compatible with your finish.
Enzyme-based degreasing agents lift greasy residues without harsh abrasion. Dilute per instructions, apply with a microfiber mop or stiff nylon brush, and let dwell briefly so the agents penetrate grooves.
Agitate stubborn spots, then rinse thoroughly to remove loosened oil and cleaner film. Repeat only if needed.
Dry with a clean towel to inspect for missed areas and restore traction quickly.
Using a Steam Cleaner Safely and Effectively
Want to power through grimy grout without chemicals? You can—if you follow steam cleaning safety precautions and use the machine right.
Start by testing a hidden tile, clear debris, and wear gloves. Move methodically so steam loosens dirt without overheating surfaces.
- Check manufacturer’s label for tile compatibility
- Use low-to-medium steam setting first
- Keep nozzle moving to avoid damage
- Ventilate the room to reduce humidity
- Unplug and cool before maintenance
Finish by wiping residue with a microfiber cloth and letting tiles air-dry. Proper technique saves time and protects grout and seals.
Choosing Between Mop, Scrubber, or Brush
When you’re deciding how to tackle grimy tile, think about the job’s size and the soil’s stubbornness. If you’ve got light dust and routine spills, a microfiber mop lets you control pressure and preserve any color contrast between tiles.
For localized grout staining and scuff marks, a stiff brush gives targeted abrasion without overwetting. Choose a handheld scrubber for small areas needing mechanical action but avoid industrial machines here.
Match tool stiffness to tile durability and test an inconspicuous spot. Rotate tools as needed: mop for maintenance, brush for detail, scrubber for stubborn patches.
Save Time With a Floor Scrubber
If you’re facing larger areas or stubborn grime that a mop or brush would chew through slowly, a handheld floor scrubber can cut cleaning time considerably. You’ll move faster across tile patterns, removing surface dirt while preserving finish.
Use it around kitchen islands and under cabinets, avoiding grout-heavy scrubbing. Protect delicate zones with floor mats when needed, and pick brush pads suited to your tile type.
- Choose the right pad for glaze and texture
- Work in overlapping passes for even cleaning
- Keep solution concentration low to avoid residue
- Rinse pads often to prevent redepositing soil
- Dry floors promptly to prevent slips
Cleaning Grout Lines With Minimal Elbow Grease
Although grout looks small, it traps dirt and darkens quickly, so tackle it with targeted, low-effort methods.
You’ll spray a baking soda and water paste or a gentle commercial grout cleaner, let it sit five minutes, then scrub with an old toothbrush or a grout brush using short, firm strokes.
Rinse with warm water and mop up residue.
For less frequent cleaning, apply grout sealing once dry to repel future stains and simplify upkeep.
Finish by buffing tiles with a microfiber cloth for subtle tile polishing.
These steps cut scrubbing time while restoring grout’s clean appearance.
Removing Mold and Mildew Spots Quickly
Because mold and mildew thrive in damp grout and corners, you’ll want to tackle spots quickly to prevent spread and staining. Start by ventilating the room, then scrub spots with a mixture of water and vinegar or a diluted bleach solution for stubborn patches. Rinse thoroughly and dry to discourage regrowth.
Consider these fast steps:
- Ventilate and dry the area immediately.
- Apply vinegar, let sit, then scrub grout.
- Use diluted bleach on persistent mold with caution.
- Rinse fully and blot tiles dry.
- Apply mildew resistant coatings or sealant for long-term mold prevention.
Tackling Stubborn Oil and Grease Stains
When oil or grease won’t budge, pick a strong degreaser labeled safe for tile and grout. Apply it, let it sit a few minutes, then scrub the spot with a brush and hot water to lift the residue.
Rinse thoroughly and repeat on any stubborn patches.
Choose A Degreaser
Pick a degreaser that’s formulated for kitchen use and labeled safe for your tile and grout type; it’ll cut through built-up oil and grease faster than plain soap and water. You’ll want a product that won’t dull finishes on vintage or historical tile styles, and you can opt for eco friendly alternatives when possible. Test in an inconspicuous spot first.
Apply per instructions, let it dwell briefly, then blot away loosened grime. Follow safety: ventilate and wear gloves.
- Check compatibility with grout and sealant
- Choose pH-neutral for sensitive tiles
- Avoid bleach on colored grout
- Use biodegradable formulas
- Keep pets away during application
Scrub With Hot Water
If hot water and your degreaser are on hand, scrub the stained tiles with a stiff-bristled brush to loosen baked-on oil and grime. Work in small sections so the solution stays hot.
Agitate along tile patterns to avoid missing edges and direct suds toward grout lines. Rinse frequently and blot excess moisture so grease doesn’t spread.
For stubborn spots, repeat with a short dwell time, then scrub with circular motions focused on grout color contrasts where dirt shows most.
Finish with a clear water rinse and dry with a microfiber mop to prevent residue and restore your floor’s original sheen.
Removing Sticky Residues and Adhesives
Though sticky spots and old adhesive can seem stubborn, you can remove them without damaging tile by using the right solvents and gentle scraping.
Though stubborn, sticky spots and old adhesive can be removed from tile using the right solvent and gentle scraping
For adhesive removal and residue elimination, test a small area first. Apply a commercial adhesive remover or rubbing alcohol, let it sit, then scrape with a plastic scraper. Wipe residue away with a microfiber cloth and warm soapy water.
Repeat if needed, then dry the area.
- Test solvent on an inconspicuous tile
- Use plastic tools to avoid scratches
- Work in small sections
- Ventilate when using solvents
- Dispose of residues safely
Brighten Grout Safely Without Bleach
Before you start, test a hidden area to make sure your chosen cleaner won’t damage the tile or grout. Use a baking soda paste and a stiff brush to lift stains without harsh chemicals.
Once the grout is clean and dry, apply a grout sealer to protect your work and make future cleaning easier.
Test A Hidden Area
Because grout can react differently to cleaners, always test a hidden area first to avoid surprises and damage. You’ll protect tile durability and spot hidden stains before they spread.
Pick an inconspicuous corner, apply your cleaner lightly, wait the recommended time, then blot — don’t rub. Check for color change, crumbly grout, or glaze loss.
- Choose a small out-of-the-way spot
- Use the cleaner at full strength first on a tiny swatch
- Time reactions: note immediate and 24-hour effects
- Rinse thoroughly after testing
- Photograph results for reference
Proceed only if the test shows no harm.
Use Baking Soda Paste
If you want a gentle, effective grout whitener that skips harsh chemicals, mix baking soda into a thick paste and apply it directly to the grout lines. You’ll see baking soda benefits immediately: mild abrasion lifts dirt, neutralizes odors, and won’t etch tiles.
Work the paste into grout with an old toothbrush, keeping paste consistency thick enough to cling but spreadable. Let it sit 10–15 minutes, then scrub in circular motions and rinse with warm water.
Repeat stubborn spots once more. Dry the floor and inspect for evenness. This method brightens grout safely without bleach or harsh fumes.
Seal Grout After Cleaning
Once your grout looks brighter from the baking soda treatment, protect that clean finish by sealing it—this locks out dirt and stains so you won’t have to scrub as often. You should seal grout within 48 hours of drying.
Pick a penetrating sealer for porous grout or a topical sealer for high-traffic areas. Test a small patch to check for color variation before coating the whole floor.
Apply in thin, even layers and wipe excess off tiles. Let cure fully per product directions.
- Clean thoroughly first
- Choose the right sealer type
- Test for color change
- Apply evenly
- Allow full cure time
Speed-Dry Floors to Avoid Streaks
While the grout and tiles are still slightly damp, grab a microfiber mop or a lint-free towel and work in long, overlapping strokes so you dry the surface evenly and prevent streaks.
Move steadily toward an exit to avoid walking on wet tiles.
Use speed dry techniques like thin passes and immediate edge drying to stop water pooling.
Rotate or flip the towel when it picks up moisture so you’re always drying, not smearing.
If streaks appear, buff them with a dry microfiber in circular motions.
Finish by ventilating the room or running a fan to hasten evaporation and lock in streak prevention.
Spot-Clean vs Full Deep Clean: When to Do Each
When you spot a fresh spill or a smudge, quick stain removal with a targeted cleaner will keep grout and tile looking clean without a full scrub. If you notice recurring odors or frequent spots in the same area, treat those triggers immediately and consider what’s causing them.
Schedule a full deep cleaning regularly (monthly or quarterly, depending on traffic) so you don’t have to fight big build-ups later.
Quick Stain Removal
How do you decide whether a quick spot-clean will do or if the floor needs a full deep clean? You’ll treat small spills differently than set-in messes: consider tile patterns and grout color—darker grout hides stains, intricate patterns mask splashes.
For quick stain removal, act fast, blot, and test a mild cleaner in a hidden spot. Use targeted tools for tougher spots.
- Blot fresh spills immediately
- Use pH-neutral cleaner for sealed tiles
- Apply baking soda paste on stubborn marks
- Scrub grout lines gently with a brush
- Rinse and dry to prevent residue
If stains persist, deep clean.
Odor Or Spot Triggers
If a small spill smells or is clearly localized, you can usually spot-clean it right away; act fast to prevent odors and mold prevention issues. Use a cloth, mild cleaner, and focus on grout edges to avoid grout discoloration. If smell persists or spreads, choose a full deep clean.
| Trigger | Action | When to Deep Clean |
|---|---|---|
| Localized spill | Spot-clean immediately | No |
| Persistent odor | Treat and monitor | Maybe |
| Visible mold | Deep clean and disinfect | Yes |
| Grout staining | Scrub or deep clean | Yes |
Scheduled Deep Cleaning
Ever wondered whether that spot needs quick attention or a full scrub? You’ll decide by frequency, visibility, and risk: crumbs by the stove need prompt spot-cleaning to protect kitchen decor and prevent pests, while long-neglected grout calls for a scheduled full deep clean.
Use these quick checks to plan:
- Size and severity: small spill vs widespread stains
- Location: high-traffic zones or under appliances
- Odor presence indicating bacteria
- Time since last full clean
- Recent appliance maintenance or leaks
Spot-clean daily or after messes; deep clean monthly or after appliance maintenance, or sooner if odors or wear appear.
Deep Clean Schedule vs Quick Maintenance
While quick maintenance keeps your kitchen tiles looking presentable day to day, a regular deep-clean schedule removes buildup that short sessions miss and prevents grout deterioration over time. You’ll want quick tasks—sweeping, spot-mopping—after meals, and deeper work weekly or monthly depending on traffic and spills.
Consider tile patterns and grout colors when choosing cleaners and brush strength so you don’t fade finishes or stain grout. Deep cleans target grout lines, edges, and under appliances; quick maintenance handles surface debris.
Set reminders, rotate tasks, and adjust frequency after cooking holidays or heavy use to keep floors healthy and looking their best.
Protecting Tile With Sealers and Finishes
Keeping up with quick maintenance and scheduled deep cleans will only get you so far—sealers and protective finishes give tiles and grout a longer-lasting defense against stains, wear, and moisture. You’ll boost sealant longevity and finish durability by choosing compatible products and following application instructions.
Apply thin, even coats, allow full curing, and recoat when performance drops. Consider surface type, traffic level, and moisture exposure. Benefits include easier cleaning and less staining.
- Choose a product rated for your tile material
- Test in an inconspicuous spot first
- Follow manufacturer cure times
- Reapply according to wear
- Use proper ventilation
Picking the Right Grout Sealer for Your Floor
When choosing a grout sealer for your floor, focus on the grout type, traffic level, and moisture exposure so you get protection that actually lasts.
Pick penetrating sealers for porous grout and topical sealers for high-traffic areas needing extra sheen.
Choose penetrating sealers for porous grout; use topical sealers where high traffic demands extra shine and protection.
Match sealer choice to grout color expectations—some sealers darken grout slightly, others preserve the original tone.
Prioritize sealer durability ratings for kitchens: look for wear, chemical and moisture resistance.
Test a small area to confirm appearance and performance.
Apply according to instructions and reapply at intervals based on manufacturer guidance and your observed wear patterns.
How to Reseal Natural Stone After Cleaning
Before you seal, test the product on a small, inconspicuous area to confirm compatibility with your stone.
Apply even, thin coats with a clean applicator and wipe up any puddles to avoid blotches.
Plan a regular resealing schedule—typically every 1–3 years—so your stone stays protected.
Test Sealant Compatibility
Because natural stone reacts differently to sealants, you should always test compatibility on a small, hidden area before resealing the whole floor. You’ll confirm sealant durability and spot any tile color variation, so you avoid surprises.
Follow these quick checks:
- Clean and dry the test patch thoroughly.
- Apply a small amount of your chosen sealant.
- Wait the manufacturer’s recommended cure time.
- Inspect for darkening, streaks, or tackiness.
- Perform a water bead test to check repellency.
If the patch shows no adverse effects, you can proceed confidently; if it does, try a different product or consult a pro.
Apply Even Thin Coats
Now that your test patch passed, you’re ready to reseal the whole floor—apply thin, even coats to prevent puddling and uneven sheen. Work in small sections, brushing or rolling with steady, overlapping strokes so each layer bonds uniformly. Don’t rush drying; follow manufacturer times between coats and check for tackiness before layering.
When applying polish or a topical sealer, less is more—thin films cure better and resist edge buildup. Use quality applicators and keep ventilation steady. Practice sealing techniques on a spare tile if unsure, and wipe excess immediately to avoid streaks or trapped debris.
Maintain Regular Re-Sealing
Since natural stone absorbs wear and cleaning can strip protective layers, you’ll want to reseal it on a regular schedule to keep grout and tiles protected. You’ll check absorption with a water drop test, clean and dry thoroughly, then apply the proper sealer for Sealing importance and improved Tile durability. Follow manufacturer cure times and avoid foot traffic until set.
Reapply every 1–3 years or sooner in high-traffic zones.
Quick checklist:
- Test absorption with a water drop.
- Use a stone-specific sealer.
- Work in small sections.
- Wipe excess promptly.
- Note cure time before use.
Preventing Grout Re-Staining After Cleaning
If you want your grout to stay clean longer, seal it right after it’s fully dry and free of cleaner residue. Sealing blocks stains, repels moisture, and makes routine cleaning much easier.
Seal grout only after it’s completely dry and residue-free — sealing repels stains and makes cleaning effortless.
After grout sealing, avoid walking on tiles until cured, and wipe spills immediately to stop re-staining. Use neutral pH cleaners and a soft brush to prevent abrading the sealant.
Periodically inspect grout lines and reapply sealant where it fades. Consider tile polishing to restore sheen without harsh chemicals.
These steps keep grout protected and reduce the frequency of deep scrubbing, saving time and preserving appearance.
30-Minute Routine Adapted for Small Kitchens
Because space is tight in small kitchens, you’ll want a minute routine that targets high-traffic spots fast: sweep crumbs, wipe counters and stove, spot-clean spills on tiles and grout, and run a quick mop or damp microfiber over the floor—each task should take no more than 60 seconds so the whole routine fits into a single break.
You’ll focus on visible trouble: grout discoloration, sticky edges, and direction of Tile patterns to guide quick passes.
Keep tools compact and ready.
- Microfiber cloth for counters
- Small handheld broom
- Spray bottle with cleaner
- Damp mop pad
- Toothbrush for grout
30-Minute Routine for Large or Open-Plan Kitchens
For large or open-plan kitchens, start by prepping and zoning the space so you can tackle sections methodically without wasting steps.
Set a timer for each zone and follow quick deep-clean moves—sweep, mop with a concentrated solution, and spot-scrub grout where needed.
That way you’ll cover more ground fast and keep the whole floor consistently clean.
Prep And Zone Your Space
Wondering how to tackle a large or open-plan kitchen without getting overwhelmed? Break the room into zones—dining, prep, cooking, high-traffic—and prep each quickly so you can clean efficiently and preserve any recent grout sealing or color matching work. Use a timer for each zone and a small caddy with supplies.
- Clear clutter from one zone at a time
- Move lightweight furniture and rugs aside
- Sweep or vacuum zone before wet cleaning
- Note areas needing grout sealing touch-ups
- Keep dirty-water bucket and clean mop separate
Zone-focused prep saves time and protects finished surfaces as you clean.
Quick Deep-Clean Steps
Now that each zone’s prepped, move through the room with a timed, repeatable routine that keeps you moving and cuts overall effort. Start at the farthest corner and work toward the exit in 10–15 minute blocks per zone.
Sweep or vacuum fast, then spot-treat stubborn stains using a scrub brush along tile patterns so you don’t miss edges.
Mop with a concentrated cleaner, rinsing the mop often to avoid streaking between grout colors.
For open-plan spaces, follow a clockwise path to maintain flow.
Finish by buffing high-traffic areas dry with a microfiber cloth to restore shine.
Common Mistakes That Slow Down Cleaning
While you want to get the job done quickly, a few common mistakes actually make cleaning take longer and wear out your tiles sooner. You’ll save time by avoiding easy errors like rinsing too little or scrubbing harshly.
Rushing leads to mistakes—clean smarter: rinse, avoid harsh scrubs, and protect grout for faster, longer-lasting results.
Don’t ignore grout care or use mismatched cleaners that cause color variation or damage sealers, and watch pattern matching when replacing tiles so new pieces don’t stand out.
- Using dirty mop water repeatedly
- Overwetting grout and under-drying
- Scrubbing with abrasive pads
- Mixing chemical cleaners improperly
- Skipping protective sealant where recommended
Be deliberate, not rushed, for faster, lasting results.
Troubleshooting When Cleaning Didn’t Work
If you followed the tips above but your tiles still look dirty, don’t panic—there are specific causes you can check quickly.
First, inspect tile patterns for embedded grime; textured or porous patterns trap dirt and need stiffer brushes or steam.
Next, evaluate grout color—if it’s darkened, residue or mold may remain and require a grout-specific cleaner or a bleach solution applied carefully.
Check your cleaning solution concentration and contact time; too weak or rinsed too fast won’t lift soils.
Finally, confirm tools aren’t transferring dirt back onto floors.
Test one fix at a time to identify the culprit.
Maintain Results Between Deep Cleans
Keep up your deep-clean results with a few simple habits you can do every day. Do quick sweeps and wipe spills as they happen.
Put mats or runners down in high-traffic zones to prevent wear. These small steps will keep dirt and grime from building back up between deep cleans.
Daily Quick Sweeps
Because crumbs and grit build up fast, doing a short daily sweep stops dirt from grinding into grout and keeps your deep-clean work looking fresh longer. You’ll protect tile durability and prevent dulling or unnecessary wear. Quick sweeps also help maintain grout coloring by removing surface particles that stain over time. Spend 3–5 minutes each evening with a soft broom or microfiber dust mop.
- Focus on high-traffic zones first
- Sweep toward one exit for efficiency
- Use a compact dustpan to catch edges
- Shake out mop head often
- Inspect grout lines weekly for buildup
Spot Clean Spills Immediately
When a spill happens, tackle it right away so stains don’t set into grout or leave a sticky residue on tiles. You’ll blot liquids with a clean cloth or paper towel, then mop the area with warm water and a mild detergent to prevent staining.
For greasy messes, sprinkle baking soda, let it absorb, then sweep and wipe—effective for stain removal without harsh chemicals.
Keep a small spill kit handy: cloths, spray bottle, and a soft brush for grout. Quick spill management saves time and keeps your floor guest-ready between deep cleans, stopping stains before they bond.
Protect High-Traffic Areas
Since high-traffic zones take the brunt of daily use, protect them with simple barriers and routines so your deep-clean results last longer. You can preserve tile finish and grout by adopting targeted Maintenance tips and small habits that cut wear and dirt buildup.
Focus on entry points and cooking areas, and make protection effortless.
- Place washable rugs or mats at entries and sink areas.
- Use felt pads on chair and table legs.
- Sweep high-traffic spots daily to prevent grit abrasion.
- Wipe spills immediately to avoid stains.
- Reapply grout sealer every 6–12 months for ongoing protection.
Fast Eco-Friendly Products That Actually Clean
If you want fast, eco-friendly cleaning that actually works, choose products with concentrated natural surfactants and clear ingredient lists so you get power without harsh chemicals.
Look for bio-based degreasers, enzymatic sprayers, and pH-neutral tile cleaners that advertise eco friendly alternatives and lab-tested cleaning effectiveness. You’ll cut rinsing time and avoid residue that attracts dirt.
Concentrated formulas save packaging and dilute to match soil levels, speeding tasks. Use microfiber mops and hot water to amplify performance.
Always spot-test grout, follow label dilution, and store safely—this keeps floors spotless without toxic fumes or long drying waits.
When Hiring a Pro Is Worth It (Signs & Costs)
Although you can tackle most tile jobs yourself, there are clear signs that calling a pro will save time, protect your floor, and cost less in the long run. You should consider Pro cleaning when stains won’t lift, grout is crumbling, or specialized equipment is needed. Do a Cost comparison: DIY product costs plus time versus a one-time professional fee.
- deep-set stains persist after DIY attempts
- grout requires repair or resealing
- uneven or loose tiles exist
- you lack heavy-duty machines or cleaners
- you want a warranty or liability coverage
A pro often finishes faster and prevents costly mistakes.
Checklist: Deep Clean Kitchen Tiles in One Pass
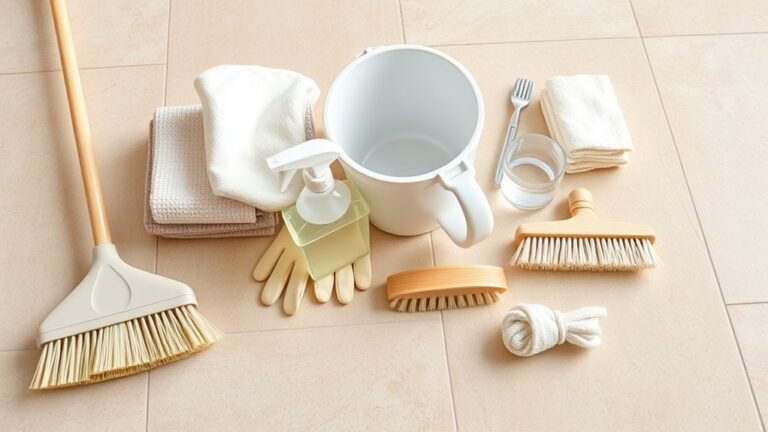
Before you start, gather everything you’ll need so you can clean the whole floor in one efficient pass: broom or vacuum, mop and bucket, pH-appropriate tile cleaner, grout brush, microfiber cloths, a scrub pad for stubborn spots, and gloves.
Move furniture, sweep debris, and spot-treat stains with the scrub pad.
Mix cleaner per instructions, mop from far corner toward exit, rinsing mop often.
Focus grout lines with the brush, matching pressure to grout color—darker grout may hide residue, lighter shows it.
Wring mop to avoid pooling.
Finish by buffing tiles dry with microfiber cloths and replace furniture.
Quick Daily Habits to Keep Tiles Sparkling
When you get into the habit of a five-minute sweep and spot-mop each day, your kitchen tiles stay bright and buildup never gets a chance to harden. You’ll preserve tile patterns and prevent grout coloring from dulling. Quick, consistent care saves time and keeps deep cleans rare.
Follow simple steps each evening or after heavy meals:
- Sweep crumbs and debris from corners and edges.
- Spot-mop spills with a microfiber cloth and mild cleaner.
- Wipe high-traffic zones where grout darkens first.
- Shake or rinse entry mats to trap dirt.
- Inspect grout lines weekly and touch up stains immediately.
Frequently Asked Questions
Can I Use a Vacuum With Beater Bar on Tile Without Scratching?
Yes — you can usually use a vacuum with a beater bar on tile if your model supports vacuum compatibility with hard floors; check settings or switch to brush-roll off for beater bar safety to avoid scratching grout or finish.
How Do Pets’ Nails and Accidents Affect Tile Maintenance?
Pets’ nails and accidents increase wear: you’ll get nail scratches and trapped pet hair that abrade grout, while urine and feces cause stains and odor. You should trim nails, clean spills promptly, and vacuum regularly.
Will Vinegar Harm Epoxy Grout or Grout Sealer?
Think of vinegar as a tiny storm: you shouldn’t use it on epoxy grout or grout sealer because vinegar effects can cause a chemical reaction, degrading sealer bonds and potentially etching or weakening epoxy grout over time.
How Often Should Entry Mats Be Cleaned to Protect Tile?
You should clean entry mats weekly to protect tile; with heavy traffic, launder or vacuum them twice weekly. Entry mat maintenance and dirt trapping strategies reduce grit buildup, prevent wear, and keep grout and tile looking better longer.
Can Radiant-Heat Floors Be Steam Cleaned Safely?
Like walking on eggshells, you shouldn’t steam at high temps; you can safely use radiant heat cleaning with low-temp steam and brief passes. Steam cleaning safety means checking manufacturer specs and avoiding excess moisture to prevent damage.
Conclusion
You’ve got the plan—and the power—to make your kitchen tiles shine without wasting hours. Follow the quick steps, pick the right tools for your tile type, and use eco-friendly cleaners that actually work; it’s surprising how small choices make a big difference. Keep up with short daily habits, and call a pro only when grout or damage needs expert care. Your floor will thank you—bright, clean, and ready for whatever comes next.