How to Protect Your Home From Water Damage
You can cut water damage risk by checking your flood zone, fixing roof leaks, and keeping gutters and downspouts clear so water drains away from the foundation. Seal foundation and wall cracks, grade soil outward, and add sump pumps, backflow valves, or flood sensors near appliances and basements. Test appliances and shutoffs regularly, keep records and contacts, and consider flood insurance. Follow these steps now and learn practical maintenance and installation tips next.
Assessing Your Home’s Flood Risk

Start by figuring out how likely your home is to flood so you can target prevention where it matters most.
You’ll check flood zone mapping from local authorities and use risk assessment tools online to see historical flood patterns, elevation data, and storm surge potential.
Walk your property to note low spots, drainage paths, and nearby water bodies that could overflow. Record vulnerabilities like basement windows or low electrical panels.
Use findings to prioritize protections — elevating utilities, installing barriers, or buying flood insurance.
Reassess after major weather events or changes to nearby land or drainage.
Inspecting Roofs and Gutters Regularly
Because your roof and gutters are the first line of defense against water, inspect them at least twice a year and after major storms to catch problems early.
Look for damaged roof shingles, loose flashing, and sagging gutters. Clean debris, check downspouts for clogs, and confirm gutter installation angles direct water away from the foundation. Replace worn parts promptly and document issues with photos.
- Check roof shingles for cracks, lifts, or missing pieces.
- Clear gutters of leaves, nests, and sediment.
- Test downspouts and extensions for good drainage.
- Verify gutters are securely fastened and pitched correctly.
Sealing Cracks in Foundation and Exterior Walls
Check your foundation and exterior walls for hairline cracks, because small gaps can let moisture in before you notice bigger problems.
Pick a sealant suited to the material and crack size — flexible polyurethane or silicone for hairline cracks, and epoxy for wider structural gaps.
Clean and dry the area, then apply the sealant per manufacturer instructions and smooth it for a watertight finish.
Inspect for Hairline Cracks
Small hairline cracks in your foundation or exterior walls can let moisture in long before they look serious, so you should inspect them regularly and seal them promptly.
You’ll want to walk the perimeter, use a flashlight, and note any fine fissures. Catching hairline cracks early protects structural integrity and prevents mold, rot, and larger failures. Document locations and sizes so you track changes over time.
- Check after heavy rain and seasonal shifts.
- Use a magnifier and chalk to mark cracks.
- Measure and photograph for comparison.
- Call a pro if cracks widen or appear repeatedly.
Choose Appropriate Sealant
Anyone tackling foundation or exterior-wall cracks should pick a sealant that matches the material, crack size, and movement expected — silicone and polyurethane work for flexible, active cracks, hydraulic cement is best for large, leaking gaps in concrete, and masonry caulk or acrylic options suit hairline fissures on brick or stucco.
You’ll assess substrate, exposure, and expected movement, then compare sealant types for adhesion, flexibility, and longevity. Consider UV and moisture resistance when you choose.
Keep in mind recommended warranties and compatibility with paints or coatings. Proper selection reduces repeat repairs and prevents water intrusion before you apply sealant.
Prepare and Apply Sealant
Before you apply sealant, clean and dry the crack thoroughly so the product bonds to sound material; remove loose debris with a wire brush, blow out dust with compressed air or a vacuum, and let the area cure completely if it’s damp.
Choose sealant types suitable for masonry or concrete, and follow manufacturer instructions for sealant application. Use a backer rod for wide gaps, apply steady beads, and smooth with a tool or gloved finger. Keep joints slightly recessed to shed water.
- Pick compatible sealant types.
- Prep surface thoroughly.
- Apply consistent beads.
- Tool and cure per instructions.
Installing and Maintaining Proper Drainage Systems
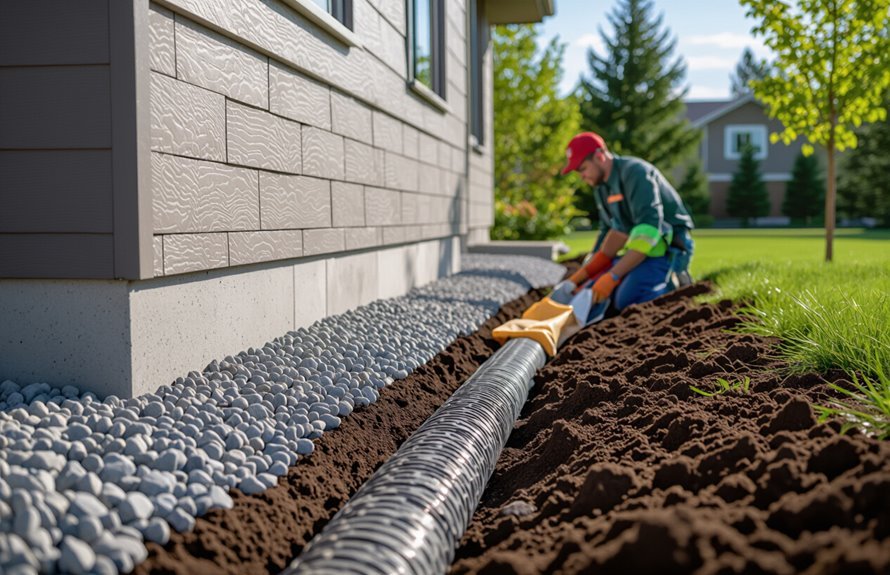
Make sure the ground slopes away from your foundation so rainwater can’t pool against your walls.
Keep gutters and downspouts clean and well-maintained to channel water safely away.
Together these simple steps will prevent most surface runoff from causing damage.
Grade Soil Away Foundation
Properly grading soil away from your foundation sends water where it belongs — downhill and away from the house — and is a simple, effective first line of defense against damp basements and foundation damage.
You should slope soil at least 6 inches over the first 10 feet, use compacted fill to resist soil erosion, and keep mulch or plants clear of the wall.
Maintain slope by checking after heavy storms and regrading where settling occurs to preserve foundation stability.
Consider shallow swales or dry creek beds to direct runoff safely without affecting landscaping.
- Check slope regularly
- Add compacted fill
- Protect from erosion
- Direct runoff
Clean and Maintain Gutters
Directing soil and runoff away from your foundation works hand in hand with a properly functioning gutter system; gutters collect roof water and channel it safely so it never pools against the house.
You should inspect and perform gutter cleaning at least twice a year, removing debris, flushing downspouts, and checking fasteners.
Consider gutter types—K-style, half-round, or seamless—based on capacity and maintenance needs.
Install guards if clogs are frequent, but still inspect regularly.
Repair leaks, sagging sections, and guarantee downspouts discharge at least 6 feet from the foundation.
Proper upkeep prevents basement leaks, erosion, and costly structural damage.
Grading and Landscaping to Direct Water Away

When your yard slopes away from the foundation and landscaping channels runoff, you cut the risk of water pooling against your home. Small changes in grade and plant placement can make a big difference in keeping basements and crawlspaces dry.
You should use landscape grading and simple drainage solutions to guide water toward storm drains or beds designed to absorb runoff. Shape soil to create a 5% slope for at least 10 feet, avoid planting water-loving species near foundations, and use swales or dry creek beds where appropriate.
- Regrade soil gently away from foundation
- Install gravel-filled swales
- Choose deep-rooted plants
- Maintain mulch and beds
Sump Pumps: Selection, Installation, and Maintenance
Landscaping can keep most runoff from ever reaching your foundation, but roofs, heavy storms, or a high water table still leave basements vulnerable — that’s where a sump pump comes in.
You’ll choose among sump pump types (pedestal, submersible, or battery backup) based on space, noise, and reliability. Match sump pump capacity to your worst-case inflow rate; undersizing invites failure.
Install the pit level with proper discharge piping and a check valve, and place the float switch clear of debris. Test it monthly, clean the pit annually, and replace batteries and worn parts promptly so your basement stays dry.
Backflow Preventers and Sewer Backup Protection
Don’t wait for sewage to back up before you act — learn the common types of backflow preventers (like check valves and backwater valves) so you can pick what fits your system.
Installing the right device and keeping it maintained greatly reduces sewer backup risk.
I’ll cover how professional installation, routine checks, and simple upkeep keep your home protected.
Types of Backflow Preventers
Because sewer backups can send contaminated water into your home, installing the right backflow preventer is one of the smartest steps you can take to guard against water damage.
You should schedule regular backflow testing and backflow inspection to keep devices functional.
Common types include:
- Check valves — simple, cost-effective for low-risk connections.
- Reduced Pressure Zone (RPZ) — high protection where contamination risk is severe.
- Double-check valves — reliable for moderate risk without hazardous materials.
- Flapper or sewer gate valves — installed on sewer lines to block reverse flow.
Choose based on risk, local code, and plumber recommendations.
Sewer Backup Risk Reduction
When you protect your home against sewer backups, you reduce health risks and costly damage; installing the right backflow preventer and maintaining it are key steps.
You should schedule regular sewer inspection to spot blockages, root intrusion, or failing seals before they cause backups.
Know basement and lower-level vulnerability, and keep drains clear of debris and grease that can trigger reverse flow.
Consider backup alarms that warn you of rising levels so you can act quickly and shut off water sources.
Coordinate with your municipality about stormwater load and know emergency procedures to minimize contamination and cleanup needs.
Installation and Maintenance
Before installing a backflow preventer, you’ll evaluate your basement layout and sewer line access so you pick the right model and location for reliable protection.
You’ll hire a licensed plumber to install and test the valve, and schedule annual inspections to guarantee seals work.
Use water resistant materials around the connection and keep documentation of tests.
Consider flood barrier systems at vulnerable entry points and clear nearby drains.
Maintain maps of shutoff valves and train household members to act quickly during alarms.
- Install by pros and test annually
- Use water resistant materials
- Add flood barrier systems
- Keep records and train family
Waterproofing Basements and Crawlspaces

If your basement or crawlspace isn’t properly sealed, moisture will find weak spots and turn into costly mold, rot, and structural damage; waterproofing those spaces keeps water out and protects your home’s foundation.
You should inspect walls and floors for cracks, install a reliable basement drainage system, and slope soil away from exterior walls. Inside, apply durable sealants and consider interior drainage plus a sump pump.
For crawlspaces, improve crawlspace ventilation and add vapor barriers to block ground moisture.
Maintain gutters and downspouts, fix leaks promptly, and schedule periodic checks to catch issues before they escalate.
Protecting Windows and Doors From Water Infiltration
Check the seals and caulking around your windows and doors regularly and patch any gaps you find to keep water out.
Replace worn weather stripping to guarantee a tight fit that blocks drafts and moisture.
Make sure gutters, downspouts, and grading direct water away from openings so runoff doesn’t pool at the threshold.
Inspect and Seal Gaps
Start by walking the perimeter of each window and door to find gaps, cracks, or deteriorated sealant where water can sneak in.
You’ll perform a quick gap analysis, noting size and location, then choose sealing techniques appropriate to the material. Clean surfaces, remove old caulk, and dry thoroughly before applying new sealant.
For larger voids, use backer rod before caulking. Check exterior trim and sill connections carefully.
- Remove old sealant and debris.
- Use backer rod for deep gaps.
- Apply silicone or polyurethane caulk smoothly.
- Inspect after curing for missed spots.
Upgrade Weather Stripping
When you swap out worn weather stripping around windows and doors, you’ll stop drafts and block the tiny channels water uses to sneak in.
Inspect seals, pick appropriate weather stripping types—foam tape for uneven gaps, V-strip for double-hung sashes, and rubber or silicone for exterior doors.
Clean surfaces, remove old adhesive, measure precisely, and test fit before cutting.
Follow recommended installation techniques: compress seals slightly for a snug fit, allow adhesive to cure, and check operation so locks and catches move freely.
Recheck seasonally and replace damaged sections promptly to keep water and energy loss at bay.
Maintain Proper Drainage
Proper drainage keeps rain and melting snow from pooling near window sills and door thresholds, so clear gutters, downspouts, and the ground below them to direct water well away from your openings.
You’ll inspect and fix blockages, extend downspouts, and guarantee grading slopes away from the foundation. Use drainage solutions like French drains or surface channels and consider landscape modifications that redirect runoff.
Seal gaps after confirming exterior drainage works. Maintain vegetation so roots don’t clog systems and replace damaged flashing. Regular checks before storms prevent infiltration and costly repairs, keeping windows and doors dry and functional.
- Inspect gutters monthly
- Extend downspouts
- Add French drains
- Regrade soil around foundation
Maintaining Plumbing: Preventing Leaks and Burst Pipes
Although you mightn’t notice slow drips or a slightly damp patch right away, regular plumbing maintenance is the best way to prevent leaks and burst pipes that can cause costly water damage.
Check visible joints, fittings, and appliances monthly, performing a pipe inspection to spot corrosion or hairline cracks. Use simple leak detection methods — listen for running water, monitor your meter, and watch ceilings and floors for damp spots.
Tighten loose connections, replace worn washers, and clear minor clogs before they worsen. Schedule professional inspections annually and shut off main water when leaving for extended periods to reduce risk.
Insulating Pipes to Prevent Freezing and Bursting
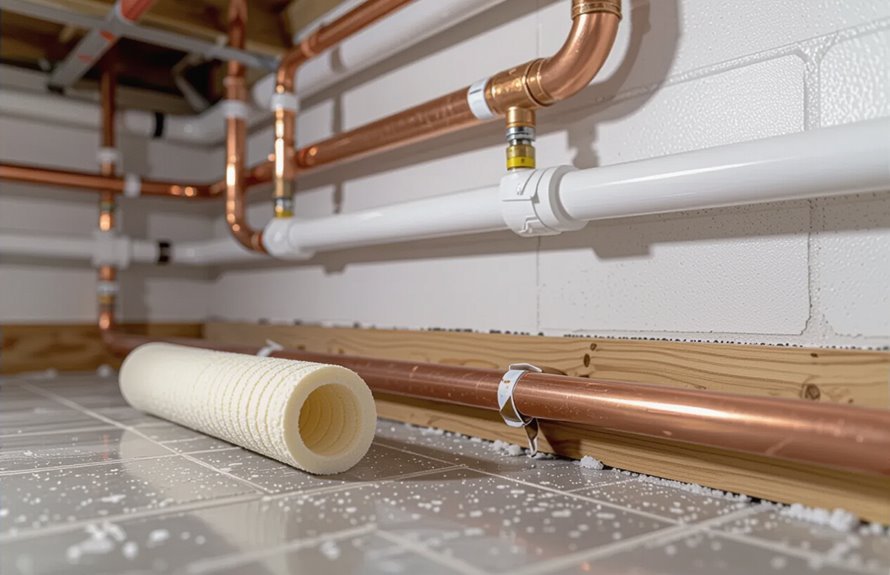
Check exposed pipes in basements, crawl spaces, attics, and along exterior walls and add foam or fiberglass insulation to keep heat in.
For pipes that still risk freezing, use electric heat tape or cable rated for plumbing and follow the manufacturer’s installation and safety instructions.
Proper insulation and heat tape together cut the chance of frozen, bursting pipes and costly water damage.
Insulate Exposed Pipes
When temperatures drop, insulating any exposed pipes you can access is one of the simplest, most effective steps you can take to prevent freezing and costly bursts.
You’ll reduce heat loss and lower the chance of cracked pipes by using proven pipe insulation techniques and addressing drafts and cold spots. Choose the right foam or fiberglass wrap, cut to fit, and seal seams with tape or clamps. Check annually and replace damaged insulation.
- Identify exposed pipes in basements, crawlspaces, attics, garages.
- Measure and cut insulation to fit snugly.
- Seal joints and secure with tape.
- Inspect for damage regularly.
Heat Tape Use
If you’ve insulated exposed pipes but still face extreme cold or persistent drafts, heat tape is a practical next step to prevent freezing and bursting.
You’ll choose between self-regulating and constant-wattage types, matching length and pipe material. For safe heat tape installation follow manufacturer steps: clean pipe, unwrap tape along the pipe, secure with approved tape, and plug into a GFCI outlet.
Test before winter and inspect periodically for wear. The heat tape benefits include targeted thawing, reduced burst risk, and energy efficiency when used correctly.
If unsure, hire a licensed pro to guarantee code compliance and safety.
Choosing Water-Resistant Building Materials
Because water finds weak spots fast, choosing water-resistant materials is one of the smartest defenses you can build into your home.
You’ll want water resistant options for walls, floors, and trim, and choose durable finishes that hold up to moisture and cleaning.
Prioritize materials that resist mold, swell, and staining.
- Cement board and tile in wet zones — durable finishes and easy to clean.
- Waterproof vinyl or sealed concrete flooring — low absorption, high durability.
- Closed-cell foam insulation — resists water and won’t promote mold.
- Stainless or aluminum trim and flashing — corrosion-resistant, long-lasting.
Installing Flood Sensors and Smart Water Shutoff Systems
Although you might never expect a burst pipe or appliance leak, installing flood sensors and a smart water shutoff gives you immediate detection and automatic response to stop damage fast.
You’ll place flood sensor technology at likely leak points—near water heaters, under sinks, and by appliances—so you get alerts the moment moisture appears.
Pair sensors with a smart shutoff to automatically halt water flow when a leak’s detected; the smart shutoff benefits include minimizing flooding, reducing repair costs, and lowering insurance risk.
Choose devices with reliable connectivity, battery backup, and easy testing so you can trust the system when it matters.
Creating an Emergency Water-Damage Response Plan
Installing sensors and an automatic shutoff cuts damage early, but you still need a clear emergency water-damage response plan so you and anyone in your household know what to do when an alarm sounds.
Create concise response procedures, list emergency contacts, and assign roles so actions are fast and calm. Post instructions near main panels and share digital copies.
- Identify shutoff valves, power cutoffs, and document step-by-step response procedures.
- Compile emergency contacts: plumber, insurer, electrician, and neighbors.
- Assign who evacuates, who secures pets, who gathers phones/documents.
- Schedule drills and update contacts annually.
Storing Valuables and Appliances Safely Off the Floor
Place valuable items and appliances at least a few inches above the floor—or higher when possible—to keep them safe from rising water and minor floods.
Use sturdy shelving, pallets, or wall-mounted racks for elevated storage, and position heavy appliances on blocks or stands.
Store paperwork, electronics, and textiles in waterproof containers with tight seals, and label contents for quick access.
Anchor shelves to studs to prevent tipping during jolts.
Keep cords, batteries, and backup drives off the ground and on higher shelves.
Regularly inspect raised setups for stability and replace damaged containers so your valuables stay protected and recoverable.
Managing Roof Penetrations and Flashing Details
When you care for roof penetrations and flashing details, you’re protecting the most common entry points for water — vents, chimneys, skylights, and pipes — so leaks don’t start at the top and work their way inward.
Regular roof inspection catches loose flashing, cracked sealant, and corrosion early. Use durable flashing materials and proper overlap, and reseal joints annually.
If flashing sits against masonry, check mortar too. Replace damaged pieces promptly or call a pro for complex areas.
- Inspect penetrations after storms.
- Replace degraded flashing materials.
- Reseal gaps with compatible sealant.
- Hire a roofer for tricky spots.
Cleaning and Maintaining Downspouts and Extensions
Downspouts and their extensions channel roof runoff away from your foundation, so keeping them clear and secure prevents basement floods and erosion.
Inspect gutters and downspouts monthly, removing debris and flushing with a hose to confirm flow. Check downspout materials for corrosion, cracks, or loose seams; replace damaged sections promptly.
Ascertain extension lengths direct water at least 4–6 feet from the foundation or tie into a drainage system. Secure extensions with clips or straps to prevent sagging.
For frozen climates, keep pathways clear and consider insulated or heated extensions to avoid ice backups and foundation seepage.
Regularly Testing and Servicing Water-Related Appliances
Keeping gutters and downspout extensions working is only part of preventing water damage; you also need to routinely test and service the appliances that use or move water inside your home.
You should follow appliance maintenance tips and schedule water safety inspections to catch leaks early. Check hoses, valves, and seals; run test cycles on dishwashers and washing machines; flush water heaters and inspect pressure relief valves; and clean refrigerator drip pans and condensate lines.
Regular checks reduce surprises and prolong equipment life. If you spot corrosion or persistent leaks, shut off supply lines and call a qualified technician promptly.
- Inspect hoses and valves monthly
- Run test cycles quarterly
- Flush and test heaters annually
- Clean drains and pans regularly
Working With Contractors: What to Ask and Expect
Who should you hire and what should you expect from them?
You’ll want licensed pros with verifiable contractor credentials, references, and insurance proof.
Ask for written estimates, clear scopes of work, and realistic project timelines.
Discuss materials, waterproofing methods, permits, and inspection needs so there’re no surprises.
Get milestones, payment schedule, and change-order procedures in writing.
Verify who’s on site, cleanup responsibilities, and warranty terms for labor and materials.
Communicate preferred contact methods and response expectations for issues.
Keep copies of contracts and receipts; they’ll help enforce agreements and guarantee the job reduces future water-damage risk.
Insurance Coverage and Documenting Your Home’s Condition
Before a storm ever hits, make sure your insurance actually covers water-related damage and that you’ve documented your home’s condition—photos, videos, and dated receipts make claims far easier to prove.
Review your insurance policy annually, note exclusions, and ask about flood endorsements. Create a home inventory with descriptions, serial numbers, and values. Store copies offsite or in the cloud.
After any incident, photograph damage before cleanup and record repair estimates.
- Check policy limits and deductibles.
- List high-value items in your home inventory.
- Time-stamp photos/videos and back them up.
- Keep receipts and contractor bids.
Conclusion
You’ve got a toolkit now to keep water out and your home dry — from checking the roof to sealing foundation cracks, keeping drains clear, and testing appliances. Work with trustworthy contractors, document conditions, and review insurance so surprises don’t wash over you. Stay proactive: a little regular upkeep is like an umbrella for your house — small actions shield you from big storms. Keep at it, and you’ll sleep easier knowing you’re protected.