How to Deep Clean Porcelain Tile Floors Properly
You’ll start by sweeping or vacuuming, then test a small tile and grout patch with your cleaner to check for etching or discoloration. Pre-treat grout, mop small sections with warm water and pH-neutral cleaner, scrub grout gently, rinse thoroughly and dry with microfiber cloths to prevent streaks. Use degreasers for oily spots and avoid acids if sensitive. Finish by resealing grout if needed. Keep going and you’ll find detailed steps, tools, and timing to follow.
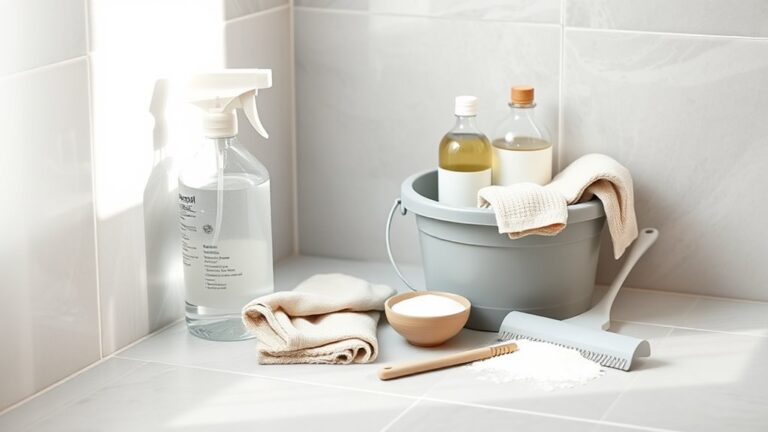
Gather These Tools and Supplies for Porcelain Tile
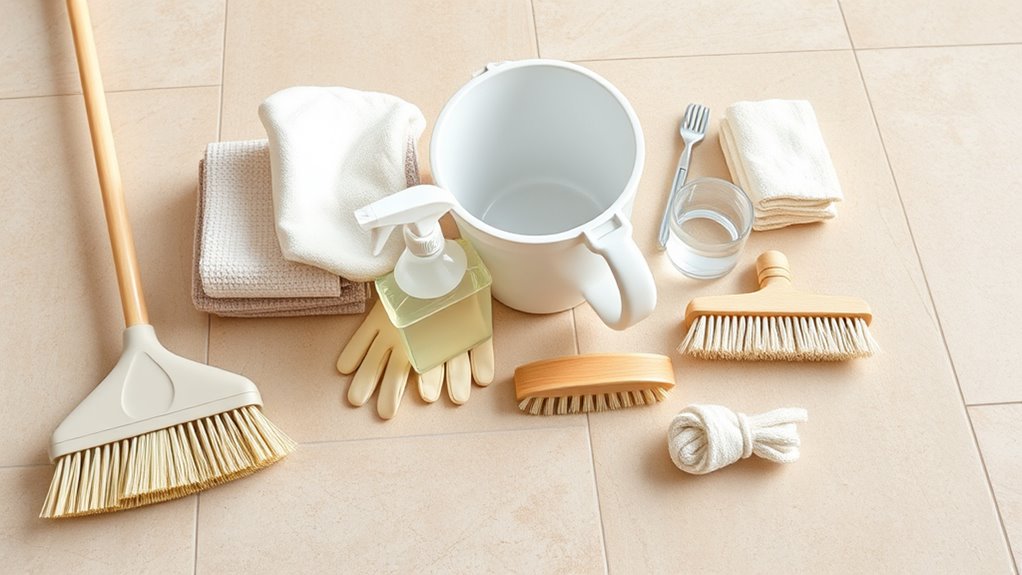
Before you start, gather the right tools and supplies so the job goes fast and finishes well. You’ll want a soft-bristle broom, microfiber mop, bucket, pH-neutral tile cleaner, sponge, grout brush, and microfiber towels.
Gather soft-bristle broom, microfiber mop, pH-neutral cleaner, sponge, grout brush, towels—organize supplies for faster, safer porcelain cleaning.
Add rubber gloves and knee pads for comfort. Skip abrasive pads or acidic cleaners that harm porcelain maintenance and dull tile aesthetics.
For stubborn grime, include a steam mop rated safe for porcelain. Keep a spray bottle with diluted cleaner handy for spot treatment.
Organize everything nearby so you move quickly and avoid reapplying cleaners, protecting finish and saving time.
Test a Tile and Grout Patch: Finish, Seal, and Acid Sensitivity
Before you start deep cleaning, test a small, inconspicuous patch of tile and grout to see how the finish and seal react to your cleaner. Apply the cleaner, rinse, and check for discoloration or dulling after it dries.
Then spot-test a diluted acid solution (like vinegar) to confirm the tile and grout aren’t acid-sensitive.
Patch Test Procedure
Wondering how your cleaner will react with your porcelain and grout? Pick an inconspicuous tile, note finish and color matching needs, and clean a 2×2 inch area.
Apply the cleaner per directions, rinse, and inspect for discoloration or dulling after it dries.
If you plan grout sealing, test the sealer on the same patch to confirm adhesion and appearance.
Document timing, dilution, and results with photos.
Repeat with any alternate products.
Only proceed with full-floor cleaning if the patch shows no damage, no staining, and the sealer performs as expected.
Acid Sensitivity Check
When you’re testing a tile and grout patch for acid sensitivity, apply a diluted acid solution (like a 1:10 vinegar-water mix or a manufacturer-recommended cleaner) to a 2×2 inch area and watch for any immediate etching, fizzing, or color change. Let it sit briefly, then rinse and dry to inspect.
Note how the finish and grout react so you can choose proper sealing techniques and protect color patterns from dulling. If you see damage, avoid acids and choose neutral cleaners.
- Record results and photo-document changes.
- Adjust cleaning and sealing techniques accordingly.
- Test adjacent tile types too.
Quick 5‑Step Deep Clean for Porcelain Tile Floors
Although it looks simple, a proper deep clean will lift stubborn grime and restore your porcelain tile’s shine without damaging the surface. Start by sweeping or vacuuming to remove loose dirt, preserving porcelain durability and tile aesthetics.
Second, pre-treat grout lines with a soft brush and a suitable paste.
Third, mop with warm water and a non-abrasive cleaner (see next section for safe options), working in small sections.
Fourth, rinse thoroughly to remove residue, then buff with a microfiber cloth while tiles are damp.
Fifth, let floors air-dry completely and inspect for missed spots, repeating spot treatment as needed.
Safe Cleaners That Work on Porcelain Tile
Which cleaners should you reach for to keep porcelain looking like new? You’ll want pH-neutral floor cleaners that protect Porcelain durability while removing surface soils. Mild dish soap diluted in water works for routine care; commercial pH-neutral tile cleaners handle deeper grime without etching. Avoid acidic or abrasive products that shorten finish life.
Reach for pH-neutral cleaners or diluted mild soap; avoid acidic or abrasive products to protect porcelain glaze.
Match Cleaning frequency to traffic: weekly for low-traffic, more often where pets or dirt concentrate. Rinse thoroughly to remove residue, and always test a small area first. Use microfiber mops and soft brushes to lift soil without scratching the glaze.
- pH-neutral cleaners
- Diluted mild soap
- Soft tools only
Homemade Cleaners That Actually Remove Dirt and Grime
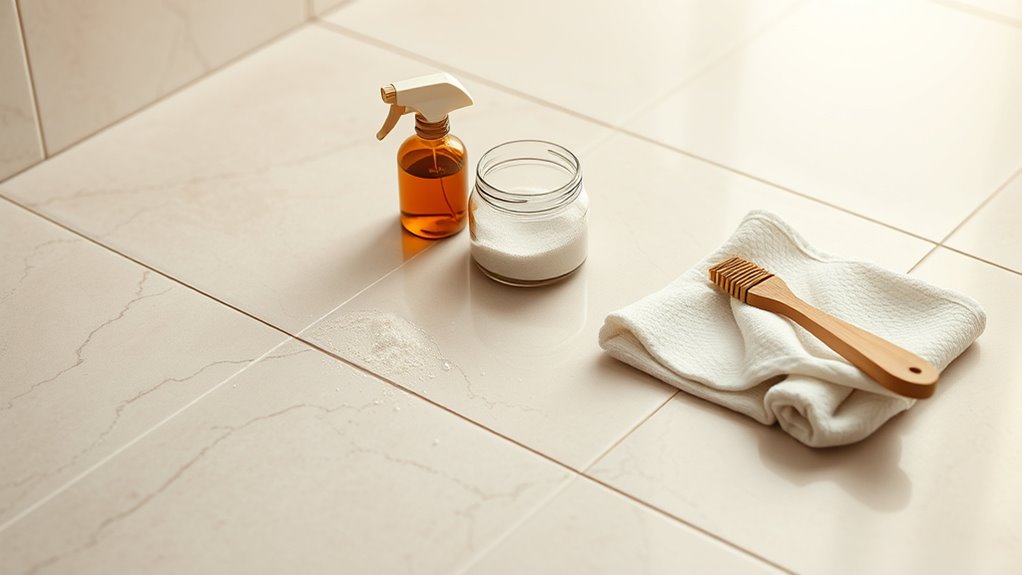
If you prefer DIY solutions over store-bought pH-neutral cleaners, several homemade mixes will safely lift dirt and grime from porcelain without harming the glaze.
Use a mild solution of warm water with a few drops of dish soap for routine grime; rinse well to avoid residue.
For tougher spots, mix equal parts white vinegar and water, test in an inconspicuous area for color matching concerns, and dilute if needed.
For stained grout, apply a paste of baking soda and water, scrub gently, then rinse and dry.
After deep cleaning, consider grout sealing to protect lines and reduce future staining.
Remove Loose Dirt and Debris Before You Wet the Floor
Before you bring out any water, sweep the floor to pick up grit that can scratch porcelain.
Follow with a dustmop to catch finer particles, and pay special attention to corners and edges where dirt hides.
Doing this first keeps your wet cleaning more effective and prevents streaks.
Sweep First, Then Dustmop
Start by sweeping the entire floor to pick up grit, pet hair, and other loose debris so you don’t grind it into the tile when you mop. Use a stiff broom for corners you can reach, then follow with a microfiber dustmop to catch fine particles and reduce streaks.
Practice proper dusting techniques to remove allergens and prevent residue. After wet cleaning, make certain of thorough floor drying to avoid water spots and slips. Keep tools clean so you’re not redepositing dirt.
- Sweep high-traffic zones first
- Dustmop with overlapping strokes
- Empty collection pan outside immediately
Tackle Corners And Edges
When you’re ready to wet the floor, work the edges and corners first to lift the loose dirt that brooms and dustmops miss. Use a narrow-bristled brush or a corner detailing tool to loosen debris along baseboards, grout lines, and appliance feet.
Vacuum or sweep that loosened material before any water touches the tile to prevent muddy residue. For tight gaps, a crevice nozzle or compressed air helps dislodge grit.
Check edge sealing around thresholds and walls; damaged seals trap grime and invite moisture. Repair or replace compromised sealing so your deep clean stays effective and your porcelain stays protected.
Step‑By‑Step Deep Clean: Vacuuming, Scrubbing, Mopping
Once you’ve cleared the room and swept up loose debris, you’ll move through a focused routine—vacuuming grout lines, scrubbing stains, and finishing with a thorough mop—to restore your porcelain tile’s shine without damaging the surface.
After clearing debris, follow a focused routine—vacuum grout, scrub stains, then mop to restore porcelain tile shine.
You’ll vacuum using a soft‑bristled attachment to lift grit from grout and textured areas, mindful of color variations and tile patterns so you don’t miss hidden dirt.
For scrubbing, use a pH‑neutral cleaner and a stiff nylon brush on grout; spot‑test any solution.
Finish by mopping with clean, warm water and a microfiber mop, changing water often to avoid streaks.
- Inspect grout depth
- Target high-traffic zones
- Rinse and repeat if needed
Remove Greasy or Oily Stains From Porcelain Tile
Start by spotting where the grease came from so you can pick the right approach and prevent repeat spills.
Use a degreasing cleaner or a mild detergent suited for porcelain, apply it to the stain, and let it work briefly before gently agitating.
Rinse well with clean water and dry the area thoroughly to remove residue and restore traction.
Identify Grease Sources
Because oils spread quickly and often soak into grout lines, you’ll want to locate the source before you clean so you can prevent re-soiling and choose the right degreaser. Inspect nearby areas to trace fresh stains back to their origin. Look for drips, splatters, and shiny patches that radiate outward. Note recurring spots to find chronic problems.
- Cooking grease: check behind stovetops, range hoods, and countertops for splatter patterns.
- Appliance leaks: inspect dishwashers, refrigerators, and ovens for oil or lubricant seepage.
- Foot traffic: observe paths that transfer grease from shoes or hands.
Choose Appropriate Cleaner
After you’ve located the grease sources, pick a cleaner that matches the type of oil and the tile finish so you don’t spread the stain or damage the glaze.
For light kitchen oils, use a pH-neutral degreaser. For heavier automotive or waxy residues, choose a mild citrus or solvent-based product labeled safe for porcelain.
Test on an inconspicuous spot near decorative accents to confirm no discoloration or finish loss.
Avoid abrasive powders on polished tiles.
Keep cloths and pads separate by color coordination to prevent transfer.
Follow manufacturer instructions and apply only enough cleaner to lift oil without scrubbing excessively.
Rinse And Dry Thoroughly
Once the cleaner has loosened the oil, rinse the area thoroughly with clean, warm water to remove all residue and prevent a filmy buildup. You’ll want to Rinse thoroughly until suds and oil are gone, checking grout lines and edges. Use a mop or soft cloth and change rinse water often to avoid re-depositing grease.
After rinsing, Dry completely with microfiber towels or a dry mop; this prevents slips and helps you spot missed spots. If stains persist, repeat the process or apply a targeted degreaser, then Rinse thoroughly and Dry completely again.
- Inspect grout for hidden residue
- Replace rinse water often
- Use absorbent, lint-free cloths
Remove Soap Scum and Hard‑Water Film Effectively

When soap scum and hard‑water film build up on porcelain, they dull the finish and make floors slippery, so you’ll want to tackle them with the right cleaners and tools to restore shine without harming the grout or glaze.
Use a pH‑neutral cleaner or a 50/50 white vinegar and water mix for mineral film; test on an inconspicuous tile first.
Use a pH‑neutral cleaner—or a 50/50 white vinegar and water mix—and spot‑test on an inconspicuous tile first.
Scrub gently with a microfiber mop or soft-bristle brush, rinse thoroughly, and dry to prevent streaks.
Increase cleaning frequency in high‑use areas and consider professional grout sealing schedules to limit future buildup and make maintenance easier.
Clean Grout Lines Safely Without Damaging Tiles
Although grout looks small, it soaks up dirt and cleaners and can stain quickly, so you’ll want to clean it carefully to protect the porcelain. Start with a mild pH-neutral cleaner and test a hidden area to avoid worsening grout discoloration or altering tile texture.
Work in small sections, blotting rather than scrubbing aggressively to prevent surface damage. Rinse thoroughly and dry to stop residue.
- Use gentle, targeted cleaners for grout-only stains.
- Avoid acidic or bleach-heavy mixes that harm grout hue and glaze.
- Use soft tools and repeat treatments instead of harsh force.
When to Use a Scrub Brush, Steam Mop, or Floor Scrubber
Before you pick a tool, consider the type and condition of your porcelain and the mess you’re tackling: use a soft scrub brush for spot-cleaning grout and stuck-on debris.
Before choosing a tool, match your porcelain’s condition and mess—use a soft scrub brush for grout and stuck-on debris.
A steam mop is suitable for routine deep-refreshes on sealed tiles.
A floor scrubber is ideal for large, heavily soiled areas that need consistent agitation and extraction.
Choose a soft brush if you need control around delicate color patterns or to match grout color without scouring.
Use a steam mop when tiles and grout are sealed and you want sanitizing steam.
Reserve a floor scrubber for open, durable floors where efficiency and extraction matter most.
Harsh Chemicals to Avoid: And Safer Alternatives
Don’t use acidic cleaners like vinegar or toilet bowl cleaners on porcelain — they’ll etch the glaze and dull the finish.
Avoid abrasive tools and harsh scrubbing pads that can scratch both tile and grout.
Instead, reach for pH-neutral cleaners, microfiber mops, and soft brushes for effective, safer cleaning.
Acidic Cleaners And Damage
When you use strong acidic cleaners on porcelain tile, they can etch the glaze, discolor grout, and strip protective sealers, so it’s important to know which products to avoid and what to use instead.
Acidic agents like vinegar, toilet bowl cleaners, or muriatic acid cause chemical reactions that dull the finish and weaken grout bonds.
You should also consider environmental concerns: harsh acids harm wastewater systems and indoor air.
Choose pH-neutral cleaners or diluted mild detergent, and rinse thoroughly.
Protect yourself with gloves and ventilation.
- Avoid vinegar and citrus-based cleaners
- Use pH-neutral commercial tile cleaners
- Rinse and neutralize residues
Abrasive Tools And Scratching
Although abrasive pads and stiff-bristled brushes can seem like quick fixes, they’ll scratch porcelain glaze and leave microabrasions that trap dirt and dull the finish. You should avoid abrasive tools that gouge or roughen tiles, since those tiny scratches grow and harbor grime.
For scratching prevention, test any tool on an inconspicuous spot first and inspect under bright light. Don’t drag heavy furniture or rough mats across flooring; lift and use protective pads instead.
Be cautious with metal scrapers and scouring powders—they accelerate wear. Prioritize gentle care to preserve sheen and reduce long-term maintenance needs.
Safer Cleaning Alternatives
Because some common household cleaners can erode glaze, discolor grout, or leave residues that attract dirt, you should skip harsh acids, bleach concentrates, and ammonia on porcelain tile. Choose eco friendly options and non toxic solutions that clean without damage. You’ll preserve finish, protect grout, and keep indoor air safer.
Mix mild dish soap with warm water for routine mopping, use diluted white vinegar sparingly on stubborn spots (test first), or employ enzyme-based cleaners designed for tiles. Follow with a clean rinse and dry to avoid streaks.
- Gentle pH-neutral cleaners for daily care
- Steam cleaning as a chemical-free option
- Microfiber mops to lift dirt without abrasives
Remove Rust, Ink, and Dye Stains From Tile and Grout
If stubborn rust, ink, or dye marks spoil your porcelain tile or grout, you can remove them without harsh scrubbing by using the right targeted cleaners and techniques. Identify the stain type first, then test a small, hidden area to confirm the cleaner won’t discolor the tile.
For rust, apply a commercial rust remover designed for tiles or a poultice of powdered rust remover and water. Let it sit, then gently agitate.
For ink or dye, try isopropyl alcohol or a peroxide-based spot cleaner.
Because of porcelain durability and stain resistance, treat spots promptly to avoid permanent staining.
How to Rinse and Dry for a Streak‑Free Finish
Once you’ve lifted stains, don’t leave cleaning residue to dry on the surface—rinse thoroughly to prevent streaks and dulling. Rinse with clean, warm water using a microfiber mop, following tile patterns so you don’t miss edges.
Change rinse water often to avoid redepositing soil. After rinsing, dry promptly to stop streaks and water spots; use a dry microfiber towel or a squeegee working toward a door or drain.
Pay attention to grout sealing edges where water pools. Finish by inspecting under varied light to catch missed streaks and uneven drying.
- Rinse along tile patterns for coverage
- Change rinse water frequently
- Dry grout sealing lines carefully
Restore Shine Without Wax or Sealer
Before you try to boost shine, make sure you remove any soap or hard-water residue that can dull porcelain.
Once the surface is clean and dry, use gentle, natural polishers like a microfiber cloth with a bit of white vinegar or a baking soda paste to bring back luster.
Work in small sections and buff until the tile looks evenly glossy without adding wax or sealer.
Remove Residue First
Want your porcelain tile to look glossy without adding wax or sealer? Start with residue removal: you’ll remove dulling film from cleaners, soap, and grime so light reflects properly. Focus on surface preparation before any polishing step. Use a mild alkaline cleaner, rinse thoroughly, and dry with microfiber to avoid streaks. Test a small area first.
- Strip leftover cleaner films to restore true shine.
- Prep grout edges and corners for uniform reflectivity.
- Rinse and buff to eliminate water spots and stubborn film.
Do this consistently and you’ll create a clean foundation for natural shine.
Polish With Natural Products
Although you don’t need wax or sealer to get a bright finish, you can restore porcelain’s natural shine using simple, natural products and a soft cloth or mop. Mix white vinegar and water (1:4) or use diluted hydrogen peroxide for stubborn spots. Buff small areas with a microfiber cloth in circular motions until you see an organic shine. For textured grout, brush then wipe dry. Test a hidden spot first.
| Product | Use |
|---|---|
| Vinegar solution | Light polish |
| Hydrogen peroxide | Stain lift |
| Olive oil (tiny) | Final buff for natural polish |
When to Reseal Grout and How to Choose a Sealer
If your grout looks dull, stains easily, or feels crumbly when you scrape it with a fingernail, it’s time to reseal; sealing preserves grout, prevents moisture and stains, and extends the life of your floor.
Check grout coloration and test small areas annually; reseal sooner in high-traffic or wet zones.
Choose a penetrating sealer for textured grout, or a topical sealer for glossy finishes, balancing appearance with Sealer longevity.
Apply per manufacturer directions, allow full cure, and avoid heavy use until set.
Maintain by spot-cleaning and rechecking every 1–3 years to protect integrity and appearance.
- Test before full application
- Match sealer to grout type
- Follow cure times strictly
Fast Method: Deep Clean a Room in Under an Hour
When you’re short on time, a focused, systematic approach lets you deep clean a room in under an hour: gather supplies, work top to bottom, and tackle high-impact areas first.
Start by dusting light fixtures and window sills, then vacuum corners and mop baseboards.
Pre-treat grout lines where grime shows, matching cleaners to grout color so you won’t cause discoloration.
Use a scrub brush on concentrated spots, follow with a neutral pH cleaner for porcelain tile patterns, and rinse with clean water.
Finish by drying with microfiber towels to prevent streaks and restore shine quickly.
Daily and Weekly Maintenance Routines to Prevent Buildup
Now that you can deep clean a room quickly, keep buildup from returning by sticking to simple daily and weekly habits. You’ll sweep or vacuum daily to remove grit that scratches finishes, mop weekly with pH-neutral cleaner, and dry grout lines to slow staining.
Pay attention to high-traffic zones and preserve grout color—consider color matching touch-ups for worn areas. Rotate rugs to protect tile patterns and avoid trapped dirt. Small, consistent actions save effort later and keep finishes uniform.
- Sweep daily to prevent abrasive buildup
- Mop weekly with gentle cleaner
- Inspect grout and match colors promptly
Quick Fixes for Problems After Cleaning
Although a deep clean solves most issues, you’ll still run into a few stubborn problems that need quick fixes—like residual haze, damp grout, or slip-prone floors.
If haze remains, buff with a microfiber pad and a diluted vinegar solution, then rinse well.
For damp grout, speed drying with a fan prevents mildew; reapply a grout sealer if staining recurs.
Smooth slippery tiles with a non-slip treatment or area rugs while you assess wear.
Address chips carefully: use a color matching epoxy repair kit to blend chips and avoid accelerated tile degradation.
Check fixes promptly to prevent bigger repairs.
DIY Cost/Time vs. Hiring a Professional : How to Choose
Fixing small issues yourself can save time and money, but you’ll want to weigh those savings against the effort and risks before deciding whether to DIY or hire a pro. Do a DIY comparison: estimate supplies, tools, and your time versus a professional quote.
Use a simple Cost analysis to include hidden costs—repairs if you slip up, disposal, and warranty value.
Choose DIY if tasks are minor, you’re confident, and savings justify the labor. Hire a pro for large areas, stubborn stains, or when warranty/insurance matters.
- Time vs. skill
- Upfront cost vs. long-term risk
- Warranty and insurance
Frequently Asked Questions
Can Porcelain Tile Be Repaired if It Chips or Cracks?
Yes — you can repair chipped or cracked porcelain tile; you’ll use filler, epoxy, or replacement, then consider tile polishing and grout restoration to match finish and color, ensuring repairs blend and your floor looks uniform again.
How Do I Match Replacement Tiles to Existing Ones?
You’ll tense when you spot a mismatch, but you can match replacement tiles by comparing Color matching under natural light, saving a sample to test. Choose adhesive selection suited to tile type and substrate, and test fit before fixing.
Are Heated Floors Compatible With Porcelain Tile Cleaning Methods?
Yes — heated flooring is compatible with porcelain tile cleaning methods; you’ll avoid high heat and harsh chemicals, use gentle cleaners and microfibre mops, and follow manufacturer guidelines to protect heating elements and grout integrity.
Can Cleaning Products Harm Underfloor Heating Systems?
Yes — harsh chemicals can damage underfloor heating components and wiring, so you’ll avoid risks by choosing safe cleaning techniques; think of chemicals sneaking like rain into circuits, and use manufacturer-approved, mild cleaners.
What Warranties Cover Damage From DIY Cleaning?
Most warranties won’t cover damage from DIY cleaning unless you follow manufacturer instructions; you should check specific terms, use approved cleaning agents, document procedures, and prioritize damage prevention to avoid voiding coverage or claims being denied.
Conclusion
You can get porcelain floors truly spotless without harsh chemicals or paying a pro — it just takes the right tools, a bit of know‑how and routine upkeep. If you’re worried it’ll be too time‑consuming, try the fast method first: you’ll often finish a room under an hour and see dramatic results. Keep up with weekly care to prevent buildup, and you’ll spend less time cleaning long term and more time enjoying your shiny floors.