
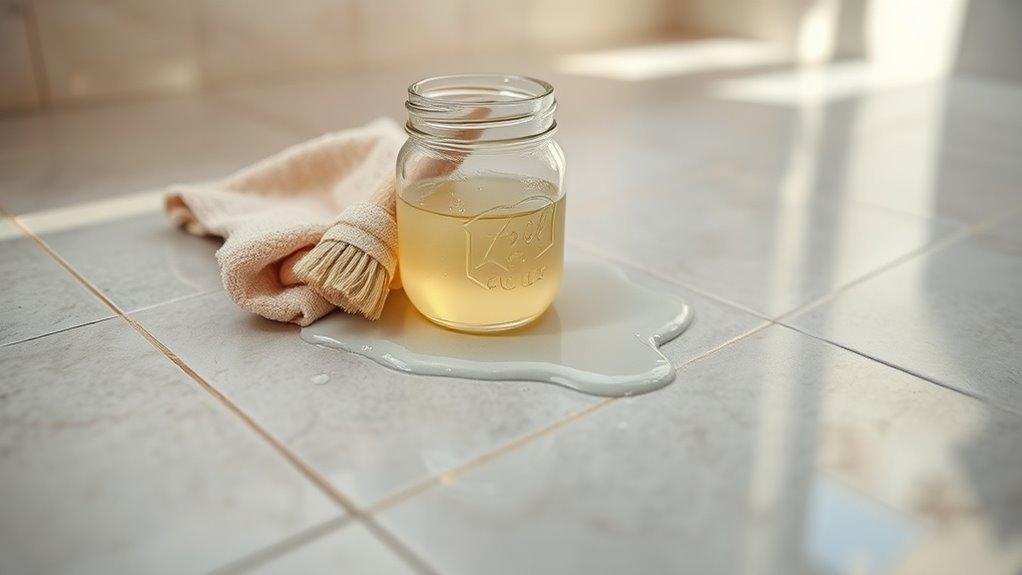
How to Clean Bathroom Floor Tiles Home Remedies
You can quickly freshen bathroom floor tiles with items you likely have: sweep, then mop with equal parts warm water and white vinegar, or scrub grout with a baking soda paste (2–3 tbsp + water) for stains. Rinse well and dry to prevent mildew; ventilate the room and reapply sealant yearly on porous grout. Test any cleaner on a hidden spot first to avoid damage, and keep going to pick up deeper tips and precautions.
Quick Natural Method to Clean Bathroom Tiles
If you want a fast, chemical-free way to freshen your bathroom tiles, mix equal parts warm water and white vinegar in a spray bottle. Spritz the surface, let it sit for a minute, then wipe with a microfiber cloth or scrub grout lines with a soft brush — the vinegar cuts soap scum and mild stains without harsh fumes.
You’ll work section by section, following tile patterns so you don’t miss spots. Rinse with clean water to avoid residue. After drying, consider grout sealing on any porous joints to prevent future staining.
Repeat weekly for consistent results.
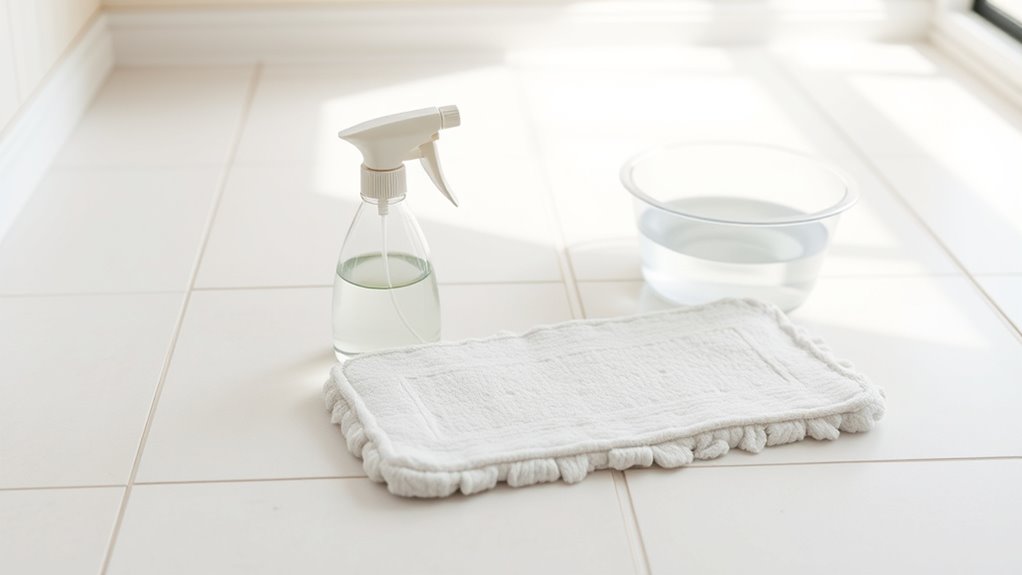
Supplies and Ingredients to Have Ready
Before you start, gather the essential cleaning tools like a broom, mop, scrub brush, bucket, and microfiber cloths.
You’ll also want a natural ingredients kit—white vinegar, baking soda, liquid castile soap, and a few drops of tea tree or lemon oil for scent and extra disinfecting power.
Having these on hand makes the job faster and keeps your tiles clean without harsh chemicals.
Essential Cleaning Tools
When you’re ready to tackle your bathroom floor, gather a few reliable tools and a short list of cleaning ingredients so you won’t interrupt your work to hunt for supplies. Have a stiff-bristled brush for grout, a microfiber mop for tiles, a bucket, rubber gloves, and a spray bottle.
Keep a grout scraper or old toothbrush for stubborn spots. Use a squeegee and absorbent towels to dry surfaces, which helps bathroom ventilation efforts and prevents trapped moisture that undermines tile sealing.
Keep a small bowl for mixing solutions and a mask if you use stronger cleaners for safety.
Natural Ingredients Kit
Though you can buy commercial cleaners, a compact kit of natural ingredients will handle most tile and grout jobs safely and affordably. Gather white vinegar, baking soda, liquid castile soap, and hydrogen peroxide.
Keep a spray bottle for vinegar solutions and a small jar for baking soda paste. Add a few drops of essential oils like tea tree or lemon for scent and antimicrobial boost.
Store a soft-bristle brush, microfiber cloths, and a grout toothbrush nearby.
Dried garden herbs such as rosemary or mint can freshen air when simmered after cleaning.
Label containers and replace supplies as needed.
Test Tile and Grout Before Cleaning
Want to make sure your cleaner won’t damage the tile or grout? You should test a hidden spot first. Pick areas showing different tile patterns and grout color to see reactions. Apply small amount of cleaner, wait a few minutes, rinse, and inspect for fading, etching, or residue. If safe, proceed; if not, try a gentler remedy.
| Spot chosen | Cleaner used | Result |
|---|---|---|
| corner by tub | vinegar mix | safe |
| behind cabinet | baking soda paste | safe |
| grout line near drain | diluted bleach | discolored |
| patterned tile edge | mild soap | safe |
| threshold seam | store cleaner | streaked |
Daily Wipe-Down Routine for Tiles
Start each day with a quick sweep to remove hair and loose dirt.
Follow with a gentle microfiber wipe to lift residues without scratching the tile.
If you spot grime or drips, treat them immediately so they don’t set.
Quick Daily Sweep
How often you do a quick sweep makes a big difference in keeping bathroom tiles looking fresh. A brief daily wipe-down prevents grime from building up and saves you time later.
You’ll sweep or vacuum loose debris, then use a damp mop or cloth to catch splashes and soap scum before they set. Pay attention to corners and grout lines, and open windows or run bathroom ventilation to speed drying and reduce mildew.
If your tiles are properly sealed with tile sealing, moisture won’t penetrate and maintenance stays simple. A minute or two each day keeps deeper scrubbing to a minimum.
Gentle Microfiber Wipe
After your quick sweep, grab a microfiber cloth for a daily wipe-down to catch lingering water spots and soap residue before they dry. You’ll work from the far corner toward the exit, folding the cloth to use clean sections as it picks up grime.
Spray a light mist of water or a mild vinegar solution on stubborn spots, then use gentle scrubbing with the cloth—don’t press hard or use abrasive tools. Rinse and wring the cloth frequently to avoid smearing dirt.
Hang the cloth to dry between uses. Regular microfiber cloths keep tiles clear and reduce buildup.
Spot-Treat Grime Immediately
Because grout and soap scum set quickly, tackle spots as soon as you see them. You’ll prevent stains and reduce scrubbing later by blotting spills, spraying a mild cleaner, and wiping with a damp microfiber. Quick action supports tile polishing results and keeps the bathroom fresh, complementing air purification efforts.
- Keep a spray bottle with diluted vinegar or mild cleaner handy.
- Use a soft brush for grout dots; avoid abrasive pads.
- Blot oils and makeup immediately with a microfiber cloth.
- Rinse residue promptly to prevent film buildup.
- Dry the area to prevent water spots and maintain shine.
Vinegar Solution for Light Dirt
When your bathroom tile just needs a quick freshen-up, mix equal parts white vinegar and warm water in a bucket to cut soap scum and light grime without harsh chemicals.
Dampen a mop or microfiber cloth, wring well, and work in small sections following tile patterns so you don’t miss corners. Rinse the mop frequently and change solution if it gets cloudy.
For grout color preservation, test an inconspicuous spot first—vinegar can lighten some pigments.
After wiping, rinse with clean water and dry with a towel to prevent streaks and to restore shine without scrubbing or abrasive cleaners.
Baking Soda Paste for Stained Grout
Mix a few tablespoons of baking soda with just enough water to form a thick paste.
Apply it to the stained grout lines, let it sit for 10–15 minutes, then scrub with a stiff brush.
Rinse thoroughly and repeat on stubborn spots.
Mixing The Paste
Start by scooping about half a cup of baking soda into a small bowl, then slowly add water a teaspoon at a time until you get a thick, spreadable paste—think toothpaste consistency. You’re mixing the paste to cling to grout without running.
If you plan to use additives like vinegar or lemon, stir them in sparingly and note stronger reactions.
Do a color testing spot on a hidden tile edge to ensure no discoloration.
Transfer the paste to a small jar for reapplication.
- Use cool water for control
- Avoid over-thinning
- Label jar with date
- Mix fresh for each session
- Keep away from metal tools
Applying And Scrubbing
After you’ve applied a line of paste along the grout, press it in with a damp toothbrush so it clings and won’t slide off during scrubbing. Work in short sections, following tile patterns to avoid missing lines.
Scrub firmly with back-and-forth strokes, angling the brush into corners and junctions. Let the paste sit for 10–15 minutes on stubborn stains, then scrub again.
Rinse with warm water and blot dry to check results. If grout looks porous afterward, consider grout sealing to protect it.
Repeat only when necessary to prevent wear, and always test a small area first.
Hydrogen Peroxide for Mildew and Mold
Wondering how hydrogen peroxide tackles mildew and mold on your bathroom tiles? You’ll use a 3% solution to sanitize spots, help with mildew prevention, and assist in mold identification by revealing active versus inactive growth.
Wondering how 3% hydrogen peroxide cleans and reveals active mildew on bathroom tiles — spray, wait, then scrub and rinse
Spray, wait 10–15 minutes, then scrub and rinse. Take care with grout and colored tiles.
- Test a hidden area first to avoid discoloration
- Use gloves and ventilate the room
- Apply directly to visible black or green patches
- Repeat treatment weekly until growth stops
- Combine inspection with routine cleaning to prevent recurrence
No-Steam Natural Cleaner: Recipe and Use
If you prefer a gentle, steam-free approach after spot-treating mildew with hydrogen peroxide, try this simple natural cleaner you can mix in minutes.
In a spray bottle combine 2 cups warm water, 1/2 cup distilled white vinegar, 1/4 cup rubbing alcohol, and 1 teaspoon mild liquid castile soap. Shake gently, mist tiles, let sit three to five minutes, then scrub with a soft brush and rinse.
This blends safe ingredients that work as chemical alternatives to harsher options and reduces reliance on commercial products.
Store away from heat and label clearly; test a small area first.
When to Use Lemon or Orange Cleaners
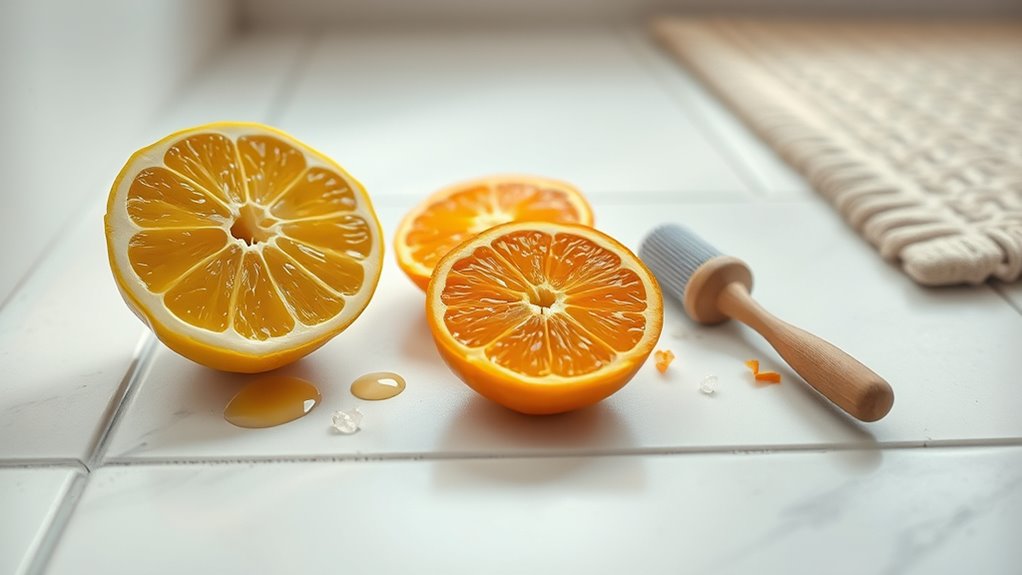
When you want a fresh scent and gentle degreasing power, reach for lemon- or orange-based cleaners on glazed tile, sealed grout, and small spot stains. Their natural citric acids cut soap scum and mineral build-up without harsh fumes.
For a fresh scent and gentle degreasing, use lemon- or orange-based cleaners on glazed tile and sealed grout.
You’ll use these when you need mild cleaning, quick freshening, or a safer option around kids and pets. Lemon advantages include natural disinfecting and brightening; consider Citrus alternatives if allergies or strong acidity concern you.
Test a hidden spot first, dilute for delicate surfaces, and avoid unsealed stone. Use a soft cloth and rinse thoroughly after cleaning.
- Test small hidden area first
- Dilute for sensitive grout
- Avoid unsealed stone
- Rinse to prevent residue
- Choose Citrus alternatives if allergic
Remove Soap Scum With Dish Soap
Grab a squirt of mild dish soap and apply it directly to the scummy areas, using a soft brush or cloth to work the suds into the grout and tile.
Let it sit a minute if the buildup’s stubborn, then scrub in small circular motions to lift residue.
Rinse thoroughly with clean water and dry with a microfiber cloth to prevent streaks and new soap buildup.
Dish Soap Application Tips
Although it’s simple, dish soap is one of the most effective cleaners for cutting through bathroom soap scum—just mix a few drops with warm water, apply to the tiles and grout, let it sit briefly, then scrub and rinse for a clear, residue-free finish.
You should test a small area after tile installation to assure colorfastness. Use soft brushes to protect grout, ventilate to protect air quality, and avoid harsh scrubbing that damages sealant.
Work in sections and keep tools separate from food items.
- Use measured drops, not excess
- Target grout lines first
- Change water when cloudy
- Wear gloves for skin protection
- Store solution briefly only
Rinse And Dry Properly
Because dish soap leaves behind residue if not fully removed, you should rinse tiles thoroughly with clean water after scrubbing to prevent streaks and slippery film. Use a mop or sponge and change rinse water often so you’re not redepositing soap scum.
Wring tightly and follow grout lines to lift suds from seams. After rinsing, dry with a microfiber cloth or towel to prevent water spots and mold.
Guarantee good bathroom ventilation while drying to speed evaporation and reduce humidity. Once dry, inspect for residue; if present, repeat a targeted rinse.
Consider tile sealing afterward to ease future cleaning.
Tackle Greasy or Oily Tile Residues
When greasy film or oily spots show up on your bathroom tiles, they can make the whole floor look dull and feel slippery, so deal with them promptly using the right cleaners and tools.
You’ll target grease buildup and oil stains with degreasers or a vinegar-solution, letting it sit briefly before wiping. Work small sections and rinse thoroughly to avoid residue. Test any product in a hidden spot first.
- Apply a diluted vinegar spray for light oil stains
- Use dish soap on stubborn grease buildup
- Let cleaner dwell 5–10 minutes
- Rinse with warm water
- Dry completely to prevent slipping
Scrubbing Tools That Won’t Scratch Tiles
After removing grease and rinsing, pick scrubbing tools that clean effectively without scratching glaze or grout. You’ll want scrubbing brushes with soft to medium nylon bristles for tile surfaces and grout lines; they remove dirt without abrading.
For tougher spots, use scratch proof tools like microfiber pads, non-abrasive magic sponges, or rubber-edged grout cleaners. Avoid wire brushes, steel wool, or harsh scouring pads that dull finishes.
Test any new tool on a hidden area first. Work in small sections, rinse frequently, and replace worn brushes—frayed bristles reduce effectiveness and can cause micro-scratches over time.
Cleaning Ceramic and Porcelain Tiles
If you want ceramic or porcelain tiles to look their best, start with a gentle routine that protects the glaze and grout while removing dirt. You’ll mop with warm water and a mild pH-neutral cleaner, spot-treat stains with baking soda paste, and avoid acidic remedies that dull glazes. Rinse thoroughly and dry to prevent water spots.
Match cleaning frequency to traffic and consider how tile patterns and grout colors influence visual dirt. Maintain grout seals every year.
- Sweep or vacuum daily
- Use a microfiber mop
- Apply baking soda paste for stains
- Rinse with clean water
- Dry with a soft towel
Cleaning Natural Stone Tiles Safely
Natural stone is sensitive, so always test a cleaner on a small, hidden spot before treating the whole floor.
Use only pH-neutral cleaners made for stone to avoid etching or discoloration.
If a product changes the test area, stop and try a gentler option or consult the manufacturer.
Test Cleaners First
Want to avoid damaging your stone tiles? You should always test cleaners in an inconspicuous spot before wider use to protect Tile durability and finish. Small trials reveal staining, etching, or color change so you can adjust or skip a product.
Follow these quick checks before cleaning the whole floor:
- Apply cleaner to a hidden area and wait the recommended time.
- Blot, don’t rub, to assess surface reaction.
- Rinse the test patch thoroughly and let it dry.
- Compare sheen and color to adjacent tiles.
- Note results and choose alternatives if any change appears.
Use pH-Neutral Solutions
Because stone reacts to strong acids and alkalis, you should stick to pH-neutral cleaners to avoid dulling or etching the surface. You’ll protect natural stone by using mild, soap-free solutions labeled pH-neutral or specifically for stone. Apply gently with a soft mop or cloth, rinse thoroughly, and dry to prevent residue that feeds mold.
Combine regular pH-neutral cleaning with proper grout sealing to block moisture and reduce mold prevention needs. Spot-test new products in an unobtrusive area first.
For stubborn stains, consult a stone-safe poultice rather than turning to vinegar, bleach, or abrasive scrubbers that can damage the tile.
When to Avoid Vinegar or Acids
While vinegar and other acidic cleaners work well on many surfaces, you should avoid them on grout sealed with a high-pH sealer, natural stone (like marble, travertine, or limestone), and any tiles labeled acid-sensitive.
Avoid vinegar and other acidic cleaners on high-pH sealed grout, natural stone, or any acid-sensitive tiles.
You’ll want to know Vinegar dangers and Acid risks: acids can etch stone, strip sealers, and discolor grout. Test small areas first, and choose pH-neutral cleaners when in doubt. If damage occurs, stop immediately and consult a professional.
- Etching on polished stone
- Sealer breakdown over time
- Color fading or blotching
- Increased grout porosity
- Corrosion of metal trim
Remove Deep-Set Grout Stains Naturally
If grout stains are stubborn, you can start with a baking soda paste to scrub away surface grime.
For tougher discoloration, apply hydrogen peroxide to lift stains without harsh chemicals.
You can also try steaming the grout and finishing with a vinegar wipe for extra brightening where vinegar is safe.
Baking Soda Paste Method
When grout’s deep-set stains won’t budge with everyday cleaners, mix baking soda with just enough water to make a thick paste and apply it directly to the affected lines. Let it sit 10–15 minutes, then scrub with a stiff brush, rinse, and repeat for stubborn areas. You’ll preserve varied grout colors and avoid altering tile patterns when you work gently. Test a small spot first.
- Use a toothbrush for narrow grout lines
- Wear gloves to protect skin
- Work in small sections for even coverage
- Dry thoroughly to prevent mildew
- Seal grout after cleaning to prolong results
Hydrogen Peroxide Application
Wondering how to lift stubborn grout stains without harsh chemicals? You can use hydrogen peroxide to target deep-set grime safely. Apply 3% peroxide, let it sit 10–15 minutes, scrub with a nylon brush, then rinse. Test a hidden area first; avoid colored grout that may fade. After cleaning, consider grout sealing to protect results and tile sealing where recommended to prevent future stains. Repeat only as needed.
| Step | Tip |
|---|---|
| Prep | Sweep and spot-test |
| Apply | 3% peroxide, wait |
| Finish | Scrub, rinse, seal grout sealing |
Steam And Vinegar Combo
After using hydrogen peroxide for spot treatment, you can combine steam and white vinegar to tackle deeper grout stains without harsh chemicals. You’ll steam the grout to loosen dirt, then apply diluted white vinegar to lift stains; work small sections, rinse well, and dry.
Steam’s heat opens pores in grout, while vinegar cuts grime, helping preserve surrounding tile patterns when you clean. After drying, consider grout sealing to prevent recurrence. Take care with porous or natural stone—test a hidden area first.
- Use a handheld steamer for control
- Mix vinegar with water (1:1)
- Scrub with a nylon brush
- Rinse thoroughly
- Apply grout sealer once dry
Natural Disinfecting Methods After Cleaning
Although you’ve already removed grime and soap scum, you’ll want to finish with a natural disinfectant to kill lingering bacteria and mold spores without harsh chemicals. You can spray diluted tea tree oil, hydrogen peroxide, or a vinegar-citrus mix, let sit, then wipe. Good ventilation and proper bathroom lighting help the surface dry faster after tile installation and reduce mold risk.
| Agent | Dilution | Contact time |
|---|---|---|
| Tea tree oil | 10 drops/1 cup water | 10 min |
| Hydrogen peroxide | 3% undiluted | 10 min |
| Vinegar-citrus | 1:1 vinegar:water + peel | 10 min |
| Steam | No chemicals | Immediate |
Brighten Grout Lines Without Bleach
If you want grout lines to look fresh without bleach, try targeted, low-abrasion methods that lift stains and restore color without damaging the surrounding tile or sealant. You can brighten grout using baking soda paste, hydrogen peroxide spot lifts, or oxygen bleach soaks, then finish with gentle scrubbing and rinsing.
Consider grout coloring to even out tones and sealant to protect results. Pair this with light tile polishing to restore sheen without aggressive abrasives. Follow with a protective sealer and routine maintenance.
- Baking soda paste for mild stains
- Oxygen bleach soak for deeper lifts
- Hydrogen peroxide spot application
- Grout coloring for uniform appearance
- Light tile polishing and sealing
Spot Treatments for Stubborn Discoloration
Want to tackle a stubborn stain without redoing the whole floor? Use targeted spot treatments: mix baking soda and water into a paste, apply to the discoloration, cover with plastic wrap for 15–30 minutes, then gently scrub with a soft brush.
Tackle stubborn stains without redoing the floor: apply a baking soda paste, cover briefly, then gently scrub.
For oil or soap scum, apply dish soap diluted with warm water and blot.
For mineral stains, try white vinegar cautiously on ceramic (test first).
Match your approach to tile patterns so you blend treated areas.
After treatment, rinse thoroughly and consider grout sealing around the spot to prevent recurrence.
Repeat once if needed, avoiding harsh scrubbing that damages tiles.
Drying and Ventilating to Prevent Mildew
Because moisture breeds mildew fast in bathrooms, you’ll want to dry surfaces and boost airflow immediately after cleaning or showering. You can prevent stubborn growth by adopting simple mildew prevention and ventilation techniques that keep tiles and grout dry and aired.
- Wipe tiles and grout with a squeegee or microfiber towel after each shower.
- Run an exhaust fan for 20–30 minutes post-shower; open a window if possible.
- Leave shower doors or curtain ajar to allow circulation.
- Use a small dehumidifier or portable fan for damp bathrooms.
- Check and fix leaks promptly to stop recurring moisture.
Natural Grout Sealers and When to Use Them
Keeping grout dry helps prevent mildew, but sealing it provides long-term protection that reduces cleaning and moisture damage. You’ll want natural sealers when you prefer low-toxicity options: beeswax blends, plant-based oils, or silicate solutions.
Test a small area to verify color and breathability suit your tile. Apply after grout fully cures—usually 48–72 hours for new work—or anytime grout shows persistent staining or absorbs water during a simple splash test.
Reapply sooner in high-traffic or wet zones. Use a small brush or applicator, wipe excess, and let it cure per product instructions for best results.
How Often: Quick vs Deep Cleaning
How often you clean your bathroom floor depends on traffic, moisture, and how quickly dirt builds up; you’ll do short, frequent cleanups for maintenance and deeper scrubs less often.
You should quick-clean high-use zones twice weekly and deep-clean monthly or quarterly depending on tile patterns and grout sealing status.
Quick cleans remove surface grime; deep cleans lift embedded dirt and refresh sealed grout.
Adjust schedule after spills, guests, or humidity spikes.
- High-traffic quick wipe: 2× weekly
- Low-traffic quick wipe: weekly
- Light deep clean: monthly
- Intensive deep clean: every 3 months
- Reassess after moisture changes
Eco-Friendly Disposal and Safety Tips
When you finish cleaning, dispose of used cleaners and debris responsibly to protect your home and the environment.
For eco disposal, dilute mild homemade solutions and pour them down the drain only if your sewer system allows; otherwise, absorb liquids with paper and seal them for municipal hazardous waste pickup.
Rinse and reuse microfiber cloths; compost organic debris.
For Safety precautions, ventilate the area, wear gloves and eye protection, and keep pets and children away until floors are dry.
Store leftovers in clearly labeled, sealed containers away from heat.
Follow local regulations for chemical disposal and never mix cleaning agents.
Troubleshooting Damage From a Remedy
If a cleaning remedy has left stains, etching, or residue on your tiles, act quickly to limit further damage and make repairs easier. You’ll assess the issue: light residue often wipes away with warm water and a soft cloth; stains may need a mild poultice; serious etching or discoloration could require professional attention.
Protect surrounding grout sealing during any treatment. Consider whether improper tile installation contributed to trapped moisture or weak grout. Don’t use harsh acids that worsen etching.
Protect grout seals while treating tiles. Check for poor installation and avoid harsh acids that deepen etching.
If uncertain, stop and consult a pro to avoid irreversible harm from DIY fixes.
- Test remedies on a hidden spot first
- Blot, don’t scrub abrasive marks
- Neutralize cleaners before rinsing
- Replace damaged grout if compromised
- Document damage for warranty or pro help
Maintenance Tips to Keep Tiles New Longer
After addressing any stains or etching, keep your tiles looking new by adopting a few simple maintenance habits you can do weekly and seasonally.
Sweep or vacuum weekly to remove grit that scratches glaze, then mop with a pH-neutral cleaner. Dry tiles and grout to prevent mildew; improve bathroom ventilation with an exhaust fan or open windows after showers.
Inspect grout lines quarterly and touch up or regrout where needed. Reapply tile sealing to porous stone or grout every year or as manufacturer recommends.
Avoid harsh acids or abrasives, and address spills promptly to preserve finish and longevity.
Frequently Asked Questions
Can I Use Essential Oils to Scent My Tile Cleaner Safely?
Yes — you can safely add DIY essential oils as natural fragrances to your tile cleaner, but you’ll dilute them properly, test a small area for sensitivity, and avoid undiluted oil on surfaces or near pets and kids.
How Do I Prevent Grout Yellowing From Hard Water?
You prevent grout yellowing from hard water by sealing grout after deep cleaning, using grout sealing regularly, and installing water softening to reduce mineral buildup; you’ll also scrub with mild acid cleaners and dry surfaces after use.
Are Steam Cleaners Safe on Older Grout?
Like a knight with a steam lance, you can use steam cleaners on older grout cautiously; they’ll loosen dirt, but don’t overdo it—combine grout sealing afterward for mold prevention, and avoid excessive heat or pressure.
What Temperature of Water Is Best for Tile Cleaning?
Use warm water (about 100–120°F) for tile cleaning; it loosens dirt without harming tile. You’ll boost results by combining proper tile sealing and occasional grout whitening treatments to protect and brighten grout lines.
Can Pets Safely Walk on Tiles Immediately After Cleaning?
Can pets safely walk on tiles immediately after cleaning? You shouldn’t—wait until floors are fully dry and free of tile residue to guarantee pet safety, since dampness or cleaner traces can irritate paws or cause slipping.
Conclusion
You’ve finished scrubbing and rinsing; the tiles glisten like a calm, clear pond catching morning light. Keep that fresh memory by wiping spills fast, sweeping grit away, and using gentle, natural cleaners so the shine lasts. Test solutions first, store supplies safely, and tackle deep cleans now and then. Small daily habits are like breath for your bathroom—simple, steady, and they’ll keep your floor looking new longer.
