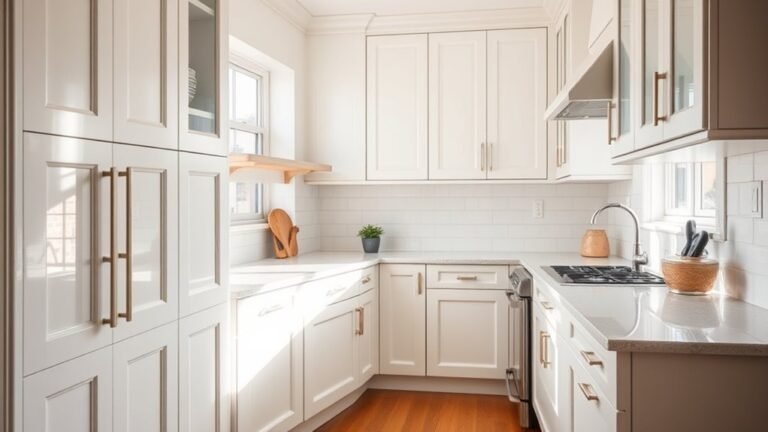
How to Clean a Tile Kitchen Floor Step by Step
Start by clearing countertops and floor clutter, then sweep or vacuum to remove grit and crumbs. Spot-treat spills immediately with a damp microfiber and mild detergent. Mix a pH-neutral cleaner with warm water, wring your mop until damp, and mop in sections using an S-pattern; rinse and change water as it gets dirty. Scrub grout with a nylon brush and baking soda paste for stains, dry thoroughly, and seal grout on schedule—keep going to learn practical tips and tools.
Quick Answer: Best Way to Clean Kitchen Tile Floors
If you want a fast, effective clean, sweep or vacuum to remove loose dirt, then mop with a pH-neutral tile cleaner or a mild mix of warm water and a few drops of dish soap. Rinse with clean water and dry with a microfiber mop to prevent streaks and residue.
You’ll tackle grout with a soft brush and a baking soda paste for stubborn spots. Work in small sections, changing water often.
Keep your cleaning tools matched to tile patterns to avoid abrasion, and consider color coordination when choosing cleaners or sealers so your floor’s look stays consistent and refreshed.
Why Regular Cleaning Matters for Kitchen Tiles
You should clean your kitchen tiles regularly to prevent grime from building up and becoming harder to remove. Doing so also helps extend the life of your tiles by avoiding wear from abrasive dirt and stains.
Regular cleaning keeps the surface hygienic so your kitchen stays safer for food prep.
Prevents Grime Buildup
Ever wondered why a quick sweep feels like such a victory in the kitchen? You stop spills from settling, so grime prevention becomes routine rather than a chore.
When you wipe up crumbs and drips promptly, dirt doesn’t embed in grout or rough tile surfaces. Consistent tile maintenance keeps debris from hardening into stubborn stains, saving you scrubbing time later.
You’ll notice fewer odors and less slippery residue after cooking. By making brief daily touches part of your habit, you reduce the need for harsh cleaners and intensive treatments, keeping tiles looking clean with minimal effort.
Extends Tile Lifespan
Why does regular cleaning matter for your kitchen tiles? You protect investment and appearance: dirt, oils, and food acids wear finishes and fade tile color while gritty grime abrades surfaces. Regular care prevents micro-scratches, preserves slip resistance, and keeps grout color consistent so repairs are less frequent.
Visualize consequences:
- Dull, scratched tiles losing shine.
- Darkened grout color that demands deep restoration.
- Surface etching from acid spills left unattended.
- Cracked tiles needing replacement.
You’ll extend tile lifespan by removing contaminants promptly and using appropriate cleaners, saving time and money over patching, regrouting, or full replacement.
Maintains Hygienic Surfaces
Because kitchen tiles sit where food’s prepped and dropped, regular cleaning keeps surfaces hygienic and reduces germs, pests, and food-borne contamination that can build up in grout lines and porous textures.
You’ll prevent bacterial colonies and mold by wiping spills promptly, mopping with a mild detergent, and scrubbing grout periodically.
Pay attention to tile patterns that hide dirt so you don’t miss trapped crumbs, and choose grout colors that mask stains only if you still clean thoroughly.
Consistent care lowers infection risk, deters pests, and preserves appearance, making your kitchen safer and more inviting for cooking and serving.
Daily Routine to Keep Kitchen Tile Floors Clean
Keep your tile floor in top shape by sweeping or vacuuming daily to remove grit and crumbs.
Wipe up spills immediately to prevent stains and sticky residue.
Once a week, do a quick damp mop to lift dirt and refresh grout.
Daily Sweeping Or Vacuuming
If you sweep or vacuum your kitchen tile every day, you’ll prevent grit and crumbs from scratching grout and dulling the finish. You’ll make tile patterns pop and protect grout coloring by removing abrasive particles before they settle. Use a soft-bristle broom or a vacuum attachment designed for hard floors. Aim for quick runs after meals and before bed.
- Sweep corners where crumbs hide.
- Vacuum along grout lines gently.
- Shake out rugs to avoid tracked dirt.
- Empty the vacuum canister often.
Consistent light cleaning keeps tiles vibrant and reduces deep scrubbing later.
Wipe Up Spills Immediately
Spilled coffee or a dropped tomato can stain grout and make tiles slippery, so wipe spills as soon as you notice them. You’ll prevent stains and reduce slip risk by blotting liquids, scooping solids, and finishing with a damp cloth. Quick spill management keeps dirt from bonding to grout and preserves surface polishing efforts. Use neutral cleaner for sticky residue, then dry to avoid streaks. Keep a small kit (cloth, scraper, spray) near the kitchen for fast response.
| Spill type | Immediate action | Follow-up |
|---|---|---|
| Liquid | Blot | Dry |
| Solid | Scoop | Clean |
| Sticky | Scrape | Polish |
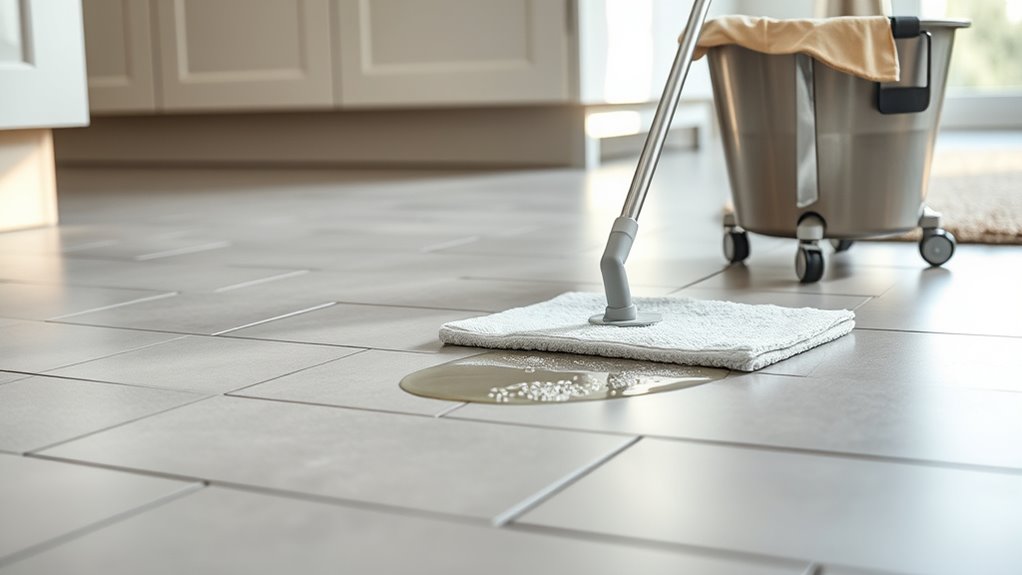
Weekly Damp Mopping Routine
When you mop once a week, you’ll remove surface grime and lingering residues that daily spot-cleaning misses. Start by sweeping or vacuuming; loose dirt scratches tile color and dull shine.
Mix a mild cleaner with warm water, wring the mop so it’s damp, not soaked. Mop in sections following grout patterns to lift trapped soil, rinsing the mop frequently.
- Sweep toward one corner.
- Work cleaner in small squares.
- Rinse mop and change water as it darkens.
- Buff edges with a microfiber cloth.
Let floor dry fully before replacing rugs or moving appliances.
Essential Cleaning Tools for Tile Floors
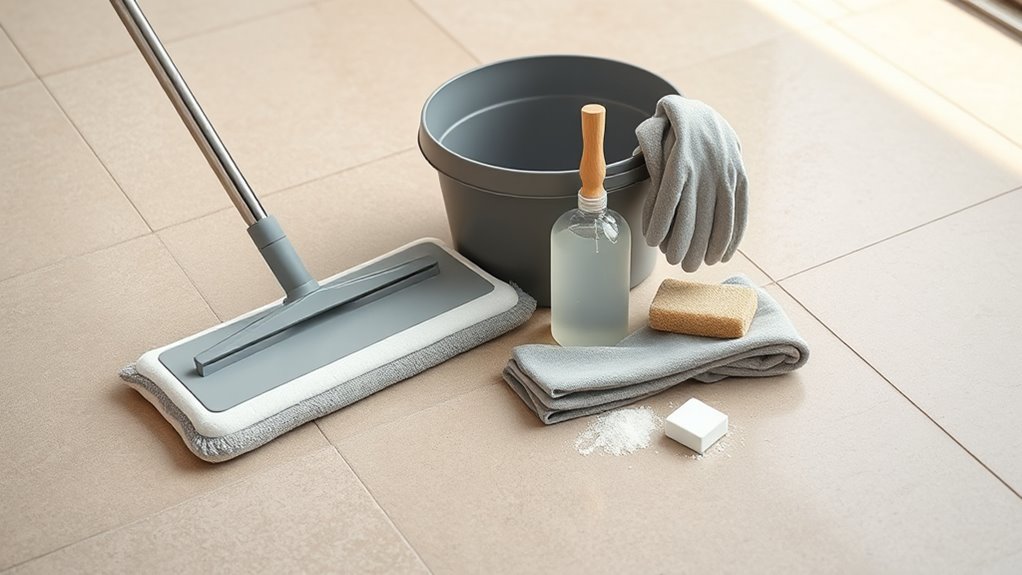
You don’t need a closet full of gadgets to keep tile floors looking great—just a few reliable tools chosen for durability and ease of use. Start with a soft-bristle broom or vacuum designed for hard floors to remove grit that scratches tile patterns.
Use a bucket, microfiber cloths, and a scrub brush with firm nylon bristles for grout textures and stubborn spots. A grout toothbrush or small grout brush lets you target lines without damaging edges.
Keep a pH-neutral cleaner and a spray bottle for spotwork. Finish with clean water and microfiber towels to avoid streaks.
Best Mops for Tile Floors and Why They Matter
Why does the mop you choose matter? You want a tool that cleans efficiently, protects grout, and stands up to regular cleaning frequency. Choose based on mop durability, absorbency, and ease of wringing.
- Microfiber flat mop — glides, traps dirt, gentle on grout.
- Spin mop with a bucket — deep rinses, good for sticky messes.
- Sponge mop — squeezes spills fast, best for quick touch-ups.
- Steam mop — sanitizes without chemicals, ideal for sealed tile.
Pick a mop matching your tile type and how often you mop to save time and maintain shine.
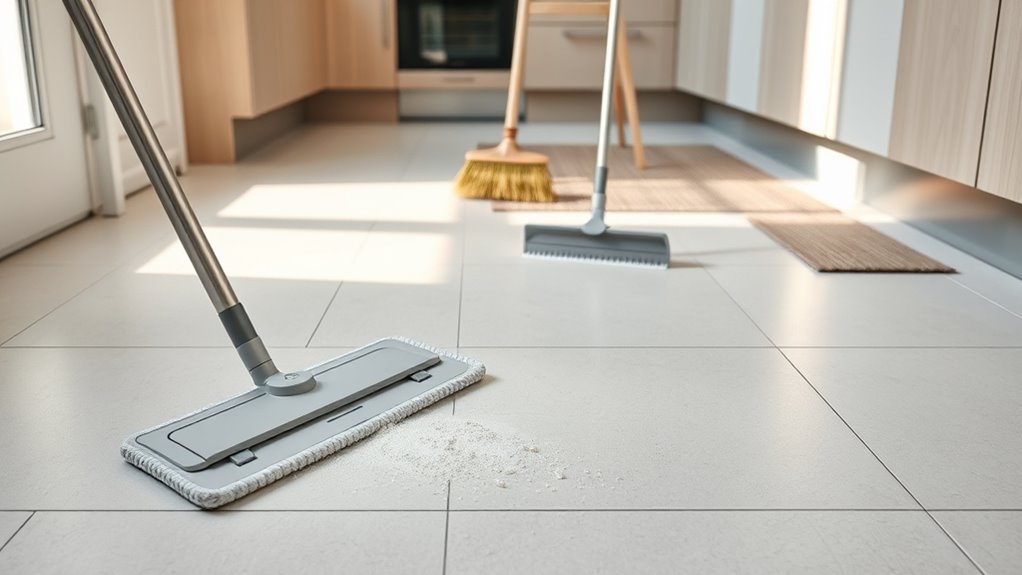
When to Vacuum vs. When to Sweep
Choosing the right mop matters, but deciding whether to vacuum or sweep first makes that mop work better. You’ll vacuum when loose debris, pet hair, or fine dust clings to grout lines and tile patterns; a vacuum reaches crevices faster and prevents scratching.
Sweep when larger crumbs and spills are obvious and you need a quick tidy—use a soft-bristled broom to avoid abrasion and to preserve any color contrast between grout and tile.
For mixed messes, vacuum high-traffic zones, sweep corners, then finish with your chosen mop. Match method to mess for cleaner, longer-lasting floors.
Preparing the Kitchen: Clear, Sweep, and Dry-Mop
Start by clearing countertops and any items on the floor so you won’t track dirt back onto freshly cleaned tile.
Sweep thoroughly to remove loose debris from grout lines and corners.
Finish with a dry-mop or microfiber dust mop to pick up fine dust before wet cleaning.
Clear Countertops And Surfaces
Before you sweep or mop, clear countertops and surfaces so dirt and crumbs have nowhere to hide. You’ll work faster and spot stains or surface discoloration when counters are bare. Remove small appliances, mail, and dishes; group items for quick sorting. Consider countertop organization to keep essentials tidy before cleaning.
- Stack dishes into the sink or dishwasher.
- Unplug and tuck away small appliances.
- Wipe crumbs into a dustpan or cloth.
- Check corners and behind jars for hidden debris.
Leave only necessary items out; this prevents recontamination and saves time when you clean the floor.
Sweep Then Dry-Mop
With counters cleared, give the floor a thorough sweep to remove crumbs and grit that can scratch tiles or clog your mop. Use a soft-bristled broom, working from edges toward the center, following tile patterns so you don’t miss debris near grout colors that hide dirt.
| Tool | Action |
|---|---|
| Broom | Sweep edges first |
| Dustpan | Collect debris promptly |
| Dry mop | Finish with microfiber |
After sweeping, glide a dry microfiber mop in overlapping strokes. You’ll pick up fine dust and hair without wetting grout. Inspect corners and under appliances before wet-mopping.
How to Pre-Treat Sticky Spills and Spots
If a sticky spill’s still tacky, tackle it right away so it doesn’t set into grout or attract more dirt. Blot excess with a paper towel, then dampen a microfiber cloth with warm water.
For stubborn spots, apply a small dab of dish soap, work gently, and rinse. Consider stain removal steps for sticky residues near grout; avoid scrubbing grout aggressively to protect grout sealing.
- Scoop solids with a spatula.
- Blot—don’t rub.
- Apply mild soap gently.
- Rinse and dry.
Finish by drying the area thoroughly so residue doesn’t re-attract dirt.
Mixing a DIY Tile Floor Cleaner That Works
Before you mix anything, choose safe ingredients like mild dish soap, white vinegar (used sparingly on glazed tile), and warm water to avoid harming grout or finish.
Measure carefully and test the solution on a small, hidden spot to confirm it won’t discolor or etch your tiles.
When it’s safe, mix small batches, label the container, and use within a few days for best cleaning power.
Safe Ingredient Choices
Want a DIY tile cleaner that actually works without harming your grout, finish, or fumes? You’ll pick ingredients that’re gentle, effective, and safe for varied tile patterns and grout color.
Choose pH-neutral soap for sealed ceramic or porcelain, diluted white vinegar only for unsealed natural stone, and rubbing alcohol for spot disinfecting. Avoid bleach on colored grout and ammonia on acid-sensitive stone.
- pH-neutral liquid soap — gentle shine
- White vinegar diluted — brightens ceramic
- Rubbing alcohol — quick dry disinfect
- Baking soda paste — lift stains without abrasion
Test a hidden spot first.
Mixing And Usage
When you’re ready to mix a DIY tile cleaner, measure ingredients precisely and label the bottle so you know what’s inside.
Use simple mixing techniques: combine warm water, a mild pH-neutral detergent, and a splash of vinegar or rubbing alcohol in a clean container, stirring gently to avoid suds.
Test a small area first.
For usage safety, wear gloves and make certain good ventilation, never mix bleach with acids, and keep pets and children away while cleaning.
Apply solution with a mop or microfiber, rinse with clean water, and store leftover cleaner in a labeled, sealed container out of reach.
Safe Store-Bought Cleaners for Ceramic and Porcelain
If you prefer convenience, you can rely on several reputable store-bought cleaners that are safe for ceramic and porcelain tile. Look for pH-neutral formulas labeled as safe for glazed tile and grout. You’ll want products that protect color variations and won’t dull tile patterns.
If you want convenience, choose pH-neutral, glazed-tile-safe cleaners that protect color and won’t dull patterns
Choose ones with mild surfactants and no bleach or ammonia. Consider these visual cues when shopping:
- A clear, streak-free finish for glossy tiles.
- A foam that lifts dirt without residue.
- A gentle scent that masks kitchen odors.
- Packaging that lists grout-safe use and dilution instructions.
How to Test Cleaners on Tile and Grout
After choosing a store-bought cleaner that’s labeled safe for glazed tile and grout, you should always test it in an inconspicuous spot to confirm it won’t harm color, finish, or grout sealers. Pick a hidden area near a cabinet toe-kick or behind an appliance.
Apply a small amount, wait the manufacturer’s recommended dwell time, then blot and rinse.
Check tile patterns for fading or surface change and inspect grout color for lightening, darkening, or sealer breakdown. If any change appears, stop and try a milder cleaner.
Document results so you won’t repeat a damaging product.
Using a Mop Correctly: Technique and Timing
When you mop, use a figure-eight or S-pattern and wring the mop so it’s damp, not soaking, to avoid leaving streaks or water in the grout.
Aim to mop after sweeping and once any cleaner has had time to sit, usually 5–10 minutes, so soils lift more easily.
For high-traffic kitchens, mop daily or spot-clean as needed and do a thorough mop weekly.
Proper Mopping Technique
Although mopping seems simple, using the right technique and timing makes cleaning faster and prevents streaks or damage. You’ll start by choosing a mop and solution that won’t dull your tile pattern or alter grout color. Work methodically:
- Sweep or vacuum, visualizing clean lines across tiles.
- Dip and wring so the mop’s damp, not dripping.
- Mop in overlapping S-shaped strokes, following the tile pattern.
- Rinse the mop often and finish with a light pass along grout lines.
Let the floor air-dry; avoid heavy foot traffic until it’s fully dry to prevent smudges.
Best Mopping Timing
If you want streak-free, long-lasting results, time your mopping to match how dirty the floor is and the room’s humidity. You should mop high-traffic areas daily or spot-clean spills immediately; schedule full mopping weekly for moderate use and twice weekly if kids or pets increase soil.
Mop when sunlight isn’t strongest to avoid fast drying that leaves streaks on varied tile patterns. After scrubbing grout colors that show wear, let grout cure between deep cleans to prevent damage.
Finish with a quick pass using a microfiber mop to lift residue and speed even drying.
How to Deep-Clean Grout Lines Step by Step
Since grout traps dirt and grime in tiny crevices, you’ll need a focused routine to get it truly clean. Begin by sweeping and vacuuming to remove surface debris. Mix a grout cleaner and scrub with a stiff brush along lines. Rinse thoroughly, then dry with microfiber towels.
- Visualize dark lines becoming pale.
- Picture grout pores releasing grime.
- Imagine restored contrast between tile and grout.
- See the floor ready for finishing touches.
After deep-cleaning, consider grout sealing to protect results and follow with tile polishing to enhance shine and ease future maintenance.
Choosing a Grout Cleaner: Store-Bought vs. Homemade
You’ll weigh store-bought cleaners’ fast action and formulated strength against the budget-friendly, customizable homemade options like baking soda and vinegar.
Consider effectiveness on tough stains, safety for your family and grout, and any ventilation or protective gear required.
I’ll outline pros and cons so you can pick the best fit for your floor and routine.
Store-Bought Cleaner Pros
When you want fast, reliable results with minimal guesswork, store-bought grout cleaners are hard to beat. You’ll appreciate formulas designed for different tile patterns and grout colors, saving trial-and-error. They strip soil, brighten joints, and often contain seal-enhancing agents, so you work less and see consistent outcomes. Pick a product labeled for your tile material and ventilation needs.
- Spray-and-wipe convenience for quick touch-ups
- Concentrated options for deep-clean cycles
- Color-safe choices to protect grout hues
- Professional-strength versions for stubborn buildup
Follow label directions and test a small area first.
Homemade Solution Options
Thinking about a DIY grout cleaner? You can mix baking soda and water into a paste or combine vinegar with warm water for routine spots.
For stubborn stains, hydrogen peroxide plus baking soda targets discoloration without masking tile patterns.
Test any mix on a hidden area to guarantee it won’t alter grout colors or harm finish.
Use a small brush to work the solution into grout lines, then rinse thoroughly so residue doesn’t attract dirt.
Homemade options save money and let you adjust strength, but keep proportions consistent and label mixtures to avoid accidental misuse.
Safety And Effectiveness
Although homemade cleaners can be economical and effective for light grime, choosing between store-bought and DIY grout solutions comes down to balancing safety, strength, and the specific problem you’re tackling. You’ll assess risks and results: store brands often deliver stronger stain removal but contain harsher chemicals.
DIY mixes are gentler, cheaper, and friendlier to kitchen decor and sensitive noses. Match cleaner to grout type and stain severity, and always test first.
Picture options as tools:
- Soft brush, baking soda paste.
- Oxygen bleach soak.
- Commercial acid grout cleaner.
- Protective gloves, ventilation.
Follow label instructions for safe, effective tile maintenance.
Tools for Grout Work: Brushes, Steamers, and Picks
If you want clean, lasting grout, the right tools make all the difference: stiff nylon brushes handle routine scrubbing without damaging tile, narrow grout brushes reach between tight lines, steamers lift embedded dirt and kill mold with heat, and picks or grout saws let you remove damaged grout before regrouting.
Choose brush stiffness to protect grout color and follow tile patterns to avoid uneven wear. Use steamers for deep-set grime, but test a small area first.
Picks help remove loose grout for a proper bond when you replace it. Keep tools clean and replace worn brushes promptly.
How to Brighten Discolored Grout Without Bleaching
You can brighten stained grout without harsh bleach by using gentle acid-based cleaners like diluted white vinegar or a commercial grout brightener made for tile.
For tougher spots, make a paste from baking soda and a mild acid. Apply it to the grout, let it sit, then scrub with a stiff brush to lift stains.
Always test a small area first and rinse thoroughly to protect surrounding tile and grout.
Gentle Acid-Based Cleaners
When grout has dulled from mineral buildup or stubborn stains, gentle acid-based cleaners can restore brightness without the harshness of bleach. They dissolve deposits and lift discoloration while being safe for most ceramic and porcelain tiles when used correctly.
You’ll choose a mild acid product labeled for grout, test a hidden spot, then rinse thoroughly. Consider how Tile patterns and grout colors interact so you don’t over-brighten contrasts.
Apply with a soft brush, wait the recommended time, then neutralize and rinse.
Visualize:
- soft brush strokes along grout lines
- dissolved mineral film lifting
- even grout tones returning
- refreshed tile contrast
Stain-Lifting Paste Methods
Although using bleach is common, stain-lifting paste methods let you brighten discolored grout without harsh chemicals by combining gentle abrasives and targeted cleaners into a spreadable compound you apply directly to the stain. You’ll mix baking soda, hydrogen peroxide, and a dash of dish soap, apply paste along grout lines following tile patterns, let it sit 10–15 minutes, then scrub with a nylon brush. Rinse, dry, and inspect; repeat stubborn spots. After success, consider grout sealing to protect results. Use this targeted method for grout-only issues to preserve tiles and avoid over-wetting adjacent surfaces.
| Ingredient | Action | Time |
|---|---|---|
| Baking soda | Abrade | 10–15 min |
| Peroxide | Lift | Rinse |
How to Remove Soap Scum and Film From Glazed Tiles
What’s leaving that filmy haze on your glazed tiles is usually a mix of hard water minerals, soap residues, and body oils — and you can remove it without harsh abrasives.
Start by wiping with a microfiber dampened with white vinegar diluted 1:1 to break soap residue; rinse with clean water.
For stubborn film, make a paste of baking soda and water, apply gently, then rinse.
Watch grout discoloration and treat grout lines with a soft brush.
- Vinegar spray
- Microfiber cloth
- Baking soda paste
- Soft grout brush
Removing Oil and Grease From Tile Surfaces
If grease or cooking oil has built up on your tile, you can cut through it quickly with the right degreasing method and a bit of elbow grease.
First, remove loose debris and move lightweight furniture placement items aside so you can access edges.
Sprinkle baking soda over greasy spots, spray a mix of warm water and dish soap, let sit five minutes, then scrub with a stiff brush.
Wipe with a microfiber mop and rinse with clean water.
For heavy grease, use a commercial degreaser following label directions and ventilate the room.
These cooking tips help prevent future buildup.
Dealing With Baked-On Food and Stubborn Stains
When food’s baked on, you’ll want to soften the residue first with warm water, a bit of dish soap, or a steam cleaner to loosen it.
Then scrub with a brush that matches your tile and grout—use stiff bristles for grout and a softer brush for glazed tile.
For persistent spots, apply a targeted stain remover and follow the product instructions until the stain lifts.
Soften Hardened Residue
Though stubborn, baked-on food and hardened residue don’t have to mean hours of scrubbing—you can loosen them effectively with the right combination of heat, moisture, and gentle abrasion.
First, soften spots before you tackle tile patterns or check grout sealing. Apply warm water, a few drops of dish soap, then cover with a damp towel for 10–15 minutes to steam stains.
For grease, use a degreaser diluted per label.
For mineral deposits, white vinegar helps.
Visualize the process:
- Warm, soapy soak
- Damp towel steam
- Targeted degreaser
- Vinegar for minerals
Blot, repeat as needed before scrubbing.
Scrub With Appropriate Brushes
Now that the residue has softened, pick the right brushes to finish the job without damaging tile or grout. You’ll use different scrubbing techniques: circular motions for surface gunk, firm back-and-forth strokes for edges, and short taps for stubborn spots.
For glazed tile, choose soft nylon brushes or a microfiber pad to avoid scratches. For unglazed tile and grout, use stiffer nylon or a grout brush to reach crevices.
Keep a handheld brush for corners and a long-handled one for larger areas. Rinse brushes frequently, replace worn bristles, and test a small area first to confirm brush selection is safe.
Use Targeted Stain Removers
If baked-on food or dark grout spots won’t budge with general scrubbing, reach for targeted stain removers designed for the problem. You’ll choose products by stain type—grease, burned sugars, or mineral buildup—testing in an inconspicuous spot first to protect color contrast and tile patterns.
Apply, wait per instructions, then agitate with a nylon brush and rinse thoroughly. Picture the process:
- Scrape loose debris.
- Apply remover to a small area.
- Let dwell, then scrub gently.
- Rinse and dry, repeat if needed.
Work methodically across tiles, avoiding harsh abrasives on delicate surfaces.
How to Remove Rust and Hard-Water Spots From Tile
When rust or hard-water spots mar your tile, you can remove them without harsh scrubbing by using the right cleaners and a gentle technique. For rust removal, apply a commercial rust remover or a paste of baking soda and lemon, let it sit, then rinse. For hard water spots, use white vinegar diluted with water, test first, then wipe and rinse. Always blot, don’t scour, and dry thoroughly to prevent recurrence.
| Problem | Cleaner | Action |
|---|---|---|
| Rust | Rust remover | Apply, wait, rinse |
| Light rust | Baking soda + lemon | Paste, sit, rinse |
| Hard water | Diluted vinegar | Wipe, rinse |
| Prevention | Drying | Wipe dry after cleaning |
Cleaning Natural Stone Tile Without Damage
Because natural stone is porous and sensitive to acids and abrasives, you’ll need cleaners and methods made specifically for marble, travertine, slate, or limestone. Use pH-neutral cleaners and lukewarm water; never vinegar, bleach, or citrus-based products. Test a cleaner on an inconspicuous spot first. Blot spills quickly to avoid staining.
- Soft-bristle broom to remove grit.
- Microfiber mop damp—not soaking—to prevent water penetration.
- Soft cloth for spot-cleaning oils or food.
- Gentle poultice for stubborn stains, following product directions.
These cleaning tips protect natural stone’s finish while keeping your floor safe and attractive.
Sealing Tile and Grout: When and How to Do It
Since grout and many tile types absorb moisture and stains, you should seal them to extend their life and make cleaning easier.
First, choose a sealant suited to your tile—penetrating for porous stone, topical for glazed ceramic. Test a small area.
Clean and fully dry the surface, then apply with a brush or roller, following manufacturer directions. Wipe excess from grout lines to keep grout color consistent.
Use sealing techniques like thin even coats and proper drying time between layers. Ventilate the room and avoid traffic until cured.
Note product labels for compatibility with household cleaners.
How Often to Reseal Grout and Stone Tiles
After sealing your tile and grout, you’ll need a schedule for resealing to keep that protection effective. Check porous stone every 6–12 months and grout in high-traffic areas every 6 months; low-traffic grout can wait 1–2 years. Test by sprinkling water—if it soaks in, reseal.
After sealing tile and grout, recheck porous stone every 6–12 months and grout every 6–24 months; water-test to know.
Consider tile patterns and color coordination when planning reseal projects so repaired areas blend. Visual cues help you spot wear: dull grout, stains, or water absorption.
Plan resealing tasks room-by-room to avoid overwhelming work.
- Inspect
- Test
- Reseal
- Blend with design
Replacing Grout: Step-by-Step Regrouting Guide
When you’re ready to replace grout, gather the right tools and materials—grout saw or oscillating tool, new grout, a grout float, sponge, and safety gear.
Start by removing the old grout carefully to avoid chipping tiles, then vacuum or brush the joints clean.
Once the joints are prepped, you’ll be set to mix and apply the new grout following the manufacturer’s directions.
Tools And Materials
Before you start regrouting, gather the right tools and materials so the job goes smoothly and the new grout bonds properly. You’ll want grout that matches your tile decor and grout color choice, plus supplies to apply and finish it neatly.
Essentials include a grout mix, sealant, and a bucket for mixing. You’ll also need hand tools and safety gear.
Pick color samples, thin-set if needed, and clean towels.
- Grout mix and sealant
- Grout float and finishing tool
- Mixing bucket, sponge, shop vacuum
- Safety gear: gloves, goggles, knee pads
Removing Old Grout
Ready to get the old grout out? You’ll safeguard adjacent tiles and vintage decor by working methodically. Remove fixtures and vacuum loose debris.
Score grout lines with a grout saw or oscillating tool, keeping blade shallow to avoid damaging tile patterns. Work in short sections, clearing dust often with a brush and vacuum.
For stubborn spots, use a carbide bit and steady pressure; don’t rush. Wipe with a damp sponge to check depth—aim to remove at least two-thirds of the old grout.
Finish by cleaning thoroughly; let the joints dry fully before regrouting to ensure a strong bond.
How to Repair Cracked or Chipped Tile Pieces
If a tile gets cracked or chipped, you don’t have to replace the whole floor—small repairs can restore appearance and prevent moisture damage. First, clear debris and clean the area. Match replacement or repair epoxy to your tile patterns and grout color for a seamless look.
Then follow these steps:
- Remove loose fragments with pliers.
- Fill deep chips with epoxy resin; shape while tacky.
- For hairline cracks, inject flexible tile adhesive.
- Sand and buff once cured; seal edges to block moisture.
Work carefully, test color on a scrap, and let cures fully set before walking.
How to Prevent Grout Staining From the Start
Because grout soaks up spills and dirt quickly, you’ll want to seal and protect it right after installation to keep stains from setting in. Choose a quality sealer that matches grout color and enhances tile patterns. Apply evenly, let cure, and reapply yearly in busy zones. Wipe spills fast, use mats near sinks, and avoid harsh cleaners that strip sealers. Test any product on an inconspicuous spot first. Small habits protect your floor’s look and feel.
| Feeling | Action |
|---|---|
| Relief | Seal grout now |
| Pride | Maintain tile patterns |
| Confidence | Choose right grout color |
| Calm | Routine touch-ups |
Spot-Cleaning Tips for High-Traffic Kitchen Areas
When spills and tracked-in dirt concentrate near the sink, stove, and entryways, you’ll want quick, targeted cleaning routines that remove grime without wearing down tile or grout. You’ll act fast, keep tools at hand, and mimic spot techniques used for outdoor patio stains or wall tiles to stay consistent.
Use these visual steps:
- Blot fresh spills with a microfiber towel to avoid spreading.
- Sprinkle baking soda on greasy spots, let sit five minutes.
- Scrub grout lines gently with a soft brush and warm water.
- Rinse and dry the area to prevent residue and water marks.
How to Maintain Tile Shine Between Deep Cleans
After spot-cleaning high-traffic zones, keep your tile’s shine between deep cleans with a few simple habits you can do weekly: sweep or vacuum loose grit, mop with a pH-neutral cleaner diluted per label instructions, and buff dry with a microfiber cloth to restore luster and prevent water spots. Rotate mop directions to follow tile patterns so dirt lifts evenly. Reapply grout sealing yearly and touch grout with a toothbrush when needed. Use doormats to cut tracked debris. Simple routines preserve finish and slow wear.
| Visual | Texture | Action |
|---|---|---|
| glossy tiles | smooth | sweep |
| patterned tile | grout lines | mop |
| entry mat | coarse | buff |
| sunlit floor | sheen | inspect |
Quick Fixes for Slippery Tile After Cleaning
If your tiles feel slippery after mopping, rinse them thoroughly with clean water to remove any leftover cleaner.
You can apply a non-slip treatment or an anti-slip spray for extra traction on smooth tiles.
Place slip-resistant rugs or mats in high-traffic areas to prevent accidents while the floor fully dries.
Rinse Thoroughly After Cleaning
Because leftover cleaner and suds can leave a slick film on tile, you should rinse the floor thoroughly with clean water to remove any residue that causes slipperiness. Rinse in sections, mop with clear water, and change the water often so grime and suds don’t redeposit.
Pay attention to grout lines and textured tiles; they trap residue and stay slippery longer. Keep visuals in mind for even results:
- Imagine clean tiles reflecting light evenly.
- Picture grout returning to its original shade.
- Visualize color coordination with your kitchen’s floor patterns.
- See a streak-free, safe walking surface.
Dry with a microfiber mop.
Apply Non-Slip Treatments
When tiles still feel slick despite rinsing, you can apply quick non-slip treatments to restore traction and safety. These options range from temporary spray-on coatings to simple household fixes like diluted vinegar or sand additives for mats.
You’ll choose between commercial non-slip coatings that bond to tile and DIY approaches that add texture. Test any product in a small area, follow label directions, and let surfaces cure fully before walking.
For a low-cost fix, sprinkle fine grit or use anti-slip tape in high-traffic spots. Reapply as needed, and monitor wear so you maintain effective slip-resistant treatments.
Use Slip-Resistant Rugs
Although a deep clean can leave tile shiny and slick, you can quickly restore safe footing by laying down slip-resistant rugs or runners. They add traction, protect floors, and define walkways.
Choose low-profile, non-slip backed rugs designed for wet areas to maximize slip resistance. Consider rug placement near sinks, stoves, and entryways.
Secure edges with tape or grippers and clean rugs regularly to avoid buildup.
- Narrow runner by sink for drying dishes.
- Small mat at entry to trap moisture.
- Cushioned pad in front of stove for standing.
- Low-pile runner along main traffic path.
How to Safely Use a Steam Cleaner on Tile Floors
If you’re thinking about using a steam cleaner on your tile floor, do it carefully to protect the grout, seals, and any floor finish—steam’s heat and moisture can be great for loosening dirt but can also damage sensitive materials if misused.
Check manufacturer guidelines for steam safety and confirm tiles and grout are rated for steam cleaning. Test an inconspicuous spot, monitor tile temperature, and use the lowest effective heat setting.
Move the steam head steadily—don’t linger—to prevent seal breakdown or discoloration. Wring out excess water first, ventilate the room, and dry grout lines with a microfiber cloth afterward.
Avoiding Common Mistakes That Dull Tile Shine
Because a few common habits strip tile of its shine, you should be deliberate about products and techniques—skip abrasive cleaners, don’t overuse wax-based polishes, and avoid harsh scrubbing that scratches glaze. You’ll protect finish and grout durability by choosing mild pH-neutral cleaners and soft tools.
Skip abrasives and wax overload—use pH-neutral cleaners and soft tools to protect tile shine and grout.
Watch how traffic wears different tile patterns and target care where wear concentrates. Visualize problem spots:
- Scratched grout lines from stiff brushes.
- Dull centers from wax buildup.
- Matte haze where acidic cleaners etch.
- Shine lost along grout seams from neglect.
Clean gently, rinse thoroughly, and buff with a microfiber for even shine.
How Tile Type Changes Your Cleaning Approach
Different tiles demand different care, so once you’ve stopped using abrasive cleaners and harsh scrubbing, match your routine to the material.
Porcelain tolerates stronger cleaners and steam, so you can remove stains without worrying about surface damage; adjust cleaner strength by tile color to avoid discoloration.
Natural stone needs pH-neutral products and gentle mopping; seal regularly to protect against staining and watch grout pattern for trapped dirt.
Glazed ceramic is forgiving but avoid scratchy pads.
For textured or matte finishes, use soft brushes and rinse thoroughly.
Test any new cleaner on a small area matching grout pattern and tile color first.
Cleaning Under Appliances and Hard-to-Reach Spots
You’ll need to move appliances safely—unplug them, get help for heavy units, and use sliders or a dolly to avoid scratching tiles.
Once they’re out, clean hidden gaps with a vacuum, stiff brush, and a mop or steam cleaner to remove trapped grime.
Finish by sealing gaps and adding door sweeps or mats to prevent future dirt buildup.
Move Appliances Safely
When tackling the deep-clean under large appliances, plan ahead so you can move them safely and avoid damage to the floor or the unit. Check appliance placement and note how cords, water lines, and gas fittings run. Wear gloves and use furniture sliders or appliance rolls to protect grout and honor tile color selection. Have a helper for heavy lifts and lock casters before sliding back.
- Unplug and shut off supplies.
- Clear surrounding cabinets and remove baseboards if needed.
- Slide slowly on sliders, keeping weight centered.
- Inspect underside and floor for rust or leaks.
Clean Hidden Gaps
Although those narrow spaces seem insignificant, they trap dust, crumbs, and grease that can discolor grout and attract pests, so tackle them before they become a bigger problem. Slide movable appliances when safe, use a thin brush or crevice tool, and inspect grout color changes near edges. For stubborn grime, dampen a microfiber cloth with mild cleaner and scrub along tile patterns to lift residue.
| Tool | Use |
|---|---|
| Crevice tool | Vacuum tight gaps |
| Thin brush | Agitate grout lines |
| Microfiber | Wipe and polish |
| Mild cleaner | Break down grease |
| Flashlight | Spot missed dirt |
Prevent Future Dirt
After cleaning those hidden gaps, focus on preventing dirt from returning by tackling areas under appliances and other hard-to-reach spots on a regular schedule. Pull or tilt appliances when possible, slide a thin microfiber mop beneath, and use a crevice tool for grout lines.
Rotate tasks weekly so you don’t miss corners where color variations show wear or grout traps crumbs among tile patterns.
- Move fridge monthly.
- Remove oven kickplate.
- Vacuum behind washer.
- Mop under cabinets.
Seal grout annually, use felt pads on appliance feet, and keep a handheld vacuum handy to stop buildup.
How to Remove Floor Wax or Buildup From Tiles
If you’ve ever noticed a cloudy, sticky film or a slippery sheen on your tile kitchen floor, that’s usually wax or cleaning-product buildup—and you can eliminate it without stripping or damaging the tile.
Start by sweeping, then mop with warm water and a few drops of mild dish soap.
For stubborn residue, mix equal parts white vinegar and water, test in a hidden spot to guarantee tile patterns and grout colors won’t fade, then mop.
Rinse thoroughly with clean water to remove vinegar.
For persistent buildup, use a dedicated tile cleaner per manufacturer instructions and buff dry to restore sheen.
Tips for Keeping Grout White Longer
Once your tiles are free of wax and buildup, keep the grout looking fresh by sealing it and sticking to a simple cleaning routine. You’ll protect grout from stains and extend time between scrubs while preserving kitchen decor and reducing dirt tracked from appliance maintenance.
Do small tasks weekly and treat spills fast.
- Wipe crumbs and spills daily with a microfiber mop.
- Spot-clean grout with baking soda paste when you see discoloration.
- Reseal grout every 12–18 months to repel stains.
- Place mats by appliances and entryways to catch dirt.
Follow this to keep grout white longer.
Seasonal Deep-Clean Checklist for Kitchen Tile
When seasons change, give your kitchen tile a thorough deep clean to remove trapped grime, refresh grout, and catch wear before it becomes damage. Start by clearing counters and moving small appliances, then sweep and vacuum edges.
Mop with a pH-neutral cleaner, scrub grout lines with a stiff brush, and rinse thoroughly.
Inspect grout for cracks and re-seal where needed.
Clean under and behind large appliances during routine appliance maintenance to prevent buildup.
Wipe baseboards and transition strips, replace mats, and air-dry fully.
Keep a short list of cooking tips nearby to avoid greasy spills that speed grime return.
Budget-Friendly Cleaning Supplies That Still Work
After you’ve finished the seasonal deep clean and fixed any grout issues, you don’t need expensive products to keep the floor looking great. You can maintain tile patterns and grout colors with simple supplies that work. Keep a small kit handy and follow a quick routine.
- Microfiber mop — lifts dirt without streaks.
- Bucket with warm water — for regular rinsing.
- Mild dish soap — gentle on sealant, cuts grease.
- Soft brush — targets grout lines without scratching.
Rotate these tools, spot-test if unsure, and store them near the kitchen for fast touch-ups.
Natural Cleaners Safe for Kids and Pets
If you want cleaners that’re effective and non-toxic for kids and pets, choose simple, well-tested ingredients like vinegar, baking soda, and castile soap applied appropriately.
Mix a cup of water with a tablespoon of castile soap for daily mopping.
Use baking soda paste to lift stubborn grime on grout, rinsing well.
Diluted vinegar works for grease but avoid on natural stone.
Test any solution in an inconspicuous spot, especially with varied tile patterns or new color trends that might react.
Wipe up residues, keep containers labeled, and store mixtures out of reach to protect family and pets.
Eco-Friendly Disposal of Cleaning Solutions
Wondering how to get rid of leftover cleaning solutions without harming your household or the planet? You’ll handle them responsibly: never pour concentrated mixes down drains or onto soil.
Dilute mild, biodegradable cleaners with lots of water before flushing small amounts.
For stronger products, check labels and take them to a hazardous-waste drop-off.
- Picture rinsing a bottle into a sink with running water.
- Picture sealing unusable concentrates in labeled containers.
- Picture taking hazardous jars to a community collection site.
- Picture sorting empties for recycling: recycling glass where accepted, and composting waste where safe.
How to Protect Tile Flooring From Future Damage
Once you’ve disposed of cleaners responsibly, you’ll want to keep your tile in good shape so you don’t have to repeat intensive cleaning or repairs.
Use felt pads on furniture and mats at entrances to trap grit that scratches finishes. Wipe spills immediately to prevent staining and discoloration, especially on light tile color.
Reseal grout periodically to preserve grout patterns and block moisture; follow manufacturer timing. Avoid harsh acids or abrasive tools; choose pH-neutral cleaners instead.
Trim pet nails and use area rugs in high-traffic zones. Inspect tiles regularly and fix small chips or loose grout before they worsen.
When to Call a Professional Cleaner for Tile Floors
Because routine care can handle most messes, you’ll want to call a professional when stains, grout deterioration, or persistent buildup resist your best efforts and risk long-term damage.
You should hire help if cleaning starts altering your tile pattern or if attempts to restore grout color fail.
Professionals have tools and sealants for deep-set grime, uneven grout, cracked tiles, and odor issues you can’t fix.
- Deep-set oil or rust stains
- Crumbling or missing grout
- Loose, cracked, or lifted tiles
- Lingering mildew or odor after cleaning
Act sooner to protect overall flooring integrity.
Step-by-Step Checklist: Clean a Kitchen Tile Floor Today
If you want a clean kitchen floor today, follow this clear, step‑by‑step checklist that takes you from quick debris removal to finishing sealant so you don’t miss any spots or damage grout.
Remove movable items: push back outdoor furniture stored nearby and unplug small kitchen appliances.
Clear the area first: move outdoor furniture back and unplug small kitchen appliances before cleaning.
Sweep or vacuum to lift crumbs and grit.
Pretreat stains with a pH-neutral cleaner.
Mop from far corner toward the exit, rinsing the mop frequently.
Scrub grout lines with a brush if needed.
Rinse with clean water, let dry, then apply sealant to grout only if recommended.
Replace items and enjoy.
Frequently Asked Questions
Can Grout Color Be Changed Without Regrouting?
Yes — you can change grout color without regrouting by using colorant stains or dyes, then sealing. You’ll apply color restoration products, let them cure, and finish with grout sealing to protect and even the shade.
Will Rugs or Mats Damage Tile Over Time?
Don’t throw the baby out with the bathwater: you can use rugs and mats without harming tile if you mind rug placement and mat durability, clean beneath them regularly, avoid rubber backing, and swap spots to prevent uneven wear.
How Do I Remove Adhesive Residue From Tile?
You’ll soften adhesive with a heat gun or hairdryer, then scrape gently with a plastic scraper; use adhesive remover or rubbing alcohol for residue, rinse, and finish with tile cleaning solution to restore shine and prevent film.
Are Heated Floors Safe With All Tile Types?
Yes — most tiles work with heated floors, though ironically the warmest tiles aren’t the most dramatic. You’ll want to follow tile maintenance guidelines, guarantee proper installation, and check floor safety limits for specific porcelain, ceramic, or natural stone.
Can Pets’ Nails Scratch Glazed Tile?
Yes, pets’ nails can scratch glazed tile, though it’s less likely; you should do regular pet nail maintenance and use rugs or felt pads for tile scratch prevention so you won’t notice wear over time.
Conclusion
You’ve got this—clean tile floors aren’t a mystery, just a routine you can master. Start simple, sweep and spot-treat, then mop with the right solution; repeat often and protect grout with sealant. Small, steady care keeps tiles gleaming and damage at bay; think of it as a short daily dance—sweep, swish, shine—that saves you big scrubs later. Consistency pays, and a little effort now keeps your kitchen bright tomorrow.