How to Install a Tile Roof: What Homeowners Need to Know
You can install a tile roof yourself on a simple, well-framed house, but it’s labor-intensive and can need permits, structural reinforcement, and safety gear. Choose the right tile—clay, concrete, slate, or synthetic—consider weight, cost, and durability, then prep the deck, underlayment, flashing, and battens before laying and securing tiles, hips, ridges, and penetrations. Expect days to weeks of work and $5,000–$20,000 in costs, and keep reading to learn detailed steps and tips.
Can You Install a Tile Roof Yourself?
You can install a tile roof yourself if you have roofing experience, the right tools, and help for lifting heavy tiles.
Expect the project to take several days to weeks and cost anywhere from a few hundred dollars for tools and underlayment up to several thousand for tiles and supplies.
Hire a pro if your roof is steep, structurally complex, or under warranty—or if you’re unsure about safety or local code requirements.
Short summary of feasibility, time, cost range, and when to hire a pro
Although installing a tile roof is doable for a confident DIYer with carpentry skills and the right safety gear, it’s a tough, time-consuming job that many homeowners should think twice about.
You can learn how to install a tile roof, but expect several days to weeks, $5,000–$20,000 depending on size and materials.
Hire a pro for steep roofs, complex flashing, or warranty needs.
Basic Understanding What Is a Tile Roof and Why Choose It?
A tile roof uses individual clay, concrete, slate, or synthetic tiles to protect your home, and each type has different looks, weights, and price points.
You’ll weigh pros and cons like durability versus cost and the extra structural load heavier tiles impose.
Before you commit, make sure your roof pitch, framing strength, and local codes support the tile system you choose.
Types of roofing tiles (clay, concrete, slate, synthetic)
When choosing a tile roof, you’ll find four main options—clay, concrete, slate, and synthetic—each offering distinct looks, lifespans, weights, and price points; understanding those differences helps you match performance and aesthetics to your home’s needs. You’ll compare visual style, maintenance needs, and installation demands.
| Type | Key trait |
|---|---|
| Clay | Traditional |
| Concrete | Versatile |
Pros and cons (durability, weight, cost, aesthetics)
You’ve seen the main tile types—clay, concrete, slate, and synthetic—so now consider what each brings and takes away in practical terms.
- Durability: slate and clay last decades; synthetics vary.
- Weight: concrete and slate are heavy; may need reinforcement.
- Cost: clay and slate cost more upfront; synthetics are cheaper.
- Aesthetics: choices range from traditional to modern; pick style and budget.
Structural requirements (roof pitch, framing strength, local codes)
Three key structural factors determine whether your roof can handle tiles: pitch, framing strength, and local building codes.
You’ll need a minimum slope (often 3:12 to 4:12) for water shedding, reinforced rafters or trusses to support heavier loads, and permits or inspections that guarantee compliance.
Consult an engineer and local authorities before installing tiles to avoid costly corrections.
Pre-Installation Planning
Before you start tearing off the old roof, walk the structure with an inspection checklist to confirm the deck, slope, and framing can support tile.
Check permits, local building codes, and any HOA rules, then estimate exact material quantities and costs for tiles, underlayment, battens, and fasteners.
Finally, plan safety measures and gather the required tools and equipment so you’re ready and compliant when work begins.
Assessing roof suitability (inspection checklist)
When you’re planning a tile roof, start with a focused inspection to confirm your roof’s structure, slope, decking, and existing fasteners can support the added weight and installation requirements.
- Check framing for rot, cracks, or undersized rafters.
- Measure roof pitch; tiles need adequate slope.
- Inspect decking for damage, proper fastening, and span.
- Verify flashing condition, vents, and chimney stability.
Permits, building codes, and HOA rules
If your tile roof project is going to stay legal and avoid costly delays, you’ll need to confirm permits, local building codes, and any HOA restrictions before you order materials or schedule crews.
Contact your local permitting office for required approvals, review wind, fire, and structural rules, and get HOA sign-off if needed.
Keep records of permits and communications for inspections.
Estimating materials and costs (tiles, underlayment, battens, fasteners)
Start by calculating the exact roof area and waste factor so you can order the right number of tiles and avoid costly overages or shortages. Then price tiles, underlayment, battens, and fasteners; include delivery and trim. Compare suppliers, factor labor if not DIY, and budget a contingency for breakage.
| Item | Unit | Estimated Qty |
|---|---|---|
| Tiles | pcs/sqft | |
| Underlayment | rolls | |
| Battens/Fasteners | bundles/boxes |
Safety planning and required tools/equipment
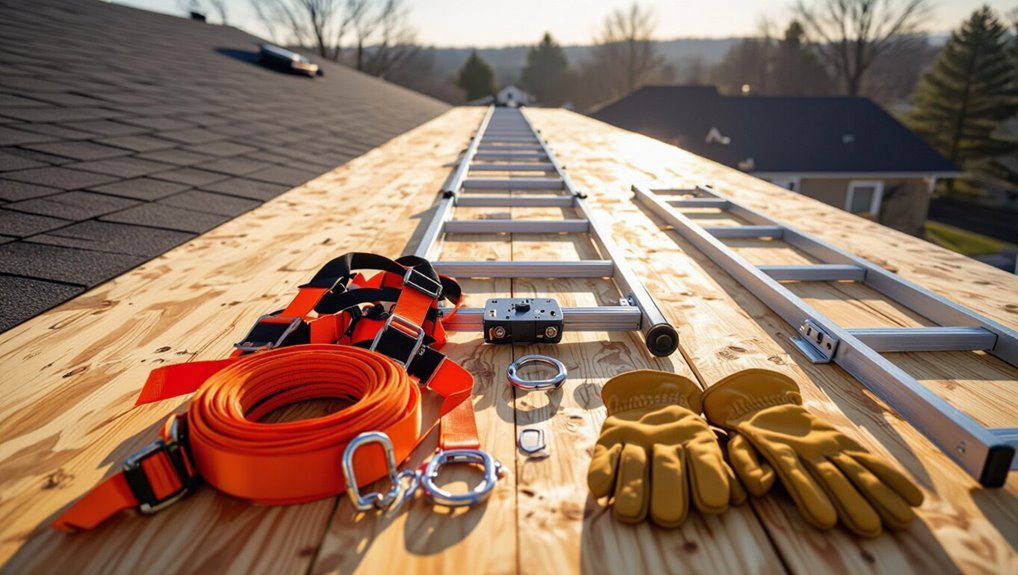
Because roofing work puts you above ground and around heavy materials, you should plan safety and gather the right tools before you touch a tile.
Inspect fall protection, secure ladders, and set up scaffolding. Wear gloves, eye protection, and non‑slip boots. Keep a first‑aid kit and communication device handy.
- Fall arrest harness
- Stable ladder/scaffold
- Tile cutter and pry bar
- Gloves, goggles, boots
Step-by-Step Installation Process
Now you’ll move through a clear, sequential installation process starting with removing the old roofing and preparing the deck.
Next you’ll inspect and reinforce the roof structure, install underlayment and drip edge, and add battens or a tile support system if needed.
Finally, you’ll lay starter courses and align the tiles to guarantee a secure, even finish.
Step 1 Removing old roofing and preparing the deck
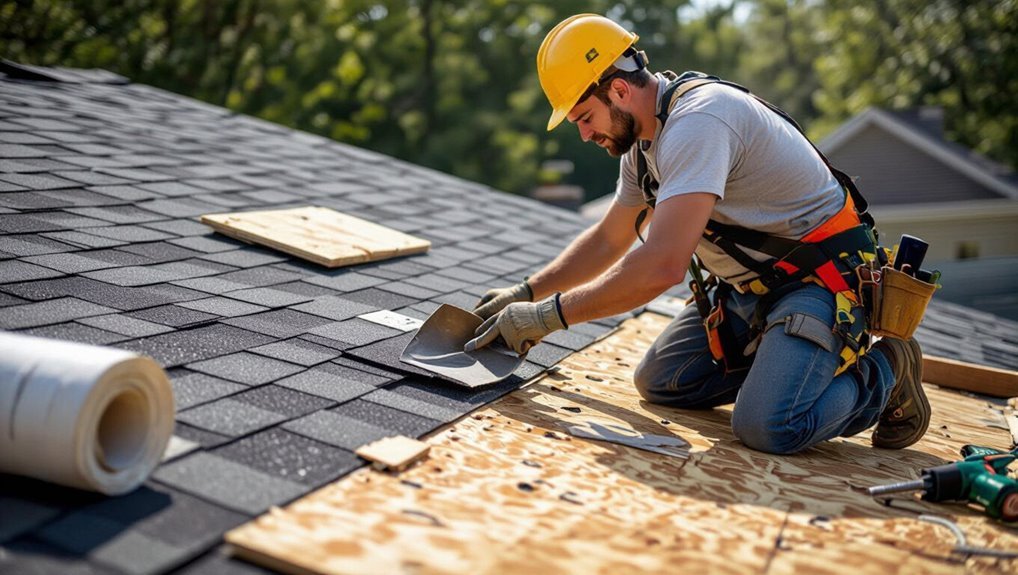
Strip off the old roofing components and inspect the deck for damage before you do anything else.
Remove shingles, underlayment, flashing, and nails; sweep debris and check for soft or rotted areas.
Replace damaged decking panels, fasten loose boards, and guarantee a smooth, clean surface.
Install a breathable underlayment and new drip edge so the deck’s ready for tile underlayers.
Step 2 Inspecting and reinforcing roof structure
With the deck cleaned and underlayment in place, inspect the roof’s framing to confirm it can support the weight of tile.
Check rafters, trusses, and sheathing for rot, splits, or sagging. Measure span and spacing against tile load tables.
Reinforce weak areas with sistered rafters, collar ties, or added blocking.
Verify secure fasteners and proper ventilation before proceeding.
Step 3 Installing underlayment and drip edge
Start by laying a high-quality underlayment across the clean deck, overlapping each course per the manufacturer’s directions and fastening it securely to prevent wind uplift.
Next, install a corrosion-resistant drip edge along eaves and rakes, nailing it into the deck beneath underlayment at rakes and over at eaves.
Seal seams, flash penetrations, and inspect for smooth, continuous water shedding before proceeding.
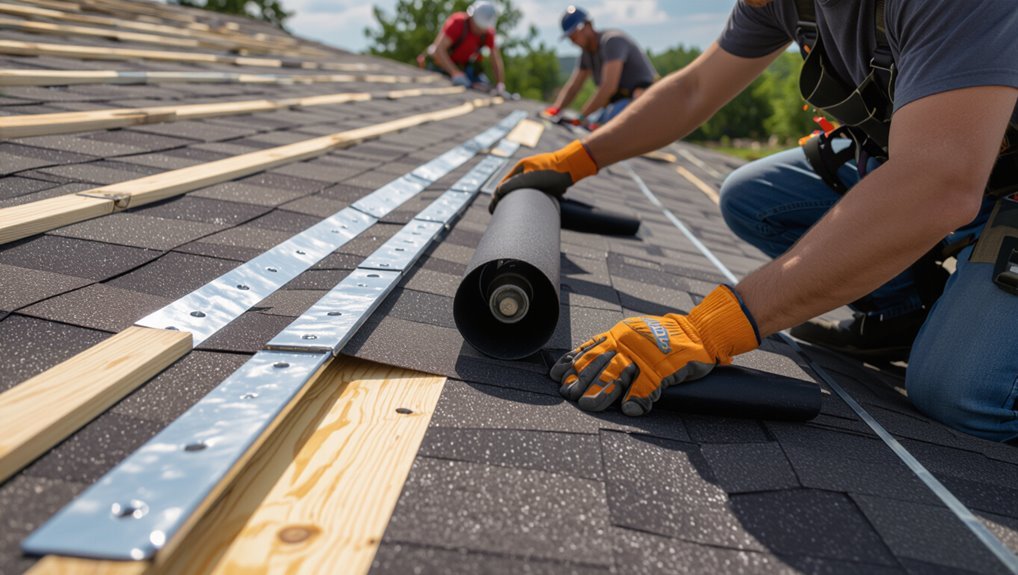
Step 4 Installing battens or tile support system (if required)
If your roof system requires battens or a tile-support framework, you’ll fasten them next to create a consistent, level grid that secures and spaces the tiles.
Measure and mark batten lines from the eave to the ridge, confirm proper overlap at rafter intersections, use corrosion-resistant screws or nails into rafters, and check level and spacing frequently before proceeding.
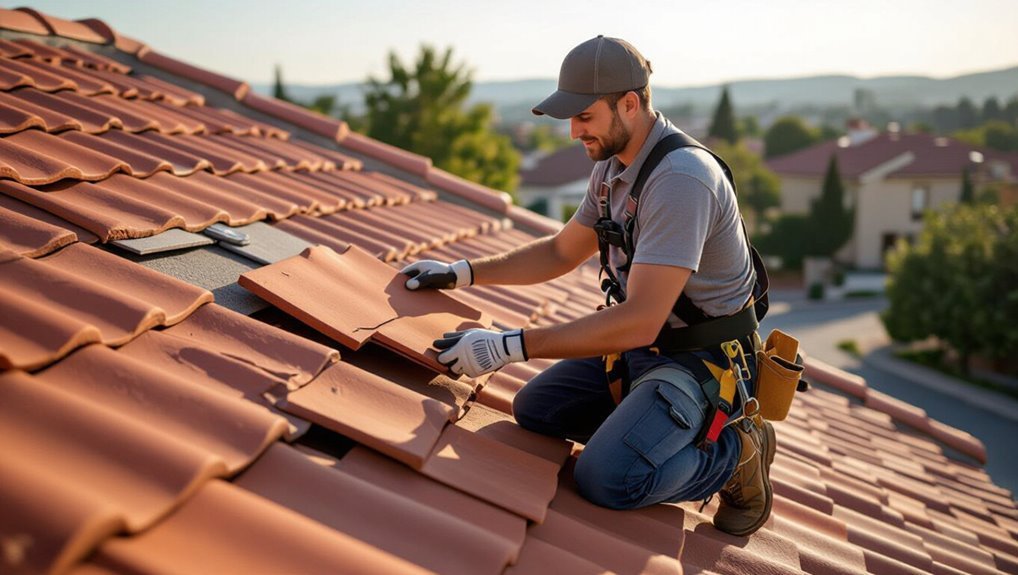
Step 5 Laying starter courses and aligning tiles
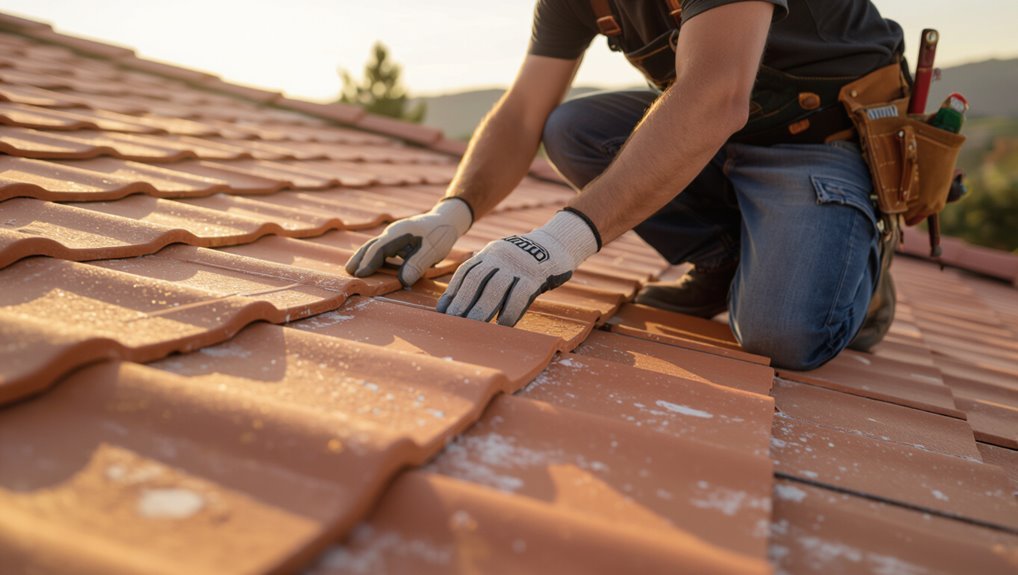
1. Begin by fitting a straight starter course along the eave, ensuring tiles overhang correctly for drainage.
Use a chalk line to keep rows true, then place tiles snugly against the starter, checking alignment at the ridge and hips.
Adjust spacing for consistent exposure, trimming edge tiles as needed.
Keep frequent visual checks so courses remain straight and uniform.
Step 6 Securing tiles (nailing vs. clipping) and flashing details
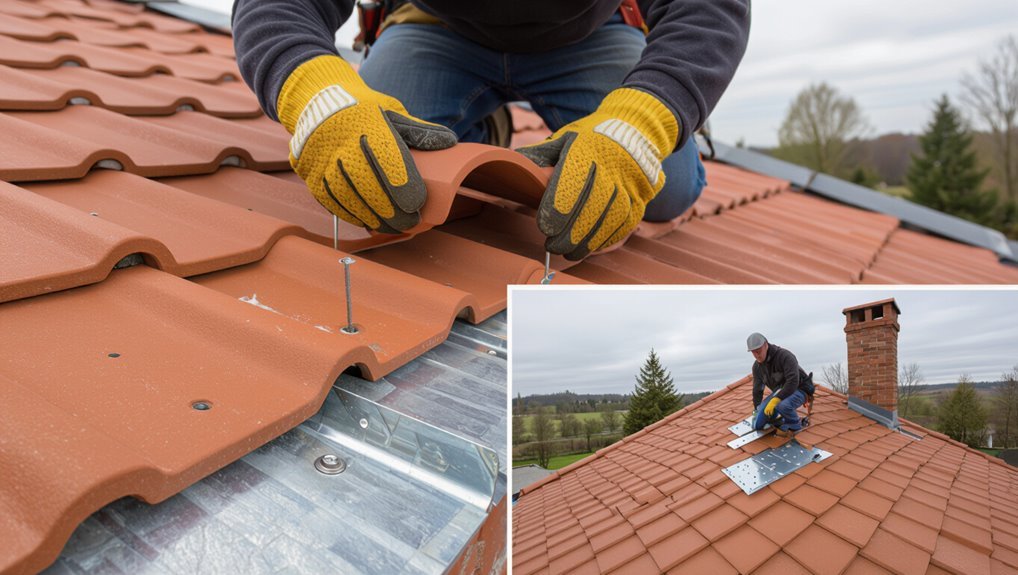
Three main choices determine how your tiles stay put: nails, clips, or a combination of both, and each method has trade-offs related to wind resistance, local code, and tile type.
You’ll nail through the head for simplicity, use clips for concealed securement, or pair both for high-wind areas.
Flashing around chimneys, vents, and eaves must be integrated under tiles and sealed properly.
Step 7 Ridge, hip, and valley treatments
Once your tiles are secured and flashing is in place, you’ll move to finishing the roof’s peaks and intersections where water and wind concentrate.
Install ridge tiles with a dry- or mortar-set cap, overlapping and fastening per manufacturer specs.
Shape hip tiles to conform, cutting neatly at valleys.
For valleys, use woven or metal valley liners and guarantee smooth tile changes to shed water effectively.
Step 8 Installing roof penetrations (vents, chimneys) and sealing
Because roof penetrations are inevitable, you’ll tackle vents, chimneys, and other openings with careful flashing and sealing to prevent leaks and wind intrusion.
Cut tiles neatly, install metal or step flashing keyed under tiles, and secure vent boots or chimney saddles.
Use compatible flashing sealant and oxide-resistant fasteners, then embed flashing under tiles and press seals firmly to guarantee watertight connections.
Step 9 Final inspections, cleanup, and waste disposal
Step 9 wraps up the job: inspect every seam, tile, flashing, and penetration for proper fit and seal, remove debris and loose nails, and sort waste for disposal or recycling so your roof looks clean and performs as designed.
Walk the roof and attic, document issues, tighten or replace fasteners, sweep tiles, bag trash, and arrange legal disposal or recycling for leftover materials.
Tools, Materials, and Estimated Quantities
Now you’ll need the right tools—roofing hammer, tile cutter, scaffold, chalk line, and safety gear—to work efficiently and safely.
I’ll cover material specs and typical tile counts per square (plus underlayment, battens, and fasteners) so you can order the right amounts.
Finally, we’ll compare cost-saving alternatives like concrete vs. clay tiles and when it’s appropriate to choose them.
Essential tools list
Before you climb onto the roof, gather the right tools and materials so the job goes smoothly and safely; below is a concise list of what you’ll need and the typical quantities for a standard residential roof.
- Roofing hammer, pry bar, and nail gun — several boxes of corrosion-resistant nails.
- Chalk line, tape measure, and level — one of each.
- Safety harness, roof jacks, and scaffolding — rentals as needed.
- Tile cutters, angle grinder, and diamond blades — expect spare blades.
Material specs and common tile quantities per square foot
With your tools and safety gear ready, you’ll also want to pick the right materials and know how many tiles you’ll need per square foot. Choose clay or concrete tiles, underlayment, battens, and fasteners. Typical coverage varies by profile—confirm manufacturer specs and add 10% waste.
| Tile Type | Coverage/sq ft | Notes |
|---|---|---|
| Flat clay | 11–12 | dense |
| Barrel | 8–10 | overlaps |
| Concrete | 10–11 | durable |
Cost-saving alternatives and when to use them
Although premium clay or concrete tiles give longevity and curb appeal, you can cut project costs by choosing alternatives that fit your budget and performance needs.
Consider concrete-look composite tiles, metal tiles, or asphalt shingles with tile profiles. They’ll reduce material and labor costs.
Estimate quantities by square footage: composites often match tile coverage, metal needs fewer pieces, asphalt uses standard bundle counts.
Use appropriate underlayment.
Common Mistakes and How to Avoid Them
Before you lay a single tile, understand the common mistakes that cause leaks, broken tiles, and structural problems.
Poor deck prep, wrong underlayment or flashing, misaligned or poorly fastened tiles, and ignoring load limits each create predictable failures you can prevent.
In the next sections you’ll get clear checks and fixes to avoid those issues.
Poor deck preparation and its consequences
If you rush or skip proper deck preparation, you set your new tile roof up for leaks, premature failure, and costly repairs.
Poorly secured or rotting decking won’t support tile weight, warps under moisture, and creates uneven surfaces that crack tiles.
Inspect, replace damaged sheathing, guarantee solid nailing surfaces, and confirm proper slope so tiles sit flat and fasten securely.
Incorrect underlayment or flashing installation
When underlayment or flashing gets installed wrong, water can bypass tiles and wreck the roof from underneath, so you need to get these layers right the first time.
Inspect for continuous underlayment, proper overlaps, and sealed penetrations. Fit flashing tightly at valleys, chimneys, and eaves, and use compatible materials.
If unsure, hire a roofer to prevent hidden leaks and rot.
Improper tile fastening and alignment
After checking underlayment and flashing, turn your attention to how tiles are fastened and aligned—mistakes here let wind, water, and gravity undo all that careful prep.
Use correct fasteners, follow manufacturer spacing, and seat tiles fully in battens or mortar.
Check alignment with a chalk line, maintain consistent overlaps, and secure ridge and hip tiles to prevent uplift and shifting during storms.
Ignoring structural load limits
Though you might focus on tiles, underlayment, and flashing, don’t ignore whether your roof structure can handle the extra weight—tile roofs can add several times the load of asphalt shingles and overstressed rafters or trusses will sag, crack, or fail.
Have an engineer evaluate load capacity, reinforce framing if needed, and obtain permits. Skipping this risks collapse, costly repairs, and voided warranties.
Maintenance, Repairs, and Longevity
You’ll want a simple inspection schedule and seasonal checks to catch issues early.
Learn how to replace a broken tile safely and how to spot and repair leaks or flashing failures before they spread.
Also review expected lifespan and warranty details so you know when to repair, restore, or replace.
Regular inspection schedule and seasonal maintenance
A simple, consistent inspection schedule keeps a tile roof performing well and prevents small problems from becoming big, expensive repairs.
You should check tiles, flashing, gutters, and underlayment each season, and after storms. Address debris and minor mortar or sealant wear promptly.
- Inspect spring for winter damage
- Clear summer debris
- Check flashing before fall
- Prep gutters and trim branches
How to replace a broken tile safely
Seasonal checks will often spot cracked or slipped tiles before they cause leaks, so when you find a broken tile you should act promptly and safely.
Wear fall protection, sturdy shoes, and gloves.
Remove surrounding tiles gently, lift the broken piece, slide in a matching replacement, and secure it per manufacturer guidance.
Inspect nearby tiles and clean debris before finishing.
Repairing leaks and flashing issues
When leaks show up or flashing fails, act quickly to prevent water damage and mold.
Inspect underlayment, ridge caps, and valleys for stains or rot.
Locate the leak source—follow staining to seams or penetrations.
Replace damaged flashing and reseal with appropriate metal and roofing cement.
Test with water, clear debris, and schedule professional help for complex or recurrent leaks to guarantee a lasting repair.
Expected lifespan and warranty considerations
Tile roofs can last 50 years or more with proper care, but actual lifespan depends on tile type, installation quality, climate, and maintenance.
You should review manufacturer warranties, noting coverage length, material vs. labor, and exclusions.
Keep installation records and inspections to support claims.
Consider extended warranties if available, and address defects or improper installation promptly to avoid voiding coverage.
When to Hire a Professional
If your roof has complex rooflines, needs structural upgrades, or local codes tighten the permit process, you shouldn’t DIY and should call a pro.
Look for licensed roofers with solid references, detailed bids, and insurance, and compare at least three offers.
Ask contractors about warranties, timelines, change orders, and include scope, materials, payment schedule, and cleanup terms in your contract checklist.
Indicators you should not DIY (complex rooflines, structural upgrades, local regulations)
Because installed tile adds a lot of weight and complexity, you shouldn’t tackle projects that involve unusual rooflines, major structural upgrades, or strict local codes on your own.
If your roof has multiple valleys, steep pitches, chimneys, or penetrations, or if framing needs reinforcement or permits are required, hire a pro.
Mistakes risk collapse, leaks, fines, and costly rework.
How to evaluate and choose a qualified roofer (licenses, references, bids)
When you’re ready to hire someone, focus on three things: proper licensing and insurance, solid references and verifiable past work, and clear, detailed bids that let you compare costs and scope.
Verify licenses, confirm insurance, call references, and inspect recent tile jobs.
Get multiple bids and timelines, watch for red flags, and choose the contractor with transparent communication.
- Check licenses
- Verify insurance
- Call references
- Compare bids
Questions to ask contractors and sample contract checklist
Want to make sure you hire the right pro? Ask focused questions and use a clear contract checklist to avoid surprises.
- Timeline, milestones, and completion date.
- Detailed scope, materials, manufacturer specs, and tile type.
- Permits, inspections, insurance, and warranty terms.
- Payment schedule, retainage, change-order process, and lien release requirements.
Cost Comparison: DIY vs Professional Installation
You’ll want to compare a typical cost breakdown—usually 60–70% labor and 30–40% materials for professional installs—against what you’d spend doing it yourself.
Think beyond upfront savings to long-term value, factoring warranties, workmanship, and how a pro installation can boost resale appeal.
Use those figures to decide whether DIY risk and time are worth the money you might save.
Typical cost breakdown and labor vs material percentages
A tile roof typically accounts for material costs of 50–65% and labor for 35–50% of the total price, so you’ll see how choice of tile and roof complexity quickly shift your budget; DIY can cut labor but adds risk and often voids warranties, while professional installation raises upfront cost but brings speed, safety, and long-term savings through proper flashing and underlayment.
| Item | Typical % |
|---|---|
| Materials | 50–65 |
| Labor | 35–50 |
Long-term value and resale considerations
Consider how your choice between DIY and professional tile roofing affects long-term value and resale: a professionally installed roof signals quality, warranties, and higher curb appeal, often boosting sale price and easing inspections.
DIY can cut upfront costs but may raise buyer concerns, reduce offers, or require expensive fixes later. Weigh immediate savings against potential diminished resale value and marketability.
Best Practices and Safety Tips
Before you start laying tiles, make sure you’ve arranged proper fall protection, checked ladder stability, and planned around safe weather windows to avoid slips or wind hazards.
Wear appropriate PPE and secure tools so nothing becomes a hazard while you’re working at height.
When removing old materials or broken tiles, follow local disposal rules and recycle what you can to minimize environmental impact.
Fall protection, ladder safety, and weather considerations
1 clear rule governs rooftop safety: treat every surface as slippery and every height as hazardous, and plan your fall protection accordingly.
You’ll wear a harness, anchor it to rated points, and inspect gear. Check ladder angle, footing, and tie it off.
Avoid work in high winds or wet conditions; postpone until safe.
- Harness and anchors
- Ladder setup
- Weather checks
- Inspection routine
Environmental and disposal best practices
When you remove old tiles and underlayment, handle materials and waste as potential contaminants and plan disposal routes that meet local regulations.
Test for asbestos and paint hazards, use sealed containers, and label debris.
Recycle intact tiles and metal flashings, compost organic waste where allowed, and hire licensed haulers for hazardous loads.
Keep receipts and permits for compliance and future resale.
Frequently Asked Questions
You probably have a few practical questions before you start, like how long installation takes and whether your house can handle the extra weight of tile.
You’ll also want to know if underlayment and flashing differ for tile, how tiles hold up in various climates, and which maintenance or repairs affect warranties.
We’ll answer each of these clearly so you can make informed decisions and avoid costly mistakes.
How long does tile roof installation typically take?
How long it takes to install a tile roof depends on the roof’s size, complexity, and the crew’s experience, but most residential jobs finish within a few days to a week.
You’ll usually see removal of old roofing, underlayment, flashing, and tile setting staged daily.
Expect weather and inspections to add time; ask your contractor for a clear timeline and milestones.
Can my house support the additional weight of tile?
Because tile is much heavier than asphalt shingles, you’ll want to confirm your home’s structure can handle the load before committing to a tile roof.
Hire a licensed structural engineer to inspect rafters, trusses, and attic framing. They’ll calculate dead and live loads, recommend reinforcements if needed, and tell you whether lightweight tile options work.
Budget for any required upgrades.
Are underlayment and flashing different for tile roofs?
After confirming your roof can bear the extra weight, check the underlayment and flashing—tile roofing uses different materials and installation methods than asphalt.
You’ll need heavy-duty, often synthetic underlayment or double layers to handle tiles’ weight and water management.
Flashing must be larger, corrosion-resistant, and integrated with battens and mortar in some systems.
Follow manufacturer specs and local code for durability and leaks.
How do tile roofs perform in different climates?
While tile roofs excel in hot, dry climates thanks to their thermal mass and ventilation, they’re also used successfully in many other regions when installed correctly.
In cold, wet, or coastal areas you need proper underlayment, ice and water protection, and corrosion-resistant fasteners.
Wind-rated profiles and correct anchoring handle storms.
Consult local codes and installers to match tile type and installation to your climate.
What warranties and maintenance will void/retain tile warranties?
Knowing how tile roofs react to different climates helps you understand what manufacturers expect from homeowners to keep warranties valid.
Read warranty terms: they usually require professional installation, approved underlayment, proper ventilation, and documented inspections.
Avoid walking on tiles, DIY structural changes, incompatible sealants, or unapproved repairs—those can void coverage.
Regular cleaning, clearing gutters, and prompt professional repairs will help retain your warranty.