How to Fix a Concrete Garage Floor: Cracks, Pitting, and Surface Damage
You can fix most concrete garage-floor issues yourself by first inspecting cracks, pitting, and moisture, then cleaning and degreasing thoroughly. Small hairline or shrinkage cracks can be filled with cementitious or epoxy patchers; larger or active cracks need stitching or epoxy injection. Clean and prep pits before applying polymer-modified patches or overlays, then cure and seal. Choose coatings—epoxy, polyaspartic, or polyurethane—for durability. Keep preventative maintenance up to date and follow the step-by-step guide below to learn how.
Quick Answer Can You Fix a Concrete Garage Floor Yourself?
You can handle many garage floor fixes yourself—like filling small cracks, resurfacing, or applying a sealer—while large structural cracks, significant settling, or moisture issues usually need a pro.
Expect DIY repairs to cost anywhere from $20–$500 and take a few hours to a weekend, whereas professional jobs can run into the thousands and take several days.
Start by evaluating damage size and moisture so you know whether to tackle it or call an expert.
Short summary of feasible DIY repairs vs. when to call a pro
Most small issues—hairline cracks, surface spalling, minor oil stains, and shallow pitting—are doable with basic tools and a weekend’s work.
You can often fix them yourself using patching compounds, sealers, and simple cleaning methods.
Learn how to fix concrete garage floor problems like small cracks or pitting, but call a pro for structural damage, large voids, moisture issues, or warped slabs.
Estimated cost and time ranges for common fixes
After tackling small repairs yourself, it’s helpful to know what common fixes typically cost and how long they take so you can decide whether to DIY or hire help. You can save money on crack repair and small patches; deep repairs, resealing, or full overlays often need pros. Compare estimates and time before committing.
| Fix | Cost/Time |
|---|---|
| Hairline cracks | $10–$50 / 1–2 hrs |
| Patching pitting | $50–$200 / 1–4 hrs |
| Resurfacing | $500–$2,000 / 1–3 days |
| Full overlay | $2,000–$6,000 / 2–5 days |
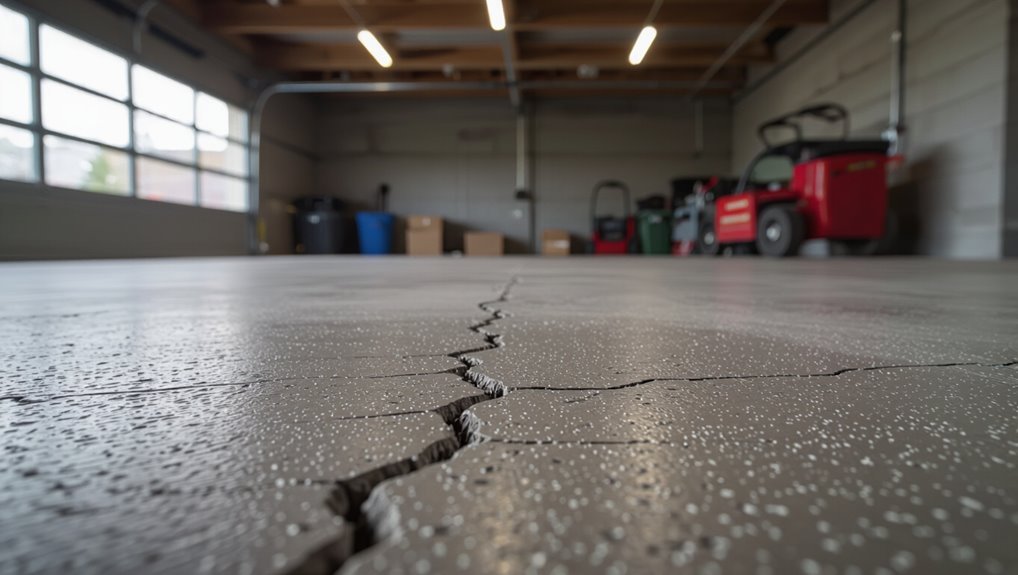
Understanding Concrete Garage Floor Problems
You’ll want to know what’s causing cracks, pitting, and other surface damage before you start repairs.
Cracks can be hairline, shrinkage, settlement, or structural, while pitting and spalling usually come from freeze–thaw cycles, deicing salts, or heavy abrasion.
Learn to tell cosmetic issues from true structural problems so you can choose the right fix.
What causes cracks, pitting, and surface damage
When your garage floor shows cracks, pitting, or flaking, it’s usually because a few common problems—poor mix, improper curing, heavy loads, freeze-thaw cycles, or chemical attack—have combined to weaken the concrete’s surface and bond.
Moisture intrusion, salt or deicer exposure, repeated impact or abrasion, and inadequate reinforcement all accelerate deterioration, letting small defects widen into larger damage unless you address moisture control, load limits, and protective coatings.
Types of cracks (hairline, shrinkage, settlement, structural)
Many of the surface problems you just read about start as different kinds of cracks, and knowing which type you’re looking at helps decide how to fix it.
Hairline cracks are narrow, cosmetic and often from shrinkage.
Wider shrinkage cracks follow curing.
Settlement cracks indicate underlying soil movement.
Structural cracks are large, jagged or diagonal and need prompt professional assessment and repair.
How pitting and spalling develop (freeze-thaw, deicing salts, abrasion)
If water gets into tiny surface pores and freezes, it expands and pops out bits of concrete. Repeated cycles turn small pits into larger flakes.
Deicing salts and road chemicals speed this by drawing moisture into the slab and breaking down the cement paste. Constant abrasion from tires, tools, and foot traffic wears away the exposed aggregate and finishes, accelerating both pitting and the larger-scale spalling you’ll see as chunks flake off.
You’ll notice rough, weakened surfaces that crumble under impact, shed coating, and expose rebar to corrosion if untreated. So address moisture, chemicals, and abrasion to limit progression.
When damage indicates a structural issue vs. cosmetic problem
Because not all cracks and surface damage mean your garage is at risk, you’ll want to distinguish cosmetic issues from structural ones early on.
Hairline cracks, surface scaling, and shallow pitting are usually cosmetic and fixable with fillers or resurfacer.
Wide cracks, shifting slab sections, significant settlement, or exposed rebar indicate structural problems—call a structural engineer and avoid simple DIY fixes until inspected.
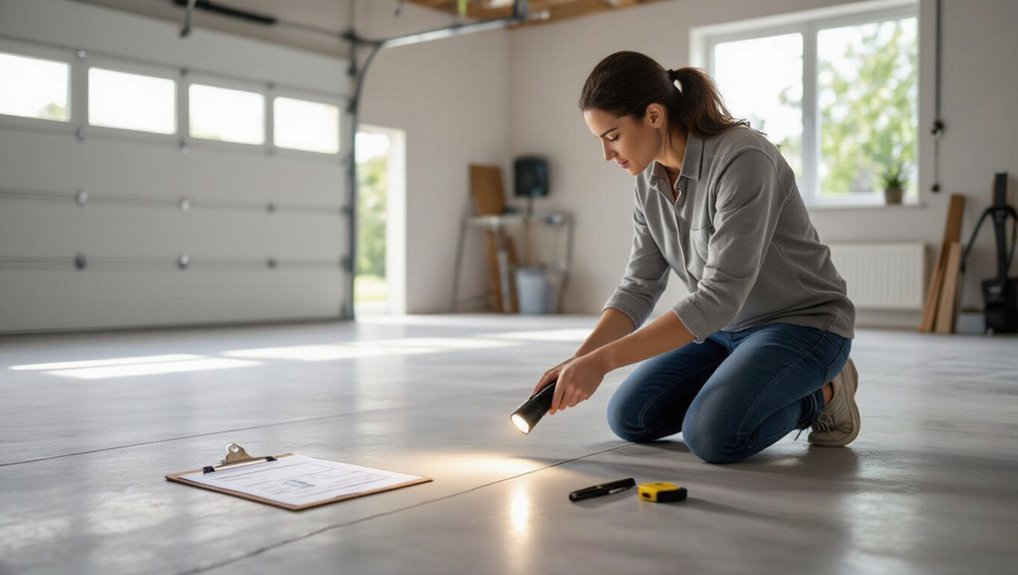
Assessing Your Garage Floor Inspection Checklist
Grab a tape measure, crack gauge, moisture meter, flashlight, and basic repair tools so you’re ready to assess every area.
Walk the slab methodically—follow a step-by-step visual inspection, measure each crack’s width and depth, and map damage on a diagram.
Record moisture readings, note drainage problems and soft spots in the subgrade, and keep clear photos and notes for your repair plan.
Tools and materials needed for assessment
Before you start poking at cracks or measuring dips, gather a concise kit of tools and materials that’ll let you assess the garage floor accurately:
- Tape measure, straightedge, and level for dimensions and flatness.
- Flashlight and magnifier for surface detail.
- Hammer and screwdriver for sound-testing delamination.
- Camera, notebook, and marker for documenting locations and severity.
Step-by-step visual inspection procedure
Now that you’ve gathered the assessment tools, start a systematic visual inspection to map out damage and irregularities.
- Walk the floor in bright light, scanning for cracks, spalls, stains, and uneven areas.
- Mark each defect with chalk or tape and note location on your checklist.
- Photograph defects from multiple angles for records.
- Prioritize areas by severity and frequency of use for repair planning.
How to measure crack width, depth, and map damage
When you’ve mapped defects, measure each crack’s width and depth so you can choose the right repair method and estimate materials. Use a crack gauge or calipers for width, a ruler or depth gauge for depth, and note whether cracks are clean, jagged, or tapered.
Record locations on your floor plan, classify cracks by size (hairline, narrow, wide), and mark areas needing consolidation or patching.
Documenting moisture, drainage, and subgrade issues
Because moisture, poor drainage, and a compromised subgrade can undermine repairs and lead to recurring damage, you should record any signs of dampness, water staining, efflorescence, ponding, or soft spots as part of your inspection.
Note location, extent, frequency after rain, and nearby downspouts or grading issues.
Take photos, measure moisture with a probe or hygrometer, and flag areas needing further testing.
Quick Preparations Before Repair
Before you start repairs, make sure you’re wearing the right PPE and taking basic safety precautions like ventilating the space and shutting off nearby electrical sources.
Next, clean and degrease the floor thoroughly so patches or resurfacing will bond properly.
Finally, decide whether you’re tackling small localized repairs or staging a full resurfacing, since each approach needs different prep and materials.
Safety precautions and PPE
Although the repair itself matters, your safety matters more, so equip yourself with proper PPE and clear the area before you touch the concrete.
Wear gear, ventilate, and control hazards. Follow these steps:
- Gloves and knee pads to protect hands and joints.
- Safety goggles and a respirator for dust and fumes.
- Sturdy boots to prevent slips.
- Keep a fire extinguisher nearby.
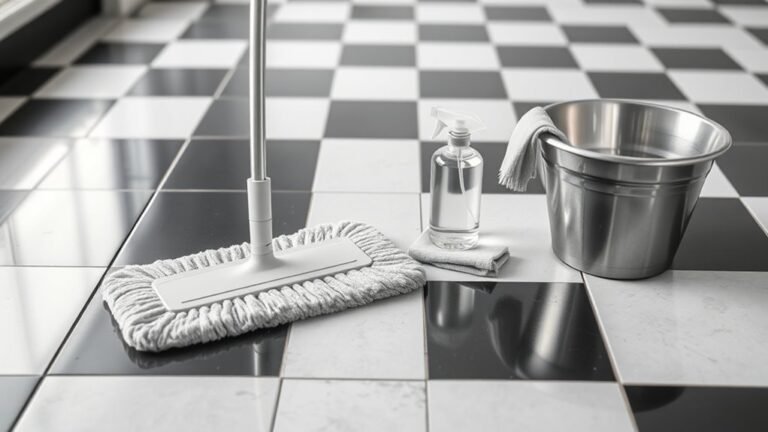
Cleaning and degreasing the surface
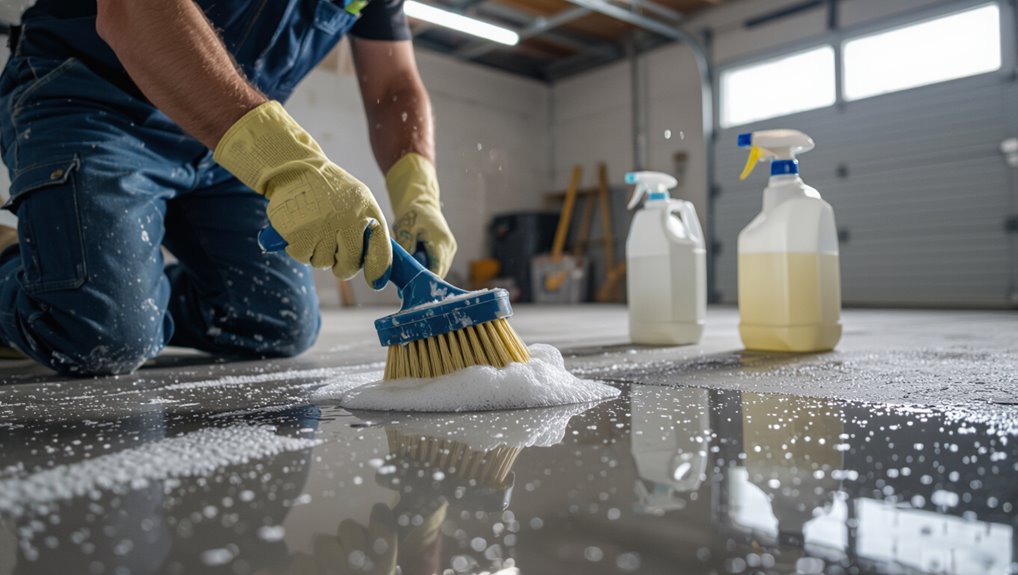
A stiff-bristled broom and a shop vacuum will make the first pass, then you’ll tackle oil, grease, and stubborn stains with a degreaser and scrub brush so the repair materials can bond properly.
- Apply degreaser to stains.
- Scrub with a stiff brush.
- Rinse thoroughly and squeegee water away.
- Let surface dry completely before repairing.
Repair staging: small patches vs. full resurfacing
Once you’ve cleaned and degreased the floor, decide whether you’ll spot-repair small cracks and chips or resurface the entire slab: small patches work when damage is limited and the surface is mostly sound, while full resurfacing makes sense for widespread wear, large spalling areas, or uneven texture that affects usability.
Choose patches to save time and material; pick resurfacing for durability, consistent appearance, and long-term protection.
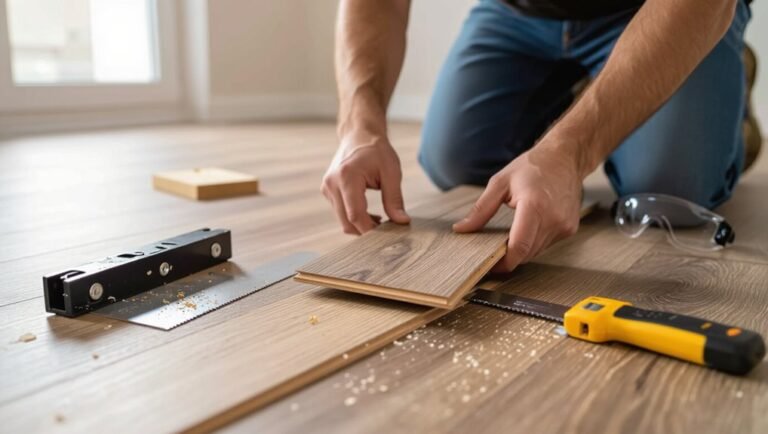
How to Fix Cracks Step-by-Step Repairs
Start by preparing cracks—remove loose material and widen any undercuts so fillers bond properly.
Pick a filler that matches the crack type (epoxy or polyurethane for movement, cementitious for static hairlines) and apply the proper technique for hairline versus non-structural cracks.
For structural or active cracks use stitching or epoxy injection, then finish by curing and sealing the repairs for long-term protection.
Step 1: Prepare cracks (remove loose material, widen undercuts)
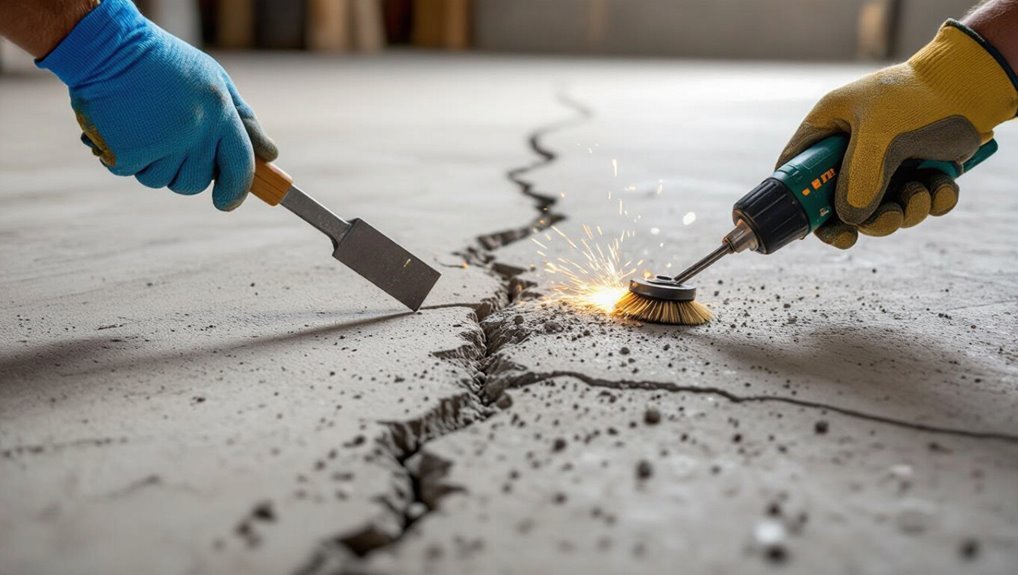
Before you apply any patching material, clear out loose debris and widen any undercuts so the repair can bond properly.
- Remove dust, chips, and dirt with a wire brush or vacuum.
- Use a cold chisel or grinder to widen undercuts slightly.
- Blow or vacuum the groove again to remove residual particles.
- Damp-clean the crack; let excess water evaporate before proceeding.
Step 2: Choose the right filler (epoxy, polyurethane, cementitious)
When you pick a filler for garage-floor cracks, match the material to the crack size, movement, and planned use: epoxy works best for narrow, static cracks needing a rigid, durable bond; polyurethane is flexible and ideal for cracks that expand and contract; and cementitious repair mortars suit wider gaps and areas where you’ll grind or resurface.
| Type | Best for | Cure/Finish |
|---|---|---|
| Epoxy | Hairline/static | Hard, durable |
| Polyurethane | Moving cracks | Flexible, waterproof |
| Cementitious | Wide gaps | Grindable, structural |
Step 3: Apply filler for hairline and non-structural cracks (technique)
If a crack is hairline or non-structural, you’ll want to clean it thoroughly, let it dry, and then apply a compatible filler so the repair bonds and blends with the floor; this keeps moisture and dirt out and prevents the crack from widening.
Use a small putty knife or squeeze tube, press filler into the crack, level flush, wipe excess, and let cure per manufacturer directions.
Step 4: Repair structural or active cracks (stitching, epoxy injection)
Smaller, non-structural cracks are one thing, but structural or active cracks need a stronger fix to stop movement and restore strength.
You’ll clean the crack, drill stitching holes across the fracture, and install steel staples or grout sleeves.
For deep or moving cracks, inject low-viscosity epoxy or polyurethane under pressure to bond and seal.
Monitor for continued movement before proceeding.
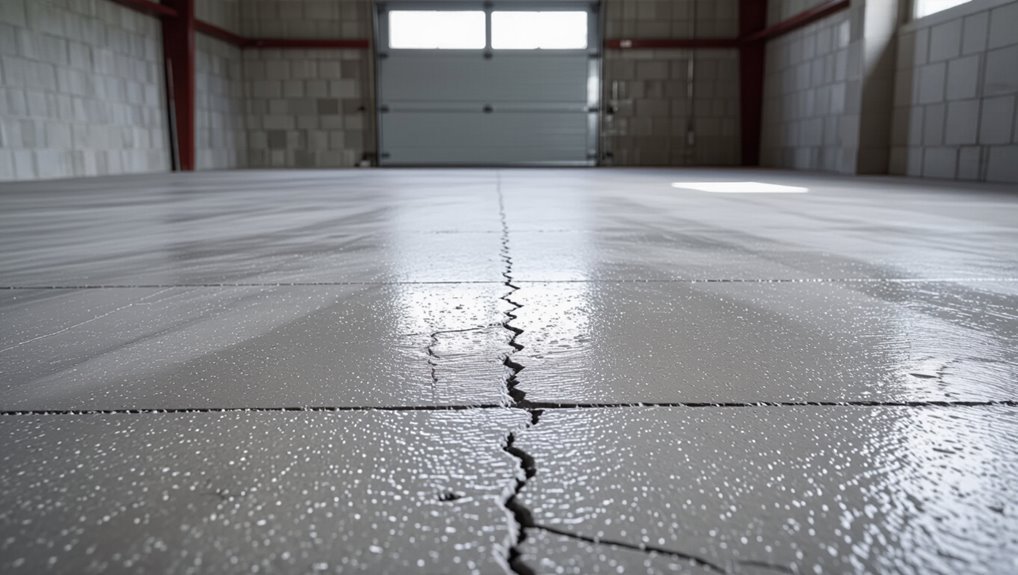
Step 5: Finishing, curing, and sealing repaired cracks
Step 5 wraps up the repair by smoothing, curing, and sealing the crack to restore appearance and prevent moisture or contaminants from getting back in.
After trimming excess filler, sand or grind flush, clean debris, then apply a compatible curing compound to keep moisture for proper cure.
Finally, seal with penetrating or film-forming sealer to block water, oils, and freeze-thaw damage.
How to Repair Pitting, Spalling, and Surface Damage
For small pits you’ll want to clean and fill them with a concrete patching compound, following the manufacturer’s prep and application steps.
For larger spalls you’ll remove the loose concrete, treat any exposed rebar, and choose between trowel patches, bonded overlays, or self-leveling compounds depending on depth and area.
Finish by texturing and matching the surface so repairs blend with the existing floor.
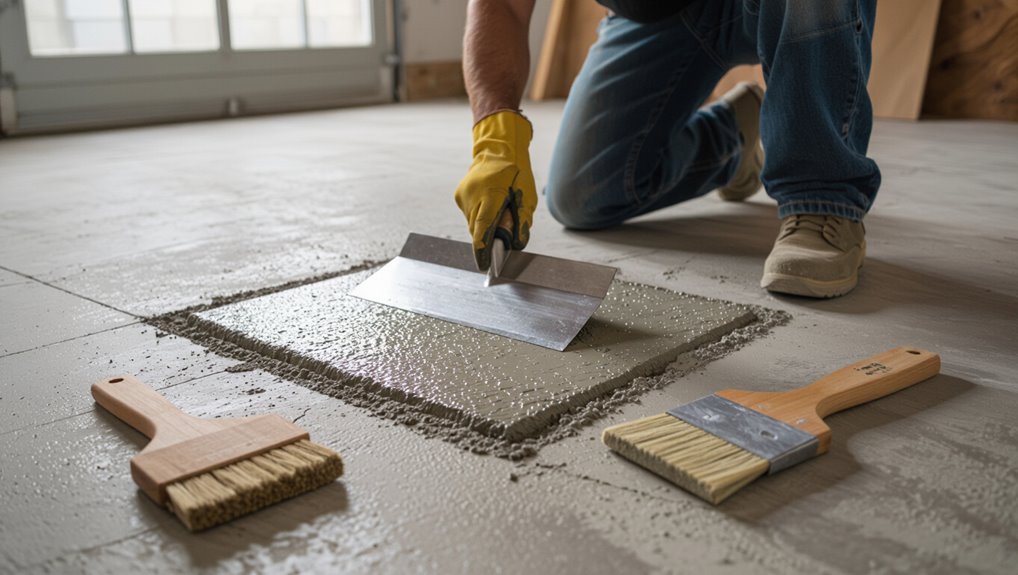
Small pit repair: patching compounds and application steps
Start by cleaning the pit thoroughly—remove loose debris, dust, oil, and any deteriorated concrete—so the patching compound can bond properly.
- Choose a polymer-modified or epoxy patch for small pits.
- Mix per manufacturer directions to a trowelable consistency.
- Dampen the area, apply compound, and press firmly to eliminate voids.
- Smooth, tool edges, and cure per instructions before light use.
Large-area spall repair: remove damaged concrete, rebar treatment, patching
Tackle large-area spalls by removing all loose and damaged concrete back to sound material, exposing the rebar so you can assess corrosion and section loss.
You’ll then clean and treat the steel, apply a bonding agent if required, and patch with a suitable concrete repair mortar in layers to restore thickness and strength.
After steel treatment, compact each lift, cure properly, and finish to match surrounding profile.
Trowel vs. bonded overlay vs. self-leveling compounds when to use each
Once you’ve addressed exposed rebar and patched large spalls, you’ll need to decide how to restore the remaining surface: hand-applied trowel mortars, bonded overlays, and self-leveling compounds each suit different depths, profiles, and performance needs.
You’ll choose based on depth, slope, and wear.
| Option | Best for |
|---|---|
| Trowel mortar | Shallow repairs, feathering |
| Bonded overlay | Thin resurfacing, cosmetic |
| Self-leveling | Large flat errors, thin builds |
Texturing and finishing to match existing floor
After you’ve repaired pits and spalls, matching the floor’s texture and finish determines how visible those repairs will be—so blend, feather, and finish with the same tools and techniques the original floor used.
Study the existing texture, practice on scrap, and apply repair material in thin layers.
Use matching trowel patterns, broom strokes, or grinder finishes, then seal to unify sheen and durability.
Resurfacing and Coating Options
If your floor has widespread wear or large patches, you’ll want to resurface rather than keep doing localized fixes.
Consider overlays, microtoppings, or skim coats for surface renewal, then choose between epoxy, polyurethane, or polyaspartic coatings based on durability and cure time.
Proper preparation, priming, and following application and curing timelines are critical for any option to perform well.
When to resurface vs. localized repairs
When slab damage is limited to small cracks, spalls, or surface pitting, you’ll usually opt for localized repairs; but when large areas show scaling, deep cracks, or a worn, powdery surface that cleaning and patching can’t restore, resurfacing or a coating system becomes the better choice.
Choose localized fixes for isolated, structural-stable defects; choose full resurfacing when widespread deterioration, moisture issues, or aesthetics demand uniform coverage.
Concrete overlays, microtoppings, and skim coats pros and cons
Once you’ve decided that a full resurfacing is the right move, you’ll need to weigh overlays, microtoppings, and skim coats to match performance, appearance, and budget. You’ll choose based on thickness, durability, prep, and cost; thinner microtoppings smooth minor flaws, thicker overlays handle heavier wear.
| Option | Best for |
|---|---|
| Overlay | Heavy traffic |
| Microtopping | Thin cosmetic repair |
| Skim coat | Texture smoothing |
| Cost | Varies by material |
Epoxy, polyurethane, and polyaspartic coatings selection guide
Because coatings vary widely in durability, cure time, and cost, you’ll want to match the product to how you use the garage: epoxy offers strong adhesion and chemical resistance for lower budgets, polyurethane adds UV stability and flexibility for areas exposed to sun or temperature swings, and polyaspartic delivers rapid curing and superior abrasion resistance for fast turnarounds and heavy traffic.
| Type | Strength | Best use |
|---|---|---|
| Epoxy | Chemical resistance | Budget garages |
| Polyurethane | UV stable, flexible | Sunlit bays |
| Polyaspartic | Fast cure, abrasion | Commercial or heavy use |
Preparation, priming, application, and curing timelines
Before you roll out a coating, prepare the slab thoroughly: remove grease, loose concrete, and dust, repair cracks or spalls, and profile the surface by grinding or shot-blasting to guarantee proper adhesion.
Prime with the manufacturer’s recommended primer, mix and apply coatings in correct ratios and temperatures, follow lap and pot-life instructions, and allow full cure times before traffic—typically 24–72 hours for light use.
Drainage, Moisture, and Substrate Problems Diagnosis and Fixes
Start by checking for moisture vapor transmission and efflorescence—white powdery salt or damp spots are clear signs.
You’ll want to address moisture with the right sealer or a vapor barrier, and repair any cracks or hollow areas in the slab.
Finally, correct slope and drainage so water moves away from the garage and won’t cause the same problems again.
Identifying moisture vapor transmission and efflorescence
Moisture and efflorescence can silently ruin a garage floor coating if you don’t spot them early, so know what to look for: persistent damp spots, a salt-like white powder on the surface, flaking or powdering concrete, and paint or sealer that bubbles or peels.
Test suspicious areas with tape and a plastic sheet overnight; rising condensation or dampness indicates vapor transmission needing diagnosis.
Mitigating moisture: sealers, vapor barriers, and slab repairs
If that tape-and-plastic test showed dampness or you found efflorescence, you’ll need to stop water and vapor at their sources before reinstalling coatings.
Fix slab cracks and edge leaks with hydraulic cement or epoxy injection.
Install a vapor barrier under new overlays or beneath living-space slabs.
Use breathable penetrating sealers for existing concrete; avoid non-breathable films unless vapor control is confirmed.
Fixing slope and drainage to prevent future damage
Because water follows the path of least resistance, correcting slope and drainage is essential to keep your garage floor dry and your concrete sound.
Check slope toward the drain or garage exit, regrade surfaces, and install channel drains or trench drains where needed.
Add exterior grading, gutters, and downspout extensions.
Guarantee sub-surface drainage and compacted base to prevent pooling and future deterioration.
Tools, Materials, and Cost Guide
You’ll need a handful of essential tools—like a grinder, chisel, trowel, and concrete mixer or mixing paddle—and I’ll list affordable options so you can shop smart.
I’ll also cover common repair materials (epoxy, polymer-modified patch, crack injection kits) and recommended brands/types for reliable results.
Finally, you’ll get a clear cost breakdown comparing DIY supplies and tools versus hiring a pro so you can decide what’s best for your budget.
Essential DIY tool list
Getting the right tools and materials up front saves time, prevents mistakes, and keeps costs predictable as you repair or refinish your concrete garage floor.
You’ll need basics plus a few specialty items to work safely and efficiently.
- Angle grinder with diamond cup wheel
- Concrete patch trowel and mixing bucket
- Shop vacuum and wire brush
- Protective gear (gloves, goggles, respirator)
Common repair materials and recommended brands/types
When you’re picking repair materials, choose products designed for garage floors and match them to the damage—crack repair, surface spalling, or full resurfacing each need different mixes and strengths.
Use:
- Epoxy fillers (PC-11 style) for hairline cracks.
- Polymeric sand or urethane for wider joints.
- Cementitious resurfacer for pitted areas.
- Bonding agents and primers from reputable brands like Quikrete or Sika.
Typical cost breakdown for DIY vs. professional repairs
Although you can save money by doing smaller repairs yourself, weighing tool, material, and time costs against hiring a pro helps you choose the best route. DIY tools (grinder, trowel) plus materials often run $50–$400; pros charge $200–$2,000 depending on scope. Choose DIY for minor cracks, hire pros for structural or widespread damage.
| DIY | Pro |
|---|---|
| Low cost | Higher fee |
| More time | Faster |
| Learning curve | Expertise |
| Limited warranty | Guaranteed work |
Common Mistakes to Avoid
Don’t fix visible damage without finding and addressing the root cause, or the problem will return.
Make sure you pick materials suited to the crack type and moisture conditions, prep the surface thoroughly, and cure repairs properly.
Also don’t overlook reinforcement or underlying structural issues that need professional assessment.
Repairing without addressing root cause
If you skip diagnosing what’s causing the damage and just patch the surface, you’ll likely see the same cracks or spalling return.
You need to identify settlement, freeze-thaw, poor reinforcement, drainage, or load issues first. Otherwise your fixes fail.
Address structural or environmental drivers, repair underlying problems, then apply surface repairs so they last instead of recurring and wasting time and money.
Using wrong material for crack type or moisture conditions
Once you’ve identified and fixed the underlying causes of damage, picking the right repair material matters just as much.
Using the wrong compound for a hairline shrinkage crack or applying a vapor-blocking epoxy over a damp slab will cause the problem to come back.
Match fillers to crack width and movement, use breathable mortars when moisture’s present, and follow manufacturer limits for substrate moisture.
Poor surface prep and inadequate curing
When you skip proper cleaning and profiling, coatings and patching compounds won’t bond and will delaminate or flake within months.
You must remove oil, dust, laitance, and weak surface layers, and profile the concrete for mechanical grip.
Also follow manufacturer curing times and protect repairs from traffic and temperature swings; rushing or skipping curing weakens bond strength and shortens coating life.
Overlooking reinforcement and structural issues
You’ve handled surface prep and curing, but don’t ignore what’s happening beneath the slab: reinforcement and structural problems can sabotage repairs and coatings.
Check for corroded rebar, settlement, voids, or inadequate reinforcement before patching.
Address structural issues with a professional—repair or underpinning may be needed.
Otherwise, cracks will reappear and coatings will fail, wasting time and money.
Prevention and Best Practices to Protect Your Garage Floor
To keep your repairs lasting, you should follow a simple routine maintenance checklist that catches small issues early.
Stick to a regular sealing and coating maintenance schedule so the surface stays protected.
In winter, use salt alternatives and manage snow-melt to prevent freeze-thaw damage and chemical wear.
Routine maintenance checklist
A simple routine can keep your concrete garage floor looking good and lasting longer: sweep weekly, mop spills promptly, check for cracks monthly, and reseal every 2–3 years or as needed.
- Remove grit and debris to prevent abrasion.
- Wipe oil and chemicals immediately.
- Inspect joints, edges, and drain areas.
- Touch up small chips and fill hairline cracks promptly.
Best sealing and coating maintenance schedule
1 simple schedule will keep your sealant and coatings performing well: inspect surfaces every six months, reseal porous or worn areas every 2–3 years (sooner for heavy use), and recoat high-traffic or chemically exposed zones as needed.
Clean before inspections, note discoloration or peeling, and spot-repair chips promptly.
Keep records of dates and products so you’ll maintain consistent protection and avoid premature deterioration.
Seasonal care: winter salt alternatives and snow-melt management
When winter hits and you’re tracking grit, salt, and melting slush into the garage, choose gentle de-icers and manage runoff to protect your concrete; harsh salts and uncontrolled meltwater can eat sealants, cause spalling, and leave long-term stains.
Sweep regularly, use calcium magnesium acetate or sand for traction, install a drain or threshold, and wipe puddles promptly to minimize freeze-thaw damage.
When to Hire a Professional
If your garage floor shows big cracks, sinking, or moisture coming through, you’ll want a pro to assess structural risk and stop further damage.
Learn how to vet concrete contractors by checking licenses, references, and past work so you hire someone qualified.
Expect a professional estimate to outline scope, timeline, materials, and a clear cost breakdown before work begins.
Red flags indicating need for structural repair or contractor
Although small cracks and surface stains are common, certain signs mean you should call a structural contractor immediately:
visible slab settlement or step-offs, wide (over 1/4″) or growing cracks, sudden sinking or heaving, doors and walls misaligning, active water intrusion undermining the slab, or exposed reinforcing steel and crumbling edges.
If you see these, stop DIY and get a professional assessment.
How to evaluate and hire a qualified concrete contractor
How do you pick a concrete contractor you can trust?
Evaluate credentials, experience, and communication. Ask for references and photos of similar jobs. Confirm licensing and insurance, and get clear timelines.
- Verify license and insurance
- Check local references and recent work
- Ask about warranty and materials
- Get a written scope and payment schedule
What to expect in a professional repair estimate
Expect a clear, itemized estimate that spells out the problem, the proposed fix, materials, labor hours, and a timeline so you know exactly what you’re paying for and when the job will finish.
You should also get cost breakdowns, warranty details, permit needs, and cleanup responsibilities.
Compare estimates, ask questions about unknowns, and choose the contractor who explains risks and trade-offs plainly.
Step-by-Step Repair Plan Template (DIY Project Roadmap)
Decide the project scope—small, medium, or large—and map a realistic timeline so you know how long each phase will take.
List the materials and tools you’ll need for your chosen size to avoid mid-job trips to the store.
Then follow a day-by-day workflow example for a typical resurfacing job so each task (prep, repair, pour, cure) happens in the right order.
Project scope and timeline (Small, Medium, Large)
Before you start, pick the project size—small, medium, or large—so you can match time, tools, and materials to the job. Estimate days, skill level, and permit needs. Use the table to outline scope quickly:
| Size | Time | Skill |
|---|---|---|
| Small | 1 day | Beginner |
| Medium | 2–4 days | Intermediate |
| Large | 1+ week | Advanced |
Materials and tools per project size
A clear list of materials and tools will keep your repair efficient and prevent mid-job trips to the store, so gather everything specific to your chosen size—small, medium, or large—before you begin.
Choose quantities, mixes, and equipment scaled to scope. Prioritize safety gear, mixing tools, and finishing supplies.
- Small: patch kit, hand tools
- Medium: bags of repair mortar, mixer
- Large: bulk cement, power trowel
- Common: PPE, grinder, sealant
Day-by-day workflow example for a typical resurfacing job
Now that you’ve gathered the right materials and tools for your project size, map out a realistic day-by-day plan to keep each stage orderly and manageable.
Day 1: clear, degrease, mark damage.
Day 2: grind and vacuum.
Day 3: fill cracks and pitting; cure.
Day 4: apply primer.
Day 5: apply resurfacer; smooth.
Day 6: cure and inspect; recoat if needed.
FAQ
You’ll find answers here to common concerns like how long repairs last and whether you can drive on patched concrete the same day.
I’ll explain what epoxy can and can’t do for hiding cracks, how to reduce the chance of them returning, and when resurfacing an old floor is worthwhile.
Use these FAQs to decide the best next steps for your garage.
How long does a concrete repair last?
How long will a concrete repair last?
Lifespan depends on repair type, prep quality, materials, and traffic.
Small hairline crack repairs can last decades if sealed properly; patched spalls or overlays last years to decades with proper bonding and maintenance.
Poor prep, freeze-thaw exposure, heavy loads, or moisture can shorten life.
Regular sealing and prompt rework extend durability.
Can I drive on repaired concrete the same day?
Can you drive on repaired concrete the same day?
Usually no — most patch compounds and overlays need at least 24–72 hours to cure before vehicle weight and turning stress.
Lightweight surface patches might allow foot traffic sooner, but wait the manufacturer’s minimum cure time.
Riding lawn mowers or light loads may be okay after 24 hours if specified; when in doubt, give it more time.
Will epoxy coating hide cracks permanently?
Wondering if epoxy will make cracks disappear for good?
Epoxy can conceal and bridge hairline and minor surface cracks, creating a smooth, attractive finish.
It won’t permanently fix structural or active cracks—those can reappear or telegraph through the coating.
For best results, repair significant cracks first, then apply epoxy to hide and protect the surface while improving durability and appearance.
How do I stop cracks from returning?
If you want cracks to stay fixed, start by addressing their cause—repair structural or active cracks with appropriate methods (epoxy injections for static hairline cracks, routing-and-sealing or polyurethane for moving joints, and underpinning or re-sloping for settlement issues)—then use proper surface repairs, a quality primer, and a compatible epoxy or sealer to lock the repairs in and prevent moisture and salts from re-triggering damage.
After curing, maintain drainage, control freeze–thaw exposure, and monitor for movement so you can spot and address small failures before they widen.
Is it worth resurfacing an old garage floor?
Once you’ve fixed active causes of cracking and sealed repairs, you’ll want to decide whether resurfacing the whole slab makes sense.
Resurface if the surface has widespread pitting, staining, or thin wear that cleaning and spot repairs can’t fix.
Resurfacing restores appearance, adds protection, and can extend life, but consider cost, adhesion to old concrete, and future structural issues before committing.