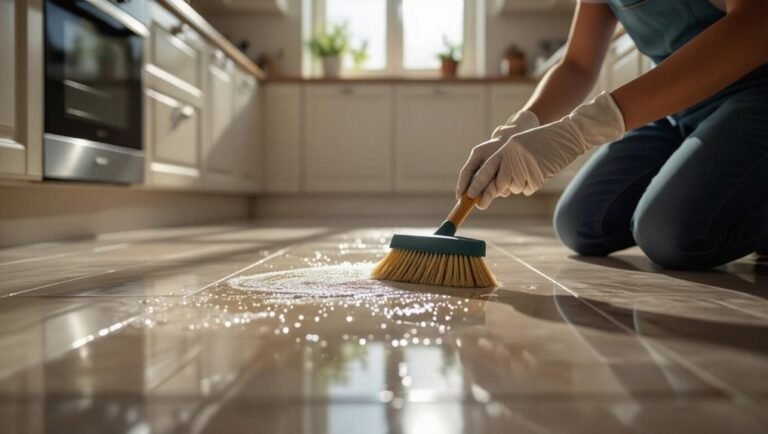
How to Clean White Grout on Tile Floor (Best Methods)
You can restore white grout quickly by making a baking soda–hydrogen peroxide paste, applying it to grout lines, letting it fizz for 5–10 minutes, then scrubbing with a stiff brush and rinsing; for larger areas use oxygen bleach per label, and on glazed tile a diluted vinegar rinse works (avoid on marble or limestone). Wear gloves, ventilate, and test a hidden spot first. Follow up with sealer when dry, and keep going to learn more methods and tips.
Quick: Restore White Grout Fast (Step-by-Step)
If you want to restore white grout fast, start by gathering a stiff brush, a spray bottle, baking soda, hydrogen peroxide, and a microfiber cloth—these simple items tackle most stains quickly.
Mix baking soda into a paste, apply to grout, then spray peroxide until it fizzes; let sit five minutes.
Make a baking soda paste, apply to grout, spray with peroxide until it fizzes, and wait five minutes.
Scrub firmly with the brush, rinse with water, and blot dry with the cloth.
For persistent discoloration, repeat or use a grout pen for color matching.
Once grout’s clean and dry, apply a clear tile sealing product to protect against future grime and maintain brightness.
Who This Guide Is For and What It Covers
Whether you’re tackling a quick weekend refresh or planning a deeper renovation, this guide is for homeowners, renters, and DIYers who want practical, low-cost ways to get grout back to white. You’ll find step-by-step cleaning methods, safe product choices, and tools for different mess levels so you can decide what fits your schedule and budget.
It also explains how to assess stains, protect surrounding tile, and maintain results. You’ll learn about restoring grout color and avoiding common mistakes, plus a brief note on historical trends in tile care to help you choose approaches that respect older finishes.
What Type of Grout Do You Have: Cement, Epoxy, or Urethane?
Because different grout types react differently to cleaners and tools, you should identify whether your grout is cement-based, epoxy, or urethane before you start cleaning.
Identify your grout—cement, epoxy, or urethane—before cleaning to choose safe products and avoid damage.
Cement grout is porous, often shows grout color fading, and takes stains—so you’ll use gentler cleaners and consider sealing techniques after cleaning.
Epoxy grout is nonporous, highly stain-resistant, and tolerates stronger cleaners; it usually keeps its grout color longer and rarely needs sealing.
Urethane is flexible, resists cracking, and falls between cement and epoxy in care needs; avoid abrasive tools on urethane.
Identifying the type guides product choice and prevents damage during cleaning.
Clean vs Regrout: When to Repair or Replace Grout
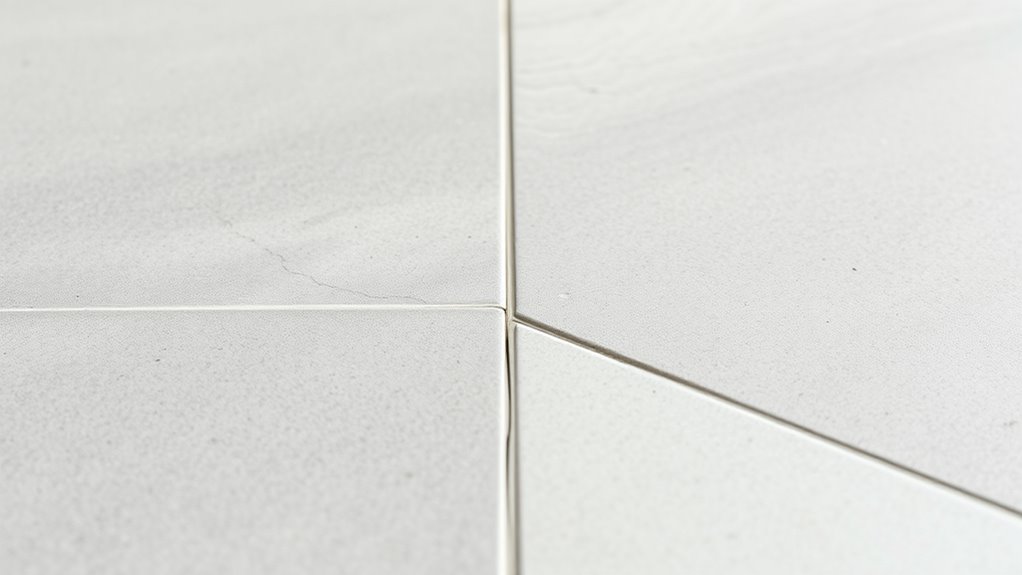
When grout looks dingy, first consider whether a deep clean will restore it or if replacement is the better investment—you’re deciding between scrubbing and saving money now or regrouting to fix structural issues and prevent future problems.
Check these signs to choose:
- Heavy staining unresponsive to cleaners — grout color won’t return.
- Cracking or crumbling — structural failure needs regrout.
- Persistent mold or water damage — replace to stop leaks.
- Recent tiling or aesthetic update — regrout for uniform appearance.
Use repair timing based on urgency: clean for cosmetic issues, regrout when integrity or moisture control is compromised.
Safety First: PPE and Ventilation for Grout Cleaning
If you decide to clean rather than regrout, protect yourself before you start: grout cleaners, bleach, vinegar, and commercial strippers can irritate skin, eyes, and lungs. Wear chemical-resistant gloves, goggles, and a mask rated for chemical vapors; use long sleeves to avoid splashes.
Open doors and windows and run a fan for cross-ventilation; avoid enclosed spaces. Keep a bucket of water and neutralizer nearby for spills. Test cleaners in a small area first to prevent discoloration that would force Grout sealing or Color matching later.
Dispose of waste per label instructions and keep pets and kids away until dry.
Prep Tile and Surrounding Areas to Avoid Damage
Before you start scrubbing, clear the area and protect anything that could be damaged. You’ll prevent stains, scratches, and accidental chemical contact by prepping carefully. Consider grout color variations and nearby sealant types before applying cleaners.
- Remove rugs, furniture, and fragile items from the workspace.
- Test a small hidden tile to check for colorfastness and sealant reaction.
- Tape off baseboards and wood trim with painter’s tape to prevent splashes.
- Keep pets and children out while the area dries to avoid tracking residue.
Prep well so cleaning restores grout without harming surrounding finishes.
Supplies: Common Household Items and Tools
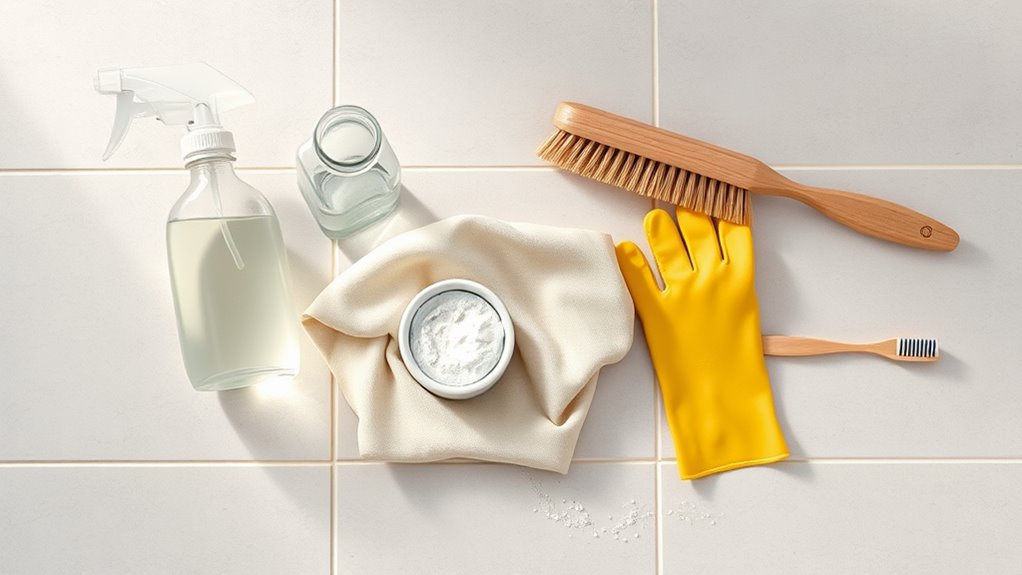
You’ll only need a few everyday cleaners like baking soda, vinegar, or a mild detergent to tackle white grout.
Grab scrubbing tools—an old toothbrush, a stiff nylon brush, and a grout brush—to agitate stains effectively.
Don’t forget protective gear such as gloves and eye protection to keep yourself safe while cleaning.
Everyday Cleaning Supplies
When you’re tackling white grout, you don’t need expensive, specialized products—just a handful of common household items and basic tools that work reliably. Think of cleaning as part of domestic routines shaped by historical trends and cultural significance; simple supplies keep grout bright.
- Baking soda — mild abrasive paste for stains.
- White vinegar — acidic rinse for deodorizing.
- Hydrogen peroxide — spot bleach for stubborn discoloration.
- Dish soap — breaks oils and lifts dirt.
You’ll also want gloves, spray bottle, and microfiber cloths. Use products sparingly, test a hidden spot, and rinse thoroughly after treating grout.
Scrubbing Tools Needed
Though simple cleaners do most of the work, the right scrubbing tools make grout cleaning faster and less tiring. You’ll want stiff brushes, small detail brushes, and a grout float for stubborn stains; pick brush stiffness by grout color so you don’t damage tinted lines. A toothbrush, nylon scrub pad, and spray bottle handle most jobs, while a steam cleaner or electric grout brush saves time on large areas. After cleaning, consider sealing techniques to protect results. Use the table to match tool, purpose, and best use.
| Tool | Purpose | Best use |
|---|---|---|
| Stiff brush | Agitation | Dark grout |
| Toothbrush | Detail | Corners |
| Steam cleaner | Deep clean | Large areas |
| Grout float | Scraping | Residue removal |
Protective Gear Essentials
Because grout cleaners and scrubbing can kick up dust and splash solutions, you should protect your eyes, hands, and lungs with basic household gear: safety goggles, chemical-resistant gloves (rubber or nitrile), and a simple dust or surgical mask.
Use these items before testing cleaners on grout color or applying sealing techniques. Keep ventilation on, and avoid mixing products.
- Safety goggles — prevent splashes into eyes.
- Chemical-resistant gloves — protect skin and nails.
- Dust/surgical mask — reduces inhalation of particles and fumes.
- Old clothes or apron — shield fabrics from stains and bleach.
Baking Soda + Hydrogen Peroxide Paste: Recipe & Use
If your grout’s looking dingy, mix a paste of baking soda and hydrogen peroxide to tackle stains and brighten lines without harsh chemicals. Apply with a toothbrush, let sit 5–10 minutes, scrub gently, then rinse. You’ll notice grout staining lift and easier color matching when you compare before/after. Test a small area first.
| Item | Ratio | Time |
|---|---|---|
| Paste | 3:1 baking soda:peroxide | 5–10 min |
| Tool | Toothbrush | Scrub 1–2 min |
| Rinse | Warm water | Dry w/ cloth |
Repeat for stubborn spots; avoid prolonged soaking on porous tiles.
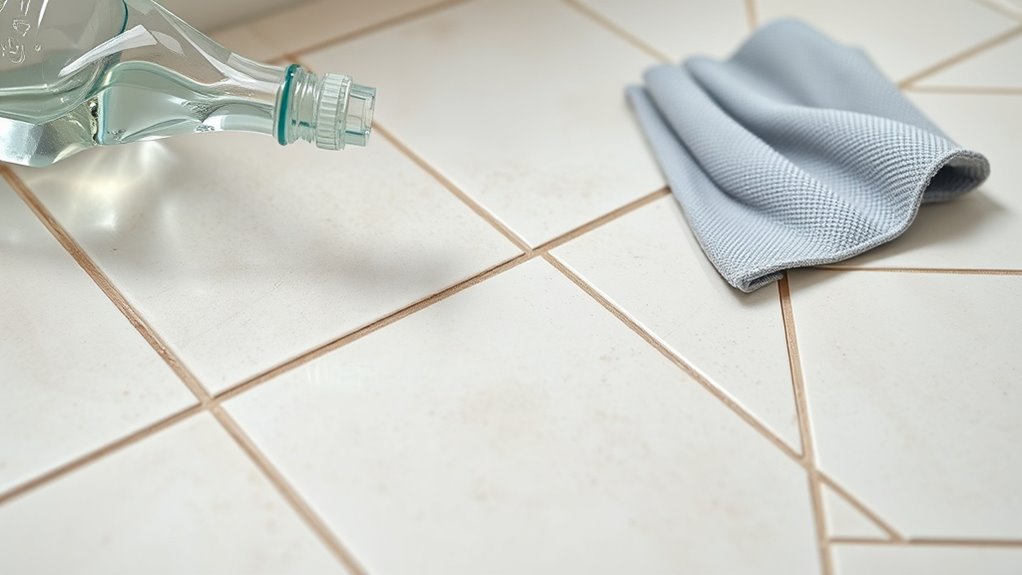
Vinegar for Grout: When It Helps and When to Avoid It
When deciding whether to reach for vinegar, know that its acidity can cut grease and mild stains from grout quickly, but it can also damage stone tiles and older grout seals—so use it selectively and test first.
- You’ll use vinegar best on ceramic or glazed tiles; it breaks down grime as a mild acid.
- Check pH levels: household vinegar is acidic (around pH 2–3), which causes Vinegar dangers on sensitive surfaces.
- Don’t use it on marble, travertine, limestone, or waxed grout; it etches and weakens seals.
- Test a hidden spot, dilute 50/50 with water, rinse thoroughly, and neutralize afterward.
Oxygen Bleach Method for Large Areas and Mildew
For large areas and mildew you’ll want to use oxygen bleach because it whitens grout without the harsh fumes of chlorine.
Mix the powder per label instructions, wear gloves and eye protection, and don’t let the concentrate sit on colored grout or metal.
Apply the solution, let it dwell 10–30 minutes depending on soil, then scrub and rinse thoroughly.
Oxygen Bleach Benefits
Looking for a safer, scalable way to brighten grout and tackle mildew? You’ll like oxygen bleach: it lifts stains without harsh fumes and treats large areas quickly. It’s gentle on tile finishes, helps restore original color so future color matching’s easier, and reduces mildew recurrence when combined with proper grout sealing. Use it to refresh floors before resealing.
- Effective on broad swaths without scrubbing hard
- Safer for pets and plants than chlorine bleach
- Helps preserve grout texture for consistent color matching
- Prepares surfaces for long-lasting grout sealing
Mixing And Safety
Before you mix oxygen bleach, read the product label and measure precisely so you use the right concentration for large areas and mildew control.
Wear gloves, eye protection, and a mask; guarantee good ventilation and keep pets and kids away.
Mix in plastic buckets with cool water, stirring until dissolved—don’t exceed recommended strength to avoid tile discoloration or damage that complicates color matching later.
Test a small inconspicuous area first.
Store unused solution briefly and dispose of leftovers per label.
After treatment and drying, consider grout sealing to protect against future mildew and to preserve the restored white appearance.
Application And Dwell
Once you’ve mixed and tested the oxygen bleach solution, apply it evenly over the grout lines using a pump sprayer or a stiff-bristled brush, working in manageable sections so the solution stays wet long enough to act. Let it dwell 10–15 minutes for mildew, longer for heavy stains, but don’t let it dry.
Agitate stubborn areas with a brush, then rinse well.
- Start at the far corner and work toward the exit.
- Reapply to heavily soiled spots; avoid over-saturation near wood.
- If color matching is needed after cleaning, test grout replacement discreetly.
- For extreme cases, consider grout removal.
Choosing a Commercial Grout Cleaner: What to Look For
When you’re picking a commercial grout cleaner, focus on formulation, safety, and compatibility with your tile—harsh acids can etch natural stone while oxygen-based or enzyme cleaners are gentler for most ceramics and porcelain.
Check labels for pH, active ingredients, and whether the product is rated for your tile type. Look for stain removal claims backed by testing or certifications, and prefer concentrates you dilute to control strength.
Check product labels for pH, active ingredients, tile compatibility, verified stain-removal claims, and choose dilutable concentrates for control.
Consider color matching additives if you plan to recolor grout after cleaning. Verify ventilation needs, PPE recommendations, and rinse instructions to avoid residue or damage.
Test a small, inconspicuous area first.
Enzyme Cleaners and Mold Removers for Organic Stains
Because organic stains like mildew, mold, and food residues feed on proteins and fats, enzyme-based cleaners target their food sources rather than just masking odors or bleaching color. So they’re often the safest, most effective option for grout in damp areas.
You’ll find enzyme cleaners break down residues, reducing regrowth and odor without harsh fumes. Use them when mildew or organic stains recur.
Quick tips:
- Test a small area for colorfastness.
- Apply per instructions, let dwell for recommended time.
- Agitate gently with a grout brush.
- Rinse thoroughly and dry to prevent return.
Using Diluted Bleach Safely on White Grout (Step-by-Step)
If you need a fast, reliable way to whiten stained grout, diluted bleach can work — but you should use it carefully to protect tile, finishes, and your lungs. Ventilate, wear gloves and eye protection, dilute bleach 1:10 with water, test in an inconspicuous area, and avoid colored tiles to prevent color matching issues. Rinse thoroughly and neutralize with baking soda solution. If you prefer permanent restoration, consider grout dye after bleaching.
| Step | Action |
|---|---|
| 1 | Ventilate and protect |
| 2 | Mix 1:10 bleach solution |
| 3 | Spot-test tile |
| 4 | Apply briefly, scrub |
| 5 | Rinse and neutralize |
Mechanical Cleaning: Brushes and Hand Tools That Work
When bleach and cleaners have loosened grime, you’ll want the right tools to finish the job. Use a stiff-bristle scrub brush for broad areas, a grout cleaning pick for stubborn lines, and an electric scrubbing tool to save time on large surfaces.
I’ll cover when and how to use each so you get the best results without harming the tile.
Stiff-Bristle Scrub Brushes
Although grout cleaners and solutions do the heavy lifting, you’ll get the best results by pairing them with a stiff-bristle scrub brush designed for grout lines. You’ll control pressure, target stains, and avoid scratching tile. Choose brushes matching grout color contrast and consider sealing techniques after cleaning to lock results.
- Pick a stiff nylon brush sized for the grout width.
- Use short, firm strokes along the line.
- Rinse frequently to avoid redepositing grime.
- Replace worn bristles to maintain effectiveness.
Work in small sections, dry thoroughly, and seal when grout is fully cured for long-lasting whiteness.
Grout Cleaning Picks
Wondering how to tackle stubborn grout stains in tight spots? Use grout cleaning picks—pointed plastic or nylon tools—to scrape debris from narrow lines without damaging tile.
You’ll work along grout joints, prying out mold, soap scum, and dirt where brushes can’t reach. Hold the pick at a shallow angle, apply steady pressure, and lift residue into a damp cloth.
After cleaning, inspect for color matching issues; if grout looks uneven, consider grout coloring for repairs so patched sections blend.
Picks are low-cost, precise, and handheld—ideal for spot work before any chemical or larger mechanical treatments.
Electric Scrubbing Tools
After you’ve loosened stubborn spots with a grout pick, electric scrubbing tools speed up the rest of the job and reach areas a hand tool can’t. You’ll get consistent pressure, less fatigue, and faster drying.
Choose brush heads suited to grout depth and tile finish, and test in an inconspicuous spot. For finishing, consider grout coloring or color matching to restore uniform appearance.
- Cordless rotary brush — versatile for floors and corners.
- Oscillating multi-tool — precise for deep stains.
- Steam scrubber — chemical-free sanitizing.
- Detail brush attachments — for edges and grout lines.
Using Steam Cleaners and Power Tools: Pros and Cautions
If you opt for steam cleaners or power tools to tackle white grout, you’ll get faster, deeper cleaning than with manual scrubbing—but you should also know the limits and risks. You’ll remove embedded dirt quickly, but watch grout color changes and avoid damaging porous grout; follow sealing techniques after cleaning. Use low-pressure attachments, test a small area, and wear eye and hand protection. Don’t overheat or over-saturate grout lines.
| Tool | Benefit | Caution |
|---|---|---|
| Steam cleaner | Kills mold | Can lighten grout |
| Rotary brush | Speeds cleaning | May erode grout |
| Pressure nozzle | Deep clean | Risk tile damage |
| Heat gun | Dries grout | Overheating risk |
| Vacuum | Removes debris | Limited stain removal |
Removing Rust and Hard-Water Stains From Grout
When rust or hard-water deposits stain your grout, tackle them with targeted cleaners and gentle agitation rather than brute force. Acidic solutions like diluted white vinegar or a citric-acid paste dissolve mineral buildup, while oxalic-acid rust removers specifically lift iron stains.
Use this approach:
- Test cleaner on a hidden grout spot to ensure colorfastness.
- Apply vinegar or citric paste for water stain buildup; let sit 5–10 minutes, then scrub with a soft brush.
- For stubborn orange rust, use an oxalic-acid product per directions, rinsing thoroughly.
- Rinse, dry, and consider sealing grout to reduce future rust removal needs.
Treating Deep-Set Mildew and Black Mold Safely
Because deep-set mildew and black mold can damage grout and harm your health, you should tackle them with care and the right precautions. Wear gloves, eye protection, and a respirator rated for mold spores; ventilate the area and keep others away.
Because deep mildew and black mold can harm grout and health, tackle them carefully with PPE and ventilation.
Mix a mildew-safe cleaner or diluted bleach (follow label directions) and apply with a stiff brush, working small sections. Rinse thoroughly and dry grout completely to discourage regrowth.
For porous damage, remove and re-grout or use a mildew-resistant sealant after repair.
Regular cleaning and humidity control are key for mildew prevention and long-term grout health.
How to Test Any Cleaner on a Hidden Spot First
Before you clean the whole floor, pick an out-of-sight area like behind a toilet or under a cabinet.
Apply a small amount of the cleaner, let it sit for the recommended time, and then rinse.
Check for discoloration, surface damage, or residue before proceeding.
Pick An Out-of-Sight Area
Although you want the grout clean, you should always test any cleaner on an out-of-sight spot first—like inside a closet, under a cabinet, or behind an appliance—so you can check for discoloration, finish damage, or unexpected reactions without risking visible areas. Pick a spot that matches the tile and grout type.
Try these quick checks:
- Clean a small patch and note immediate color change.
- Rinse and dry to spot lingering residue.
- Wait 24 hours to detect delayed reactions.
- Compare to nearby visible grout and consider color options or grout sealing if shade shifts appear.
If safe, proceed.
Apply Cleaner And Wait
Now that you’ve chosen a hidden test spot, apply a small amount of your cleaner to the grout line and let it sit for the manufacturer’s recommended time—usually a few minutes—to see how it reacts.
Watch for immediate changes: discoloration, surface dulling, or residue. After the wait, blot gently and inspect under good light for color matching with adjacent grout and any shift in grout texture.
If the grout looks unchanged and the texture remains intact, proceed with a larger area.
If you see fading, crumbling, or poor color matching, rinse thoroughly and try a milder product or consult manufacturer guidance.
Stain-Specific Fixes: Oil, Dye, Ink, and Paint
When you’re tackling oil, dye, ink, or paint stains on white grout, pick a method that matches the stain’s chemistry so you don’t spread or set it further. Use degreasers for oil, solvent or rubbing alcohol for ink, and mild bleach or peroxide for dye; test first. After removal, consider color matching with grout colorants to hide residual discoloration.
- Oil: apply dish soap/degreaser, blot, repeat.
- Ink: dab isopropyl alcohol, avoid scrubbing.
- Dye: use oxygen bleach paste, let sit.
- Paint: soften with warm water or paint remover, scrape gently.
Rinsing, Neutralizing, and Drying After Cleaning
After you remove stains, rinse the grout thoroughly to lift residual cleaners and loosened residue so it won’t keep reacting or attract new dirt. Use clean water and a stiff brush, changing water often. Neutralize any acidic cleaner with a baking soda paste or a mild alkaline rinse, then rinse again. Blot excess moisture with microfiber towels and let the floor air-dry fully; fan or open windows to speed drying. Drying preserves grout texture and helps you evaluate Color options if you plan sealing or recoloring later.
| Step | Purpose | Timing |
|---|---|---|
| Rinse | Remove residues | Immediately |
| Neutralize | Stop reactions | After rinsing |
| Dry | Prevent mold | Within hours |
Brightening Options: Whiteners vs Pigment-Based Products
When you want brighter grout, you’ll choose between oxidizing whiteners that chemically lift stains and pigment-based products that cover them.
Whiteners can restore the original color by breaking down organic discoloration, while pigments sit on the surface to mask stains and even out appearance.
Consider whether you need stain removal or just cosmetic coverage before picking a product.
Whiteners: Oxidizing Agents
If your grout has faded or stained rather than simply darkened by soil, oxidizing whiteners deliver a chemical brightening that actually breaks apart colored organic compounds instead of just covering them. You’ll use these for color correction when grout coloring fades unevenly. They lift stains from deep pores, restoring white without adding pigment.
- Apply according to label; many need dwell time.
- Test a hidden area for tile compatibility.
- Rinse thoroughly to stop oxidation and prevent residue.
- Repeat only if results improve; overuse can weaken grout.
Wear gloves, ventilate, and avoid mixing with acids or ammonia.
Pigments: Surface Coverage
Why choose a pigment-based product instead of an oxidizing whitener? You’ll pick pigments when stains are stubborn or oxidation risks your grout. Pigment coverage sits on top, masking discoloration instantly rather than changing chemical bonds.
Surface pigments restore visual whiteness quickly, letting you avoid harsh chemicals and long dwell times. Apply sparingly, work into grout lines, then wipe excess—proper technique guarantees even pigment coverage and prevents streaks.
Note pigments don’t remove mold or deep stains; treat those first. For high-traffic areas, expect occasional reapplication.
Use pigment-based products as a cosmetic, fast fix, not a permanent cure.
Sealing White Grout: Types of Sealers and How to Apply
Because grout absorbs stains and moisture, sealing it is the most effective way to keep white lines bright and prevent future discoloration. You’ll choose between sealer types (penetrating, topical, solvent or water-based) based on tile and traffic. Use clean, dry grout and follow manufacturer directions.
- Sweep and clean grout thoroughly.
- Test sealer types in an inconspicuous spot.
- Apply with a small brush or roller for precision.
- Wipe excess and allow full cure time.
Application techniques matter: work in thin coats, avoid pooling, and ventilate the area. Proper sealing preserves whiteness and reduces staining.
How Often to Reseal and Simple Upkeep Tasks
You should reseal grout every 1–3 years depending on traffic and sealer type, checking annually for water beading to know when it’s time.
Do a quick weekly wipe with a pH-neutral cleaner and microfiber mop to keep grime from settling into pores.
For spots, treat stains immediately with a paste or diluted bleach solution and a soft brush to prevent permanent discoloration.
Reseal Frequency Guidelines
If your grout’s been sealed properly, you’ll usually need to reseal it every 1–3 years depending on foot traffic and exposure to moisture. Check annually in busy areas and after heavy spills. When resealing, consider color matching or a grout dye to refresh appearance before sealing.
- Inspect grout for water beading and wear.
- Clean thoroughly; allow full drying time.
- Apply sealer per manufacturer instructions, in thin even coats.
- Note high-moisture zones and reseal more often.
Keep records of dates and product used so you’ll maintain consistent protection and appearance.
Quick Weekly Maintenance
How often should you do a quick weekly check on white grout? Do it once a week to spot dulling, stains, or worn sealer before they worsen.
Wipe grout lines with a pH-neutral cleaner and a soft brush, then dry thoroughly.
Inspect grout coloring—note any darkening that suggests moisture or dirt buildup.
Keep a small kit: touch-up sealer, grout coloring pens for minor cosmetic fixes, and a microfiber cloth.
If you notice persistent discoloration or gaps, schedule deeper cleaning or resealing per your reseal frequency guidelines.
Regular checks save time and keep tile looking crisp between major maintenance.
Spot Treatment Tips
When grout starts to look dull or picks up stains in high-traffic spots, treat those areas immediately and plan to reseal the whole floor on a predictable schedule—typically every 1–3 years depending on traffic and the sealer type. You’ll avoid deep grout staining by acting fast and doing simple upkeep.
- Blot spills, scrub gently with a pH-neutral cleaner.
- Use a grout pencil for small repairs and color matching touch-ups.
- Reseal worn areas spotwise between full reseals to extend protection.
- Sweep and mop weekly, dry grout lines to prevent dirt buildup.
Check seals annually; reapply sooner if water beads fail.
Routine Maintenance: Daily, Weekly, and Monthly Hacks
Because small, consistent actions prevent grout from darkening, set up a simple routine you can stick to daily, weekly, and monthly.
Daily: sweep or vacuum crumbs and wipe spills immediately with a damp microfiber to stop stains before they set.
Weekly: mop with a pH-neutral cleaner, scrub grout lines lightly with a soft brush, and inspect for discoloration or mold.
Monthly: apply a grout refresher or sealant if recommended for your grout type; check grout patterns for wear and consider touch-up color options to keep lines looking uniform.
Stick to this cadence to maintain bright, durable grout.
When to Call a Professional Grout Restorer or Contractor
If your grout is crumbling, missing large sections, or has deep staining that won’t come out, it’s time to think about a professional grout restorer.
You should also call a contractor if you don’t have the time, tools, or experience to tackle extensive repairs safely and effectively.
A pro can assess damage, recommend repair or replacement, and save you from costly mistakes.
Extensive Grout Damage
How bad does grout damage have to be before you call in a professional? You should call when damage goes beyond cleaning: crumbling, deep staining, or structural loss.
Pros handle color matching and restore grout texture so repairs blend seamlessly.
- Widespread crumbling across multiple tiles.
- Deep, permanent stains after cleaning attempts.
- Loose or missing grout affecting tile stability.
- Mold embedded below grout surface or recurring after fixes.
If you see these signs, hire a grout restorer or contractor who can assess subfloor issues, recommend regrouting, and ensure a durable, visually consistent result.
Time Or Skill Constraints
Once you’ve ruled out structural problems or severe damage, consider whether you have the time, tools, and confidence to tackle the remaining work yourself. If deadlines loom or grout restoration would disrupt your schedule, use Time saving hacks like targeted steam cleaning or renting a grout saw to speed tasks. If you enjoy hands-on projects, follow Skill building tips: practice on a small area, wear protective gear, and watch pros’ technique videos. Hire a pro when stains persist after tried methods, tile alignment is off, or warranty/insurance needs a licensed contractor.
| When to DIY | When to Call Pros |
|---|---|
| Small stains | Extensive regrout |
| Practice projects | Structural issues |
Cost Estimates: DIY, Retail Cleaners, and Pro Work
When you’re budgeting to clean white grout, you’ll find costs vary widely depending on whether you tackle it yourself, buy a retail cleaner, or hire pros. Consider your grout color and grout texture—darker stains or rough texture can raise effort and price.
- DIY basics: $0–$20 for vinegar, baking soda, brushes; good if you’re patient.
- Mid-range retail cleaners: $10–$40; faster, formulated for grout stains.
- Specialty grout kits: $30–$100; include sealers, tailored tools for tricky textures.
- Professional service: $150–$600+ depending on area size, stain severity, and prep.
Common Mistakes That Can Permanently Damage Grout
Because grout is porous and fragile, a few careless choices can do lasting harm. You can erode or stain grout by using harsh acids, abrasive scrubbers, or overly strong bleach; those strip sealers and weaken grout, forcing costly regrouting. Over-scrubbing removes pigments, complicating color matching later.
Ignoring manufacturer instructions or mixing cleaners risks chemical reactions that permanently discolor joints. Painting or applying sealers without testing hides problems and limits grout color options when you need repairs.
Always spot-test, use gentle cleaners, and consult pros for deep damage so you preserve grout integrity and avoid irreversible mistakes.
Frequently Asked Questions
Can I Use Bleach on Colored Grout Without Discoloring It?
You can, but you shouldn’t assume bleach won’t fade colored grout; it can lighten pigments. Test a hidden spot first, dilute properly, and consider gentler stain removal alternatives like oxygen bleach or pH-neutral grout cleaners.
Will Grout Whitening Pens Permanently Hide Stains?
No, grout whitening pens won’t permanently hide stains; they temporarily cover discoloration but won’t replace proper grout stain removal. You should clean thoroughly, then follow grout sealing tips to protect results and extend longevity.
Can Pets Safely Walk on Recently Cleaned or Sealed Grout?
Like walking on fresh paint, you shouldn’t let pets roam immediately; you’ll wait until sealers dry. For pet safety, follow manufacturer’s cure times—sealing benefits include protection and faster cleaning, but drying fully keeps animals safe.
How Long Before Grout Can Handle Heavy Traffic Post-Cleaning?
You can usually resume heavy traffic after 24–72 hours depending on drying, curing, sealing techniques used, and ventilation; increase cleaning frequency if traffic’s high, and wait full cure (up to 7 days) for best durability.
Does Hard Water Cause Grout to Deteriorate Over Time?
Yes — hard water’s minerals can cause grout erosion over time; you’ll see mineral buildup, staining, and gradual weakening that makes grout more porous and prone to cracking unless you treat and seal it regularly.
Conclusion
You’ve got this — clean grout is doable with the right approach and a bit of elbow grease. Remember what works depends on your grout type, and don’t confuse tough stains with permanent damage; sometimes regrouting or a pro is the better call. Use proper PPE, follow routine maintenance, and avoid harsh mistakes that’ll cost more later. Think of it like tuning a gramophone: small, regular care keeps things sounding (and looking) great.