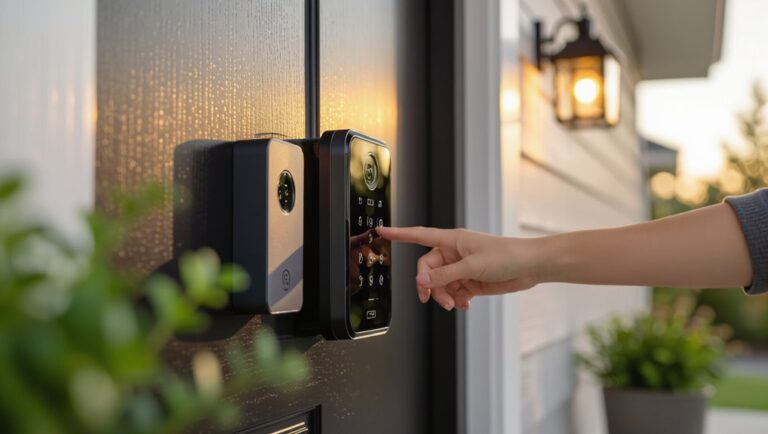
How to Make Your Home Safe for Children
Scan each room from a child’s eye level and remove reachable hazards like small objects, cords, chemicals, and unsecured furniture. Anchor TVs and tall dressers, install gates at stairs, and lock cabinets with medicines and cleaners. Add window guards, non-slip surfaces, and stove knob covers. Keep cribs bare and set water heater to safe temps. Post emergency numbers, test smoke/CO alarms monthly, and practice simple drills — keep going to get practical step-by-step fixes and checklists.
Identify Common Household Hazards
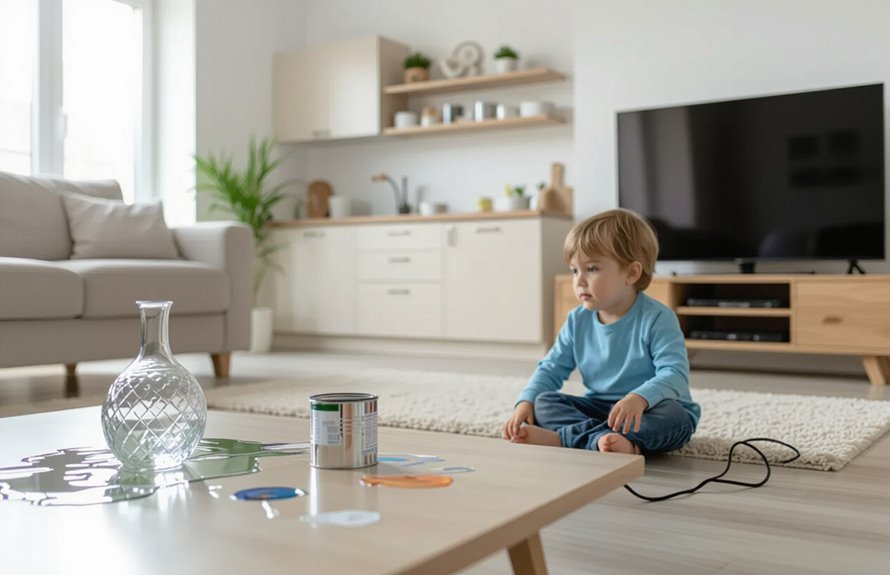
Start by scanning every room from a child’s eye level and note anything they could reach or swallow. You’ll use simple hazard identification techniques: look for small objects, reachable cords, accessible chemicals, unsecured furniture, and hot surfaces.
Check floor-level storage, low shelves, and under beds for choking items or sharp edges. Note common risks like loose batteries, plastic bags, medication, and unstable TVs.
Photograph hazards, list locations, and prioritize by likelihood and severity. You’ll spot patterns—rooms that need ongoing attention—and create clear, actionable notes so you can address each identified danger efficiently and confidently.
Create a Childproofing Plan
Once you’ve mapped hazards, turn that information into a focused childproofing plan that lists what to fix, when, and who’ll do it.
Prioritize tasks by risk and frequency of child behavior that causes incidents — choking, climbing, or accessing chemicals. Set deadlines for quick fixes and schedule larger projects, assigning responsibilities to household members or contractors.
Keep a checklist and update it after changes or as your child grows. Include emergency preparedness steps: smoke detector tests, escape routes, and a stocked first-aid kit with familiarity for caregivers.
Review the plan monthly and after any incident to keep kids safe.
Secure Furniture and Televisions
Because toddlers love to climb and curious kids can pull, secure dressers, bookcases, and TVs to prevent tip-overs and serious injury. Use furniture anchors and TV straps rated for your items, attach them to studs, and remove tempting items from tops. Check mounts and straps regularly, and anchor tall furniture even if it seems stable. Teach kids not to climb furniture.
| Item | Action |
|---|---|
| Dresser | Anchor to studs |
| Bookcase | Use brackets |
| TV | Secure with TV straps |
| Small items | Remove from tops |
| Check | Inspect quarterly |
Follow manufacturer instructions and replace worn anchors promptly.
Install Safety Gates and Barriers

Pick a gate that fits the opening and your child’s age — pressure-mounted ones suit quick setups, while hardware-mounted gates give a firmer hold.
Make sure you install gates using the manufacturer’s recommended hardware and check mounts regularly for looseness.
Place gates at the top and bottom of stairs and across doorways you want to restrict to keep kids out of hazards.
Choose the Right Gate
A good safety gate keeps curious toddlers and pets out of danger without getting in your way, so choose one that fits the doorway or stairwell, meets current safety standards, and installs securely.
Pick gate materials that suit use—metal or sturdy wood for stairs, durable plastic for temporary spots—and avoid decorative gaps small children could exploit.
Check gate height so toddlers can’t climb over; standard heights are usually 28–36 inches.
Look for one-hand operation you can use while holding a child, a latch kids can’t manipulate, and pick a model with clear safety certification.
Replace any gate with visible wear.
Secure Mounting Methods
When you install safety gates and barriers, use mounting methods that match the surface and the gate type so the barrier stays secure under pressure and everyday use.
Measure and mark mounting points, choosing wall anchors, screw-in brackets, or pressure-mounted options appropriate for drywall, plaster, or wood.
For permanent needs pick hardware-mounted gates with reinforced brackets; for temporary use consider pressure-mounted models but check fit daily.
Tighten connections, use anti-lift pins where needed, and test by pushing and pulling.
Regularly inspect secure mounts for wear or loosening.
Proper installation guarantees child safety and prevents accidental dislodging.
Doorway and Stair Placement
Place gates and barriers at the top and bottom of all stairways and any doorway that leads to hazardous areas, and position them so they block the full width of the opening without creating trip hazards.
Choose hardware-mounted gates for the top of stairs and pressure-mounted where appropriate, matching doorway design to frame strength.
Install gates with visible locks and regular inspection points so you can confirm secure engagement.
Keep stair visibility clear by maintaining lighting and removing obstructive rugs or décor near edges.
Train caregivers to use gates consistently, and guarantee barrier height and spacing prevent climbing or squeezing through for child safety.
Lock Cabinets and Drawers
Install secure latches and locks on cabinets and drawers to keep curious hands out of harm’s way.
Store medications, cleaning supplies, sharp tools, and other hazardous items in locked or high cabinets so they’re out of reach.
Regularly organize and inventory those spaces so you know what’s stored where and can spot hazards quickly.
Secure Latches and Locks
Because curious little hands can open cabinets and drawers faster than you think, secure latches and locks are essential for keeping hazardous items out of reach. You’ll choose lock types based on cabinet style, material, and how often adults need access.
Use magnetic, adhesive, or screw-mounted latches for different surfaces; add keyed or combination locks where chemicals or knives are stored. Install soft-close mechanisms to prevent slamming fingers.
Test every device regularly and replace worn parts immediately. Teach caregivers how to operate locks and keep keys out of sight. Prioritize child safety without making daily routines cumbersome.
Organize Hazardous Items
Now that cabinets and drawers are fitted with reliable latches and locks, organize hazardous items so adults can find them quickly while kids can’t.
Group similar products together: store cleaning supplies in one locked cabinet, medicines in another, and sharp tools in a designated drawer.
Use clear labels and label hazardous items with bold, simple warnings and expiration dates.
Keep frequently used adult items up high and rarely used ones in the back.
Maintain an inventory list taped inside the cabinet door so you can restock safely.
Regularly check seals and discard damaged containers to prevent leaks and accidental poisonings.
Protect Electrical Outlets and Cords
While you’re childproofing other areas, don’t forget to secure outlets and hide or fasten cords so kids can’t poke, chew, or trip on them.
Use snug outlet covers or tamper-resistant receptacles to block access to sockets. Tuck cords behind furniture, run them along walls, or use cord management sleeves and clips to keep cables bundled and out of reach.
Anchor power strips under desks or high on walls. Unplug unused devices and keep chargers off the floor.
Regularly inspect cords for fraying and replace damaged ones. Teach older children to never play with outlets or cords and model safe habits.
Keep Poisonous Substances Out of Reach
Keep all household poisons—cleaners, medications, batteries, pesticides, and even some plants—well out of reach and sight.
You’ll lock cabinets, use childproof latches, and store items high. Label containers and keep toxic plants removed or clearly marked.
Check expiration dates and never transfer chemicals into food containers. Practice secure medication storage: childproof caps, locked boxes, and daily routines that put pills away immediately.
Teach older children basic hazards without frightening them. In case of exposure, post emergency numbers and the poison control hotline.
Visualize common risks:
- A low cabinet with spilled detergent.
- A nightstand with loose pills.
- A potted toxic plant on a sill.
Ensure Window and Balcony Safety

Check that all windows have sturdy, childproof guards and that balcony doors lock securely so kids can’t get out unsupervised.
Remove furniture, planters, or toys near windows and balcony railings that a child could climb on.
If you have a balcony, add a safety net or higher barrier and test locks regularly.
Install Window Guards
Because children can climb and fall through low or open windows, install sturdy window guards and window stops to prevent accidents.
You’ll choose window guard materials rated for strength and spacing to keep little bodies safe, and follow clear installation guidelines for anchor points and releasable emergency exits.
Measure frames, pick tamper-resistant fasteners, and test locks regularly.
- Picture a steel grille with 4-inch spacing blocking a bedroom sash.
- Imagine a quick-release bracket you can open in seconds from inside.
- Think of padded sill covers and secure screws hidden from curious hands.
Secure Balcony Doors
Window guards protect kids from falling through windows, but balcony doors pose a different risk you should address just as carefully.
Secure balcony doors with locks placed out of reach and consider sliding-door pin locks or keyed deadbolts so toddlers can’t open them alone.
Install a safety stop to prevent doors from opening wide enough for a child to slip through.
Keep balcony furniture away from the door to reduce temptation to approach the edge.
Teach older children balcony safety rules and always maintain active child supervision when doors are open or when kids are near balconies, especially during gatherings.
Remove Climbable Hazards
If furniture, planters, or toys sit near doors and lower windows, kids can use them as a ladder to reach dangerous openings—so move anything climbable at least three feet away and keep a clear zone beneath all windows and balcony doors.
You should secure rooms by removing climbable furniture and anchoring items that can be moved. Check balcony railings for gaps, lockable latches, and screens that can’t support weight.
Don’t forget outdoor hazards like pots, benches, or stacked chairs.
Visualize common risks:
- A chair under a balcony door.
- A planter by a bedroom window.
- Stacked toys near railings.
Make Stairs Safe for Young Children
When toddlers start exploring on their feet, stairs suddenly become one of the biggest hazards in your home, so it’s important to make them as safe as possible with gates, good lighting, and secure handrails. You’ll install sturdy stair railing, add non slip surfaces on treads, and keep toys away. Use top and bottom gates, check for loose balusters, and teach children to hold the rail. Inspect regularly and replace worn parts.
| Item | Action | Frequency |
|---|---|---|
| Gate | Install/top & bottom | Immediately |
| Railing | Secure/inspect | Monthly |
| Treads | Add non slip | Immediately |
| Lighting | Brighten/replace | As needed |
| Toys | Remove | Daily |
Design a Safe Sleeping Environment
Because infants and young children spend so much time sleeping, you should make their sleep space free of hazards: use a firm mattress that fits the crib, keep pillows, loose bedding, bumpers, and toys out, place the crib away from cords and blinds, and always put babies to sleep on their backs in a smoke-free room.
You’ll choose safe bedding and follow crib safety guidelines. Keep the room calm, maintain comfortable temperature, and check the mattress fit regularly.
Visualize risks:
- A snug mattress with a tight sheet.
- An empty crib with clear sides.
- Cords and curtains tied well away.
Childproof the Kitchen and Dining Areas
Start by securing cabinets and drawers so curious hands can’t reach cleaning supplies, knives, or small appliances.
Keep pot handles turned inward and use stove knob covers or back burners when you’re cooking to prevent burns.
Teach simple rules about hot surfaces and make them routine so everyone stays safe.
Secure Cabinets and Drawers
Secure cabinets and drawers to keep cleaners, sharp tools, and choking hazards out of reach, and choose locks that fit your family’s routine so you actually use them.
For child safety, set up secure storage that looks tidy and makes daily life easier. Use latches, magnetic locks, or sliding bolts; label inside for quick access by adults.
Test placements at crawling and standing heights. Rotate items as children grow.
- A lower cabinet with a magnetic lock and labeled bin.
- A drawer divider holding utensils, locked.
- A high shelf with bulky cleaners and a bolt lock.
Safe Cooking and Hot Surfaces
When you’re cooking or serving food, keep kids away from hot surfaces and moving appliances by creating clear zones and using physical barriers like stove guards and safety gates; this reduces burns and scalds while letting you work confidently. You should use safe cooking techniques, turn pot handles inward, set a no-entry dining perimeter, and supervise during meal prep. Install oven locks, keep hot drinks out of reach, and teach simple rules. Regularly check appliance cords and test smoke alarms. Use the table below for quick reminders.
| Action | Tip |
|---|---|
| Stove guards | Block access to burners |
| Pot handles | Turn inward |
| Oven locks | Prevent opening |
| Supervision | Stay present and teach |
Maintain Bathroom Safety Measures
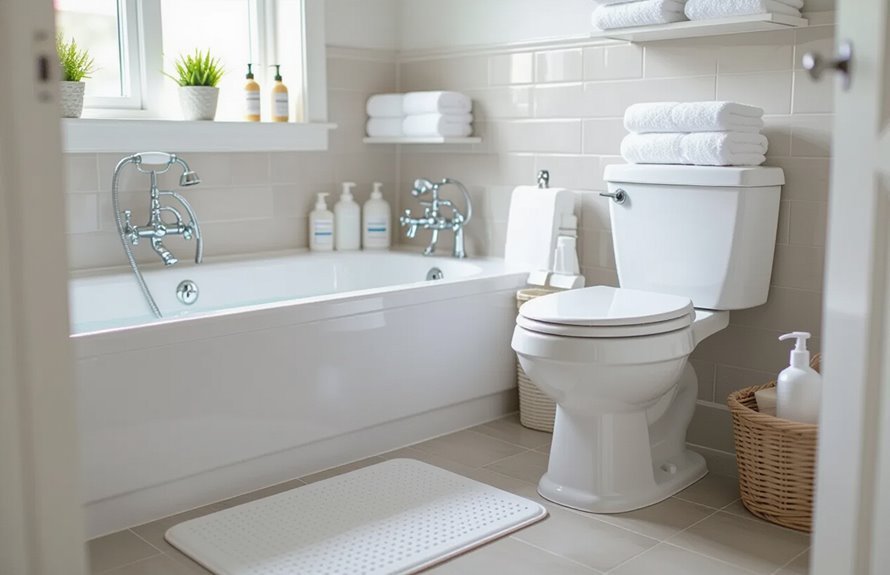
Because slips, scalds, and access to hazardous items are common in bathrooms, you should make a few straightforward changes to keep children safe:
Install bathroom slip proofing like non‑skid mats and adhesive strips, set your water heater to a safe temperature, and keep cleaning products locked.
Use faucet covers and anti‑scald devices so baths stay warm, not hot.
Choose safe bath toys that drain and resist mold, and inspect them regularly.
Secure toilet lids and close lids on wastebaskets.
Supervise young children at all times.
Small, consistent steps reduce accidents and give you peace of mind.
- Non‑skid mats and adhesive strips
- Anti‑scald faucet covers
- Mold‑resistant, draining bath toys
Store Toys and Small Objects Safely
Keep small parts and anything that could fit in a child’s mouth out of reach to prevent choking.
Sort toys by size and age-appropriateness so you can grab the right ones quickly.
Use labeled bins or shelves to keep everything organized and safe.
Keep Choking Hazards Out
Small items like coins, marbles, and button batteries can block a child’s airway in seconds, so store them up and away where little hands can’t reach.
You should use choking prevention tips when sorting playthings and choose safe toy selection for each age. Check pockets, couch cushions, and floors after visitors. Seal small parts in labeled containers and keep battery compartments secured.
Rotate toys so you can inspect them often.
- A clear bin with a locked lid for tiny parts.
- A high shelf box for craft supplies and batteries.
- A drawer organizer for coins and hardware.
Organize by Size and Age
When you sort toys and tiny items by size and appropriate age, you’ll make it easier to pick safe options quickly and reduce choking risks.
Group rattles and large blocks separately from beads, puzzle pieces, and battery-powered parts so caregivers always know what’s off-limits for younger children.
Label bins with age ranges and “child size” warnings, and store small parts up high or in sealed containers.
Teach kids to return items to their correct spots.
Use clear bins for quick inspection and rotate toys to limit clutter.
Regularly audit toy organization to discard broken pieces and update age-appropriate groupings.
Use Safe Cleaning and Laundry Practices
How can you make everyday cleaning and laundry safer for kids? Choose eco friendly products for non-toxic cleaning and effective stain removal, and store them out of reach.
Use childproof locks on cabinets and keep single-dose packets in high containers.
- A vivid image: a bright bottle with a locked latch on a high shelf.
- Visualize a laundry room with detergent in a locked bin and clear labels.
- Picture a child-safe spray station—products stored, mop and bucket tucked away.
Always rinse toys and clothes thoroughly, run appliances with closed doors, and teach toddlers to avoid cleaning supplies.
Childproof Outdoor Play Areas
Moving safety habits outdoors keeps your child protected beyond the laundry room — start by surveying your yard for hazards like uneven ground, exposed roots, and hard surfaces under play equipment.
Level or mark tripping zones, remove debris, and keep pathways clear. Choose impact-absorbing outdoor surfaces such as engineered wood fiber, rubber mulch, or sand beneath swings and climbers.
Anchor and inspect play equipment regularly for rust, sharp edges, and loose bolts. Fence pools and ponds, lock gates, and store tools and chemicals out of reach.
Supervise active play, rotate toys to avoid wear, and maintain clear sightlines from the house.
Teach Children Basic Safety Rules
Because children learn best with clear, consistent rules, start by teaching short, specific safety guidelines they can remember and follow—like looking both ways before crossing, never opening the door to strangers, and asking permission before climbing or using tools.
Use safety role playing to practice responses, and schedule simple emergency drills so they react calmly. Reinforce rules with praise and brief reminders. Keep explanations age‑appropriate and repeat regularly.
Use visuals and models to make concepts concrete:
- A painted crosswalk and toy car for practicing.
- A locked-door puppet scenario.
- A step-by-step escape route map.
Prepare for Medical Emergencies
Teaching safety rules lays the groundwork, but you should also be ready for situations that need immediate medical attention. Keep a stocked first aid kit, learn CPR, and rotate supplies regularly. Post emergency contacts near phones and save them in your phone. Practice mock scenarios with caregivers so responses are quick and calm. Review allergies, medicines, and action plans for each child. Share clear instructions with babysitters and relatives.
| Item | Action |
|---|---|
| First aid kit | Check monthly |
| Contacts list | Update immediately |
| Practice drills | Schedule quarterly |
Set Up Fire and Carbon Monoxide Protections
While childproofing rooms and stocking first-aid supplies protect kids from many hazards, you also need to prevent and prepare for fire and carbon monoxide risks; install working smoke and CO detectors on every level and outside sleeping areas, test them monthly, and replace batteries or units as recommended so alarms always function when you need them.
Check device placement, keep exits clear, and teach older kids to recognize the sound of a fire alarm and carbon monoxide detector. Plan and practice escape routes, and store emergency numbers by phones. Visualize scenarios to guarantee quick, calm responses.
- Nighttime bedroom alarm sounding.
- Hallway glow to exit.
- Family meeting spot outside.
Monitor Visitors and Caregiver Safety Practices
When you invite others into your home or leave your child with a caregiver, stay proactive about safety: check references, confirm vaccination and first-aid training where relevant, and make sure visitors know house rules and emergency procedures.
You should use clear visitor screening: verify identity, ask for referrals, and document arrival/departure times. Brief caregivers on allergies, medications, and safe sleep. Encourage ongoing caregiver training and share your emergency contacts and exit routes.
Trust your instincts—remove privileges if someone seems unreliable. Periodically observe interactions and give concise feedback to reinforce safe behaviors without micromanaging.
Regularly Review and Update Safety Measures
Because children, furniture, and routines change, you should schedule regular checks of your home’s safety measures and update them as needed. You’ll run quick safety audits and a focused hazard assessment each season, after visitors, or when kids reach new milestones.
Note broken locks, loose cords, accessible cleaners, or furniture that can tip. Prioritize fixes and set deadlines so you don’t delay.
- Visual check: doors, gates, window guards.
- Touch test: furniture stability, outlet covers, smoke detectors.
- Action: repair, replace, or relocate hazards promptly.
Keep a brief log so improvements stay current.
Conclusion
You might’ve heard that childproofing once guarantees a totally risk-free home — that’s a comforting myth. In truth, safety’s ongoing: you’ll need to spot new hazards as kids grow, update locks and gates, and keep emergency plans current. By taking the steps in this guide — securing furniture, locking drawers, installing alarms, vetting caregivers, and practicing drills — you’ll seriously reduce risks and stay ready, not perfect, so your home stays a safer place for your children.