How to Remodel Your Kitchen on a Budget
Start by evaluating what works and what doesn’t, then rank must-haves versus nice-to-haves so you focus on high-impact, low-cost fixes first. Set a firm budget, split the remodel into phases, and pick durable, affordable materials like engineered quartz, laminate counters, or vinyl plank flooring. Paint cabinets, swap hardware, add peel-and-stick backsplash and layered LED lighting for big visual gains. Salvage or upcycle pieces to save money, and keep a contingency to avoid surprises — continue for practical step-by-step tips.
Assessing Your Current Kitchen and Setting Priorities
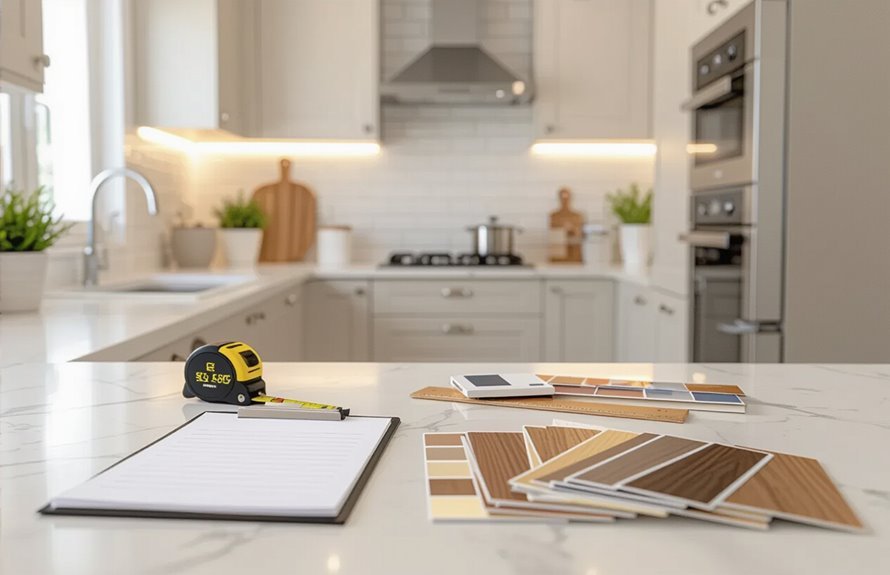
Before you buy materials or call contractors, take a clear-eyed inventory of your kitchen: note what works, what’s worn or broken, and what you can live without.
Walk each zone, record functionality, and photograph trouble spots for a solid kitchen analysis. List must-haves versus nice-to-haves, factoring daily routines and resale value.
Use priority determination to rank repairs, updates, and cosmetic tweaks so you tackle high-impact, low-cost items first.
Decide if appliances, storage, or surfaces matter most, then commit to changes you can maintain. This focused assessment prevents impulse upgrades and keeps your remodel practical and effective.
Establishing a Realistic Budget and Timeline
Decide what you can realistically spend and stick to that limit so surprises don’t blow your budget.
Break the project into phases—prioritize essentials now and schedule upgrades later—to spread costs and minimize disruption.
Track expenses and timelines for each phase so you’ll know when to adjust scope or pause.
Set Clear Spending Limits
Start by calculating what you can comfortably spend, then break that total into clear line items—materials, labor, permits, and a 10–20% contingency—so you know where every dollar is going and can spot trade-offs quickly.
Next, list spending categories like cabinetry, appliances, countertops, and unexpected repairs, assigning realistic amounts to each. Set strict caps for nonessential upgrades and decide which costs you’ll absorb versus cut.
Keep budget flexibility by earmarking contingency funds and reviewing expenses weekly. If a bid exceeds your cap, negotiate, substitute materials, or delay that item—don’t let one overrun derail the whole project.
Create a Phased Timeline
When you break the remodel into clear phases—planning/demolition, rough-in (plumbing/electrical), cabinets/install, countertops/finishes, and final inspections—you’ll keep both schedule and budget realistic and manageable.
Plan each phase with milestones, costs, and contingencies so you can track progress and spending. Use a phased approach to prioritize high-impact, low-cost tasks first, then tackle bigger investments.
Build timeline flexibility for permit delays, material backorders, or unexpected repairs; shift noncritical tasks rather than all at once. Communicate the plan with contractors and household members, update estimates as you go, and avoid slipping into scope creep.
Planning the Layout for Function and Savings
Think about the work triangle—placing your stove, sink, and fridge so you don’t waste steps—and you’ll save both time and money.
Create multi-use zones that combine prep, cooking, and storage to cut down on excess cabinetry and appliances.
Keep traffic flow clear so people can move through without interrupting cooking or causing costly layout changes later.
Work Triangle Basics
A simple work triangle — linking your sink, stove, and refrigerator — keeps movement efficient and cuts down on wasted steps, saving time and money during both cooking and the remodel.
When you design a kitchen layout, place those three points so each leg measures about 4–9 feet; that balance boosts workflow efficiency without crowding space.
Keep paths clear of islands or tall cabinets that disrupt the triangle. For tight budgets, reconfigure existing plumbing and electrical to align with the triangle rather than relocating all major appliances.
Smart placement reduces appliance moves, lowers labor costs, and makes daily cooking smoother.
Multi-Use Zones
If you want to stretch every square foot and dollar, plan multi-use zones that combine tasks—like a prep area doubling as a homework station or a beverage nook that holds small appliances—so you get more function without adding cabinetry.
You’ll design open concept, flexible spaces that adapt to daily needs. Keep surfaces durable and visible storage accessible so zones shift easily. Use furniture and fittings that serve multiple roles.
- Dedicated prep counter that converts to a workspace
- Island with storage, seating, and appliance parking
- Corner beverage/coffee bar with plug-in and shelves
Prioritize Traffic Flow
Where will people move while you cook, clean, and socialize? Think through your kitchen layout to keep work zones clear and walkways direct.
You’ll map traffic patterns so cooks aren’t bumped and kids can pass without cutting across prep space. Place the sink, stove, and fridge in reachable proximity but avoid forcing through-traffic between key zones.
Use islands, open shelving, or a narrow utility corridor to guide movement affordably. Simple tweaks—shift a cabinet, widen an existing path, or relocate trash—improve flow without major rebuilds.
Prioritizing traffic patterns saves time, reduces frustration, and cuts remodeling costs.
Choosing Cost-Effective Materials That Last
When you pick materials, focus on durability and maintenance as much as upfront cost—choosing slightly higher-quality items now will save you money on repairs and replacements later.
You’ll want sustainable materials and durable finishes that stand up to daily use without constant upkeep. Consider these practical options:
- Engineered quartz counters — low maintenance, stain resistant, long lifespan.
- Solid-core or plywood cabinets with a durable finish — repairable and stable.
- Porcelain or large-format ceramic tiles for floors — hard-wearing, affordable, easy to clean.
Compare warranties, source local suppliers, and prioritize value over trendy, short-lived choices.
Painting Strategies to Transform the Space Cheaply
Although a fresh coat of paint seems simple, it’s the fastest, most affordable way to change your kitchen’s look and feel without a full remodel.
You’ll pick a cohesive color palette that brightens, enlarges, or grounds the room—test swatches on different walls and view them at various times. Use high-quality primer and durable finish paint for easy cleaning.
Combine matte walls with semi-gloss trim to emphasize architectural details and allow wipeability; that’s smart texture combinations. Paint open shelving or an accent wall for impact without replacing fixtures.
Plan, tape carefully, and tackle the project over a weekend to save labor costs.
Refinishing vs. Replacing Cabinets: Pros and Cons
Deciding whether to refinish or replace your cabinets hinges on your budget, timeline, and the cabinet condition: refinishing keeps costs and waste low by updating surfaces and hardware, while replacement gives you a fresh layout and modern durability at a higher price.
You’ll weigh refinishing benefits against replacing drawbacks to choose what fits your goals.
- Cost: refinish saves money; replacement costs more up front.
- Time & disruption: refinishing is quicker; replacement takes longer and may need professional help.
- Longevity & design: refinish extends life; replacement lets you change layout and materials for durability.
Affordable Cabinet Hardware and Trim Upgrades
If you want a big style update without replacing cabinets, swapping inexpensive hardware and adding simple trim will transform the look for a fraction of the cost.
Start by choosing affordable finishes like brushed nickel, matte black, or antique brass to match your style and hide wear. Replace old pulls with stylish knobs and coordinate hinges for cohesion.
Apply crown molding or beadboard trim to plain cabinet tops and recessed panels for depth—cut lengths yourself to save. Measure carefully, paint or stain trim before installing, and use quality screws.
These small changes boost curb appeal without blowing your budget.
Budget-Friendly Countertop Options Compared

Wondering which countertop gives you the best look for the least money? You’ll weigh durability, maintenance, and style.
Consider granite alternatives if you want natural stone looks without high cost; engineered pieces mimic veining and resist stains.
Look at laminate options for the lowest price and huge pattern variety—modern laminates can convincingly copy wood or stone.
Explore quartz substitutes and recycled materials for eco-friendly, low-maintenance choices; some blends use glass or porcelain for toughness.
Compare installation costs, edge profiles, and warranties to pick what fits your budget and daily use without overspending.
- Granite alternatives
- Laminate options
- Quartz substitutes and recycled materials
Economical Backsplash Ideas and Installation Tips
Once you pick a cost-effective countertop, the backsplash is a smart place to save and add personality without blowing your budget.
Choose peel and stick options for a fast, DIY-friendly update; they’re easy to trim, replace, and clean. Consider budget friendly tiles like subway or ceramic mosaics—mix patterns sparingly to keep costs down.
Prep walls properly: clean, smooth, and prime to guarantee adhesion. Use a level and spacers for straight lines, and seal grout to prevent stains.
If you need a change later, removable solutions minimize labor and let you refresh style affordably.
Lighting on a Budget: Fixtures, Placement, and Upgrades
Think in layers: combine ambient, task, and accent lighting so your kitchen works and looks brighter without blasting the budget.
You can save by swapping to LED fixtures, using affordable pendants over islands, and adding under-cabinet strips for tasks.
Place lights where you need them most—over prep areas, sinks, and worktops—to stretch every dollar and improve function.
Layered Lighting Basics
How do you get bright, functional light in the kitchen without blowing your budget? Use lighting layers to combine ambient lighting, task lighting, and accent lighting so each area works for cooking, prepping, and mood.
Maximize natural light first, then add efficient choices focused on energy efficiency and appropriate fixture styles. Install dimmer switches to control brightness and save power.
- Prioritize task lighting over general light for counters and stove.
- Use ambient fixtures for overall coverage and balance.
- Add accent lighting for highlights and visual interest without high cost.
Budget-Friendly Fixtures
With your lighting layers mapped out, you can focus on affordable fixtures and smart placement that deliver the right light without a big price tag.
Choose LED under-cabinet strips and simple pendant kits — they cut energy costs and look modern. Mix finishes to hide wear; pair budget lighting with a statement fixture over an island if your budget allows.
Swap dated sink hardware for affordable faucets that match new finishes, tying the room together. Use dimmable options where possible to adjust mood and save power.
Prioritize durable, easy-to-install pieces for the biggest visual impact on a small budget.
Strategic Fixture Placement
Because where you place fixtures matters as much as which ones you buy, plan your layout around how you actually use the kitchen.
You’ll save money by optimizing a simple fixture layout and applying strategic spacing to avoid excess fixtures. Aim light where you prep, cook, and clean; use task, ambient, and accent sources sparingly.
Consider switching to LED and repurposing existing junctions to cut wiring costs. Mount under-cabinet lights close to the backsplash and center pendants over islands for balance.
Prioritize flexible controls like dimmers and smart bulbs so you adjust brightness without rewiring.
- Task lighting: focused, under-cabinet
- Ambient: ceiling, evenly spaced
- Accent: pendants, over island
Flooring Solutions That Look Expensive Without the Cost
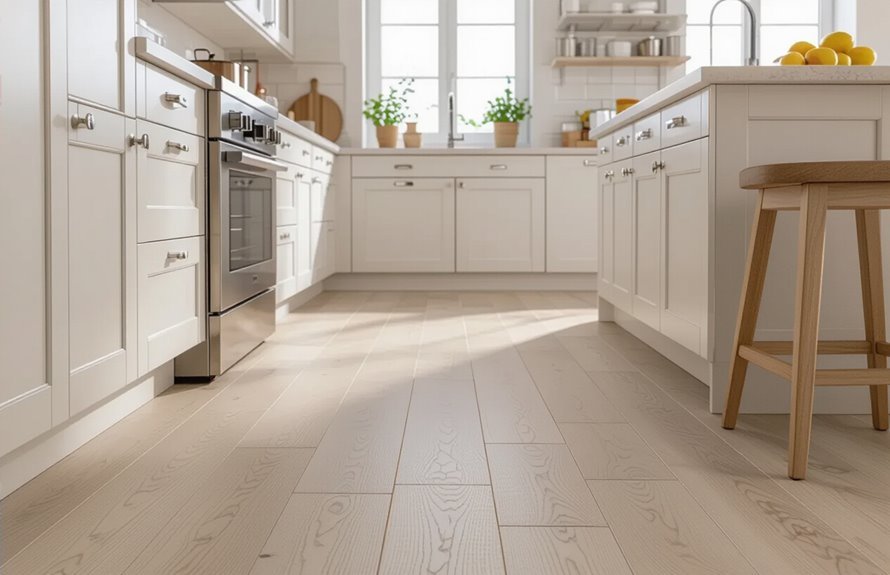
A smart flooring choice can make your kitchen feel luxe without blowing your budget, and you don’t have to sacrifice durability or style to do it. Choose luxury vinyl for realistic stone or wood looks, or engineered hardwood for warmth without solid wood cost. Pick plank sizes and grout colors that mimic high-end materials. Install yourself or hire pros for tricky cuts.
| Type | Look | Cost |
|---|---|---|
| Luxury vinyl plank | Wood/stone realism | Low |
| Engineered hardwood | Warm, authentic grain | Mid |
| Porcelain tile | Marble mimicry | Mid-low |
Appliance Choices That Balance Price and Performance
Flooring sets the tone, but your appliances do most of the daily work, so choose models that match your style and cooking needs without overspending.
You’ll focus on essentials, prioritize energy efficient options, and balance upfront cost with long-term savings. Consider proven brand reliability, warranties, and user reviews before buying.
- Prioritize a reliable refrigerator with good insulation and energy efficient options to cut bills.
- Pick a versatile range or cooktop that fits your cooking habits and has durable controls.
- Choose a quiet, efficient dishwasher from brands known for reliability and serviceability.
Maximizing Storage With Smart, Low-Cost Solutions
When you’re short on space, smart storage changes how your kitchen works without blowing the budget.
Use vertical storage with wall mounted shelves and ceiling racks to free counters. Improve under sink organization with pull-out trays and labeled pantry baskets. Fit drawer dividers to keep utensils tidy and use magnetic strips for knives and spice jars.
Turn awkward corner cabinets into rotating shelves or lazy Susans. Install pegboard storage for pots, lids, and tools you reach for daily. Choose collapsible furniture—tables and stools—that tucks away.
These low-cost fixes boost function and make cooking easier.
DIY Projects Worth Doing Yourself Safely

You can save a lot by tackling a few simple projects yourself, like painting cabinets with proper prep and quick, even coats.
Swapping out cabinet knobs and pulls is fast and gives a big visual update with minimal tools.
For a fresh look without mess, peel-and-stick backsplash tiles go up in minutes and peel off cleanly if you change your mind.
Paint Cabinets Yourself
Revitalizing your cabinets with a fresh coat of paint is one of the most impactful and budget-friendly kitchen updates you can tackle yourself, and with the right prep and tools you’ll get professional-looking results without hiring a contractor.
Start by choosing a cabinet color that complements your room and test samples. Sand, clean, and prime to guarantee adhesion.
Use proper painting techniques—thin coats, sanding between layers, and a quality brush or foam roller—for durability. Focus on one section at a time to stay organized.
- Prep: sand, clean, prime
- Paint: thin coats, sand between
- Finish: durable topcoat, cure time
Replace Hardware Easily
A simple swap of knobs and pulls can give your kitchen an instant face-lift without draining your budget or calling a pro.
You’ll refresh cabinet character by mixing hardware styles—matte black for contrast, brass for warmth, or minimalist pulls for a modern look. Measure existing hole spacing and keep templates to guarantee alignment.
Remove old fasteners, clean surfaces, and use appropriate screws; fill mismatched holes with wood filler before sanding and repainting.
Practice installation techniques on a spare drawer to build confidence. With basic tools, patience, and consistent placement, you’ll upgrade appearance quickly and safely.
Install Peel-And-Stick Backsplash
When you’re ready for a quick, affordable upgrade, peel-and-stick backsplash tiles let you transform your kitchen with minimal tools and time.
You can handle this project yourself and enjoy peel and stick benefits like low cost, variety, and easy cleanup.
Prep properly: clean, dry, and level the wall. Measure and plan layout to avoid awkward cuts.
- Trim tiles with a utility knife for precise fits.
- Use a level and spacers to keep rows straight.
- Seal edges with caulk for moisture protection.
Follow installation tips, work steadily, and you’ll get pro-looking results.
When to Hire Pros and How to Find Affordable Labor
Thinking about whether to hire pros? You should when work involves gas, structural changes, or permits—safety and code compliance matter.
Get multiple bids, check licenses and insurance, and ask for references. Use freelance contractors for smaller tasks to cut costs, and monitor the local labor market to time hiring when demand—and rates—dip.
Negotiate clear scope, fixed prices, and timelines to avoid surprises. Consider hiring pros for inspections and complex installs while doing cosmetic updates yourself.
Pay promptly for quality work, keep communications documented, and don’t compromise safety or warranties to save a few dollars.
Shopping Hacks: Sales, Outlet Finds, and Secondhand Sources
Looking for big savings without sacrificing quality? Use discount shopping tactics: sign up for retailer emails, track clearance cycles, and compare outlet prices online.
Hunt outlet finds for appliances or tile remnants that match your plan. Check thrift store finds for cabinet hardware, light fixtures, or vintage sinks you can clean up.
- Compare online outlets and local clearance racks.
- Inspect secondhand items thoroughly before buying.
- Negotiate prices at flea markets or private listings.
You’ll save hundreds by combining sales, outlets, and secondhand sources—just prioritize condition, return policies, and exact measurements before committing.
Salvaging and Repurposing Materials for Character
You can stretch your budget and add one-of-a-kind character by salvaging and repurposing materials from vintage sources, demolition salvage yards, and reclaimed-wood suppliers. You’ll spot vintage finds like barn wood, old tiles, and metal fixtures that become focal points. Use upcycled furniture for islands or open shelving to save money and gain charm. Clean, stabilize, and refinish pieces yourself or hire a pro for structural work. Match finishes and mix textures sparingly so items feel intentional, not cluttered. Prioritize durability and safety when repurposing materials.
| Item | Use |
|---|---|
| Barn wood | Counter accents |
| Tiles | Backsplash |
| Metal | Hardware |
| Cabinets | Upcycled furniture |
Small Design Tweaks That Deliver Big Visual Impact
When you make a few targeted changes—like swapping cabinet hardware, adding a bold light fixture, or installing a narrow open shelf—you’ll transform the kitchen’s feel without a major remodel.
You’ll focus on small, strategic moves: refresh the color palette with an accent wall or painted island; mix finishes for texture contrast; and improve lighting to highlight focal points.
Consider these quick wins:
- Replace knobs and pulls for an instant style update.
- Swap a pendant or add under-cabinet lighting to change mood.
- Add open shelving and curated items to boost personality and function.
Preventing Costly Mistakes and Staying on Track
Small updates can hide bigger pitfalls if you aren’t careful, so plan with intent before ordering materials or committing to demo. You’ll save time and money by using clear budget planning, timelines, and permit checks. Meet contractors, get written estimates, and prioritize structural fixes over cosmetic wants. Track expenses daily, flag overruns early, and keep a 10% contingency for surprises. For mistake prevention, confirm measurements twice, test layouts with cardboard, and lock in shipment dates. Communicate changes in writing to avoid disputes.
| Item | Action |
|---|---|
| Estimate | Compare 3 bids |
| Layout | Mockup with tape |
| Timeline | Update weekly |
Staging and Final Touches to Boost Value and Appeal
Although the heavy work is done, staging and the final touches are what sell the room — so focus on lighting, decluttering, and a few high-impact updates that show off the kitchen’s flow.
You’ll want staging tips that highlight space, function, and style without overspending. Replace dated fixtures, add layered lighting, and clear counters to create openness. Use a cohesive color accent and swap hardware for an instant lift.
Consider these quick moves:
- Brighten with adjustable task and ambient lights.
- Declutter, style open shelves, and stage a simple vignette.
- Update cabinet pulls, faucet, and a statement backsplash tile.
Conclusion
You’ve mapped priorities, set a realistic budget, and picked smart materials — now finish strong. Take small, high-impact steps like fresh paint, swapped hardware, and repurposed cabinets to stretch every dollar. Stay organized, schedule wisely, and avoid impulse upgrades so surprises don’t sink your plan. Think of your kitchen like a well-tended garden: with patience and care, even modest investments will bloom into lasting value and everyday joy.