How to Refinish Your Home’s Wood Floors
You can refinish your wood floors yourself by evaluating surface damage, repairing loose or warped boards, and sanding progressively from coarse to fine grit. Clear the room, protect trim, and ventilate well. Test stains on scraps, apply conditioner if needed, and seal with polyurethane or a waterborne finish, sanding lightly between coats. Wear an N95 or better, goggles, and keep rags in a metal can. Keep going to get step-by-step techniques and cost tips.
Assessing Your Floor’s Condition and Deciding If Refinishing Is Right
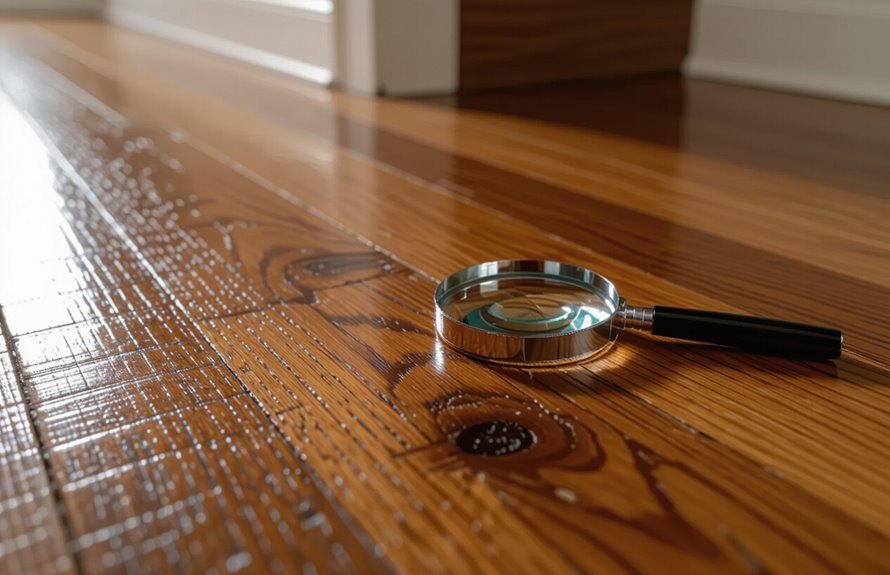
Wondering whether your floors need refinishing or just a spot repair? You’ll start a quick floor assessment by scanning for deep gouges, widespread discoloration, cupping, or finish wear.
Check multiple rooms under different light angles and lift rugs to reveal hidden damage. Test a small area by sanding a corner; if raw wood looks good and damage is superficial, a refinishing decision leans positive.
If boards are warped, structurally compromised, or finish has penetrated cracks, you’ll likely need board replacement instead. Document findings, prioritize rooms, and decide whether refinishing will restore appearance and lifespan.
Necessary Tools and Materials for Floor Refinishing
You’ll need a mix of power tools, hand tools, abrasives, and finishing supplies to refinish a hardwood floor properly.
Gather sanding machines (drum or orbital), an edger, and a vacuum-rated dust extractor. Bring hand scrapers, putty knives, wood filler, and sanding blocks for corners.
Stock progressive-grit sandpaper (36–120), tack cloths, and quality brushes or lambswool applicators. Choose polyurethane or water-based floor finishers and compatible thinners or cleaners.
Keep respirators, safety glasses, ear protection, kneepads, and disposable gloves handy. Also have mixing sticks, measuring cups, and clean lint-free rags for stirring and touch-ups.
Preparing the Room: Clearing, Protecting, and Ventilation
Start by removing all furniture, rugs, and wall hangings so you have a clear workspace and nothing gets damaged.
Tape plastic or drop cloths over trim, doorways, and adjacent floors to protect them from dust and finish.
Open windows, run fans, and use a respirator if needed to keep fresh air flowing while you sand and finish.
Remove Furniture and Rugs
Before you sand or strip, clear the room completely so nothing gets scratched or trapped in the finish: move all furniture, lift any rugs and runners, and take down wall hangings that hang close to the floor.
You’ll plan furniture removal so heavy pieces go out first and fragile items get wrapped and labeled. Use proper lifting technique or help to avoid damage or injury.
For rugs, roll, tie, and store them in a dry place—proper rug storage prevents mildew and keeps pile clean.
Finally, check corners and under radiators for forgotten items before you start.
- Heavy pieces first
- Wrap fragile items
- Roll and tie rugs
- Inspect thoroughly
Protect Adjacent Surfaces
With the room cleared and rugs rolled, protect the surfaces that border your work area so sanding dust and finish won’t mar baseboards, doorframes, or nearby walls.
Tape heavy-duty paper or drop cloths along baseboards, and apply painter’s tape to trim and doorframes to create clean edges.
Use plastic sheeting as surface coverings over built-ins and heating vents, securing seams with tape.
Erect temporary protective barriers at doorways to limit dust migration to other rooms.
Check coverings frequently and replace torn sections.
Take care around outlets and switches—cover plates or remove them to keep finish off electrical fixtures.
Ensure Proper Ventilation
Although you’ve cleared and protected the room, you’ll still need good airflow to remove dust and fumes during sanding and finishing.
You’ll plan ventilation techniques before you start: open windows, run fans, and create cross-breezes to push contaminants out. Use a window exhaust fan or shop vac with a HEPA filter to capture dust, and position intake fans to improve air circulation.
Seal doorways to other rooms to prevent spread. Monitor conditions and pause if odors build. Follow product directions for solvent ventilation and wear a respirator when recommended to protect your health.
- Open windows and doors
- Use exhaust fans
- Add HEPA filtration
- Seal other rooms
Repairing Gaps, Cracks, and Loose Boards

Before you sand, you’ll want to fix gaps, cracks, and any loose or damaged boards so the finish goes on smoothly.
Use wood filler or rope to fill small gaps, screw or glue down loose boards, and replace planks that are split or warped.
Tackling these repairs now will give you a stable, even surface for refinishing.
Filling Cracks and Gaps
You’ll start by identifying which cracks and gaps need simple filler and which need more extensive repair—small hairline cracks and gaps between boards can be filled with flexible wood filler or caulk, while wider gaps, splintered boards, or loose planks require stabilizing, shimming, or replacing boards before finishing.
You’ll choose filling techniques and gap materials suited to movement, grain, and finish. Clean debris, sand edges, and test color match.
Apply filler smoothly, remove excess, and sand flush once cured. Seal to prevent moisture entry. Consider polyurethane-compatible products for stained or clear-coated floors.
- Clean first
- Match color
- Use flexible filler
- Sand flush
Securing Loose Boards
After filling small cracks, move on to boards that won’t stay put—loose planks can pinch finish, squeak, and let dirt collect in gaps.
First, locate nails or cleats that’ve failed by tapping and listening for hollow sounds. Pull fasteners and apply wood glue into the seam and under the board edge, then press the board down.
Use board clamps or weighted cauls to hold it flat while the glue cures. For squeaks, drive trim screws through the tongue at an angle, countersink, and fill.
Sand flush once dry and inspect joints for tightness before finishing.
Replacing Damaged Planks
When a plank is cracked, badly cupped, or beyond simple fastening, you’ll need to remove and replace it to restore a smooth, stable floor.
You’ll cut out the damaged plank, clean the tongue-and-groove, and test-fit a replacement. Focus on plank selection for matching species, thickness, and grain.
Use proper installation techniques: adhesive or nail, tapping block, and glue in seams. Finish edges flush and sand transitions. Seal and stain to match existing floor.
- Match plank selection precisely
- Prepare subfloor and joints
- Use correct installation techniques
- Sand and finish for blend
Choosing the Right Sandpaper Grit Sequence
Choosing the right sandpaper grit sequence sets the foundation for a smooth, even floor and saves you time and extra passes later. You’ll plan grit selection around damage level: start coarse for deep scratches, move progressively finer to remove marks, and finish with a fine grit for prep. Use proper sanding techniques—keep the sander moving, overlap passes, and check frequently. Match grit jumps (no more than two steps) to avoid swirl marks. Refer to this quick guide:
| Stage | Grit | Purpose |
|---|---|---|
| 1 | 36–40 | Remove old finish |
| 2 | 60–80 | Eliminate deep scratches |
| 3 | 100–120 | Smooth and prep |
How to Use a Drum Sander and Edger Safely
Because a drum sander and edger remove a lot of material quickly, you need to respect their power and follow strict safety steps before you start.
You’ll wear eye, ear, and dust protection, secure loose clothing, and inspect machines and cords.
Practice on scrap to learn edger techniques and drum sander safety—keep both moving to avoid gouges. Work with a helper to manage dust collection and steady the power supply.
- Check blades, belts, and sanding drums.
- Attach and test dust extraction.
- Start machines off the floor, then lower gently.
- Keep a steady, even pace.
Hand-Sanding Corners and Hard-to-Reach Areas

Grab a sanding block and a selection of grit papers, and get ready to tackle the corners and tight spots the big machines can’t reach.
You’ll work systematically, using finer grits as you progress to blend with machine-sanded areas.
Use triangular sanding pads, detail sanders, or flexible sanding sponges to fit baseboards, between stair treads, and around vents.
Employ corner techniques like angling the block slightly and sanding along grain direction to avoid gouges.
Keep sanding tools moving to prevent divots, check your progress often, and feather edges into adjacent surfaces so shifts look seamless when you finish.
Proper Cleaning Between Sanding Passes
After each sanding pass, thoroughly remove dust so the next grit can bite evenly and your finish will adhere properly.
You’ll vacuum, tack, and wipe to eliminate grit and fine particles; use a vacuum with a floor brush, then a slightly damp microfiber cloth. Follow these cleaning techniques to prevent swirl marks and uneven adhesion.
Between each sanding step, inspect the surface under good light and repeat cleaning until no dust remains.
Helpful sanding tips: use slow, overlapping passes and change abrasives only when clean. Maintain clean pads and filters to avoid reintroducing debris.
- Vacuum with brush attachment
- Tack cloth wipe
- Damp microfiber pass
- Light inspection and repeat
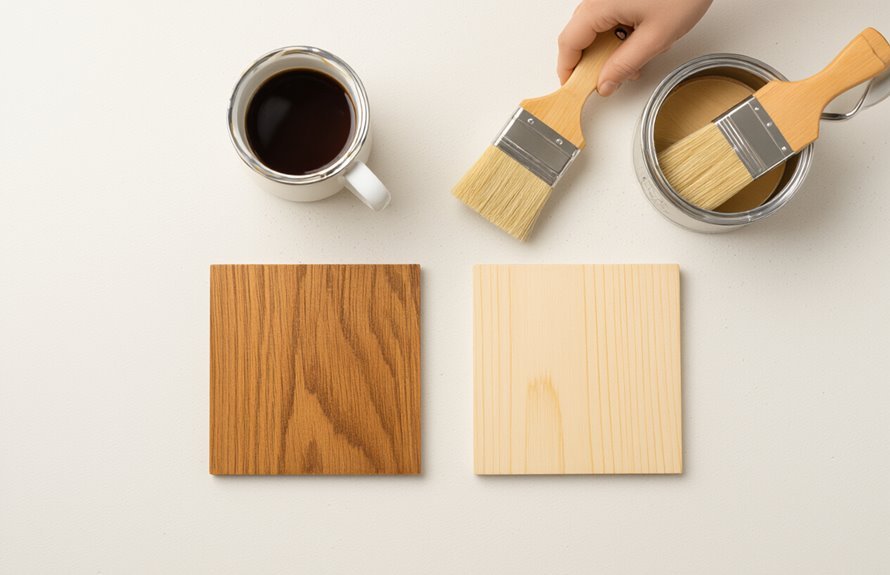
Selecting the Best Stain Color for Your Home
When you pick a stain, start by matching the existing wood tones in your home so the floor feels cohesive with your furniture and trim.
Check samples in the actual room at different times of day, because natural and artificial lighting will change how a color reads.
Trust your eye in the space rather than the sample card.
Match Existing Tones
1 clear rule will guide your stain choice: match the undertone and value of your existing wood so the new finish blends instead of stands out.
You’ll test small patches, compare samples, and focus on color matching and stain compatibility to avoid surprises. Work near seams and edges to see how new blends with old wear.
- Sand and test in an inconspicuous spot.
- Compare samples under natural daylight (brief check).
- Note undertones: warm, cool, or neutral.
- Choose a stain with proven compatibility for your floor’s species.
Follow samples, not assumptions.
Consider Room Lighting
How will the light in your room change the way a stain reads? Pay attention to natural and artificial lighting options before picking a color.
North-facing rooms mellow warm stains; south light enhances amber tones. Overhead LEDs can wash out subtle grain, while warm incandescent bulbs deepen richness.
Test samples in several spots and observe them at different times to note floor reflections and shadows. Place a scrap plank where furniture will sit to see true contrast.
Remember gloss level affects reflections too—matte hides imperfections, high gloss amplifies color. Choose what complements your light, not fights it.
Applying Wood Stain Evenly and Troubleshooting Blotching
Before you start staining, make sure the floor is clean, sanded to an even grit, and free of dust so the stain can penetrate uniformly; poor prep is the main cause of blotching.
You’ll use consistent stain absorption techniques and blotch prevention methods: test on scraps, precondition porous woods, apply thin coats, and wipe excess promptly.
Work in manageable sections, follow the grain, and blend overlaps while stain is wet. If blotches appear, sand lightly, reapply conditioner, and restain.
Keep tools clean and maintain steady pressure to avoid streaks.
- Test first
- Use conditioner
- Thin coats
- Wipe excess
Choosing Between Oil-Based and Water-Based Finishes
Wondering which finish will give you the look and durability you want? You’ll weigh oil based advantages like deeper ambering, rich warmth, and strong resilience to wear.
Oil finishes ease slight imperfections and often need fewer coats, though they yellow over time and smell stronger.
Water based benefits include clearer, non-yellowing results, faster drying, and lower odor, so you can return rooms to use sooner.
Choose based on appearance, indoor air concerns, and traffic level: pick oil for vintage warmth and ruggedness, pick water for modern clarity and quicker turnover.
Test samples to confirm the final look.
Applying Sealer and Topcoats: Techniques and Drying Times
Once you’ve sanded and cleaned the floor, apply a sealer to lock in tannins and create a uniform base for topcoats; work in long, even strokes and maintain a wet edge to avoid lap marks.
You’ll be applying sealers evenly, watching for puddles and brushing out edges. After the sealer dries per label times, choose between polyurethane or waterborne finishes when choosing topcoats based on durability and sheen.
Allow specified drying hours between coats and longer before light use. Ventilate, control temperature and humidity, and follow manufacturer cure times to avoid tackiness and adhesion issues.
- Read label drying times
- Maintain wet edge
- Control environment
- Use recommended tools
Sanding Between Coats for a Smooth Finish
You should sand between coats to knock down raised grain and guarantee each layer bonds smoothly.
Start with a finer grit after the first coat (around 120–150) and finish with 180–220 to avoid visible scratches.
Always vacuum and tack the floor thoroughly before sanding so dust doesn’t scratch the next coat.
Why Sand Between Coats
Although a coat of finish protects the floor, you should sand between coats to remove dust nibs, level brush or roller marks, and promote adhesion for the next layer.
You’ll get a visibly smoother surface, better bonding, and improved finish durability when you use proper sanding techniques. Light sanding scuffs the previous layer so the next coat wets out evenly.
Don’t over-sand; you only need to break the sheen. After sanding, vacuum and tack cloth thoroughly.
Follow these steps:
- Inspect for imperfections.
- Lightly sand the entire surface.
- Clean all dust completely.
- Apply the next thin coat.
Best Grit Progression
After you’ve lightly sanded and cleaned between coats, pick grits that gently scuff without removing the previous layer—start around 120–150 for oil- or water-based poly and move to 180–220 if the finish is thin or you need a finer feathering.
You’ll choose grit types based on finish hardness and coat thickness. Use sanding techniques that keep motions consistent and pressure light—cross-sanding only for major flaws.
Hand-sand edges and use a random-orbit sander for fields. After each pass, vacuum and tack to check for scratches. If scratches remain, step down one grit and repeat until the surface feels uniformly smooth.
Cleaning Before Sanding
Dust and grime will ruin a smooth finish, so clean thoroughly before any sanding between coats. You’ll remove dust, oils, and residues with proper surface preparation to guarantee new coats bond.
Use a vacuum, tack cloth, and a mild cleaning solution recommended for the finish you’ve applied. Wait until the floor’s fully dry before sanding lightly with fine grit.
- Vacuum to pick up loose particles.
- Wipe with a tack cloth to trap fine dust.
- Apply the appropriate cleaning solutions for residue removal.
- Allow complete drying time before sanding between coats.
Managing Dust Control Throughout the Project
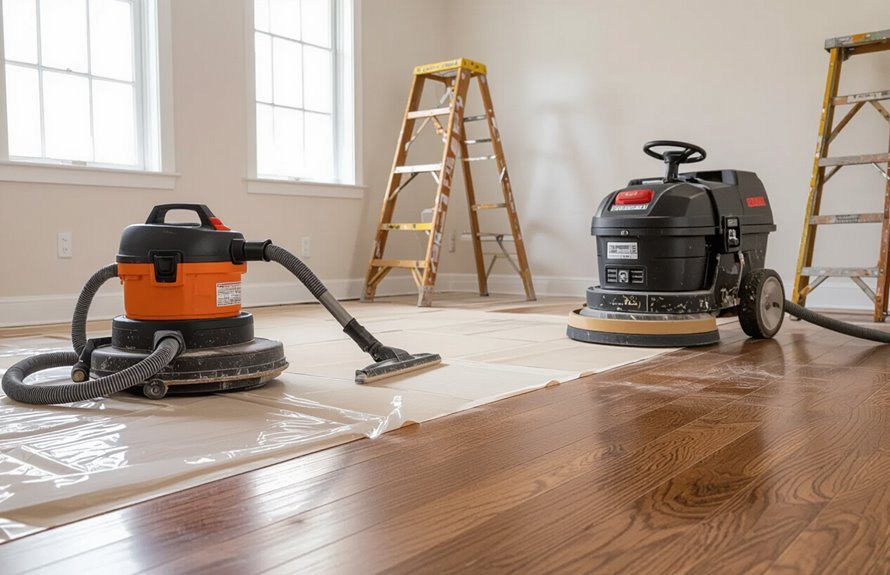
Because sanding and finishing stir up fine particles that travel everywhere, you’ll want a clear dust-control plan before you start work.
Seal off rooms with plastic sheeting and doorways, tape seams, and create negative pressure by exhausting air outdoors. Use professional dust containment boxes around sanding zones and run high-quality vacuum systems attached to sanders.
Wear an N95 respirator and change filters frequently. Clean between passes with a HEPA vacuum and tack cloths to remove residual grit. Protect vents and HVAC returns.
Monitor cleanup continuously so dust doesn’t settle on freshly sanded or finished surfaces, compromising adhesion and appearance.
Dealing With Nail Pops, Rust Stains, and Pet Damage
Before sanding, you’ll want to address nail pops by driving the nail back below the surface or replacing it and filling the hole with wood filler so your finish goes on smooth.
For rust stains, test a mild oxalic acid-based remover on a scrap piece or an inconspicuous spot, then neutralize and rinse thoroughly to avoid discoloration.
Tackle these fixes now so they don’t telegraph through your new stain and finish.
Fixing Nail Pops
Nail pops, rust stains, and pet damage are common blemishes you’ll want to address before sanding and refinishing so your final finish looks smooth and even.
When fixing nail pops, tap the head back down or remove the nail, then replace with a screw into the joist for a secure hold. Use wood filler for small gaps, then sand flush. If the board’s loose, glue and weight it until set.
Follow these fixing techniques to prevent recurrence.
- Locate popped nails
- Decide repair vs replace
- Use screws into joists
- Fill and sand smooth
Removing Rust Stains
Rust stains from old nails or metal furniture can bleed through new finishes if you don’t treat them, so you’ll want to remove or neutralize the discoloration before sanding.
Start by testing a mild oxalic acid solution on a hidden scrap; it’s effective for rust removal techniques without harming wood grain. Apply with a damp cloth, let it sit briefly, then neutralize and rinse thoroughly.
For stubborn spots, repeat carefully or use a commercial rust remover formulated for wood. After drying, sand lightly and follow stain prevention tips: dry spills quickly and use protective pads under metal furniture.
Refinishing Engineered or Exotic Hardwood Floors
Although engineered and exotic hardwoods look similar to solid oak, they need different care when you’re refinishing them.
You’ll inspect wear layer thickness on engineered flooring; if it’s thin, sanding may ruin the veneer.
With exotic hardwood, test stain compatibility—some species absorb finish unevenly.
Use fine-grit sanding and light pressure; avoid aggressive sanding on veneers.
Prefer water-based or manufacturer-recommended finishes to prevent discoloration.
When unsure, consult the floor’s specs or a pro.
- Measure wear layer
- Test stain on scrap
- Sand gently with fine grit
- Use approved finish
Estimating Time, Labor, and Project Costs
Before you start, create a realistic schedule and budget based on room size, floor condition, and your experience—these factors will drive most of the time and cost decisions.
Break the job into prep, sanding, staining, and finishing. For time estimation, allot extra hours for repairs, edges, and unexpected delays.
Tally labor whether you’re solo or hiring help; pros work faster but cost more upfront.
For cost analysis, list materials, tool rentals, and disposal fees, then add contingency (10–20%).
Compare DIY versus contractor quotes to decide. Track progress against your schedule and adjust budget as surprises arise.
Safety Precautions: PPE, Fire Risk, and Chemical Exposure
With a schedule and budget set, you’ll also want to plan for safety—refinishing floors brings dust, flammable materials, and chemical vapors that can harm you and your home.
Wear appropriate personal protective equipment: N95 or better respirator, eye protection, gloves, and hearing protection.
Control fire risk by removing ignition sources, storing rags in metal cans, and ventilating solvents.
Follow chemical safety: read labels, use containers with lids, and never mix products.
Keep a fire extinguisher handy and clear exits.
- Respirator type and fit
- Glove and eye protection
- Ventilation plan
- Rags and disposal protocol
Maintaining and Caring for Newly Refinished Floors
Once the finish cures, you’ll protect your investment most effectively by establishing simple, consistent care habits—regular gentle cleaning, prompt spill management, and smart furniture handling will keep the floor looking like new. Create a cleaning routine: dust daily with a microfiber cloth, mop weekly with a damp (not wet) mop and pH-neutral cleaner, and blot spills immediately. Use protective measures: felt pads, rugs in high-traffic areas, and humidity control. Avoid harsh chemicals or steam cleaning. Inspect finish yearly and spot-repair scuffs promptly to extend life.
| Action | Frequency |
|---|---|
| Dusting | Daily |
| Mopping | Weekly |
| Spill care | Immediate |
| Protective pads | As needed |
| Inspect/repair | Yearly |
When to Hire a Professional vs. DIY Refinishing
Wondering whether you should tackle floor refinishing yourself or call in a pro? You’ll weigh time, skill, and cost.
Minor surface wear, straightforward sanding, and small rooms can suit DIY, but complex layouts, deep damage, or historical finishes benefit from professional guidance.
Consider safety, equipment rental, and DIY challenges like dust control and consistent staining. Choose a pro if warranties, tight timelines, or resale value matter.
- Small, simple rooms — DIY
- Extensive damage or exotic wood — hire pros
- Limited time or need for warranty — hire pros
- Comfortable with tools and prep — DIY
Conclusion
You’ve learned the steps to strip, repair, sand, stain, and seal your wood floors, but that doesn’t mean you have to do it alone. DIY gives you control and savings; hiring a pro gives you speed and certainty. You can save weekends and sweat with careful planning, or trade time for expertise when the job’s complex. Whatever you choose, balance patience with practicality, follow safety rules, and enjoy the quiet satisfaction of floors that look like new.