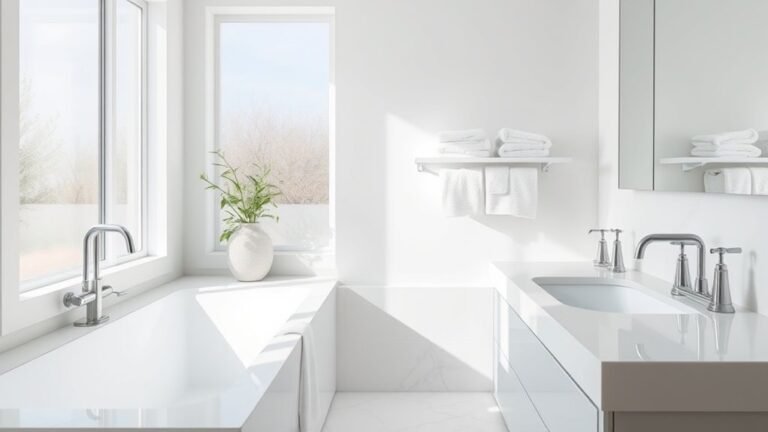
How to Deep Clean Bathroom Floor Tiles Safely
Start by clearing the area and testing a cleaner on a hidden tile to avoid etching or discoloration. Sweep or vacuum grit, then mop with a pH-neutral cleaner for ceramic and porcelain; avoid acids on natural stone. Scrub grout with a soft brush and a baking soda–hydrogen peroxide paste, rinse thoroughly, and dry to prevent mildew. Re-seal grout when water no longer beads. Follow these steps and keep going to learn targeted fixes for stains, mold, and sealant care.
Quick Step-by-Step Bathroom Tile Deep-Clean Checklist
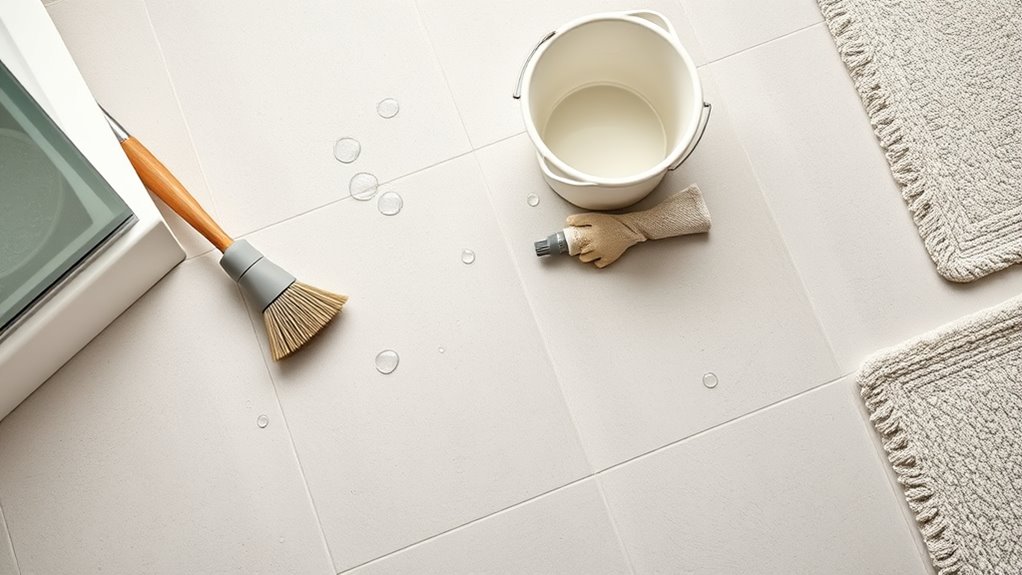
Before you begin, gather your supplies—gloves, a stiff brush, a mop, bucket, pH-appropriate cleaner, grout brush, and a spray bottle with diluted bleach or vinegar for mold.
Start by removing rugs and debris, then vacuum or sweep thoroughly.
Test cleaner on a hidden tile to protect bathroom decor and unique tile patterns.
Apply cleaner, let it sit per instructions, scrub grout lines with the grout brush, then agitate tiles with the stiff brush.
Rinse with clean water, mop up excess, and dry to prevent streaks.
Inspect for missed spots and repeat spot-cleaning as needed.
Ventilate until fully dry.
Who Needs a Bathroom Tile Deep Clean: And Why
Whether you use your bathroom daily or only on weekends, you should deep-clean the tile whenever you notice persistent grime, darkened grout, mold, or lingering odors that regular cleaning doesn’t fix. You need deep cleaning when stains resist scrubbing, when grout looks aged, when allergies flare, or when moisture breeds mildew.
It protects finishes, preserves Bathroom tile art, and keeps tile color trends looking intentional instead of dingy. Prioritize deep cleans if you:
- See visible mold or black grout lines.
- Smell mildew after drying.
- Have high foot traffic or kids/pets.
- Want to refresh your tile’s appearance.
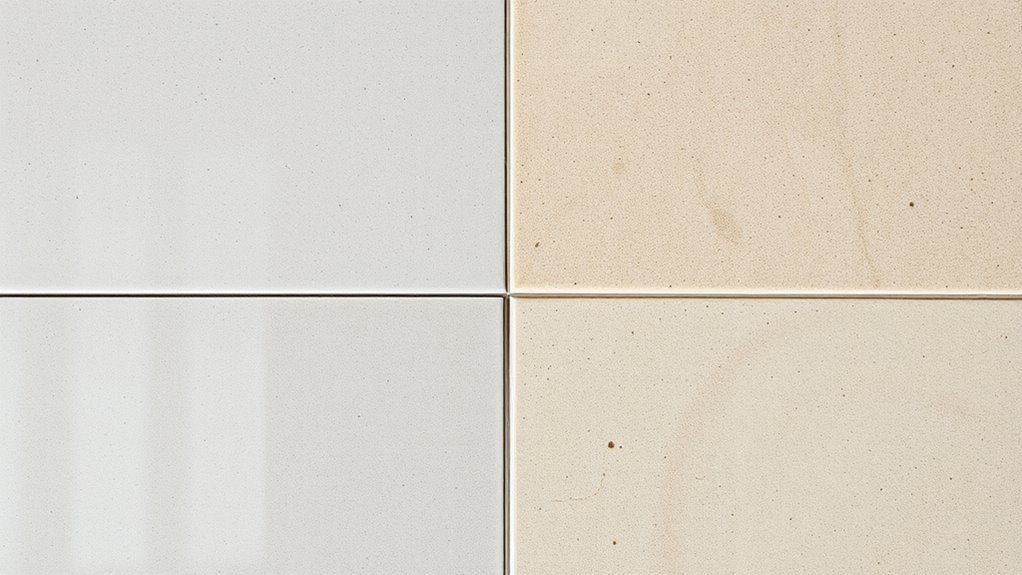
Which Bathroom Floor Tile Types Affect Cleaning Choices
Your tile material changes how you clean, so you’ll treat porcelain and ceramic differently from natural stone.
You’ll also need to pay attention to grout condition and whether sealant is present or needed.
Knowing these differences helps you pick safe cleaners and the right techniques.
Porcelain And Ceramic
Two common choices—porcelain and ceramic—look similar but clean differently, so you’ll want to know which tile you have before choosing products or techniques. Porcelain is denser and less porous; ceramic is glazed over a softer body. Check tile material, grout type, and surface finish under good bathroom lighting to spot differences.
Use pH-neutral or mild cleaners for both; avoid abrasive pads on glossy glazes.
- Porcelain: tougher, resists stains, can take stronger cleaners.
- Ceramic: more forgiving, glaze protects but chips easier.
- Grout: seals matter more than tile type.
- Testing: always patch-test first.
Natural Stone Types
Natural stone tiles—like marble, travertine, slate, and limestone—each demand different care because they’re porous, sensitive to acids, and can scratch or etch easily; you need tailored routines for safe cleaning. Know the stone type, avoid acidic cleaners, use pH-neutral products, and test in an inconspicuous spot. Routine stone maintenance prevents damage and preserves finish. Quick reference:
| Stone Type | Typical Sensitivity | Recommended Cleaner |
|---|---|---|
| Marble | High (etches) | pH-neutral |
| Travertine | High (porous) | Mild detergent |
| Slate | Medium (stains) | Neutral cleaner |
| Limestone | High (etches) | Gentle cleaner |
Grout And Sealant
Although tile material dictates basic cleaning needs, grout and sealant often determine what you can safely use and how often you’ll need to treat the floor. You should check grout discoloration and sealant durability before choosing cleaners.
Unsealed grout soaks stains; sealed grout resists moisture but wears down.
- Inspect grout lines for discoloration and soft spots.
- Test sealant with a water bead test to gauge durability.
- Use pH-neutral cleaners on sealed tiles; avoid acids on stone.
- Re-seal grout periodically if water no longer beads.
Addressing grout and sealant prevents damage and reduces deep-clean frequency.
How Grout Composition Changes Your Cleaning Method
Your grout type changes what cleaners and scrubbing you should use. Porous cement-based grout soaks up stains and needs gentler, pH-neutral cleaners and often sealing.
While nonporous epoxy grout stands up to stronger cleaners and more aggressive scrubbing. Knowing which you’ve got lets you pick the right products and avoid damage.
Porous Vs. Nonporous Grout
Ever wondered why some grout soaks up stains while other grout wipes clean? You’ll notice porous grout absorbs water and grime, so you’ll need gentler cleaners, longer dwell time, and sealing.
Nonporous grout resists staining; you can use stronger cleaners and quick rinses without damage.
- Identify: test with water—if it beads, it’s nonporous grout; if it darkens, it’s porous grout.
- Cleaner choice: mild detergent for porous grout; stronger alkaline cleaners for nonporous grout.
- Sealing: essential for porous grout; optional for nonporous grout.
- Maintenance: frequent gentle cleaning for porous grout; routine cleaning for nonporous grout.
Cement-Based Vs. Epoxy Grout
Knowing whether your grout is cement-based or epoxy changes what you’ll use and how you’ll clean it.
You’ll treat cement grout gently: it’s porous, so mop with pH-neutral cleaner, avoid bleach or high-acid solutions, and scrub with a soft brush to lift dirt without eroding joints. Seal cement grout regularly to protect it.
Epoxy grout is dense and stain-resistant, so you can use stronger cleaners and occasional bleach on stubborn mold, but still avoid abrasive pads that can scratch adjacent tiles.
For either type, test cleaners in an inconspicuous spot and ventilate the room while you work.
Tile-Cleaning Tools You Need for a Safe Deep Clean
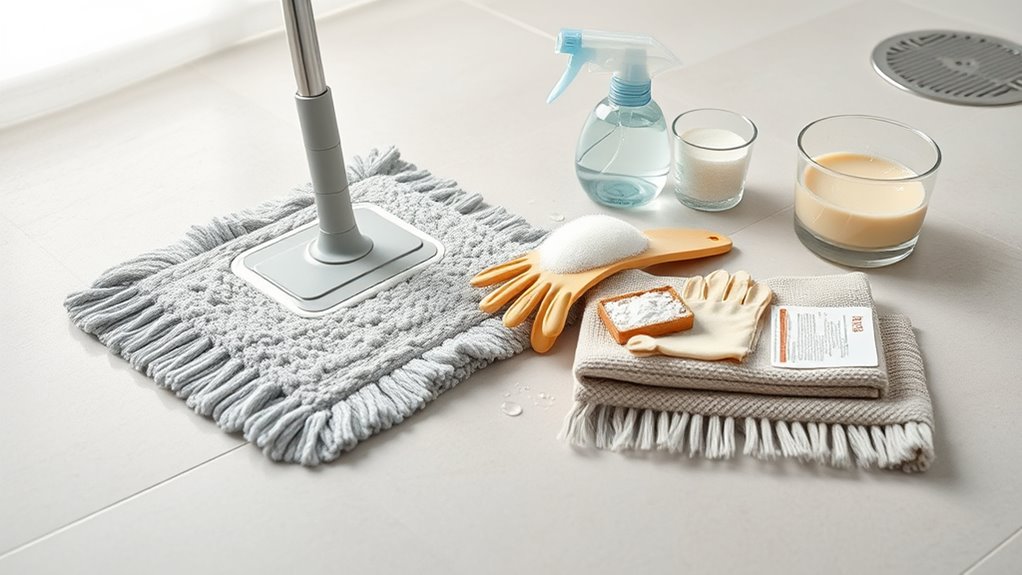
Before you start scrubbing, gather the right tools so you can work efficiently and safely: a stiff-bristled brush or grout brush, a mop and bucket, a microfibre cloth or sponge, rubber gloves, knee pads or a small stool, a grout scraper or old toothbrush, and a pH-appropriate cleaner (neutral for sealed tiles, mild acidic for mineral stains).
Consider how color schemes and tile patterns affect visual cleaning—darker grout hides grime, busy patterns mask streaks. Now pick tools for your tile type and comfort.
- Stiff-bristled brush/grout brush
- Mop, bucket, microfibre cloth
- Rubber gloves, knee pads/stool
- Grout scraper/toothbrush, pH-safe cleaner
Protect Vents, Fixtures & Finishes Before Cleaning
After you’ve gathered tools suited to your tile type, take a few minutes to shield nearby vents, fixtures, and finishes so cleaning won’t cause damage or extra work. Cover venting accessories with painter’s tape and lightweight plastic or mesh to keep grit and liquid out without blocking airflow completely.
Remove or wrap loose rugs, toilet-seat covers, and small decorative items. Use soft cloths or cushioning pads around metal fixtures and trim to prevent scratches from brushes or pads.
For sealed finishes, avoid harsh chemicals; for unsealed areas, keep cleaning solutions away from hardware and dry surfaces promptly for lasting fixture protection.
How to Test a Cleaner on a Small Tile Area First
Before you clean the whole floor, spot test the cleaner on a hidden tile and grout line.
Wait the recommended time, then wipe the area and check for discoloration, etching, or softening.
If the tile and grout look unchanged, you can proceed with confidence.
Spot Test First
If you’re using a new cleaner, start by applying it to a small, inconspicuous patch of tile and grout so you can confirm it won’t discolor, etch, or damage the surface. You’ll learn how the formula reacts before treating the whole floor. Test on both glazed and unglazed tiles, and try an eco-friendly alternative if you’re worried about harsh chemicals or historical tile preservation concerns.
- Clean the patch, apply the cleaner, wait the labeled time.
- Rinse thoroughly and blot dry.
- Inspect for color change, dulling, or residue.
- Proceed only if the test area shows no harm.
Check For Damage
1 simple check can save you from costly damage: pick a small, hidden tile and apply the cleaner exactly as you’ll use it on the floor. Wait the recommended time, rinse, and inspect for surface dulling, etching, or grout lift. You want to protect tile aesthetics and guarantee color matching remains intact.
| Observation | Action |
|---|---|
| No change | Proceed with cleaning plan |
| Slight dulling | Dilute cleaner, retest |
| Stain/lightening | Stop, choose gentler product |
| Grout damage | Repair grout, avoid product |
Record results and test multiple tiles if your floor mixes batches or finishes.
Safe Cleaners for Ceramic and Porcelain Floor Tiles
When you choose cleaners for ceramic or porcelain tiles, pick products that remove grime without stripping the glaze or damaging grout. You’ll want pH-neutral detergents for routine cleaning, diluted vinegar solutions sparingly for mineral buildup, and enzyme-based cleaners for organic stains removal.
Avoid harsh acids or ammonia that dull finishes. Consider applying hydrophobic coatings after cleaning to repel water and make maintenance easier.
Test any product in an inconspicuous spot first.
- pH-neutral tile cleaner
- Enzyme cleaner for organic stains
- Mild vinegar solution (diluted)
- Sealer/hydrophobic coating for protection
Cleaners to Avoid on Natural Stone Floors
You may have used pH-neutral detergents on ceramic tiles, but natural stone like marble, travertine, and limestone reacts differently to cleaners. Avoid acidic cleaners (vinegar, lemon) and high-alkaline bleaches; they etch, dull, or discolor stone.
Steer clear of abrasive powders or scouring pads that scratch surfaces. Don’t use ammonia or strong commercial degreasers that strip sealers and create chemical hazards.
Even “eco friendly solutions” can be risky if they’re acidic or abrasive—check labels. When in doubt, test a small hidden area or consult the manufacturer.
Preserve sealers and stone by choosing products formulated specifically for natural stone.
Make a Mild Homemade Bathroom Tile Cleaner
Because natural stone and grout need gentle care, make a mild homemade cleaner that cleans without harming sealers or finishes.
Mix warm water with a few drops of pH-neutral dish soap and a splash of white vinegar only for ceramic or porcelain—avoid vinegar on natural stone.
Test a hidden spot after any Tile installation or when you move Bathroom accessories.
Use a soft mop or microfiber cloth and rinse thoroughly to prevent residue.
- 1 gallon warm water
- 1–2 teaspoons pH-neutral dish soap
- 2 tablespoons white vinegar (skip for stone)
- Soft mop or microfiber cloth
Tile-Safe Degreasers: How to Degrease Before Scrubbing
If grease and soap scum have built up on your bathroom tiles, start with a tile-safe degreaser to loosen grime before any scrubbing—this prevents scratching and makes cleaning faster.
Choose a pH-neutral product labeled safe for ceramic, porcelain, or natural stone; test in a hidden spot to protect grout coloring.
Apply per instructions, let dwell to dissolve oils, then agitate with a soft brush.
Rinse thoroughly to remove residues that can feed mold, aiding mold prevention.
Repeat only if needed.
Wear gloves, ventilate the room, and avoid harsh acids or bleaches that harm tile finishes.
Remove Surface Dirt and Loose Debris Quickly
Before you wet the floor, sweep or vacuum to lift loose hair, dust, and grit that will otherwise turn into mud when scrubbed. You want a quick, thorough pass so cleaning solutions work on stains, not on debris.
Focus on corners and edges where mold prevention matters most; removing grit reduces wear that can force tile regrouting later.
- Use a soft-bristle broom for dry debris.
- Vacuum with a hard-floor attachment for hair.
- Tip dirt into a dustpan; don’t smear it across tiles.
- Wipe baseboards and thresholds before mopping to catch lingering grit.
Best Brushes and Tools for Grout Lines Without Damage
When you want clean grout without scratching tiles, pick tools that balance stiffness and gentleness: nylon-bristle grout brushes, old toothbrushes, and soft-bristled scrub brushes cut through grime without abrading surfaces.
While rubber grout rakes and silicone scrapers remove stubborn buildup from joints without chipping edges.
You’ll also want a microfiber cloth for final wiping and a small vacuum or toothbrush attachment to lift loosened debris.
Choose brushes with comfortable, non-slip handles to reduce pressure.
Pair tools with Eco friendly solutions and Pet safe cleaning products—vinegar alternatives or enzyme cleaners—to protect tiled surfaces, grout integrity, and household occupants.
How to Deep-Scrub Grout Without Eroding It
When you deep-scrub grout, pick a gentle cleaner like a pH-neutral grout solution or a baking soda paste to avoid stripping minerals.
Use soft-bristle brushes or a nylon scrub pad so you remove grime without abrading the grout lines.
After cleaning, apply a grout sealer to protect the pores and reduce the need for aggressive scrubbing later.
Choose Gentle Cleaners
Although grout can look like porous stone that needs heavy chemicals, you can deep-scrub it effectively with gentler cleaners that won’t eat away the binder or discolor the tiles. You’ll protect bathroom tile aesthetics and preserve tile color variations by choosing mild, pH-neutral options. Test cleaners in an inconspicuous spot first. Prefer mixes that lift dirt without bleaching.
- pH-neutral cleaner diluted per label — safe for most grout.
- Hydrogen peroxide spot treatment for stubborn stains, not full baths.
- Baking soda paste for targeted scrubbing, rinsed thoroughly.
- Commercial grout cleaner labeled non-bleaching and tile-safe.
Use Soft Bristle Tools
Now that you’ve picked gentle cleaners, pick tools that won’t wear the grout while you lift grime. Use brushes with soft bristles so you remove dirt without eroding the joint. Hold the brush at a low angle and move in short, controlled strokes along grout lines, letting gentle scrubbing do the work.
For tight spots, use a soft-bristle toothbrush or a nylon grout brush rather than metal or stiff options. Rinse frequently to check progress and avoid redepositing debris.
If grout resists, repeat gentle scrubbing instead of increasing force; patience protects the grout’s surface integrity.
Seal Grout After Cleaning
Because grout soaks up moisture and cleaners, sealing it after a deep clean locks out stains and slows future discoloration, so you’ll keep tiles looking fresh longer.
After scrubbing, let grout fully dry (48–72 hours), then apply a penetrating grout sealing product with a brush or applicator; wipe excess from tiles quickly to avoid residue.
For best results, test a small area first.
- Choose a water-based grout sealing product for easier cleanup.
- Work in small sections for even coverage.
- Follow manufacturer cure times before heavy use.
- Consider tile sealing where porous tiles need protection.
Use a Steam Cleaner Safely on Bathroom Floor Tiles
When you use a steam cleaner on bathroom floor tiles, follow the manufacturer’s instructions and test a small, hidden area first to make certain the heat and moisture won’t damage grout, sealant, or sensitive tile finishes.
Prioritize steam safety by wearing gloves and keeping steam away from skin and sealed edges. Work in short passes to avoid prolonged exposure that could weaken grout or affect tile durability.
Keep the room ventilated and mop up excess moisture promptly.
If you see discoloration, softened grout, or peeling sealant, stop and switch to a gentler cleaning method or consult a professional.
Steam Cleaner Settings and Limits for Tiles
After confirming your tiles and grout tolerate steam, set your cleaner to a low- or medium-steam setting and start with the gentlest option the unit offers. You’ll avoid damage and protect tile aesthetics while evaluating effectiveness.
After confirming tile and grout tolerance, begin on low–medium steam, move slowly, and test a small area first.
Move slowly, keep the nozzle 1–2 inches above grout lines, and test a small area. Increase steam only if soil won’t lift.
- Use low heat for glazed tiles and sensitive sealants.
- Choose medium for unglazed porcelain or ceramic.
- Avoid high heat on natural stone or recently applied grout sealing.
- Limit exposure time to prevent discoloration or loosening grout.
Baking Soda and Vinegar Alternatives for Tile Cleaning
If you prefer gentler or more effective options than baking soda and vinegar, several alternatives can tackle tile grime without risking grout damage or lingering odors. You can use diluted castile soap with warm water for regular cleaning; it’s gentle, effective, and one of the best eco-friendly alternatives.
Hydrogen peroxide (3%) works for stains and brightening grout—apply, wait a few minutes, then scrub and rinse.
For a DIY vinegar substitute, mix lemon juice with water and a touch of castile soap to get acidity without the strong smell.
Always test a small area first to protect finishes.
How to Lift Mold and Mildew Without Harsh Bleach
Because bleach can harm grout, finishes, and indoor air, you’ll want gentler ways to lift mold and mildew that still kill spores and remove stains.
You can scrub affected grout with a paste of baking soda and hydrogen peroxide, let it sit five minutes, then rinse.
For porous tiles, use a vinegar spray (avoid on natural stone).
Finish with a tea tree oil solution for lasting Mold prevention and improved air quality.
Consider professional tile resurfacing if stains persist.
- Baking soda + hydrogen peroxide paste
- White vinegar spray (not on stone)
- Tea tree oil rinse
- Steam cleaning
Remove Soap Scum From Bathroom Floor Tiles
When soap scum builds up on floor tiles, it traps dirt and makes surfaces slippery, so you’ll want to break it down before scrubbing. Use eco friendly solutions like diluted white vinegar or baking soda paste for DIY stain removal. Apply, let sit 10 minutes, then scrub with a soft brush. Rinse thoroughly and dry to prevent residue.
| Product | Use |
|---|---|
| Vinegar solution | Spray, wait, scrub |
| Baking soda paste | Spot treat, scrub |
Repeat weekly and test a hidden tile first to protect grout and finishes.
Tackle Hard-Water Stains and Mineral Deposits on Tiles
Start by spotting mineral buildup in corners, along grout lines, and near drains so you know where to focus.
Use gentle acidic cleaners like diluted vinegar or a commercial descaler on a small test patch, and scrub with a nylon brush to lift deposits.
Rinse thoroughly and wipe dry.
Then reduce future buildup by drying the floor after use and installing a water-softening solution or routine wipe-downs.
Identify Mineral Buildup Areas
Where do mineral streaks usually show up on bathroom tiles? You’ll spot mineral buildup where water pools, evaporates, or flows repeatedly, causing tile discoloration and rough patches. Walk the room, feeling for gritty areas and looking for chalky white or yellow stains. Note location, severity, and whether grout’s affected.
- Shower base and corners — frequent wet/dry cycles concentrate deposits.
- Around faucets and spouts — drips leave rings and streaks.
- Near drains — runoff paths show linear buildup.
- Along baseboards and thresholds — splashes and mop lines accumulate minerals.
Record hotspots before you clean so you target effort efficiently.
Use Safe Cleaning Solutions
Because mineral deposits can etch grout and dull tile finishes, pick cleaners that dissolve scale without harming surfaces or your lungs. You’ll use mild acids like diluted vinegar or citric solutions on porcelain and ceramic, avoiding sealed natural stone. Test a hidden spot, work with gloves, and ventilate to protect respiratory health. Treat stubborn spots with a paste, rinse thoroughly, and dry to support mold prevention and effective grout sealing later. Emotional reminder:
| Feel | Action |
|---|---|
| Frustration | Scrub gently |
| Relief | Stains lift |
| Pride | Grout looks new |
| Calm | Bathroom feels healthy |
Prevent Future Deposits
Now that you’ve removed existing scale with safe cleaners and dried tiles, focus on stopping mineral buildup before it returns. You’ll protect grout, tile shine, and bathroom decor by making small, consistent changes.
Improve ventilation, use water-softening strategies, and adopt quick routines that prevent hard-water stains.
- Wipe down tiles after showers to remove water droplets.
- Install or maintain ventilation systems to reduce humidity and drying time.
- Use a mild water softener or citrus rinse weekly on problem areas.
- Seal grout annually to block mineral penetration and ease cleaning.
Remove Stubborn Oil, Hair-Dye, and Rust Stains Safely
If tougher spots like oil slicks, hair-dye drips, or rust marks won’t budge with regular cleaner, you’ll need targeted methods and the right products to remove them without damaging your tiles or grout.
Use eco friendly solutions first: a baking soda paste lifts oil, while diluted white vinegar helps hair-dye if tested on an inconspicuous area.
Try eco-friendly fixes first: baking soda paste for oil, and diluted vinegar for hair-dye — spot-test first.
For rust, try a commercial rust remover rated safe for tiles or a lemon juice and salt poultice applied briefly.
Always spot-test, work gently with a soft brush, rinse thoroughly, and ventilate.
Wear gloves and avoid abrasive tools that scratch grout or glaze.
Restore Shine to Dull Ceramic and Porcelain Tiles
To bring back the sparkle on ceramic and porcelain tiles, start by removing surface residue with a gentle cleanser and microfiber mop so dirt and soap scum won’t dull the finish.
Focus on polishing grout lines next—use a stiff brush and a grout brightener or baking soda paste to lift grime and restore contrast.
Finish by rinsing thoroughly and buffing the tiles dry to seal in the shine.
Remove Surface Residue
Although dullness often looks like permanent wear, it’s usually just a film of soap scum, mineral deposits, or cleaning residue that you can remove with the right approach. Start by sweeping, then mop with warm water and a mild pH-neutral cleaner to lift surface residue.
For stubborn film, apply a 1:1 white vinegar solution (test first) or a commercial tile deglazer. Scrub gently with a microfiber pad, then rinse thoroughly. Finish by drying to prevent new deposits.
- Sweep and vacuum debris.
- Use pH-neutral cleaner and warm water.
- Treat film with vinegar or deglazer.
- Rinse and dry completely.
Polish Grout Lines
Want those grout lines to look new again? You can refresh them with grout polishing to restore contrast and protect against stains. Start by cleaning thoroughly, then apply a grout polish or sealer with a small brush. Use a rotary grout brush for stubborn areas, working in short sections and wiping excess immediately. For surrounding surfaces, use gentle tile polishing cloths so ceramic and porcelain tiles keep their shine. Rinse and dry fully. Repeat annually or as needed. Quick chart for tools and steps:
| Step | Tool | Time |
|---|---|---|
| Clean | Brush | 10–15 min |
| Polish | Sealer | 5–10 min |
| Buff | Cloth | 5 min |
Deep Cleaning Textured or Anti-Slip Bathroom Tiles
Because textured or anti-slip tiles trap grime in crevices, you’ll need tools and techniques that reach into grooves without damaging the surface. Use eco friendly cleaning solutions like diluted vinegar or gentle enzyme cleaners for DIY stain removal. Work in small sections, scrub with soft-bristled brushes, and rinse thoroughly to avoid residue. Dry with a microfiber mop to prevent slips.
- Pre-soak with warm water and cleaner for 5–10 minutes.
- Agitate grout and grooves with a nylon brush.
- Rinse repeatedly, changing water often.
- Spot-treat stubborn areas with a paste of baking soda and water.
When to Reseal Grout and How to Choose a Sealer
You’ll know it’s time to reseal grout when water stops beading and stains soak in or the grout looks crumbly.
Pick a sealer rated for bathroom use—look for mold- and mildew-resistant, water-based options for easy application and low odor.
Always test the sealer on a small patch and follow the manufacturer’s cure time for best protection.
When To Reseal
If grout looks dull, crumbles at the edges, or soaks up spills instead of beading them, it’s time to reseal. Regular checks every 1–2 years in high-traffic or wet areas (and every 2–3 years elsewhere) keep grout protected and easier to clean.
Inspect under good bathroom lighting and after running ventilation systems so grout is dry. Reseal sooner if you see stains, mold recurrence, or water penetration.
- Test small area with water beading.
- Note grout age and traffic.
- Check corners and shower thresholds first.
- Record reseal dates for maintenance.
Choosing The Right Sealer
Wondering which sealer will actually protect your grout without trapping moisture? You’ll reseal when water stops beading or grout darkens after cleaning.
Pick a penetrating sealer for porous grout and a topical sealer for glossy tiles, matching sealer longevity to foot traffic—higher longevity costs more but reduces frequency.
Test compatibility: avoid products that cause chemical interactions with existing sealers or cleaners.
Always apply on clean, dry grout, follow cure times, and ventilate.
Do a small patch first to confirm appearance and adhesion.
Keep manufacturer data for reapplication intervals and safe-cleaning instructions.
How to Reseal Natural Stone and Other Porous Tiles
Want your stone and other porous tiles to stay stain- and water-resistant longer? You’ll clean, dry, and test a small area first to avoid natural polish loss or stone etching. Choose a penetrating sealer suited for your tile, following manufacturer directions. Apply evenly with a clean microfiber or brush, let penetrate, then wipe excess to prevent buildup.
Clean, test, then apply a penetrating sealer evenly—wipe excess, follow directions, cure fully, and recheck annually.
- Test a hidden spot for compatibility.
- Apply two thin coats if recommended.
- Wait full cure time before moisture exposure.
- Recheck annually and spot-seal high-traffic areas as needed.
You’ll preserve appearance and reduce long-term damage.
How Often to Deep Clean vs. Do Regular Maintenance
Although the exact schedule depends on traffic and finish, you should deep clean tile floors less often than you perform routine maintenance. You’ll deep clean when dirt, soap scum, or grout coloring buildup won’t respond to spot treatments — typically every 3–12 months depending on use.
High-traffic or wet bathrooms need more frequent deep work; guest baths can wait longer.
Regular maintenance removes surface soil and preserves sealers so deep cleaning doesn’t strip finishes or damage tile patterns. Track when routine care no longer restores appearance, then schedule a thorough, gentle deep clean before stains set.
Set Up a Simple Weekly Tile-Care Routine
When you keep up with a short, focused weekly routine, your bathroom tile stays cleaner longer and you’ll need deep cleans less often. You’ll prevent grime buildup, minimize grout staining, and preserve color matching between tiles and grout. Do quick tasks that take minutes but add up.
- Sweep or vacuum to remove dust and hair.
- Mop with a pH-neutral cleaner, wringing the mop well.
- Wipe splash-prone areas and fixtures after use.
- Inspect grout lines and spot-treat mild discoloration promptly.
Stick to this plan, and you’ll extend tile life while keeping maintenance simple.
Spotting Early Grout Failure: Signs and Next Steps
Watch for visible cracks or gaps and areas where grout looks loose or is crumbling, since those are the first signs grout is failing.
If you spot water stains or mold near grout lines, you’ve likely got moisture getting through.
Act quickly to clean, dry, and repair those spots to prevent bigger damage.
Visible Cracks Or Gaps
If you spot hairline cracks or small gaps in grout lines, act quickly—these are often the first signs of grout failure and let water reach the substrate. You should inspect the area, keep it dry, and plan minor repairs before mold forms.
For crack repair and gap filling, use a matching grout or flexible sealant designed for bathrooms. Follow these steps:
- Clean the joint and remove loose debris.
- Dry thoroughly and apply sealant or grout.
- Smooth and tool the repair for a neat finish.
- Allow full cure before exposing to water or foot traffic.
Loose Or Crumbling Grout
Beyond small cracks or gaps, grout can deteriorate more broadly—loose or crumbling grout feels powdery and pulls away from joints, letting water and dirt penetrate beneath tiles. You should inspect seams for movement, test loose bits with a fingernail, and note grout discoloration that signals aging. Replace failing grout promptly to protect subfloor and aid mold prevention. Reseal intact grout after repairs, and use flexible grout where movement occurs. Follow manufacturer cure times and ventilate during work. Use mild cleaners; avoid harsh scraping that damages tile edges. Table for quick checks:
| Check | Action |
|---|---|
| Powdery grout | Remove, regrout |
| Pulling away | Reseal edges |
| Discolored areas | Clean, monitor |
| Loose joints | Replace grout |
| Frequent dampness | Improve ventilation |
Water Stains Or Mold
Noticing damp spots or fuzzy black growth along grout lines? You’re seeing early signs of grout failure—water stains and mold need quick action. Address them to protect tile and subfloor.
- Inspect: probe grout for softness; smell musty odors indicating trapped moisture.
- Clean: scrub stains with a vinegar solution or diluted bleach for persistent mold, then rinse thoroughly.
- Dry: speed drying with fans or a dehumidifier to prevent recurrence and aid mold prevention.
- Repair: regrout or seal cracks; replace damaged sections to stop leaks and eliminate hidden water stains.
Act fast to avoid bigger repairs.
Repair Cracked Grout Safely (Step-by-Step)
When grout starts to crack, act promptly to prevent water damage and mold; you’ll save time and expense by repairing it correctly.
First, remove loose grout with a grout saw, following tile patterns so you don’t damage edges. Vacuum debris, then clean with a mild detergent and let dry thoroughly.
Mix matching grout, considering grout color to blend with existing lines. Apply grout with a rubber float, pressing into joints and keeping excess off tiles.
After 15–30 minutes, wipe with a damp sponge, shaping joints.
Seal cured grout per manufacturer instructions to protect against moisture and stains.
When and How to Replace Severely Damaged Tiles
If grout repair won’t stop loose, cracked, or popped tiles, it’s time to replace the damaged pieces to prevent further water intrusion and structural problems. You’ll remove broken tiles, clean the substrate, and match replacements to existing bathroom decor so the repair blends.
For proper tile installation, use the right adhesive, spacers, and grout, letting each layer cure fully before traffic.
- Remove grout and broken tile carefully.
- Inspect and repair the subfloor or backer board.
- Set replacement tile with appropriate adhesive.
- Regrout, seal, and check alignment with surrounding tiles.
Protect Your Health: PPE and Safe Cleaning Habits
Before you start scrubbing, put on gloves, eye protection, and a mask to keep chemicals and grit off your skin and out of your lungs.
Open windows and run a fan to keep fresh air moving while you work.
Taking these simple steps will cut your exposure and make the job safer.
Wear Proper PPE
Though cleaning tiles seems simple, you should gear up with proper personal protective equipment to protect your skin, eyes, and lungs from harsh cleaners and debris. You’ll want gloves, goggles, and a mask when trying DIY hacks or testing eco-friendly solutions to avoid irritation or chemical exposure.
Pick nitrile gloves for chemicals, splash-proof goggles, and a P100 or N95 respirator for strong cleaners. Consider knee pads for long scrubbing sessions.
- Gloves — nitrile, intact fit
- Goggles — splash-proof seal
- Respirator — P100/N95 for fumes
- Knee pads — protect joints and posture
Ventilate Work Area
You’ve already put on your gloves, goggles, and respirator, so open windows and doors to create a steady flow of fresh air before you start scrubbing.
Position a box fan in a doorway or window to pull damp, chemical-laden air out while bringing cleaner air in—this boosts bathroom ventilation and lowers inhalation risk.
Avoid using strong chemicals in small, closed spaces; schedule deep cleaning when you can keep the room ventilated for at least 30 minutes after rinsing.
Monitor humidity; wipe up pooled water to prevent mold.
Good air circulation protects your lungs and helps cleaning products work safely and effectively.
Ventilation Tips for Safer Tile Cleaning
When you’re working with strong cleaners or scrubbing grout, keep windows and doors open and run an exhaust fan or portable fan to push fumes out and fresh air in. You’ll boost air circulation and improve odor control while protecting your lungs.
Position fans to create a clear airflow path and avoid trapping fumes in corners. Wear a mask for extra protection if ventilation is limited. Check that vents aren’t blocked and wipe up spills promptly to reduce lingering smells.
Position fans to push fumes out, wear a mask if ventilation is limited, and wipe up spills to prevent lingering odors.
- Open cross-ventilation
- Use timed exhaust fan
- Place portable fan near exit
- Monitor air quality with a window ajar
Cleaning Tiles in Rentals or Shared Bathrooms (Rules & Tips)
If you’re cleaning tiles in a rental or shared bathroom, follow house rules, respect roommates’ schedules, and use products allowed by your lease or building policies.
Ask about preferred cleaners and avoid strong chemicals if others are sensitive.
Schedule work when few people need the space, and leave clear notes about drying times.
Use gentle, lease-approved tools to protect grout and tile color contrast; test a hidden spot first.
Keep bathroom lighting on while you work to spot missed grime and slippery areas.
Store supplies neatly after, and report any damage promptly to avoid disputes.
When to Hire Professional Tile Cleaning vs. DIY
Though routine scrubbing can keep tiles looking fine, there are clear signs that you should call in a pro: persistent grout discoloration, deep-set stains, extensive mold, cracked or loose tiles, or if the job requires heavy-duty chemical or steam treatments beyond what’s safe for you to handle.
You’ll choose pro service when health risks, warranty concerns after tile installation, or preserving bathroom decor value matter.
DIY works for light grime, routine sealing, or small grout touch-ups. Consider these quick criteria:
- Safety or mold remediation needed
- Warranty or recent tile installation issues
- Stubborn, deep stains
- Large area or structural damage
Common Mistakes That Damage Tiles : And How to Avoid Them
Because tile looks durable, you might be tempted to tackle cleaning and repairs aggressively, but certain mistakes can quickly cause permanent damage. Don’t use abrasive powders or metal brushes—they scratch glaze and ruin tile aesthetics.
Tiles look tough, but aggressive cleaning can cause lasting damage—avoid abrasives and metal brushes to protect the finish.
Avoid acidic cleaners on natural stone; they etch surfaces and clash with bathroom decor. Never mix cleaners; toxic fumes and damaged grout can result.
Skip high-pressure washers indoors; they lift grout and loosen tiles. Test any new product in an inconspicuous spot first.
Use soft tools, pH-neutral cleaners, and gentle sealers to protect finishes and preserve both function and appearance.
Troubleshooting Stubborn Tile Cleaning Problems
Even with careful technique, some stains and grime refuse to budge, so you’ll need targeted fixes rather than general cleaning. Identify the stain type—mildew, soap scum, rust—then choose an eco-friendly cleaning approach like vinegar paste or baking soda. Test a small area first.
For deep grout issues or cracked tiles, consider DIY tile repair to avoid spreading damage. Use a stiff brush, patience, and repeat treatments. If stains persist, call a professional to prevent permanent harm.
- Mildew: vinegar spray, scrub, dry.
- Soap scum: baking soda paste, rinse.
- Rust: commercial remover, spot test.
- Grout cracks: epoxy or replace tile.
Frequently Asked Questions
Can Steam Cleaning Spread Mold Spores to Other Rooms?
Yes — steam cleaning can disperse mold spores if you agitate contaminated surfaces; you’ll increase air circulation and loft spores into the room. You should contain the area, ventilate outward, and use HEPA filtration to reduce spread.
Can Tile Cleaners Damage Underfloor Heating Systems?
Yes, they can — you shouldn’t let harsh cleaning chemicals sit on tiles, or they might cause underfloor damage by corroding wiring, sensors, or seals; always use compatible, manufacturer-approved cleaners and dilute as directed.
Are Essential Oils Safe to Add to Homemade Cleaners?
Yes — you can add essential oils to homemade cleaners, but don’t overdo it: they can irritate skin, damage some surfaces, and affect pets, so dilute properly, test surfaces, and avoid citrus oils on stone or heated flooring.
How to Safely Dispose of Old Grout and Tile Debris?
You should bag grout removal debris securely, wearing gloves, a mask and eye protection; wet down dusty fragments, double-bag sharp pieces, label for disposal, and follow local regulations or hazardous-waste guidelines for debris disposal.
Can Pets Walk on Freshly Cleaned/Sealed Tiles Immediately?
About 70% of sealers cure within 24 hours, so you shouldn’t let pets on freshly sealed tiles immediately; you’ll want to keep them off for at least 24–48 hours for pet safety, avoiding fumes and tackiness.
Conclusion
You’ve got the know-how to deep clean bathroom floor tiles safely, so don’t put it off—regular care keeps grout bright and tiles long-lasting. Start with the checklist, pick cleaners matched to your tile and grout, and use the right tools to avoid damage. Renting or sharing? Follow rules and communicate cleaning plans. For really stubborn issues, consider a pro. Ready to enjoy that fresh, spotless floor and the peace of mind that comes with it?