How to Clean White Porcelain Floor Tiles Easily
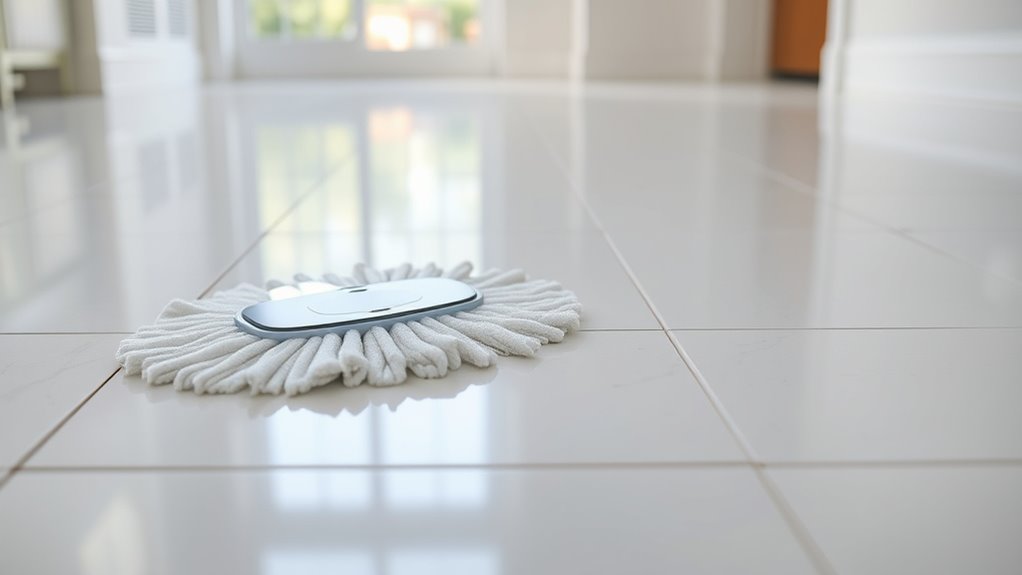
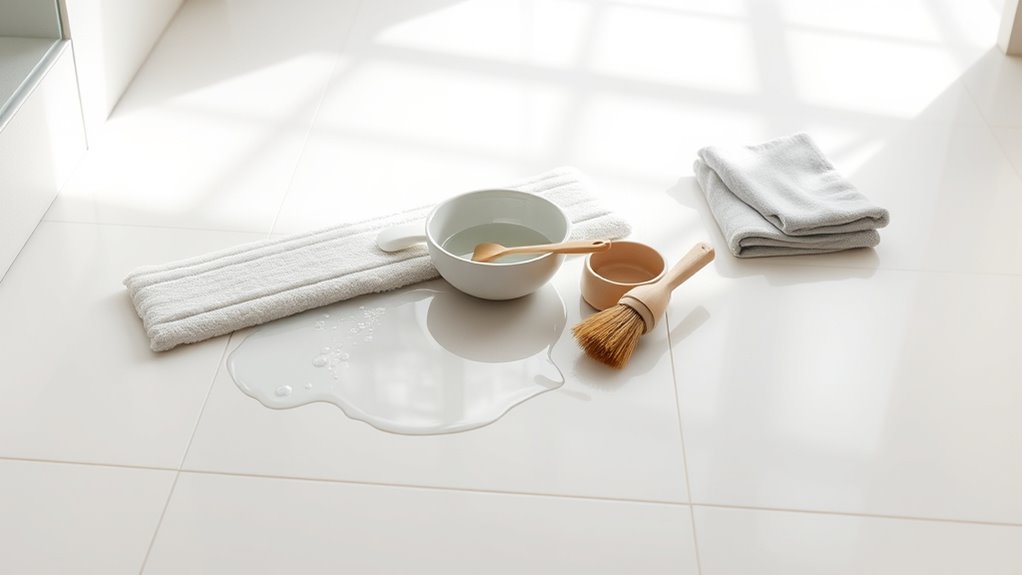
Keep grout and tiles bright by sweeping or vacuuming daily to remove grit, then mop small sections with warm water and a pH-neutral cleaner using a microfiber mop, rinsing and changing water often. Spot-treat marks with a baking soda paste, rinse, and dry with a microfiber cloth to avoid streaks. Seal grout every 1–3 years and test cleaners on a hidden tile; follow these steps and you’ll find simple fixes and deeper tips if you want more.
Quick 3-Step Clean for White Porcelain Tiles
When you’re short on time but want spotless white porcelain, this quick 3-step method gets you there efficiently.
First, sweep or vacuum thoroughly to remove grit that scratches porcelain and reduces color contrast between tiles and grout.
Second, mop with a mild pH-neutral cleaner diluted per directions; use a microfiber mop and change water often so you’re not spreading dirt.
Third, spot-treat stubborn marks with a paste of baking soda and water, scrub gently, then rinse.
Once dry, inspect grout lines and consider grout sealing if they’re porous to maintain brightness and ease future cleaning.
Why White Porcelain Shows Dirt More
White porcelain shows dirt more because its bright, reflective surface makes contrasts obvious, so even small smudges, dust, or grout discoloration stand out against the pale backdrop. You notice marks faster on white because light reflects more, highlighting texture, residue, and tiny color variations. During tile installation, uneven grout or adhesive stains become visible immediately. You’ll also see wear patterns sooner on high-traffic areas. Use placement and grout choices to minimize visibility, and expect more frequent spot checks. Below is a simple visual breakdown:
| Factor | Cause | Effect |
|---|---|---|
| Reflection | High | Shows dust |
| Grout | Contrast | Highlights lines |
| Installation | Errors | Visible stains |
| Wear | Traffic | Uneven look |
Daily Quick-Touch Routine for White Porcelain Floors
Keep a daily sweeping habit so grit doesn’t scratch the glaze and spills don’t set.
When you spot messes, use a microfiber cloth and a little cleaner for a fast spot-wipe that prevents staining.
Finish with a quick drying method—like a dry mop or towel—to avoid water spots and streaks.
Daily Sweeping Habit
Although it takes just a few minutes, sweeping your white porcelain floors every day prevents grime and grit from building up and keeps the surface looking bright. You’ll sweep along baseboards and under furniture where particles hide, using a soft-bristle broom or microfiber dust mop to avoid scratches.
Regular sweeping reduces the chance of color staining from tracked-in dirt and limits abrasive wear that can expose grout. Combine this habit with periodic grout sealing to protect joints, but keep daily work quick: sweep thoroughly but briskly, empty the dustpan, and store your tools so you’ll repeat the routine tomorrow.
Spot Wipe Technique
When you finish sweeping, grab a microfiber cloth and a small spray bottle of gentle cleaner to tackle spots before they set in. You’ll act fast: mist, wipe, and buff any spill or scuff to keep white porcelain bright.
Focus on grout lines and consider grout sealing regularly to prevent stains; sealed grout cuts cleaning time. Use light pressure and circular motions; avoid abrasive scrubs.
For extra shine, integrate polishing techniques sparingly after spot cleaning. Quick, consistent touch-ups stop buildup and preserve tile finish.
- Mist the spot
- Wipe with microfiber
- Buff gently
Quick Drying Method
If you want spotless white porcelain every day with minimal fuss, adopt a quick-dry routine that removes moisture fast and prevents streaks.
You’ll dry floors immediately after light cleaning: mop with a damp microfiber, then follow with a dry microfiber or squeegee. Work in sections along grout lines and tile patterns so water doesn’t pool or highlight dirt.
Use a color contrast cloth—light for tiles, dark for grout—to spot-check and avoid cross-contamination.
Finish by airing the room or using a fan for faster evaporation. This habit keeps white porcelain bright, streak-free, and ready for daily use.
Best Tools for Daily and Deep Cleaning

To keep white porcelain floor tiles looking their best, you’ll want a small set of reliable tools designed for both quick touch-ups and deeper scrubbing. You’ll avoid cleaning myths by choosing appropriate gear that respects tile durability and finish.
Essential items:
- Microfiber mop for daily dry and damp cleaning.
- Soft-bristle brush or grout brush for targeted scrubbing without scratching.
- Sponge and bucket for controlled rinsing and spot work.
You’ll also use a rubber squeegee to remove excess water after mopping and a handheld vacuum for crumbs. Store tools dry to prevent odors and prolong performance.
Safe Cleaners That Won’t Dull Porcelain
Now that you’ve picked the right tools, pick cleaners that protect the tile’s glaze and keep white porcelain bright. You’ll want pH-neutral, non-abrasive solutions labeled safe for porcelain; they maintain color contrast between grout and tile and won’t micro-scratch the surface.
For everyday upkeep, diluted neutral cleaner or a manufacturer-recommended product works well.
For focused stain removal, use products formulated for porcelain that target specific marks—iron, oil, or dye—without harsh acids or bleach.
Always test in an inconspicuous spot, rinse thoroughly, and dry to avoid residue. That approach preserves sheen and prevents dulling over time.
DIY Cleaners Using Household Ingredients
While you’ll still want to use pH-neutral products for regular care, simple household ingredients can handle many stains and routine cleaning without risking the glaze. You’ll remove grit and pet hair first with a soft broom or vacuum (no beater bar).
Try these DIY options sparingly to avoid color fading or residue buildup:
- Warm water with a few drops of dish soap for daily mopping.
- Vinegar (1/2 cup per gallon) for mineral spots — rinse well after.
- Baking soda paste for grout or stubborn marks — scrub gently, then wipe.
Always test a small area before full use.
Weekly Deeper-Clean Checklist for White Porcelain
Because weekly care prevents buildup, set aside 20–30 minutes to give your white porcelain floors a focused, deeper clean each week.
Start by dry-mopping to remove grit that can dull the finish. Vacuum corners and along grout lines, paying attention to areas where color contrast hides dirt.
Mix a mild pH-neutral cleaner with warm water, mop in sections, and rinse with clean water to avoid streaks.
Inspect grout and edges from tile installation for loosening or residue; scrub grout gently with a soft brush if needed.
Finish by drying with a microfiber cloth to restore shine and prevent water spots.
Monthly Maintenance Tasks to Prevent Grime Buildup
Keep spills from setting by wiping them up immediately so stains and sticky residue don’t build up.
You should sweep or vacuum high-traffic areas regularly to remove grit that scratches the glaze.
Once a month, give the floor a thorough damp mop with a mild cleaner to lift settled grime.
Clean Spills Immediately
If a spill happens, wipe it up right away so it can’t soak into grout or leave a stain on your white porcelain tiles. You’ll prevent stubborn staining and make stain removal simple.
Use a clean cloth and mild cleaner; blot, don’t rub, to avoid spreading residue into grout. For best results, follow these quick steps:
- Blot excess liquid with paper towel or cloth.
- Clean remaining trace with a pH-neutral cleaner and warm water.
- Dry and inspect; if stain persists, treat per manufacturer guidelines and consider grout sealing to reduce future absorption.
Act fast and you’ll keep tiles pristine.
Sweep And Vacuum Regularly
How often should you sweep and vacuum to keep white porcelain tiles looking their best? Aim for daily light sweeping and a thorough vacuum twice a week to prevent grit and dust from dulling the surface.
You’ll protect grout lines and avoid abrasive wear that ruins your color coordination between tiles and décor. Use a soft-bristle broom and a vacuum with a hard-floor setting to pull debris without scratching.
Regular maintenance boosts lighting enhancement by letting natural and artificial light reflect cleanly. Stick to this simple routine, and you’ll minimize the need for stronger monthly cleaning efforts.
Monthly Deep Damp Mop
Why give your white porcelain tiles a monthly deep damp mop? You’ll stop grime buildup, revive shine, and spot issues before they worsen. Use a microfiber mop with warm water and a mild pH-neutral cleaner. Focus on grout lines and corners; monthly attention prolongs grout sealing and delays costly tile replacement.
Follow this simple routine:
- Pre-sweep, then damp mop along grout lines.
- Rinse mop frequently and change water mid-clean.
- Dry with a clean towel to prevent streaks.
If grout looks worn, reapply grout sealing. If cracked tiles appear, plan timely tile replacement to protect surrounding areas.
How to Mop White Porcelain Floors Correctly
Once you’ve swept or vacuumed to remove grit, mop white porcelain floors with a gentle, pH-neutral cleaner and warm water to avoid dulling or etching the surface.
Work in small sections, rinsing the mop often so dirt doesn’t smear and cloudy residue won’t form. Use a microfiber mop for streak-free results, and change water when it looks dirty.
Pay attention to grout color—use a soft brush on stained grout before mopping. For visible color contrast between tile and grout, consider a second rinse with clean water to restore brightness.
Dry with a clean microfiber cloth to prevent water spots.
Vacuum, Broom, or Dust Mop: Which to Use?
For daily upkeep, grab a dust mop to quickly lift fine dust and pet hair without scratching the glaze.
Use a vacuum when you need to remove deep debris, grit, or settled dirt from grout lines.
Choosing the right tool keeps your white porcelain looking bright and prevents scratches.
Vacuum For Deep Debris
Wondering whether to grab a vacuum, broom, or dust mop for your white porcelain floor? You’ll want a vacuum for deep debris—especially where grout traps dirt and pet hair. A canister or stick with a soft-brush head protects finish and preserves color contrast and tile patterns. Use these tips:
- Vacuum edges and grout lines slowly to lift embedded dirt.
- Choose suction power that won’t scatter fine dust on white tiles.
- Empty the canister frequently to avoid redepositing debris.
Vacuuming first gives a cleaner base before any wet cleaning, reducing scratching and improving final shine.
Dust Mop For Daily
If you want a quick, low-effort way to keep white porcelain tiles looking pristine between deeper cleans, use a microfiber dust mop—it’s gentle on glaze, picks up fine dust and pet hair, and covers large areas fast.
You should dust mop high-traffic zones daily and less-used rooms every few days to maintain appearance without wear. Dust mops glide smoothly, reduce scratches from grit, and cut down on the need for frequent wet mopping.
Combine with spot checks and a scheduled deep vacuum or mop session weekly. Adjust cleaning frequency based on pets, kids, and foot traffic for best results.
Spot-Cleaning Spills Immediately: Step-by-Step
When a spill happens, act quickly to prevent stains and grout discoloration. Blot liquid with a microfiber cloth, don’t rub — that spreads the mess. For sticky or colored spills, use a mild pH-neutral cleaner diluted per label instructions.
- Blot excess, then spray cleaner lightly.
- Agitate gently with a soft cloth, rinse with clean water.
- Dry thoroughly to avoid grout darkening.
You’ll keep stain removal efficient by addressing spills immediately and sticking to regular cleaning schedules.
For stubborn spots, repeat steps once; avoid abrasive tools that could harm the tile surface.
Removing Scuff Marks Without Damaging the Glaze
When you spot scuff marks on white porcelain, start with a gentle eraser or melamine sponge to lift them without scratching the glaze.
If that doesn’t work, try a nonabrasive cleaner—like a mild dish soap or a pH-neutral tile cleaner—applied with a soft cloth.
After removing marks, protect the surface with occasional polishing or a manufacturer-approved sealant to reduce future scuffs.
Gentle Eraser Techniques
Although scuff marks on white porcelain tiles can look stubborn, you can often lift them quickly with a gentle eraser without harming the glaze. Just rub lightly, keep the surface clean, and test an inconspicuous spot first.
Use eraser techniques and gentle scrubbing to avoid scratching. Work in small circles, apply minimal pressure, and wipe residue with a damp microfiber cloth. If marks persist, repeat rather than increase force.
- Choose a soft vinyl or melamine eraser.
- Clean area of dust beforehand.
- Rinse and dry to inspect results.
Stop if glaze dulls or micro-scratches appear.
Nonabrasive Cleaning Solutions
If the eraser method doesn’t fully remove scuffing or you want to avoid any rubbing at all, nonabrasive cleaners offer effective alternatives that protect the glaze.
You can apply a mild, pH-neutral cleaner diluted per label instructions, let it sit briefly, then blot with a soft microfiber pad.
For stubborn marks, try a baking soda paste rinsed thoroughly to prevent color staining.
Avoid acidic or alkaline products and harsh scrubbing tools that risk tile cracking.
Always test cleaners in an inconspicuous spot first.
Rinse completely and dry to restore shine without compromising the porcelain surface.
Protective Finishing Tips
Because scuff marks sit on the surface, you can remove them without harming the glaze by using gentle, nonabrasive techniques and a light touch. Start with a dry eraser or soft cloth, then try a mild cleaner. After cleaning, add a Protective coating to reduce future marks but avoid thick films that alter shine. Consider a careful Sealant application on grout lines only. Follow these steps:
- Rub scuffs lightly with a melamine sponge, testing in a corner.
- Use diluted dish soap for residue, rinsing thoroughly.
- Buff dry and apply a thin sealant or coating sparingly, following manufacturer instructions.
How to Lift Grease and Oil Stains From Tiles
When grease or oil lands on white porcelain, act quickly to prevent dark, stubborn spots; you can usually lift fresh spills with the right approach and a few common cleaners. Blot excess with paper towels—don’t rub.
Sprinkle baking soda or cornstarch to absorb oil stains, wait 15–30 minutes, then sweep or vacuum.
Mix warm water with a few drops of dish soap and scrub gently with a soft brush for grease removal.
For persistent marks, apply a paste of baking soda and hydrogen peroxide, let sit 10 minutes, then rinse.
Dry thoroughly to check results; repeat if needed.
Removing Water Spots and Mineral Deposits
For light water spots, mix equal parts white vinegar and water and wipe the tiles with a soft cloth. Then rinse thoroughly.
For stubborn mineral deposits, make a paste of baking soda and water, apply it to the spot, let it sit a few minutes, and scrub gently with a nonabrasive pad. Rinse and dry the area to prevent new spots from forming.
Vinegar And Water Mix
Although acidic, a simple vinegar-and-water mix is one of the most effective, budget-friendly ways to dissolve mineral deposits and water spots on white porcelain floor tiles. You’ll mix equal parts white vinegar and warm water, minding vinegar safety: avoid prolonged contact and ventilate the area. Test a hidden spot first.
- Apply solution, let sit 5–10 minutes.
- Gently scrub with a soft brush or microfiber.
- Rinse thoroughly with clean water, dry with a towel.
Pay attention to water temperature—warm water boosts effectiveness but don’t use boiling. Repeat only as needed to avoid grout damage.
Baking Soda Paste
If mineral deposits or stubborn water spots won’t budge with vinegar alone, make a thick baking soda paste to gently abrade and lift residues without scratching white porcelain. Mix baking soda with just enough water to form a spreadable paste, apply to spots, and let sit 10–15 minutes.
Gently rub with a soft cloth or nonabrasive pad, rinse thoroughly, and dry to prevent new mineral rings. Test a hidden tile to verify the paste won’t affect glazing techniques or sheen.
Allow for tile expansion after deep cleaning by avoiding excess water near grout and letting tiles fully air dry.
Eliminating Yellowing and Discoloration on White Tiles
When yellowing and discoloration show up on your white porcelain tiles, tackle them quickly to prevent stains from setting and becoming harder to remove. Inspect for color fading and surface film; scrub with a mild, pH-neutral cleaner and warm water. Avoid abrasive pads that scratch the glaze.
For stubborn spots, apply a diluted hydrogen peroxide solution briefly, then rinse.
- Test a hidden area first.
- Use soft brushes for edges.
- Dry thoroughly to prevent mildew.
Keep sunlight exposure moderate to reduce color fading, and monitor grout staining separately to prevent cross-contamination.
Deep-Cleaning Grout Between White Porcelain Tiles
Before you start, you’ll want to clear loose dirt and protect nearby surfaces and skin with gloves and a mask.
Use a baking soda paste or a commercial grout cleaner and scrub with a stiff brush to lift embedded grime.
Rinse thoroughly and let the grout dry before sealing to keep it looking bright longer.
Prep And Protect
Want your grout to look as bright as the tile? Start by prepping and protecting the area before deep grout cleaning.
Identify tile patterns to plan where to work and avoid uneven wear. Remove loose dirt, sweep, and vacuum thoroughly.
Protect baseboards and nearby surfaces with painter’s tape and plastic. Test any cleaner on an inconspicuous spot.
Apply grout sealing around fixtures and junctures after prep to prevent future stains.
Follow this quick checklist:
- Clear and vacuum the floor.
- Mask edges and delicate surfaces.
- Spot-test cleaners and plan grout sealing timing.
Deep Grout Cleaning
Although grout can look intimidating, you can restore its brightness with a few focused steps and the right cleaners. Start by sweeping and vacuuming to remove loose dirt.
Then apply a pH-neutral cleaner or a baking soda paste to grout lines. Let sit 5–10 minutes, scrub with a stiff nylon brush, and rinse thoroughly.
For stubborn grout discoloration, use an oxygen bleach solution, following product instructions and testing a small area first.
Blot excess moisture and let grout dry fully before sealing to prevent future stain removal needs.
Repeat as necessary, working in small sections for best results.
Sealing Grout: When and How to Do It
Sealing grout keeps it stain-resistant and easier to clean, so you’ll want to know when to apply it and how to do the job correctly. You should seal grout after deep cleaning and once it’s fully dry—typically 24–48 hours.
Grout sealing protects porous joints from spills and dirt, prolonging whitening and reducing maintenance.
- Choose a penetrating sealer suited for porcelain tile grout.
- Apply evenly with a small brush, wiping excess from tiles.
- Allow cure time per manufacturer instructions before foot traffic.
Reapply every 1–3 years or sooner in high-traffic or wet areas.
Steam Cleaning: Is It Safe for White Porcelain?
You can use steam on white porcelain, but you need to take into account how high heat and pressure affect the glaze. Keep steam settings within manufacturer-recommended temperatures—usually low to medium—to avoid softening or cracking the glaze.
Test a hidden area first to make sure the finish holds up.
Steam Impact On Glaze
When used properly, steam cleaning can safely lift grime from white porcelain tiles without harming the glaze, but it’s important to control temperature, pressure, and dwell time so you don’t cause micro-cracks or dulling. You’ll preserve porcelain durability and minimize negative glaze impact by following careful techniques.
Consider these steps:
- Test a discreet area to check for sheen change and adhesion.
- Use low pressure and quick passes to avoid prolonged moisture exposure.
- Wipe surfaces immediately after steaming to remove loosened soil and prevent mineral spotting.
If you maintain control and test first, steam can be an effective, safe method.
Safe Temperature Guidelines
Since steam can lift grime without harming glaze if you control heat and pressure, the next step is setting safe temperature limits to protect white porcelain. You’ll follow temperature safety and heat regulation: keep steam below 140°C (284°F) on handheld units, avoid prolonged contact, and test a hidden spot first. Use short passes and let tiles cool.
| Action | Max Temp | Tip |
|---|---|---|
| Handheld steam | 140°C | Quick strokes |
| Commercial unit | 120°C | Lower setting |
| Spot test | N/A | Hidden area first |
Monitor pressure and move constantly to avoid damage.
Removing Adhesive Residue and Sticky Messes
Although adhesive and sticky spills can look like permanent stains, they usually come off with the right approach and a bit of elbow grease. You’ll want to act promptly: scrape gently with a plastic scraper, then soften remaining Sticky residue with warm soapy water.
For tougher spots, try a small amount of rubbing alcohol or a citrus-based cleaner for safe Adhesive removal.
- Test cleaner in an inconspicuous spot.
- Apply cleaner, let sit 1–2 minutes, then wipe.
- Rinse area and dry to prevent streaks.
Work gently to avoid scratching the porcelain.
How to Tackle Mildew and Mold on Tile Edges
If mildew or mold is creeping along grout lines and tile edges, act quickly to prevent it from spreading and staining the porcelain. Start by ventilating the area and drying surfaces; moisture control is key to mildew prevention.
Scrub affected edges with a soft brush and a diluted solution of white vinegar or a grout cleaner formulated for porcelain. For stubborn growth, apply a paste of baking soda and water, let sit, then rinse.
After cleaning, seal grout lines to deter recurrence and maintain airflow to keep tiles dry. Regular inspections and prompt action complete effective mold eradication and care.
Cleaning Textured or Patterned White Porcelain Tiles
When your white porcelain has texture or a patterned surface, dirt and grime can settle into crevices where a flat mop won’t reach, so you’ll need tools and techniques that get into those nooks without damaging the finish. You should rinse first, then tackle spots gently.
Use a soft-bristled brush or toothbrush to agitate grout lines and Porcelain texture.
Mild detergent mixed with warm water lifts oils without harming Tile patterns. Rinse and dry to prevent residue.
Try spot-treating stubborn areas with baking soda paste. Repeat only as needed to avoid wear.
- Soft brush
- Mild detergent
- Baking soda paste
Dealing With Deep Scratches and Chips on Tiles
Because chips and deep scratches don’t just look bad, they can trap dirt and lead to further damage, you should address them promptly and carefully. First, clean the area thoroughly to remove grit that causes more abrasion and to assess color fading versus surface residue.
For shallow scratches, gently buff with a fine abrasive pad and polish compound designed for porcelain. For chips, use a porcelain repair kit matched to your tile color; apply epoxy filler, smooth, and cure per instructions.
After repairs, seal adjacent grout to prevent grout staining and to protect the repair from moisture and dirt.
When to Replace a Tile vs. Repair It
First check the crack size—small hairline cracks can often be repaired, while large or spidering breaks usually mean replacement.
Next, see if the tile moves or feels loose; movement suggests the substrate is compromised and swapping the tile is safer.
Finally, weigh the replacement cost against repair time and appearance to decide the most practical option.
Assess Crack Size
If a crack appears in a porcelain tile, check its length, depth, and whether it goes through the glaze and body of the tile—those factors determine if you can repair it or must replace it.
You’ll watch for Crack expansion and ongoing Tile cracking as signs replacement is needed. Inspect with a magnifier and press around the crack for movement.
Consider these quick thresholds:
- Hairline, surface-only cracks — often repairable with filler.
- Deep cracks through body — replace the tile.
- Cracks that widen or show loose edges — replace to prevent damage.
Document findings before you act.
Check Tile Movement
After you document crack size and condition, check for tile movement to decide between repair and replacement.
Gently press and tap the tile; a hollow sound or noticeable shift during a tile inspection indicates a loose setting. If movement is minor and adhesive still grips, remove loose grout, perform grout repair, and re-seat the tile with fresh thinset.
For tiles that rock or separate from the substrate, full removal and replacement prevents future cracking and moisture damage.
Note surrounding tiles during inspection—movement can signal substrate issues.
Document findings, then choose repair when stable, replacement when instability persists.
Consider Replacement Cost
How much will replacing a tile cost you compared with repairing it? You’ll weigh material, labor, and time: a single replacement often needs matching tile, grout color, and careful tile installation. Consider these points:
- Cost: compare new tile price plus installation vs. patch repair supplies and sealant.
- Visibility: if grout color or pattern won’t match, replacement may be worth it.
- Damage extent: cracked loose tile or subfloor issues demand replacement; minor chips can be filled.
If matching porcelain is affordable and damage’s structural, replace. Otherwise repair to save money and maintain your white floor’s appearance.
How Humidity and Hard Water Affect White Tiles
Because moisture hangs in the air and minerals in your water leave deposits, humidity and hard water can quickly dull white porcelain tiles and stain grout lines.
You’ll notice humidity effects as musty film, slower drying after mopping, and persistent haze that masks brightness.
Hard water deposits create chalky rings, mineral streaks, and roughened grout that trap dirt.
You can treat visible buildup with appropriate cleaners and targeted scrubbing, rinse thoroughly to avoid residue, and dry surfaces promptly to restore shine.
Pay attention to affected areas like bathrooms and near sinks, where these problems intensify without regular attention.
Preventive Measures to Reduce Future Staining
Now that you know how humidity and hard water dull tiles and grout, take steps to stop buildup before it starts. You can protect white porcelain by using preventive sealing on grout and considering stain resistant coatings for high-traffic zones. Follow a simple routine and habits:
- Wipe spills immediately and dry surfaces to prevent mineral rings.
- Apply preventive sealing to grout yearly; reseal tiles only if recommended by manufacturer.
- Use mild cleaners; avoid harsh acids that strip protective coatings.
You’ll reduce staining, cut cleaning time, and keep floors brighter without changing appearance or risking damage.
Best Mats, Runners, and Felt Pads for White Porcelain
When you place the right mats, runners, and felt pads, they’ll protect your white porcelain from scratches, grout discoloration, and tracked-in dirt without trapping moisture or leaving rubber stains.
Choose breathable, non-slip mats with a cotton or jute backing that won’t transfer color. Light-toned mats complement porcelain color and hide mild dirt.
For high-traffic zones, pick low-profile runners that follow tile patterns to avoid visual clash.
Attach felt pads beneath furniture legs and check them periodically for grit. Replace rubber-backed pieces with PVC-free alternatives to prevent staining.
Clean mats regularly to keep both tiles and grout looking pristine.
Floor Protection Tips if You Have Pets or Kids
If you’ve got pets or kids, place protective rugs and runners in high-traffic zones to catch dirt and shield tiles from scratches.
Use non-slip furniture pads under chair and table legs to prevent scuffs when things get pushed around.
These simple steps will cut down on cleaning and keep your white porcelain looking fresh.
Protective Rugs And Runners
A few well-placed rugs and runners can save your white porcelain floors from scratches, dirt, and staining caused by pets and kids. Choose washable area rugs for entryways and define high-traffic zones with runners to trap grit and spills before they reach tile.
Pick low-pile, stain-resistant materials that clean easily and won’t hide stains until they set.
- Place rugs at doors and under pet bowls.
- Use runners along hallways and play areas.
- Rotate and wash regularly to prevent wear patterns.
You’ll protect floors while keeping maintenance quick and manageable.
Non-Slip Furniture Pads
Rugs help trap grit, but furniture still moves and scuffs during play or pet romps—so you’ll want non-slip furniture pads under chair and table legs to stop sliding and protect the glaze.
Choose felt or rubber pads that match leg size and weight; felt gives gentle floor padding while rubber grips for active pets.
Clean under pads regularly to avoid trapped dirt scratching tiles.
Replace worn pads and check adhesives won’t stain your porcelain.
For heavy furniture, combine screw-on glides with pads for extra furniture protection.
Install pads on all legs and rearrange occasionally to prevent uneven wear.
How to Choose Cleaners Safe for Pets and Kids
Because kids and pets spend so much time on the floor, you’ll want cleaners that remove dirt and germs without leaving harmful residues or strong fumes. Choose Pet safe solutions and Kid friendly products by checking ingredient lists, avoiding bleach and ammonia, and selecting pH-neutral formulas. Test a small area first and ventilate during use.
- Look for non-toxic labels and clear ingredient lists.
- Prefer fragrance-free, low-VOC options to reduce irritation.
- Confirm quick-dry formulas to limit exposure time.
Store cleaners out of reach, rinse thoroughly after cleaning, and monitor pets or children until floors are fully dry.
Eco-Friendly Cleaners That Work on White Tiles
If you want cleaners that’re safe for kids and pets and also gentle on the planet, choose biodegradable, plant-based formulas and simple DIY mixes that cut grime without harsh chemicals or plastic-heavy packaging.
You can mix white vinegar with water for routine mopping, or baking soda paste to tackle stains — both are eco-friendly alternatives that won’t dull glaze when rinsed.
For tougher jobs, look for cleaners labeled biodegradable formulas and nonabrasive.
Always test a small, hidden area first, use microfiber cloths to trap dirt, and rinse thoroughly so tiles stay bright without toxic residue.
Avoid These Common Cleaners That Damage Porcelain
While you want your porcelain tiles to stay spotless, some common cleaners do more harm than good—so avoid anything acidic, abrasive, or bleach-heavy. Don’t use vinegar, lemon, or straight bleach; they etch glaze and ruin grout.
Avoid acidic, abrasive, or bleach-heavy cleaners on porcelain tiles—these etch glaze and damage grout.
Skip powdered scouring, steel wool, and harsh pads that scratch surfaces. Never mix ammonia with cleaners or rely on strong degreasers from cleaning appliances without testing first.
For safe stain removal, stick to pH-neutral tile cleaners, diluted hydrogen peroxide for organic spots, or baking soda paste used gently. If unsure, spot-test in a hidden area before full application.
- Vinegar/acidic
- Abrasives
- Bleach/strong mixes
How to Restore Shine to Dull White Porcelain Floors
When your white porcelain floors look dull, you can bring back their luster with the right cleaning and a few targeted treatments.
Start by sweeping and mopping with a pH-neutral cleaner to remove grit that scratches the surface.
For stubborn marks, use a gentle scrubber and a paste of baking soda and water for safe stain removal.
Rinse thoroughly and dry with a microfiber cloth to prevent water spots.
For extra shine, try porcelain polishing with a low-speed polisher and a non-abrasive pad, or apply a thin coat of a tile-specific gloss enhancer following manufacturer instructions.
Budget-Friendly Product Recommendations for White Porcelain
1 practical way to keep white porcelain floors looking great without overspending is to choose multipurpose, low-pH cleaners, a soft microfiber mop, and a few affordable spot-treatment items like baking soda and a melamine eraser. You’ll want products that help with stain removal while preserving finish and color matching if you touch up grout or sealant.
Consider these budget picks:
- Gentle low-pH floor cleaner — concentrates last longer.
- Microfiber mop + refill pads — traps dirt without scratching.
- Baking soda + melamine eraser — for targeted scuffs and grout stains.
Test small areas first and store supplies neatly for quick touch-ups.
Professional Cleaning: When to Call an Expert
If routine cleaning, spot treatments, and DIY grout fixes aren’t restoring your white porcelain’s shine, it’s time to call a professional. You should consider professional maintenance when stains, etching, or deep grout discoloration persist despite proper care, or when tile sealer has degraded.
An expert consultation will assess underlying issues, recommend safe cleaning methods, and prevent damage from harsh chemicals or aggressive scrubbing. Call a certified tile and grout technician for large areas, historic tiles, or delicate finishes.
Expect an inspection, targeted deep cleaning, possible resealing, and maintenance advice to keep your floors bright without risking harm.
Top Tile Problems and Quick Fixes
Although porcelain is durable, you’ll still run into common issues like stains, grout discoloration, chips, and dullness—and most can be fixed quickly with the right approach.
You can handle many problems yourself: use mild bleach or baking soda paste for stain removal, regrout or use a grout pen for discoloration, and apply a polishing compound for color enhancement and shine.
For chips, use a porcelain repair kit to fill and blend.
Prevent future issues by wiping spills, using mats, and avoiding harsh acids.
Quick, consistent care keeps white porcelain looking fresh and minimizes costly repairs.
- Identify problem
- Choose fix
- Maintain regularly
Frequently Asked Questions
Can Grout Colorants Permanently Change Tile Appearance?
Yes — grout colorants can permanently change tile appearance by altering grout color and contrast, which affects perceived tile tone and pattern. You’ll want to test first, since results vary by product, tile porosity, and application.
Do Radiant Floor Heaters Damage Porcelain Tiles?
No, radiant floor heaters won’t typically damage porcelain tiles; you’ll benefit from porcelain durability and even heat distribution, but you should follow manufacturer’s installation guidelines and use proper thinset and expansion joints to prevent stress or cracking.
How Do I Transport Spare Tiles for Future Repairs?
Think of spare tiles as seeds for a future garden: you’ll store them dry and labeled, use padded boxes or rigid tile racks for transportation methods, strap securely, keep inventory, and avoid stacking heavy items on top.
Will Carpet Adhesives Discolor Nearby Tiles Over Time?
Yes — you’ll see carpet stains and adhesive residue spread or discolor nearby tiles over time if adhesives contain dyes or oils; you should remove residue promptly and seal grout to prevent long-term staining and staining migration.
Can UV Sunlight Cause White Porcelain to Fade?
Yes, prolonged UV effects can cause sunlight fading on white porcelain; you’ll notice subtle discoloration or yellowing over time, especially in direct sunlight, so you’ll want UV-filtering window treatments or rotate items occasionally.
Conclusion
So you’ve been worshiping your white porcelain floor like it’s a clean-obsessed deity—good. Keep it simple: mop, spot-clean, repeat. Don’t scrub with reckless vengeance or drown it in bleach. Use gentle cleaners, a soft mop, and grout love, and it’ll stay gleaming like an Instagram filter. If it goes rogue, call a pro. Remember: perfection’s a myth, but a little maintenance keeps your floors pretending otherwise—until your kids declare war.