How to Clean Asbestos Floor Tiles Safely
If your floor tiles might contain asbestos, don’t scrub, sand, or dry-sweep them yourself because disturbing tiles can release deadly fibers. You can do limited cleaning only if tiles are intact and sealed: use damp mopping, a HEPA vacuum, and avoid abrasive tools. Always get a qualified inspector before doing maintenance, and hire licensed professionals for testing, containment, or removal. Keep occupants away during any work, and continue for practical steps, myths, and resources.
Should You Clean Asbestos Floor Tiles Yourself?
You shouldn’t clean asbestos floor tiles yourself unless you’re trained and equipped to control dust and fibers, because disturbing the tiles can release hazardous asbestos particles into the air.
Never clean asbestos floor tiles yourself—only trained, equipped professionals can safely prevent hazardous fiber release.
You should weigh risks: personal health, environmental impact, and legal obligations often outweigh DIY savings.
You’ll protect household members by hiring licensed abatement pros who use containment, HEPA filtration, and proper disposal.
You’ll also preserve historical significance in older buildings by consulting conservation experts before any removal.
If you suspect damage or wear, don’t attempt repair; contact certified contractors for assessment, safe handling, and documented removal.
Quick Answer: Can You Clean Asbestos Floor Tiles Safely?
Quick answer: only under very limited circumstances can asbestos floor tiles be cleaned safely. You can’t assume routine Tile maintenance is safe; disturbing tiles can release fibers.
If tiles are intact, sealed, and undamaged, limited cleaning with damp methods may reduce risk, but you should be cautious.
- Don’t dry-sweep or use abrasive tools.
- Use wet-cleaning, HEPA vacuuming, and sealing only when confirmed safe.
- Hire a pro for any removal or major disturbance.
You’ll confront Asbestos myths that underplay risk; treat these tiles as hazardous until a qualified inspector says otherwise.
Who Should Read This Guide Before Attempting Cleanup
Because asbestos poses real health risks when tiles are damaged or disturbed, anyone planning even minor cleaning or maintenance should read this guide before starting.
You should read this if you own, rent, or manage older homes or buildings where vinyl or linoleum tiles may contain asbestos.
If you’ll be sanding, scrubbing aggressively, cutting, or removing flooring, don’t proceed without understanding asbestos health risks and proper containment.
DIYers tempted to save money need to weigh DIY hazards against professional removal.
Also read this if you supervise contractors, care for vulnerable occupants, or must decide on interim containment versus full abatement.
How Asbestos Vinyl and Linoleum Tiles Differ From Other Flooring
When older vinyl or linoleum tiles contain asbestos, they look and behave like ordinary resilient flooring but pose very different risks and handling requirements. You’ll notice similar appearance and wear, but asbestos fibers can release when tiles are damaged, sanded, or cleaned aggressively.
Don’t trust Asbestos tile myths that downplay fiber release; treat suspect tiles cautiously. Follow DIY safety tips: avoid dry scraping, seal dust, and use proper PPE.
Remember the main differences:
- Risk of airborne fibers from routine cleaning
- Need for wet methods and encapsulation
- Stricter disposal and abatement rules compared to non-asbestos flooring
Common Years and Buildings That Likely Contain Asbestos Tiles
If your building was constructed or had floors installed between the 1940s and 1970s, there’s a higher chance those vinyl or linoleum tiles contain asbestos.
You’ll commonly find them in commercial properties like schools, hospitals, offices, and older retail spaces.
Look for signs during renovations—multiple thin layers of flooring, mastic adhesives, or crumbly edges are red flags that warrant testing before cleaning.
Mid-20th Century Installations
Although asbestos tile use peaked between the 1940s and 1970s, you’ll still find these materials in many public and residential buildings constructed or remodeled during that period.
You should recognize installations where asbestos fiber was mixed into tile composite or where old floor bonding adhesives were used.
Typical locations include:
- Entryways and hallways in mid-century homes
- School and hospital corridors renovated in the 1950s–1960s
- Utility rooms and basements with original flooring
When you encounter those sites, assume tiles are fragile. Don’t sand or scrape; use gentle, wet-cleaning methods and consult a professional for testing or removal to avoid airborne contamination.
Common Commercial Properties
Where might you still find asbestos floor tiles in commercial settings? You’ll often see them in buildings from the 1940s through the 1970s: schools, hospitals, offices, retail stores, and some municipal buildings.
Maintenance records may note vinyl composition tiles that actually contain asbestos. Don’t buy into asbestos tile myths that claim old tiles are harmless; intact tiles can still release fibers when disturbed.
If you work in or manage these properties, prioritize awareness and consult professionals before cleaning. DIY safety is limited—don’t sand, grind, or scrub aggressively. Use wet cleaning and minimize disturbance until abatement experts evaluate the site.
Renovation And Remodel Clues
When you’re planning renovations or remodels, pay close attention to the building’s age and past uses—structures built or updated between the 1940s and late 1970s are the likeliest to have asbestos-containing floor tiles.
You should assume older vinyl or linoleum tiles might hide asbestos and treat disturbance as Asbestos hazards. Before you start tile replacement or demo, get testing and follow local abatement rules.
Note common clues:
- Layered floors or mottled 9×9 vinyl tiles
- Schools, hospitals, public buildings, and mid-century homes
- Renovation records showing mid-20th-century upgrades
Use professionals for removal or encapsulation to reduce exposure.
How To Visually Identify Possible Asbestos Floor Tiles
Look at the building’s age and when the floors were likely installed to narrow your chances of asbestos-containing tiles.
Check tile size and pattern—12×12 squares and certain geometric or mottled designs are common in older asbestos tiles.
Feel the surface texture and examine wear: brittle, chalky, or fibrous edges can be a warning sign.
Age And Installation Era
Because asbestos was widely used in flooring from the 1920s through the 1980s, you can often narrow down the risk by estimating a building’s age and checking renovation dates.
Homes or commercial spaces built or last remodeled in that period are more likely to have asbestos-containing tiles. Check ownership records and permits to confirm installation history and any past abatement.
If you suspect aged tiles, avoid disturbing them—loose asbestos fiber can be hazardous. Consider professional testing.
Look for these clues:
- original flooring installation dates
- lack of recent remodels or overlays
- records mentioning asbestos or removal work
Tile Size And Pattern
After checking a building’s age and renovation history, pay attention to the tile size and pattern—these visual cues often indicate whether flooring might contain asbestos. You’ll look for common mid-century tile sizes and repeating motifs; older asbestos tiles often use smaller squares and simple geometric repeats. Note any pattern variation across rooms; inconsistent sizes or motifs may signal later replacements. Don’t assume composition from looks alone, but use size and pattern as clues to prioritize testing.
| Common Tile Size | Typical Pattern |
|---|---|
| 9×9 inches | Checker/simple geometric |
| 12×12 inches | Repeating motifs/pattern variation |
Physical Texture And Wear
When you inspect tile surfaces up close, focus on texture and wear patterns that often accompany older asbestos-containing floor tiles: they tend to feel denser and slightly gritty compared with modern vinyl, show uniform embossing or pressed patterns, and develop hairline surface crazing or worn-through spots where the binder has eroded.
You’ll note Texture degradation as dulling, pitting, or fraying at edges; Surface smoothness is often lost, unlike newer sheets that stay slick. Check for consistent embossing, localized abrasion, and friable dust at grout lines.
Key visual cues you should prioritize:
- uniform embossing
- gritty feel or pitting
- friable edge wear
When To Stop and Test: Signs You Need Asbestos Sampling
If you spot cracked, powdered, or loose tiles, stop work immediately and get the material tested — those are clear signs the floor could be releasing asbestos fibers.
You’ll also pause if sanding dust appears, strong musty odors arise, or edges crumble when touched.
Don’t assume old tiles are safe based on tile aesthetics or buy into asbestos myths that damage is harmless.
Photograph areas, limit foot traffic, seal off the room, and avoid sweeping or vacuuming with regular vacuums.
Contact a licensed sampler or local authority for guidance before continuing cleanup to protect yourself and others.
How Asbestos Testing Works and What to Expect From Results
Curious how testing will tell you whether those tiles are hazardous? You’ll arrange asbestos sampling—either DIY kits or a pro—then submit small, sealed pieces to a lab.
Labs perform sample analysis using microscopy to identify fibers. Results typically report presence/absence and may note fiber type; they don’t tell cleanup steps here.
Expect a short turnaround (days) and a clear report. If results show asbestos, you’ll decide containment or removal with a contractor.
- Choose accredited labs for reliable sample analysis.
- Keep areas undisturbed until results arrive.
- Preserve chain-of-custody and documentation for safety and compliance.
How To Interpret Lab Reports and Asbestos Percentages
When you get your lab report, check the sample ID, method used, and whether results are reported by weight or area.
Note the asbestos percentage and compare it to regulatory thresholds to decide if the material is asbestos-containing and requires controls.
Based on the percentage and local rules, you’ll either follow containment and abatement procedures or can use non‑invasive cleaning with appropriate precautions.
Lab Report Basics
Before you decide on removal or containment, you’ll want to understand what the lab report is actually telling you about asbestos content and sample types. Read the summary, sample IDs, and method used.
Labs show percent asbestos by type (chrysotile, amosite, crocidolite) and whether the sample was bulk or air.
Match results to asbestos regulations and use clear hazard communication when sharing findings with contractors or occupants.
- Confirm sample location and chain-of-custody
- Note analytical method (PLM, TEM) and detection limits
- Highlight reported asbestos type(s) for risk assessment
Ask the lab to clarify any ambiguous entries.
Percentage Thresholds
Having confirmed sample locations, methods, and asbestos types, you’ll next need to interpret the percentages reported by the lab to decide on action levels and work procedures.
Labs give percent asbestos by weight or area; small percentages can still pose asbestos health risks if fibers become airborne. Check whether the report uses percent recovered fibers or bulk percent—methods matter.
Then compare reported values to applicable legal regulations and guidance for your jurisdiction; these set thresholds for notification, containment, or abatement.
Keep documentation, chain-of-custody, and consult a qualified professional when results approach or exceed regulatory limits.
Action Based On Results
Although lab reports can look technical, you’ll treat their asbestos percentages as decision points. Read the report, note percent by area, and consider environmental impact and historical context of the material before acting.
If results show low trace amounts, you’ll use containment and wet cleaning; moderate percentages require professional abatement planning; high percentages demand licensed removal and disposal.
- Low (<1%): controlled cleaning, monitor air
- Moderate (1–10%): consult abatement contractor, restrict access
- High (>10%): stop work, arrange licensed removal
Document everything, keep samples, and follow local regulations to protect health and environment.
Why Disturbing Intact Asbestos Tiles Raises Health Risks
When you disturb intact asbestos floor tiles—by sanding, cutting, or even aggressive scraping—you can release microscopic fibers into the air that you then breathe in or track through your home. Those fibers can lodge in your lungs and increase the risk of serious diseases like asbestosis, lung cancer, and mesothelioma.
You shouldn’t assume old tiles are harmless — debunk Asbestos myths that suggest mere age makes them safe. Even minor work can turn stable Tile safety into a hazard.
If you must clean, avoid actions that create dust, use wet methods, and consult professionals to minimize fiber release and spread.
Health Effects Linked to Asbestos Fiber Exposure, Simply Explained
If you breathe in asbestos fibers, they can stick in your lungs and slowly cause inflammation and scarring that raises the risk of serious diseases over years or decades. You may not notice symptoms for decades, yet an asbestos fiber lodged in tissue can lead to progressive conditions.
Breathing asbestos can lodge fibers in lungs, causing slow inflammation and scarring that raises long-term disease risk.
Common health risks include breathing difficulty, persistent cough, and increased cancer risk. Watch for changes and seek medical advice if exposed.
Short list of possible outcomes:
- Asbestosis: lung scarring causing breathlessness
- Mesothelioma: rare cancer of lining tissues
- Lung cancer: higher incidence in exposed people
Legal and Local Rules That Can Affect Cleanup and Disposal
Because asbestos is highly regulated, you’ll need to follow specific local, state, and federal rules for cleanup and disposal to avoid fines and health risks. Check municipal ordinances and your state’s environmental agency for permits, notification requirements, and approved waste facilities.
Document procedures and retain records to demonstrate legal compliance. Disposal regulations often mandate sealing debris, labeling containers, and using licensed transporters and landfills approved for asbestos waste.
Failure to meet requirements can lead to penalties and increased exposure risk. Contact your local waste authority for clear instructions before starting, and confirm carrier and landfill acceptance in writing.
When To Always Hire a Licensed Asbestos Professional
If the tiles show visible damage—cracks, crumbling, or any loose material—you should stop and call a licensed asbestos professional.
The same goes for work that would disturb a large area or many tiles at once, since that greatly raises the risk of airborne fibers.
A pro will assess the hazard and handle removal or containment safely and legally.
Visible Damage Present
When you see cracked, crumbling, or missing tiles, treat the area as a potential hazard and don’t try to clean or repair it yourself. Visible damage and ongoing tile deterioration can release asbestos fibers when disturbed, so you should stop work and secure the space.
Call a licensed asbestos professional to assess, contain, and abate safely. They’ll follow regulations, use proper PPE, and dispose of materials correctly.
You should especially alert professionals if you notice:
- loose fragments or powder near damaged tiles
- water damage causing softening or flaking
- previous repairs that are failing
Large Area Disturbance
Beyond visible damage, you should also call a licensed asbestos professional any time work will disturb a large area of asbestos-containing floor tiles—typically defined as more than a few square feet or multiple adjacent rooms.
If you plan renovations, remove flooring, or create widespread tile disturbance, don’t attempt DIY. Professionals control contamination with respirators, negative pressure, and proper disposal, reducing exposure risks that can’t be managed by regular cleaning.
Even seemingly minor projects that span rooms become large area concerns because fibers spread. Hire a licensed abatement contractor to assess, contain, and remove affected tiles safely and legally.
Cost Factors That Determine DIY Versus Professional Removal
While the price gap between DIY and professional asbestos tile removal can seem straightforward, several specific cost factors will determine which option actually saves you money and risk. You’ll weigh tile aesthetics and historical significance against disposal fees, containment complexity, and potential fines.
Consider labor time, licensing, and cleanup.
- Disposal and air-testing costs
- Time, permits, and waste hauling
- Damage risk to subfloor or finishes
If tiles are valuable or part of a historic property, professionals usually protect value better.
If you choose DIY, calculate total expenses including disposal and possible remediation before proceeding.
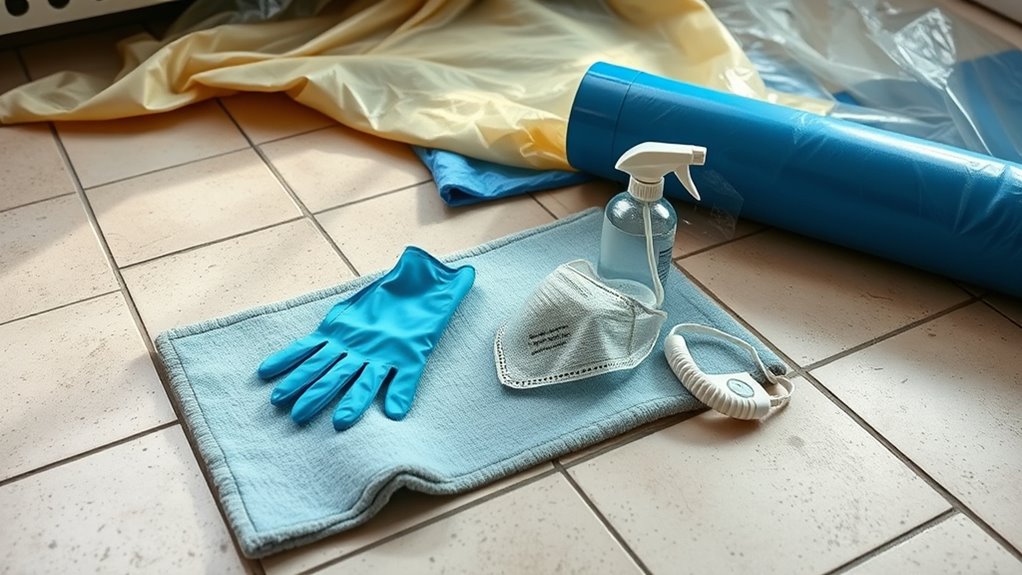
Personal Protective Equipment You Must Use for Safe Cleaning
After weighing cost and whether to hire a pro, you still have to protect yourself if you clean asbestos tiles yourself—proper personal protective equipment (PPE) cuts your exposure risk and prevents contamination of other areas.
Wear disposable coveralls with sealed seams and boot covers to stop asbestos fiber clinging to clothing. Use disposable gloves and change them often; bag used PPE immediately. Protect your eyes with tight-fitting goggles. Keep hair covered.
Don’t track dust into other rooms—remove outer PPE before exit and double-bag contaminated items. Prioritize personal safety: treat all debris as hazardous and limit who enters the work zone.
Respirator Selection: P100 Versus N95 and Fit-Testing Basics
Because asbestos fibers are tiny and can lodge deep in your lungs, choosing the right respirator and getting a proper fit matter as much as the rest of your PPE.
You should prefer P100 filters for cleanup because they block 99.97% of particles. N95 filters are less protective and suited only for low-risk, short tasks.
Don’t fall for Asbestos myths that a bandana or surgical mask suffices.
Confirm Respirator fit through a seal check and formal fit-testing when possible.
Key actions:
- Use P100 for removal or heavy dust
- Perform a user seal check every use
- Get professional fit-testing periodically
Protective Clothing, Gloves, and Footwear Recommendations
If you’re handling asbestos tiles, wear disposable coveralls with integrated hoods and taped seams to keep fibers off your skin and clothing. They’re lightweight, inexpensive, and can be discarded safely after use.
Add nitrile gloves over the wrists of the suit, pulling cuffs tight and sealing with tape if needed.
Choose disposable boot covers with non-slip soles or dedicated work boots that you leave in the containment area. Clean or bag reusable footwear before exiting.
Avoid textiles you’d reuse in daily life—this isn’t about fashion trends.
Treat protective gear like sterile tools in cooking techniques: single-use, controlled, and disposed of to prevent contamination.
How To Set Up a Containment Zone for Asbestos Tile Cleaning
Now that you’re properly suited, you’ll need to isolate the work area to keep asbestos fibers contained. Seal doors, vents, and thresholds with heavy-duty plastic and tape to create containment barriers. Post warning signs and limit access; only trained personnel should enter.
Use a negative-pressure unit and HEPA-rated equipment for air filtration positioned to pull air out of the zone without routing into occupied spaces. Clean tools and dispose of waste in labeled, sealed bags.
After work, wet-clean surfaces and remove plastic carefully to avoid disturbance. Inspect seals before starting and maintain containment until final clearance testing.
Ventilation and HVAC Precautions To Prevent Fiber Spread
Before you start cleaning, seal all HVAC vents and openings to keep fibers from entering ductwork.
Set up negative pressure with a HEPA-filtered exhaust to pull contaminated air out of the work area.
Don’t run recirculating filters or central HVAC systems that could spread asbestos throughout the building.
Seal HVAC Openings
Seal any HVAC vents, returns, and duct openings in the work area to stop asbestos fibers from spreading through your ventilation system. You should use plastic sheeting and high‑quality tape for HVAC sealing, focusing on sealing cracks and gaps around registers and access panels.
Work slowly, inspect seams, and replace damaged tape immediately. Don’t run fans or HVAC systems while you work.
After sealing, label vents to prevent accidental use and maintain barriers until cleanup completes.
- Use 6‑mil polyethylene sheeting.
- Apply HVAC sealing tape over all seams.
- Check for remaining gaps with a flashlight.
Use Negative Pressure
When you install a negative‑pressure ventilation setup, you’ll keep asbestos fibers from leaving the work area by drawing air inward and exhausting it through a HEPA‑filtered unit or outdoors. You should monitor pressure differentials, seal entry points, and position an air filtration unit to maintain steady Negative pressure. Use charcoal‑free HEPA units rated for asbestos and route exhaust away from people. Check seals frequently and swap filters per manufacturer guidance. Record differential readings and visual checks to confirm containment.
| Task | Tool | Frequency |
|---|---|---|
| Seal openings | Tape/foam | Before work |
| Run unit | HEPA air filtration | Continuous |
| Monitor | Manometer | Hourly |
| Exhaust routing | Ducting | Setup |
| Filter change | Certified HEPA | As needed |
Avoid Recirculating Filters
If you rely on your building’s HVAC or portable units, don’t use filters that recirculate air back into occupied spaces—recirculating systems can spread asbestos fibers beyond the work area.
You should isolate ventilation, use exhaust to outdoors, and choose sealed systems that support air filtration without returning contaminated air.
For dust containment, run negative pressure and avoid fan settings that return air.
Verify filter types and exhaust paths before work begins.
- Use HEPA or equivalent exhaust to outside
- Shut off recirculation modes on HVAC
- Seal ducts and test airflow with smoke or anemometer
Low-Disturbance Tools: HEPA Vacuums, Wet Mops, and Supplies
Because disturbing asbestos fibers increases risk, you’ll rely on low-disturbance tools—HEPA-filtered vacuums, damp mops, and specific supplies—to minimize airborne fibers while cleaning.
Because disturbing asbestos raises risk, use low-disturbance tools—HEPA vacuums and damp mops—to minimize airborne fibers while cleaning
Use a HEPA vacuum rated for asbestos with attachments to gently capture dust from grout and surface debris without scraping up floor adhesive or lifting tile patterns.
Keep a supply kit: disposable gloves, N95 or P100 respirator, disposable cloths, sealed plastic bags, and labeled disposal containers.
Choose non-abrasive, low-sudsing cleaners and pre-wetted microfiber pads to avoid dry sweeping.
Replace filters and consumables promptly, and bag waste immediately to prevent cross-contamination.
Wet-Cleaning Asbestos Tiles Safely
Although wet-cleaning won’t remove asbestos tiles, it lets you safely reduce surface dust and grime without stirring fibers into the air. You should wear PPE, seal off the area, and post notices per Hazard communication best practices.
Mix a mild detergent with water, dampen a microfiber mop, and rinse frequently in a sealed bucket to avoid spreading contamination.
- Keep the floor consistently wet while cleaning.
- Change water when visibly dirty; never dry-wipe.
- Use HEPA vacuum for edges after drying.
Record actions and report concerns to professionals; don’t attempt Asbestos removal if tiles are damaged or suspect.
Safe Dry-Cleaning Alternatives When Wet Methods Aren’t Practical
If you can’t use wet methods, you’ll want to rely on careful dry techniques to control dust. Use a HEPA-rated vacuum with a brush attachment to remove loose debris, and avoid standard shop vacs that can release fibers.
For light soiling, consider using barely damp disposable wipes or HEPA-filtered microfiber cloths instead of soaking the tile.
HEPA Vacuum Use
When wet cleaning isn’t practical, a certified HEPA vacuum gives you a safer dry option for removing dust and debris from asbestos floor tiles.
You should use a unit rated for asbestos work, seal all seams, and change filters outdoors using PPE.
HEPA vacuums reduce airborne fibers but don’t replace professional asbestos removal or tile replacement when tiles are damaged.
- Confirm HEPA certification and intact seals.
- Wear disposable coveralls, gloves, and an N100/HEPA respirator.
- Empty and bag debris promptly; double-bag for disposal.
Follow local regulations and hire licensed contractors for major disturbance.
Damp Wipe Alternatives
Because you can’t always use wet methods without risking damage or spreading fibers, there are safer dry-cleaning alternatives you can use on intact asbestos floor tiles to minimize disturbance. You’ll rely on low-agitation tactics: soft-bristle broom, HEPA vacuum, tack cloths, and disposable microfiber pads. These keep dust down and support good tile maintenance without provoking asbestos disturbance. Don’t buy into asbestos myths that smooth sweeping is harmless; gentle tools matter. Use PPE, work slowly, and dispose of cleaners that can’t be laundered. Below is a quick comparison to guide choices.
| Tool | Best use |
|---|---|
| HEPA vacuum | Fine dust removal |
| Soft broom | Loose debris |
| Tack cloth | Surface pick-up |
| Microfiber pad | Final wipe |
How To Prepare the Room Before You Clean Tiles
Before you touch a tile, clear the space and seal it off to minimize dust spread. Remove furniture, curtains, and loose items; shut vents and doors; turn off HVAC. Check tile patterns and note areas with loose floor adhesive so you avoid disturbing them later. Wear PPE before entering sealed area.
- Post signage: keep others out.
- Lay plastic sheeting over thresholds.
- Keep a small waste bin with damp cloths.
Have a buddy nearby for safety and to fetch supplies. Plan your route to limit foot traffic across tiles and prevent accidental scraping.
Low-Pressure Mopping: Step-By-Step
Now that the room is sealed and you’re in PPE, start low-pressure mopping to remove surface dust without disturbing tiles. Wet a microfiber mop lightly with water and mild detergent, wring thoroughly, and move in straight, overlapping strokes. Change cleaning tools when soiled. Rinse mop frequently in a separate bucket. Keep pressure gentle; don’t scrub or use steam. Follow safety precautions: avoid splashing, ventilate minimally per containment plan, and dispose of wastewater per regulations. Monitor for damage; stop if tile fibers appear. Record cleaning actions for the abatement log.
| Action | Purpose |
|---|---|
| Light wetting | Capture dust |
| Gentle strokes | Prevent disturbance |
| Frequent rinse | Avoid redeposit |
| Tool change | Maintain effectiveness |
| Log entry | Compliance record |
HEPA Vacuuming Asbestos Tiles Safely: Step-By-Step
Before you start, put on the appropriate protective gear—respirator, disposable coveralls, gloves, and eye protection.
Use a HEPA-rated vacuum and attachments designed for asbestos work, keeping the unit on the floor and seals intact.
After vacuuming, gently wet-clean any remaining residue with a low-pressure mist and disposable cloths to avoid stirring fibers.
Prepare Protective Gear
Start by assembling the right protective gear so you don’t breathe or track asbestos fibers into other areas—this isn’t optional. You’ll need to address Asbestos hazards directly and wear Protective clothing before you begin.
Fit and seal gear properly; loose or contaminated gear defeats the purpose. Check for damage and replace items that are compromised.
- Disposable coveralls with taped seams
- NIOSH-approved respirator (P100) with fit-tested seal
- Disposable gloves and boot covers
Don’t use household masks. Change out of protective gear before leaving the work area, bag it, and follow local disposal rules to avoid contamination.
Use Proper HEPA Equipment
With your protective gear on and sealed, move on to HEPA equipment to control airborne fibers during cleaning. You’ll use a certified HEPA vacuum with intact filters and a long wand to capture loose dust from Asbestos tile removal without stirring fibers.
Seal the Containment zone vents and door, run the vacuum’s tool slowly across seams and edges, and avoid aggressive scraping.
Empty and bag filter units following manufacturer and disposal rules, sealing bags for hazardous waste pickup.
Check seals and hoses frequently; replace damaged parts immediately.
Never use a regular household vacuum for asbestos work.
Wet-Clean Residue Carefully
When you’ve removed loose dust with your HEPA vacuum, dampen disposable rags or a mop with a low-sudsing, pH-neutral cleaning solution and gently wipe the tile surface and seams to pick up remaining residue without disturbing fibers. Work in small sections, rinsing rags frequently and wringing into a sealable bag. Avoid scrubbing or abrasive tools that can release fibers.
Don’t mix cleaners—chemical reactions can create harmful fumes or reduce effectiveness. Understand DIY hazards and stop if you see damage; consult a pro. Dispose of used rags and water per local regulations.
- Use gentle pressure
- Change water often
- Seal waste securely
How To Remove Surface Wax, Polish, or Adhesive Without Sanding
Removing wax, polish, or adhesive from asbestos floor tiles without sanding is doable if you use gentle, non-abrasive methods that minimize dust and fiber release. You’ll first test a small area to confirm the tile won’t degrade.
Use low-moisture techniques: apply a compatible solvent or mild chemical cleaners sparingly on a cloth, blot and lift softened residue, and avoid soaking.
Use low‑moisture methods: sparingly apply a compatible solvent on a cloth, blot to lift residue without soaking.
For sticky buildup, use a plastic scraper held flat to avoid digging.
Keep the area damp to suppress dust, wipe repeatedly with clean, damp microfiber, and collect waste in sealed bags for proper disposal.
Ventilate gently.
How To Handle Stubborn Stains Without Scraping or Grinding
If stains won’t lift with gentle blotting, try targeted, low‑moisture treatments that won’t disturb the tile matrix or raise dust. You’ll avoid scraping or grinding by using absorbent poultices, mild detergents, or short-contact chemical solutions applied sparingly. Test a hidden area first, ventilate, and wear gloves and a respirator. Work from the outside in, blotting gently rather than scrubbing. Remove residue with damp microfiber and dry thoroughly.
- Use a clay or paper poultice for oil-based stains
- Try a diluted, pH-neutral detergent for general stain removal
- Apply commercial low‑fume chemical solutions only as directed
What To Do If a Tile Cracks, Chips, or Is Accidentally Disturbed
If a tile cracks, chips, or gets accidentally disturbed, stop what you’re doing right away to minimize dust.
Contain the area by closing doors, turning off HVAC, and covering vents and openings with plastic sheeting.
Don’t try to fix or remove the tile yourself—call a licensed asbestos professional to assess and handle the situation.
Stop Activity Immediately
When a tile cracks, chips, or gets disturbed, stop what you’re doing right away and move everyone out of the room to minimize dust exposure.
You should assume fibers from older tile manufacturing can pose Asbestos health risks, so don’t touch debris or try DIY repairs.
Close the door and seal gaps with tape if available. Notify household members and keep pets away.
Call a qualified abatement professional for guidance.
While waiting, avoid creating drafts or walking through the area.
Bring no equipment or clothing from the room into other spaces to prevent spreading contamination.
- Don’t sweep or vacuum
- Don’t sand or scrape
- Don’t dry-wipe
Contain The Area
After you’ve cleared the room, contain the area to prevent asbestos dust from spreading: close and lock the door, seal gaps around the frame and vents with heavy-duty tape or plastic sheeting, and post a notice so others don’t enter.
If a tile cracks, avoid sweeping or vacuuming; gently mist the damaged spot, then cover it with plastic and tape to trap fibers. Don’t attempt floor polishing or aggressive scraping—these actions can release asbestos.
Avoid disturbing tile adhesives. Keep pets and HVAC off, limit foot traffic, and document the damage with photos.
Maintain containment until the tile is professionally assessed.
Seek Professional Help
Because cracked, chipped, or disturbed asbestos tiles can release dangerous fibers, you should stop work immediately, keep everyone out of the room, and avoid touching or trying to repair the tile yourself. Call a licensed asbestos professional to assess damage and contain the area.
Don’t trust Asbestos myths or assume Tile durability prevents fiber release—only trained teams with proper gear can safely manage fragments and cleanup. Expect testing, possible removal, or encapsulation recommendations.
Follow written instructions, preserve evidence for inspectors, and document the incident. Prepare to relocate until clearance air tests confirm safety.
- Call pros immediately
- Don’t touch debris
- Follow testing results
How To Clean Up Contaminated Dust After an Accidental Disturbance
If you’ve accidentally disturbed asbestos-containing tiles and kicked up dust, stop work immediately, leave the area, and keep others out until you’re ready to clean up safely; this minimizes further spread and exposure. For Asbestos tile removal scenes, prioritize Dust containment. Close vents, seal doorways with plastic, and wait a short settling time. Wear appropriate respirator and disposable gloves before re-entering. Wet cleanup only: mist debris and wipe with damp disposable cloths. Double-bag waste and label it. Do not vacuum with household vacuums.
| Step | Action |
|---|---|
| 1 | Secure area |
| 2 | Wait, don PPE |
| 3 | Wet wipe |
| 4 | Double-bag |
| 5 | Label and dispose |
How To Decontaminate Tools, PPE, and Footwear Afterward
Once you’ve contained and removed contaminated dust, don’t neglect the gear that protected you—tools, PPE, and footwear can carry fibers and must be decontaminated before reuse or disposal.
Work slowly to avoid releasing fibers: mist surfaces with a dampened HEPA-approved cloth, then scrub tools and non-disposable PPE with a mild detergent and clean water.
For footwear sanitation, use disposable boot covers if available; otherwise scrub soles and seams, then rinse.
Place contaminated wipes and disposable items into labeled waste containers.
- Use a dedicated wash station
- Change water frequently
- Inspect gear before reuse
Practice tool decontamination consistently.
Proper Bagging, Labeling, and Short-Term Storage of Asbestos Waste
When you’re ready to package asbestos debris, double-bag the material in heavy-duty, labeled asbestos disposal bags and seal each bag with tape to prevent fiber release. This keeps fragments contained and makes handling safer for anyone who moves the waste.
Use gloves and a respirator while lifting bags, avoid compressing them, and stagger fills so seals remain intact. Follow packaging safety by smoothing air out before sealing and placing bags in a rigid, puncture-resistant container for short-term storage.
Apply clear labeling protocols including “Asbestos Waste,” date, and contact info, and store containers in a locked, ventilated area away from public access.
How To Find and Follow Local Disposal Rules for Asbestos Materials
Before you dispose of asbestos materials, check local regulations so you know what’s allowed and what paperwork is required.
If anything’s unclear, contact your municipal or state waste authority for specific instructions and approved drop-off sites.
For large or hazardous loads, hire a licensed contractor who’ll handle transport and disposal according to the rules.
Check Local Regulations
Because rules for handling and disposing of asbestos vary widely by location, you should check local regulations before you disturb or remove any tiles. Don’t rely on Asbestos tile myths or DIY safety assumptions; local codes define acceptable methods, packaging, and transport. Call or visit your municipal or environmental agency website to get specifics.
Note permit needs, required labeling, and approved disposal sites. Keep written guidance with your project records. If unsure, ask for clarification in writing.
- Confirm permit and notification requirements
- Verify approved containment and packaging methods
- Identify licensed haulers and site restrictions
Contact Waste Authorities
If you’re handling asbestos-containing tiles, contact your local waste authority to learn the exact disposal steps, required documentation, and approved drop-off sites so you don’t risk fines or unsafe handling.
You’ll get clear rules on packaging, labeling, and transport that align with health regulations. Ask about designated asbestos collection days, landfill acceptance policies, and any fees.
Don’t rely on Asbestos tile myths or informal advice; get written guidance. Follow instructions alongside Safe cleaning techniques already used to minimize debris.
Keep records of communications and disposal receipts in case inspectors question how you managed hazardous waste.
Use Licensed Contractors
Once you’ve checked disposal rules with your local authority, hire a licensed asbestos contractor to handle removal and transport—they know the permits, packaging, and approved disposal sites and will follow your jurisdiction’s exact requirements.
You shouldn’t attempt DIY cleaning of damaged tiles confronting asbestos tile hazards; contractors reduce exposure and legal risk.
Ask for licensing, insurance, and disposal records, and confirm they follow your locality’s manifest and landfill rules.
Expect clear containment, wet methods, and HEPA-filtered equipment.
Verify final waste receipts.
- Confirm license and insurance
- Require documented disposal manifests
- Insist on post-job clearance testing
When To Encapsulate Asbestos Tiles Instead of Removing Them
When tiles are intact, undisturbed, and in good condition, you should consider encapsulation rather than removal; it’s often safer, less costly, and avoids stirring up asbestos fibers.
You’ll choose encapsulation when the surface is stable, damage is minor, and ongoing disturbance is unlikely.
Prioritize asbestos fiber health by reducing airborne release and minimizing exposure during routine cleaning.
Consult local rules to confirm legal disposal isn’t required for intact flooring and to confirm compliance with regulations.
Hire a licensed professional to assess conditions, document decisions, and perform work safely.
Monitor the floor regularly and re-evaluate if damage or renovation plans arise.
Products and Materials for Encapsulating Asbestos Tiles Safely
Because you want to seal asbestos tiles without disturbing fibers, choose encapsulants and surface materials designed for adhesion, durability, and low VOCs; pick products labeled for asbestos encapsulation and comply with local legal regulations. You’ll want:
Choose low-VOC, high-bond encapsulants made for asbestos tiles—adhesive, durable products labeled for encapsulation and compliant with regulations
- High-bond epoxy or polyurethane floor coatings for long-lasting seals
- Thin-set compatible primers that won’t require aggressive preparation
- Low-VOC, non-sanding topcoats to reduce airborne particles
Consider HEPA-filtered tools and tack cloths during prep to protect Asbestos health. Always read manufacturer instructions and confirm coatings are appropriate for tile substrate.
When in doubt, consult a licensed abatement professional to ensure compliance and safety.
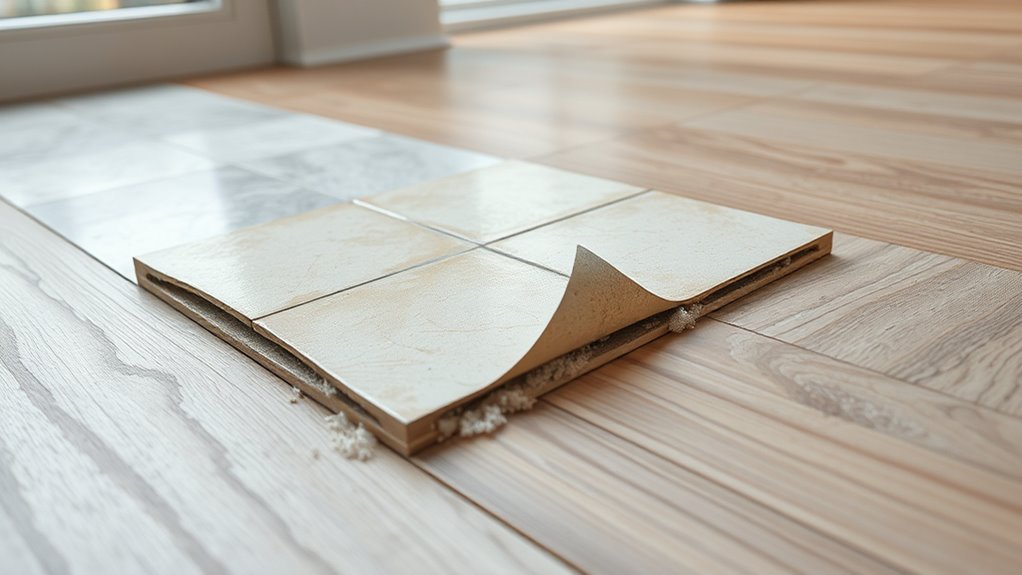
When Covering Tiles With New Flooring Is Appropriate and How To Do It
Before you cover asbestos tiles with new flooring, inspect the tiles for cracking, loose pieces, or water damage to confirm they can safely remain in place.
If the tiles are stable, you’ll need a proper underlayment—like an approved vapor barrier and cement board or dense fiber pad—to create a smooth, sealed surface and prevent tile disturbance.
Follow manufacturer guidelines and local regulations when installing underlayment to keep asbestos fibers contained and your new floor secure.
Assessing Tile Condition
If the tiles are intact, well-bonded, and free of significant damage, you can often cover them instead of removing them; this approach reduces disturbance of asbestos and lowers cost and cleanup time.
You should inspect for cracks, loose areas, and color variation that might indicate moisture or hidden damage. Test a small area by pressing and tapping tiles; listen for hollow sounds.
If heavy adhesive removal is needed or tiles crumble, don’t cover—consult a pro.
Consider these quick checks:
- Tap test for hollowness
- Visual gaps, chips, or lifting
- Signs of staining or moisture intrusion
Proper Underlayment Installation
When you decide to cover intact asbestos tiles rather than remove them, installing the right underlayment is essential to create a stable, sealed base for the new floor and to minimize any future disturbance of the tiles.
First, verify tiles are intact and consult local rules; covering’s often chosen for historical preservation or when eco-friendly cleaning and removal aren’t feasible.
Use a vapor barrier plus cement backer board or 1/4″ plywood rated for flooring, fastening without penetrating tiles directly.
Seal seams with compatible tape or sealant, level surfaces, and install new flooring per manufacturer instructions to keep asbestos undisturbed.
Choosing Flooring Systems That Work Over Encapsulated Tiles
Because you’ve sealed the asbestos tiles properly, you can focus on selecting floor systems that won’t disturb the encapsulation while giving you the look and durability you want. Choose adhesives and underlayments rated for low VOCs and compatible with existing surfaces; eco-friendly options reduce indoor pollution.
Think about aesthetic considerations—thickness, transition points, and finish affect final height and appearance. Consider lightweight floating floors or thin-sheet vinyl that sit above the seal without penetrating it.
Benefits to weigh include moisture barrier, wear rating, and ease of removal.
- Low-impact installation methods
- Minimal floor buildup
- Reversible choices
How Often To Recheck or Re-Clean Tiles That Remain in Place
Since sealed asbestos tiles can degrade over time, you should set a regular inspection and cleaning schedule to catch any wear or damage early.
Inspect quarterly if tiles are in low-traffic areas; inspect monthly in kitchens, entryways, or utility rooms.
Light wet-wiping with a damp microfiber cloth and a mild detergent will maintain tile aesthetics without disturbing the seal.
Reapply or repair sealant every 1–3 years depending on flooring durability and observed wear.
After heavy spills or scuffs, recheck within a week.
Keep a log of inspections and actions so you can spot trends and act before small issues become larger.
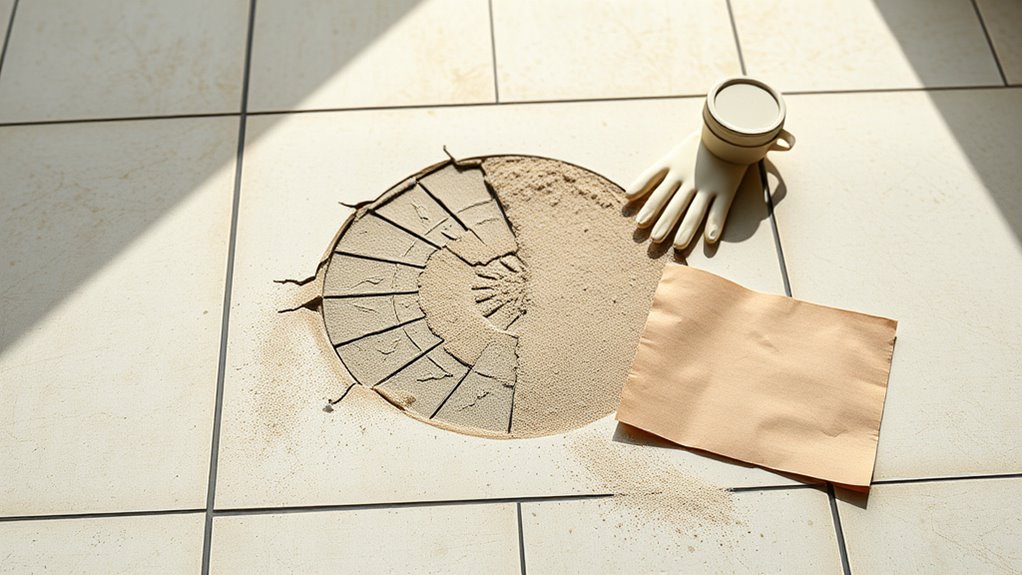
Signs You Should Stop DIY Cleaning and Call a Pro Immediately
If you notice cracking, crumbling, or powdery residue coming from the tiles, stop cleaning and call a licensed asbestos professional immediately, because those are clear signs the tile or underlying adhesive is deteriorating and could be releasing fibers.
You should also quit if you encounter unexpected issues tied to historical hazards or uncertain material composition. Don’t risk exposure.
- Visible dust clouds or airborne debris after light contact
- New damage when tiles are flexed or probed
- Strong, unexplained odors or staining suggesting hidden layers
Leave further assessment and testing to licensed pros with proper containment and monitoring.
How To Vet and Hire a Qualified Asbestos Abatement Contractor
When you hire an asbestos abatement contractor, verify their licensing and insurance to protect yourself and your property.
Ask for a detailed written work plan that outlines containment, removal methods, and disposal procedures.
Make sure they include post‑job clearance testing and will provide the results before you consider the job complete.
Verify Licensing And Insurance
Before you hire anyone to handle asbestos, verify their licensing and insurance so you don’t inherit liability or unsafe work. You’re protecting asbestos health by confirming the contractor meets local licensing requirements and carries current coverage.
Ask for copies of credentials, insurance certificates, and proof of worker training. Call issuing agencies to confirm status.
- Verify contractor’s asbestos license number.
- Confirm general liability and pollution/abatement insurance.
- Check worker certification and medical surveillance policies.
Don’t rely on verbal claims. Document everything, note expiration dates, and refuse work until you’ve independently confirmed credentials and adequate coverage.
Request Detailed Work Plan
After you’ve confirmed licensing and insurance, ask each contractor to provide a detailed written work plan outlining the scope, methods, schedule, containment procedures, cleanup, air monitoring, waste handling, and disposal sites. You’ll compare plans for clarity about removing tiles with historical context or preserving decorative patterns, methods minimizing fiber release, and specific timelines. Require names, qualifications, and equipment lists. Ask for references and sample permits. Use this quick comparison table to note differences:
| Contractor | Key Method | Disposal Site |
|---|---|---|
| A | Wet removal | Facility X |
| B | Encapsulation | Facility Y |
| C | Partial salvage | Facility Z |
Confirm Clearance Testing
Because clearance testing proves the space is safe for reoccupation, insist on a licensed third-party inspector who’ll perform post‑abatement air and surface sampling and certify results in writing; you’ll need that documentation before you remove containment.
When vetting contractors, ask for sampling protocols, lab accreditation, and references to dispel Asbestos tile myths and avoid DIY safety traps. Confirm they follow local regs and use chain‑of‑custody procedures.
Expect a written clearance report showing fiber counts and pass/fail status. If results fail, require rework and retesting.
Keep all records for future buyers and regulators.
- Verify inspector license
- Check lab accreditation
- Require written clearance report
Typical Timelines and What To Expect During Professional Jobs
When you hire a pro to handle asbestos floor tiles, expect a clear schedule: an initial inspection and testing (a few hours to a couple of days for lab results).
Followed by a containment setup and abatement that usually takes one to three days for a typical room.
And a final clearance air test before reoccupying the space.
You’ll get a written plan detailing work phases, safety measures, and waste disposal to minimize environmental impact and respect the material’s historical context.
During work you should plan temporary relocation, limited access, and prompt communication.
Expect documentation and lab reports once clearance is achieved.
Typical Residential Cost Ranges for Testing, Encapsulation, and Removal
Costs vary, but you can expect clear price bands for testing, encapsulation, and removal based on home size, tile condition, and local regulations.
You’ll pay for lab testing per sample, mid-range costs to encapsulate intact tiles, and higher rates to remove damaged or friable flooring, especially if complex Tile patterns or Historical use raises containment needs.
Typical residential ranges often fall into tiers tied to square footage and demolition difficulty.
- Testing: low per-sample fee, plus lab turnaround.
- Encapsulation: moderate, less disruptive.
- Removal: highest, includes disposal and air monitoring.
Get multiple quotes and check contractor credentials.
Insurance, Home Sale Disclosures, and Asbestos Documentation Tips
Beyond hiring contractors and budgeting for testing or removal, you’ll also need to handle the paperwork that protects you financially and legally. Keep inspection reports, lab results, and contractor invoices organized; those documents support insurance claims if damage or remediation costs arise.
When selling, follow local disclosure requirements—state the presence, testing, and any encapsulation or removal work in writing. Provide copies of reports to buyers and retain originals for your records.
Notify your insurer before major work; get written confirmations about coverage. Clear documentation speeds claims, builds buyer trust, and helps you meet legal duties without surprises.
Common Myths About Asbestos Tile Safety Debunked
Many people assume asbestos tiles are either always deadly or completely harmless, but the truth is more nuanced and depends on condition and disturbance. You should question asbestos myths that claim casual cleaning or age alone makes tiles safe.
Many assume asbestos tiles are either fatal or harmless; risk depends on condition and disturbance, not myths.
Safety misconceptions often ignore damage, sanding, or high-traffic wear that can release fibers. Don’t rely on anecdotes; use evidence and sensible precautions.
Remember three core points to keep in mind:
- Intact, sealed tiles pose low risk but still need care.
- Damaged or friable tiles can release fibers when disturbed.
- DIY removal often increases exposure risk; consider professional advice.
Quick Safety Checklist To Follow Every Time You Clean Tiles
Because even small disturbances can release fibers, you should follow a short, consistent safety checklist every time you clean asbestos tiles.
Wear PPE: disposable coveralls, N95 or P100 respirator, and gloves.
Seal off the area with plastic sheeting and tape to limit dust spread.
Avoid dry sweeping or abrasive scrubbing; use a damp mop and low-sudden-force tools.
Keep flooring patterns intact—don’t sand, grind, or cut tiles.
Bag waste in labeled, sealed plastic and dispose per local asbestos regulations.
Ventilate minimally to avoid spreading fibers.
If damage or heavy contamination appears, stop and seek professional testing or abatement help.
Resources and Contacts for Testing, Regulations, and Emergency Help
If you find signs of damage, unexpected debris, or anything outside your comfort level from the checklist, contact qualified professionals and regulators right away.
You should get testing from accredited labs and follow local legal regulations for removal and disposal.
Prioritize Asbestos health by limiting exposure until pros arrive.
Keep a clear record of contacts, test results, and permits.
- Call certified asbestos inspectors for sampling and risk assessment.
- Contact your local environmental or public health agency for legal regulations and disposal rules.
- Keep emergency numbers for licensed abatement contractors and poison control handy.
Frequently Asked Questions
Can Baking Soda or Household Cleaners Neutralize Asbestos Fibers?
No, baking soda or household cleaners won’t neutralize asbestos fibers; you shouldn’t rely on Household cleaning for Asbestos mitigation. You’d need professional asbestos mitigation services, containment, and HEPA-grade removal to safely manage asbestos hazards.
Can Pets Spread Asbestos Fibers to Other Rooms or Outdoors?
Yes — pets can carry asbestos from room to room and outside, so you should limit pet access, clean paws carefully, and consult professionals to protect pet safety and prevent outdoor contamination.
Will Regular Home Insurance Cover Asbestos Contamination Claims?
Generally no — your standard policy usually won’t cover asbestos contamination claims. You should check specifics, because asbestos health risks can trigger exclusions and Legal liability issues; you’ll likely need specialist coverage or endorsements to be protected.
Can I Transport Asbestos Tiles in a Personal Vehicle to a Disposal Site?
You shouldn’t transport asbestos tiles in a personal vehicle; it risks contamination. Hire licensed asbestos disposal services and follow transportation safety regulations, using sealed, labeled containers and professional handling to guarantee legal, safe asbestos disposal.
Are There Safe Short-Term Rentals if My Home Needs Professional Asbestos Removal?
Yes — you can find temporary rental options nearby that keep you safe; you’ll dodge asbestos removal hazards by choosing places with hard floors, easy cleaning, and documented no-contamination policies, so you won’t fret during removal.
Conclusion
You’ve learned the risks, the myths, and the steps to reduce dust — but before you act, pause. If tiles are cracked, crumbling, or from the high-risk era, don’t gamble with your lungs. Call a tester or abatement pro; if they say it’s safe, move cautiously with wet methods and PPE. If not, stop and let experts handle it. Your next move could change everything — choose safety.