How to Clean a Sticky Floor Tile Fast and Safe
You can fix sticky floor tiles fast and safely by ventilating the room, wearing gloves, and testing a small inconspicuous spot first. Mix warm water with a few drops of dish soap or a diluted vinegar solution for glazed tiles, mop or scrub gently with a microfiber cloth or soft brush, then rinse thoroughly with plain water. Dry and buff with a lint-free towel to prevent streaks and slips, and keep going for tips on tougher residues and safety.
Quick Fix for Sticky Floor Tiles: 3-Step Rescue
If your floor tiles feel tacky, you can often fix them fast with a three-step rescue: remove loose grit, dissolve the sticky residue, and rinse thoroughly so no cleaner is left behind.
Start by sweeping or vacuuming along grout lines to protect tile patterns and keep floor aesthetics intact.
Next, apply a mild degreaser or diluted vinegar solution to the sticky spots, let it sit briefly, then agitate with a soft brush.
Finally, mop with clean water, changing rinse water as needed so you don’t redeposit residue.
Dry with a microfiber cloth to restore shine and prevent streaks.
Why Tiles Feel Sticky After Cleaning (And When It Matters)
If your tiles feel sticky after cleaning, it’s often because cleaning-product residue was left behind.
You’ll also get tackiness when you don’t rinse or dry the surface properly, letting soap or cleaner concentrate as it dries.
Knowing which residues matter and how to remove them will help you tell a quick touch-up from a deeper problem.
Residue From Cleaning Products
When cleaning products leave a dull, tacky film on your tiles, it’s usually because surfactants, waxes, or diluted cleaners weren’t fully rinsed away.
That residue attracts dirt, causes floor discoloration over time, and can accelerate grout deterioration by trapping moisture and chemicals. You can spot it by a hazy sheen or sticky feel after the surface dries.
To fix it, use a neutral pH cleaner or a mix of warm water and a small amount of vinegar, then buff with a microfiber mop.
Avoid layered waxes or heavy-duty polish unless recommended for your tile type to prevent buildup.
Improper Rinse Or Drying
Residue left from cleaners often signals the same mistake that makes tiles feel sticky: not rinsing or drying properly. You’ll notice tackiness if cleaner film dries on grout or tile; it can mimic failed surface polishing and trap dirt.
Rinse thoroughly and dry to prevent residue and aid mold prevention in damp areas. Follow these quick steps:
- Rinse with clean water, using a mop or wipe.
- Change rinse water frequently to avoid spreading residue.
- Dry immediately with microfiber towels or a wet-dry vacuum.
- Ventilate the space to speed drying and discourage mold.
Quick Safety Checklist Before You Start
Before you start scrubbing, take a moment to protect yourself and the area: put on rubber gloves and eye protection. Make sure the room’s well-ventilated by opening windows or running a fan. Clear the floor of loose debris and trip hazards.
Check labels on cleaners for hazards and never mix bleach with ammonia. Test a small, hidden tile for discoloration before full stain removal attempts.
Keep children and pets out while working. Plan short cleaning sessions into your cleaning schedules to avoid fatigue and accidental spills.
Have a clear path to exits and a phone nearby for emergencies.
Tools and Common Household Supplies You Need
You’ll want a few essential tools—like a soft-bristled brush, microfiber cloths, a bucket, and a putty knife for stubborn gunk.
Gather common household liquids such as dish soap, white vinegar, baking soda, and rubbing alcohol to tackle different sticky residues.
Don’t forget protective options like gloves and knee pads to keep you safe and comfortable while you work.
Essential Cleaning Tools
When tackling a sticky floor tile, gather a few reliable tools and common supplies so you’re ready for any mess. You’ll want items that let you remove residue, protect grout sealing, and prepare for future floor polishing without damaging surfaces. Start with basics and add specialty tools as needed.
- Microfiber mop and bucket — gentle, effective for rinsing.
- Soft-bristled scrub brush — targets grout lines without scratching.
- Plastic scraper or putty knife — lifts thick gunk safely.
- Rubber gloves and microfiber cloths — protect hands, polish finish.
Use tools correctly, and you’ll speed cleanup and preserve tile.
Household Liquids Needed
If you’re dealing with a sticky tile, stock a few common household liquids that dissolve residue without harming grout or finish: white vinegar for grease and light adhesive, dish soap for general residue, rubbing alcohol for sticky spots and quick evaporation, and a bleach solution for mildew on grout (used sparingly).
Carry these cleaning agents in small spray bottles or a labeled jar so you can target spots without flooding the floor.
Dilute vinegar with water for routine use, mix a drop of dish soap with warm water for scrubbing, and reserve alcohol for stubborn tack.
Use bleach solution only on grout, briefly.
Protective Gear Options
After gathering your cleaning solutions, grab the right protective gear to keep skin, eyes, and lungs safe while you work. You’ll want items that fit well and resist spills; follow safety precautions to avoid irritation or inhalation of fumes. Keep things simple and effective.
- Nitrile gloves — chemical-resistant, disposable.
- Safety goggles — splash-proof fit.
- Respirator or mask — rated for vapors/particulates.
- Knee pads or cushioned mat — protect joints during scrubbing.
Use protective gear for every deep clean, check labels for compatibility, and replace damaged items promptly to maintain safe cleaning practices.
Test a Small Area Safely (How to Avoid Damage)

Why not try the cleaner on a hidden corner first? You’ll check for color coordination issues and how cleaning affects tile patterns before treating visible areas.
Test the cleaner in a hidden corner first — watch for fading, residue, or grout changes before cleaning visible areas.
Apply a small amount, wait the recommended time, then blot with a soft cloth. Look for fading, residue, or grout discoloration and note any texture change.
If nothing shows after drying, proceed cautiously, repeating tests near boundaries and edges.
If you spot damage, stop and choose a milder product or consult manufacturer guidance.
Testing small areas saves time and preserves appearance, keeping your floor safe while you clean.
Quick Fix for Sticky Tiles: Warm Water + Microfiber
When a sticky patch isn’t stubborn, warm water and a microfiber cloth often do the trick. You’ll prep a bucket of comfortably warm water, wring the cloth until damp, and gently wipe the sticky spot following the tile patterns so you don’t miss edges or seams.
Check grout color to verify you’re not lifting dye. If residue stays, repeat rather than scrubbing hard.
- Dip and wring the microfiber.
- Wipe along tile patterns.
- Rinse cloth and repeat as needed.
- Dry area to prevent residue or grout discoloration.
You’ll restore the tile quickly without harsh cleaners.
Use Vinegar for Light Sticky Residue
If a warm-water wipe didn’t fully lift the stickiness, try diluted white vinegar — it cuts grease and dissolves light residue without harsh chemicals.
Mix one part vinegar with three parts warm water in a spray bottle, test a hidden tile corner, then spray sparingly. Let it sit 30–60 seconds, then scrub gently with a microfiber or soft-bristle brush.
Mix 1:3 vinegar and warm water, test a hidden corner, spray lightly, wait 30–60 seconds, then gently scrub and rinse
Rinse with clean water to remove any sour smell and dry with a clean towel.
Vinegar benefits include deodorizing and breaking down sticky residue safely for most glazed tiles, but avoid unsealed stone surfaces.
Baking Soda Paste for Tacky Spills and Films
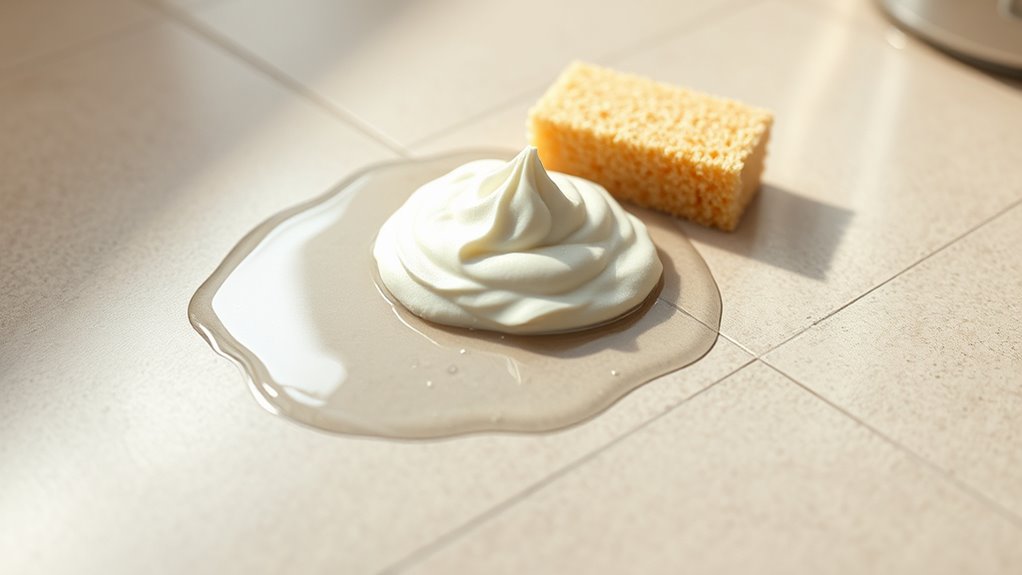
Since baking soda is mildly abrasive and alkaline, you can make a thick paste to lift tacky spills and gummy films without damaging most glazed tiles. Mix baking soda with a little water to form a spreadable paste.
Apply to sticky areas, let sit 5–10 minutes, then scrub gently with a soft brush following tile patterns to avoid streaks. Rinse and dry, and inspect grout lines—good grout sealing prevents residue buildup.
- Test on an inconspicuous spot.
- Use a plastic scraper for edges.
- Avoid prolonged scrubbing on unsealed grout.
- Buff dry for shine.
Rubbing Alcohol for Adhesive Spots
Although it evaporates quickly, rubbing alcohol is excellent at dissolving sticky adhesives from glazed tiles and grout without leaving a residue. You’ll dampen a soft cloth or cotton ball, press briefly on the spot, then wipe in gentle strokes until adhesive lifts.
For stubborn bits, let alcohol sit a minute before rubbing; repeat as needed. It’s a safe, fast DIY solution that pairs well with other natural remedies when you want chemical-free options.
Test in an inconspicuous area first to guarantee finish compatibility. Ventilate the room and store alcohol away from heat while you work.
Dish Soap and Hot Water for Greasy Residue
When grease makes your tile feel slick, mix a few drops of dish soap into a bucket of hot water and mop or scrub the area with a microfiber cloth or soft-bristled brush; you’ll lift grease without harsh chemicals. Follow these quick steps:
- Test a small spot to check for grout discoloration.
- Wring the cloth well to avoid excess water near grout.
- Scrub gently along grout lines to prevent tile cracking from uneven pressure.
- Rinse with clean water and dry thoroughly to remove soap residue.
Repeat if needed, and ventilate the room for faster drying and safer results.
Which Method to Use for Syrup, Glue, Grease, or Finish
First, you’ll identify what’s causing the stickiness—syrup, glue, grease, or a residue from floor finish.
Then pick a solvent that matches the residue: warm soapy water for syrup, rubbing alcohol or adhesive remover for glue, degreaser for oily grime, and a finish stripper for old sealants.
Test your chosen solvent in an inconspicuous spot before treating the whole tile.
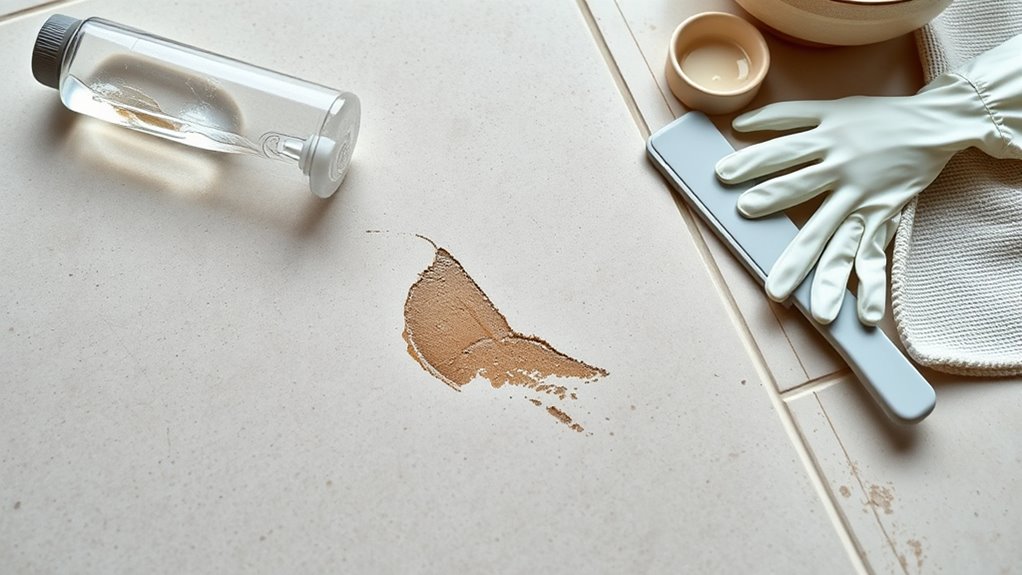
Identify The Residue Type
Before you pick up a mop, take a moment to identify what’s making the tile sticky — syrup, glue, grease, or an old finish — because each needs a different approach.
You’ll inspect texture, smell, and tackiness, noting color matching needs and whether grout sealing was recently done.
Then follow these quick checks:
- Syrup: sticky, sweet smell, soft residue.
- Glue: hardens, peels, may string.
- Grease: slick, translucent, spreads.
- Finish: uniform haze, no odor, wears off.
Record your findings so you choose the correct treatment and protect tile and grout.
Choose Appropriate Solvent
Now that you’ve identified the residue, pick a solvent that targets that specific type so you won’t harm the tile or grout.
For syrup, warm soapy water or a diluted vinegar solution lifts stickiness; test a corner first.
For glue, use a commercial adhesive remover or rubbing alcohol sparingly; scrape gently.
For grease, a degreaser or dish soap cut through oil without stripping finish.
For old floor finish, use an appropriate stripper following directions and ventilate.
Always spot-test for color matching and protect grout by resealing after cleaning; proper grout sealing prevents future stains and preserves appearance.
Remove Sticker or Tape Residue From Tiles Without Scratching
If a sticker or tape’s left a gummy smear on your tile, you can remove it without scratching by using gentle solvents and soft tools that loosen adhesive rather than abrade the surface. Test solvent in an inconspicuous spot, especially near laminated flooring edges or where carpet adhesives may have pooled.
Work patiently with a plastic scraper, not metal. Follow this concise routine:
Work patiently with a plastic scraper, not metal—follow these gentle steps to lift adhesive without scratching.
- Apply rubbing alcohol or citrus solvent, let sit 1–2 minutes.
- Gently lift with plastic scraper or old credit card.
- Wipe residue with microfiber cloth and warm soapy water.
- Dry and inspect; repeat if needed.
Step-by-Step: Lift Dried Syrup, Honey, and Sugary Spills
You can tackle dried syrup, honey, and other sugary spills with a gentle, methodical approach that mirrors removing sticker residue but swaps solvents for warm moisture to avoid sticky smear and grainy buildup. Start by softening with a warm, damp cloth; lift softened sugar with a plastic scraper; rinse; dry. For decorative patterns or historical tiles, test a hidden spot first.
| Step | Action |
|---|---|
| Soften | Warm damp cloth, 2–5 minutes |
| Lift | Plastic scraper, gentle angle |
| Rinse | Mild detergent, warm water |
| Dry | Microfiber cloth, blot thoroughly |
Fix Sticky Mop or Floor Finish Buildup
When mop residue or multiple coats of floor finish build up, they leave a tacky film that attracts dirt and dulls the tile’s shine; you can remove it safely without harsh chemicals. Try these steps:
- Sweep and vacuum to remove loose grit.
- Mix warm water with a few drops of dish soap or an eco-friendly solutions cleaner.
- Mop with the mix, rinse frequently, then dry to prevent streaks.
- For stubborn buildup, apply a diluted vinegar solution, scrub gently, and neutralize with plain water.
Use children-safe cleaners, ventilate, and test a hidden tile first to avoid damage.
Targeted Ways to Clean Sticky Grout Lines
After tackling mop residue on the tile surface, pay attention to grout lines where sticky buildup often hides and traps grime. You’ll start by sweeping and vacuuming to remove loose debris.
Then apply a mild baking soda paste or pH-neutral cleaner directly to grout. Scrub gently with a nylon brush following mosaic patterns to avoid damaging edges from aggressive scrubbing.
Rinse thoroughly and blot dry to prevent re-soiling. For stubborn spots, try oxygen bleach for colored-safe whitening, test in an inconspicuous area considering tile installation materials, and repeat only as needed to protect grout integrity and surrounding tiles.
Steam Cleaners: Safe Uses by Tile Type and Precautions
Although steam cleaners can power through sticky residue, their safety depends on tile type and grout condition. You’ll check compatibility first: porcelain and glazed ceramic tolerate steam; unglazed, natural stone, or aged grout may not.
Follow these precautions and tips:
- Test a small area for finish reaction and colorfastness.
- Use low pressure and brief passes to avoid grout damage or loosened installation tips.
- Dry grout and seams promptly to prevent moisture seepage and mold.
- Wear protective gloves and ventilate well when loosening old adhesive.
Respect creative decor details and manufacturer guidance to keep tiles safe.
Cleaners and Tools That Can Harm Tile Finishes (What to Avoid)
Don’t use abrasive cleaners or scrub pads that can wear away the glaze on your tiles.
Strong acids like vinegar or undiluted cleaners will etch and dull the surface.
Harsh solvents can strip protective finishes.
Stick to manufacturer-recommended products and gentle tools to avoid costly damage.
Abrasive Cleaners Damage Glaze
When you use abrasive cleaners or scrubbers on glazed tile, they can scratch the surface and strip away the glossy finish, leaving the tile dull and more prone to stains. You’ll want to protect tile that contributes to your color coordination and design aesthetics. Avoid harsh pads and powders; choose soft cloths and pH-neutral cleaners instead.
Tips to follow:
- Test cleaner on an inconspicuous tile first.
- Use microfiber mops and soft-bristle brushes.
- Rinse thoroughly to remove residues.
- Dry tiles to prevent water spots and dulling.
These steps preserve glaze, maintain shine, and extend tile life.
Acidic Solutions Etch Tile
Just as abrasive cleaners can harm glaze, acidic cleaners and tools can chemically etch tile surfaces, leaving dull, rough patches that won’t come back with polishing. You should avoid vinegar, lemon, grout cleaners with muriatic or hydrochloric acid, and undiluted bathroom acids; these acidic solutions dissolve glaze and cause visible tile etching.
If residue or stains worry you, test any product in an inconspicuous spot first and rinse thoroughly with clean water.
Instead, use pH-neutral cleaners designed for tile, soft cloths or mops, and gentle scrubbing. That way you clean sticky floors without compromising finish or long-term durability.
Harsh Solvents Strip Finish
If you reach for strong solvents like paint thinner, acetone, or undiluted degreasers, they can dissolve the protective finish on tile and leave it dull, blotchy, or chemically damaged. You’ll strip sealers, harm grout sealing, and ruin vibrant tile patterns.
Instead, avoid these harsh options and choose gentle pH-neutral cleaners. Watch for residue that attracts dirt and test any product in an inconspicuous spot.
- Don’t use acetone on sealed surfaces.
- Skip paint thinners near grout sealing.
- Avoid straight degreasers on patterned tiles.
- Test cleaners on a hidden tile first.
How to Dry and Buff Tiles for a Non-Sticky Finish
Start by removing all excess moisture with a dry microfiber mop or clean towel so you don’t trap dirt while buffing.
Work small sections, moving in consistent strokes with a clean microfiber pad to lift residue without scratching.
For gloss tiles, use circular motions; for matte, buff lightly along grout lines to avoid uneven sheen.
Watch for color contrast and tile patterns so you maintain a uniform appearance across seams.
Finish with a dry, lint-free cloth, checking under different light angles for streaks.
Allow full air-dry before foot traffic.
Replace pads often to prevent re-depositing grime.
Repeat vs. Switch: When DIY Isn’t Working
When your tile-cleaning routine keeps leaving a sticky film despite careful drying and buffing, it’s time to decide whether to repeat your steps or switch strategies. You’ll assess causes, consider aesthetics like color coordination and tile patterns, and pick the smarter next move. Follow these quick checks:
- Reclean with plain water to rule out residue from cleaners.
- Rinse mop heads and change microfiber cloths if they’re contaminated.
- Try a different pH-safe cleaner on a small patch to test effectiveness.
- If stickiness persists, switch to a targeted product or consult pros before damaging finishes.
Protect Ceramic, Porcelain, Vinyl, and Stone Tiles
When you clean sticky tiles, pick a cleaner formulated for that material so you don’t damage ceramic, porcelain, vinyl, or stone.
Use pH-neutral products on sensitive surfaces and avoid abrasive tools that can scratch finishes.
For natural stone, apply a proper sealer and reapply as recommended to keep moisture and stains out.
Match Cleaner To Tile
Because each tile type reacts differently to cleaners, you should choose products formulated for the material you have—ceramic and porcelain tolerate mild alkaline cleaners, vinyl needs pH-neutral solutions, and natural stone demands specially balanced, non-acidic cleaners to avoid etching or dulling.
Match cleaner to tile by checking labels and testing in an inconspicuous spot so your color coordination and tile pattern stay true. Consider:
- Ceramic/Porcelain: gentle alkaline, no abrasives.
- Vinyl: pH-neutral, no solvent-based degreasers.
- Stone: stone-safe, non-acidic formulas.
- Grout: appropriate cleaner for grout type; rinse thoroughly.
Always follow manufacturer guidance.
Seal And Protect Stone
After you’ve matched the right cleaner to your tile, protect the surface with a proper sealer and routine care so spills and wear don’t undo your cleaning efforts. You’ll apply sealing techniques suited to ceramic, porcelain, vinyl, or natural stone—porous stone needs penetrating sealers; glazed tiles may just need grout protection. Test first, follow cure times, and wipe spills quickly. Regular stone maintenance prevents staining and dulling; reseal when water stops beading. Emotional reminder:
| Care Tip | Feeling |
|---|---|
| Seal grout | Relief |
| Reseal stone yearly | Pride |
| Wipe spills immediately | Confidence |
Eco-Friendly Options Safe for Pets and Sensitive Surfaces
While you’re tackling sticky floor tiles, choose eco-friendly cleaners that kill grime without harming pets or delicate finishes. You’ll want eco-friendly alternatives and pet-safe solutions that won’t strip sealers or irritate animals.
Try mild, plant-based soap mixed with water for routine spots.
Dilute white vinegar for resilient grime on glazed tiles only.
Use baking soda paste on grout and rinse thoroughly.
Pick enzyme cleaners for organic spills.
Test first on a hidden area.
Quick Habits to Prevent Stickiness From Returning
If you want sticky tiles to stay clean, adopt a few simple habits you can do daily: wipe up spills as they happen, use doormats to cut tracked-in grime, sweep or vacuum high-traffic areas regularly, and mop with a mild solution once a week to remove residue before it builds up.
Set realistic cleaning schedules—short daily touch-ups and a weekly deeper pass.
Learn basic mop techniques: rinse often, change water when murky, and use a flat mop for even coverage.
Keep trash bins closed, avoid oily footwear indoors, and address sticky spots immediately to prevent return.
Maintain Non-Slip Safety After Cleaning
After cleaning, use a traction-boosting cleaner or additive to restore grip on slippery tiles.
Make sure you rinse any residue thoroughly and dry the floor completely before walking on it.
That way you’ll reduce slip risk while keeping the surface clean.
Use Traction-Boosting Cleaners
Because cleaning products can leave a slick residue, choose a traction-boosting cleaner to restore grip and keep your tiles safe. You’ll want a product that’s compatible with your tile and won’t alter grout color or hinder mold prevention efforts.
Use these steps:
- Test cleaner on an inconspicuous spot for 24 hours.
- Apply per directions, working small areas to avoid overuse.
- Agitate gently with a soft bristle brush to increase texture without scratching.
- Rinse thoroughly to remove excess product and prevent buildup.
Repeat periodically, especially in high-traffic or wet zones, to maintain non-slip surfaces.
Dry Thoroughly Before Use
When you finish rinsing, dry the tile completely before walking on it to prevent slips and restore traction. Use microfiber towels or a dry mop to absorb water quickly, pressing firmly into grout lines. Change or wring towels often so you’re not spreading moisture.
If an area’s still damp, aim a fan or open windows to speed drying. Wear rubber-soled shoes while working and set up wet-floor signs as one of your safety precautions.
After drying, inspect the surface for residue and repeat spot-drying if needed. Proper drying with the right cleaning tools keeps your floor safe and non-slip.
Need a Pro? How to Decide and What to Expect
Wondering if you should call a pro or tackle the sticky tile yourself? You’ll want professional advice if stains persist, grout’s damaged, or you lack tools. Consider eco friendly options when hiring to protect surfaces and air quality. Expect clear estimates, timelines, and warranty details.
Unsure whether to DIY sticky tile? Call a pro for stubborn stains, damaged grout, or missing tools—and ask about eco-friendly methods, clear estimates, and warranties.
- Assess severity: DIYable or needs specialist?
- Ask about eco friendly options and methods.
- Request written estimate and timeline.
- Confirm cleanup and warranty terms.
If you decide to hire, get references, verify insurance, and agree on payment terms before work starts to avoid surprises.
Troubleshooting Common Problems After Cleaning
If problems pop up after you clean sticky floor tiles, don’t panic — most are fixable with a few targeted steps.
If residue remains, rinse with warm water and a microfiber mop; repeat until tackiness disappears.
For streaks, buff dry with a soft cloth and avoid oily cleaners.
Pet or food stains may need spot treatment—try gentle DIY remedies like diluted vinegar or baking soda paste, test in an inconspicuous area first.
For grout discoloration, use a soft brush and mild bleach solution cautiously.
If adhesive or deep stains persist after stain removal attempts, consider professional assessment rather than harsher DIY methods.
Fast Checklist: Safe Steps to Restore Non-Sticky Tiles
Start with a quick safety check—gloves, ventilation, and a slip-free workspace—so you don’t make the problem worse.
Choose an effective cleaner suitable for your tile and grout, apply it sparingly, and scrub stubborn spots.
Finish with rapid drying techniques like mopping up excess moisture and running fans to prevent residue and slips.
Quick Safety Check
Before you touch cleaning solutions or scrub with a brush, run a quick safety check to protect yourself and your floor. Inspect lighting fixtures for exposed bulbs or cords that could get wet. Look for loose tiles, sharp edges, or grout gaps. Check for signs of pests so pest control can be contacted before you disturb nests. Clear the area of kids, pets, and trip hazards.
- Ventilation: open windows or run vents.
- Power: unplug nearby appliances.
- Surface test: try a small, hidden spot.
- Gear: wear gloves and non-slip shoes.
Effective Cleaning Solutions
While you gather supplies, pick cleaners that match your tile and finish so you won’t damage grout or sealant. You’ll choose mild detergent for glazed tiles, pH-neutral cleaner for natural stone, and a degreaser for kitchen grime. Test a small area, note effects on tile patterns and grout coloring, then proceed. Use soft tools—microfiber mop, soft brush—avoid abrasive pads. Rinse thoroughly to remove residue. If stubborn stickiness persists, repeat spot cleaning or use a manufacturer-recommended product. Keep ventilation on and wear gloves.
| Cleaner type | Use case |
|---|---|
| Mild detergent | Glazed tiles |
| pH-neutral | Natural stone |
Rapid Drying Techniques
Once the tile’s surface is clean, speed up drying to prevent re-soiling or water spots by removing excess moisture and increasing airflow. You’ll also protect grout and preserve floor patterns and different tile materials.
Follow this fast checklist:
- Squeegee excess water toward a drain or towel to lift surface liquid.
- Blot seams and grout with microfiber cloths to pull trapped moisture.
- Aim fans or open windows to create cross-ventilation; use a dehumidifier in humid rooms.
- For porous tile materials, finish with low-heat air or let a fan run longer to ensure complete drying before foot traffic.
Frequently Asked Questions
Can Sticky Tiles Cause Allergic Reactions Indoors?
Yes — sticky tiles can trap indoor allergens like dust mites and mold, and you’ll notice worsened sneezing, itchy eyes, or asthma. You’ll reduce reactions by cleaning, drying thoroughly, and using allergen-proof measures.
Can Cleaning Products Damage Radiant Floor Heating?
Yes — you can damage radiant heating if you use harsh cleaning solutions; gentle floor maintenance, like pH-neutral cleaners and minimal water, prevents corrosion or insulation harm while aggressive chemicals or excess moisture can warp systems and wiring.
How to Handle Sticky Tiles on Outdoor Porches?
You should sweep debris, hose the porch, then scrub sticky tiles with a mild detergent and soft brush; rinse well and let dry. For outdoor maintenance, watch weather effects—pressure wash when dry and seal tiles to prevent recurrence.
Can Pets Spread Sticky Residues Between Rooms?
Yes — pets can spread sticky residues between rooms through fur, paws, and toys; you’ll notice pet hair clumps and dragging that transfers gunk, and scratching damage can dislodge stuck particles, so clean paws and vacuum often.
Are Warranties Voided by DIY Tile Cleaning?
Yes, you can void warranties if you use improper methods or harsh chemicals; check your tile sealant instructions. If unsure, don’t risk it — get professional cleaning or confirm manufacturer guidance to protect coverage.
Conclusion
You’ve fixed the sticky mess and kept things safe — but don’t stop now. Like a calm floor after a storm, your tiles should feel dry and sure underfoot, not slick with cleaner or grimy residue. Keep testing small spots, switch to a neutral cleaner when you need it, and wipe up spills fast. Small habits prevent big slips: regular quick care turns frantic fixes into steady maintenance, so your floors stay confident and your chores stay simple.