Essential Tools Every Homeowner Should Have
You should keep a compact set so you can handle common repairs fast: a claw hammer, adjustable wrench, tape measure, utility knife, level, and a small socket set. Add Phillips, flathead, Torx and precision screwdrivers, needle-nose and slip-joint pliers, a caulking gun with sealants, basic paint brushes and rollers, and garden hand tools. Include a flashlight, fire extinguisher and first-aid kit for emergencies. Keep tools organized and maintained, and you’ll find more useful tips ahead.
Basic Hand Tool Set Every Homeowner Needs
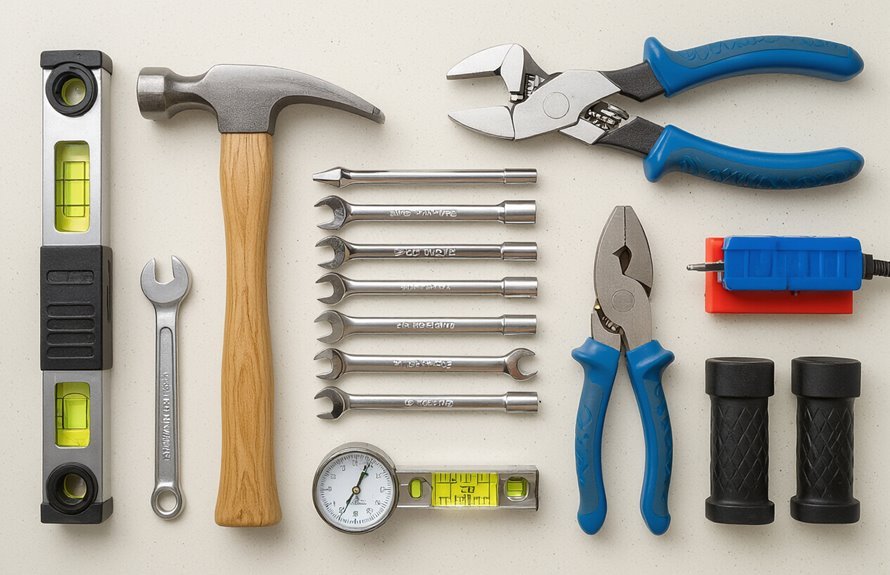
You don’t need a garage full of gear to handle common repairs—just a compact set of reliable hand tools. You’ll want a claw hammer, adjustable wrench, slip-joint pliers, tape measure, utility knife, level, and a small socket set.
Pack them in a sturdy toolbox and follow toolbox organization tips: group by function, use foam or dividers, and keep frequently used items accessible.
Practice basic hand tool maintenance: clean after use, oil moving parts, and tighten loose handles. Store tools dry to prevent rust.
With this pared-down kit, you’ll tackle most household jobs confidently and efficiently.
Screwdrivers for Every Type of Fastener
You’ll want a set that covers Phillips and flathead tips for everyday jobs, plus Torx and hex drivers for furniture and appliances.
Keep a precision set for small electronics and an electrician’s insulated set for wiring work.
If you use power tools, add an electric screwdriver or interchangeable bit driver to speed things up.
Phillips and Flatheads
1 essential tool every homeowner should own is a good set of screwdrivers — both Phillips and flathead — since almost every repair or install will call for one or the other.
You’ll want multiple sizes to match fastener heads, avoid cam-out, and finish jobs cleanly. Learn basic screwdriver maintenance to keep tips sharp and handles secure.
Know common screwdriver types so you grab the right driver quickly.
- Use a Phillips for cross-head screws
- Use flatheads for slotted screws and prying small items
- Keep a magnetic bit holder for tiny screws
- Replace worn tips to prevent damage
Torx and Hex Drives
After you’ve got Phillips and flatheads covered, add Torx and hex drivers to handle fasteners that resist stripping and need more torque.
You’ll find torx drive advantages in electronics, appliances, and cars—Torx bits transfer torque without cam-out, so screws stay intact.
Hex drivers shine for furniture assembly, bolts, and plumbing fittings; learn common sizes and you’ll tackle hex drive applications confidently.
Buy a compact bit set with magnetic holders and a ratcheting handle so you don’t grab multiple tools.
Store bits neatly and inspect tips for wear; using the right head prevents damage and speeds repairs around your home.
Precision and Electrician Sets
Small precision and electrician screwdriver sets give you the right tip for every delicate or live-circuit job, from tiny electronics to outlet terminals.
You’ll appreciate having precision tools for phone repairs, glasses, and small appliances, while electrician sets include insulated handles that reduce shock risk.
Choose magnetic tips, varied sizes, and a compact case so you can work quickly and safely. Always follow electrician safety practices: shut power, test circuits, and wear eye protection.
- Precision Phillips, flat, and tri-wing bits
- Insulated slotted and Phillips screwdrivers
- Magnetic bit holder and extension
- Compact organized case
Hammer and Mallet Essentials
Few tools are as indispensable as a good hammer, and knowing when to reach for a mallet can save your work and your hands.
You’ll want a claw hammer for general repairs, a ball-peen for metalworking, and consider sledge options for heavy demolition—hammer types matter.
For gentle assembly or tapping joints, pick the right mallet: rubber, rawhide, or wooden heads differ—mallet materials determine rebound and surface protection.
Hold tools firmly, strike squarely, and swap to a mallet when you need to avoid marring.
Store them in a toolbox, inspect handles for cracks, and replace worn heads promptly.
Adjustable and Combination Wrenches
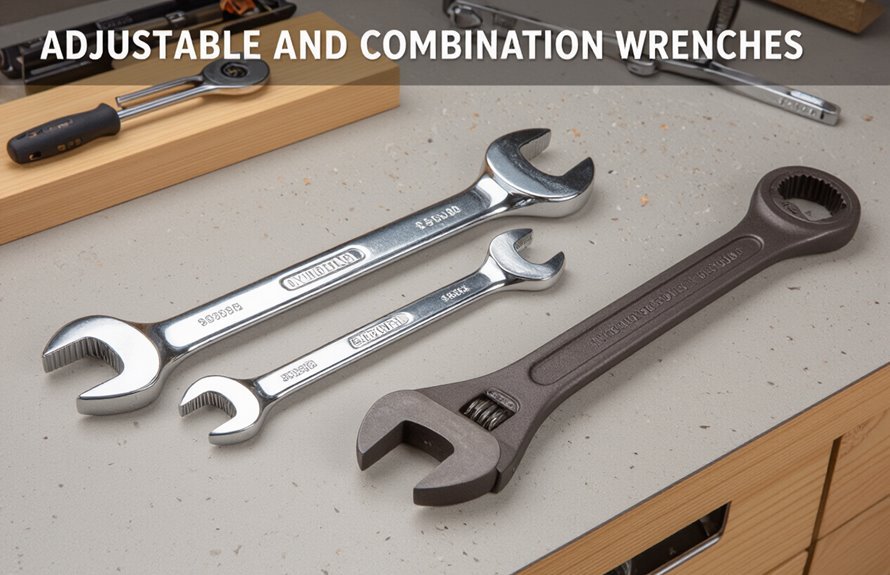
When choosing wrenches, pick sizes that match the fasteners you use most so you won’t struggle on the job.
Decide between open ends for quick turning and box ends for better grip on stubborn nuts, and keep an adjustable wrench for odd sizes.
Store them clean and dry, tip the adjustable open slightly to prevent sticking, and inspect for wear before each use.
Choosing the Right Size
How do you know which wrench size will save you time and prevent damage? You check tool size considerations and practice selecting tool dimensions before starting.
Match wrench jaws to fastener flats, avoid loose fits, and use adjustable wrenches when a single versatile option helps. Keep a small set of fixed sizes for common jobs so you don’t struggle or round bolts.
- Carry 8mm–19mm for metric jobs and 1/4″–3/4″ for imperial.
- Choose combinations for durability and predictability.
- Use the smallest correct size to maximize torque control.
- Replace worn jaws to prevent slippage.
Open vs. Box Ends
Anyone tackling household repairs will want to know the difference between open-end, box-end, adjustable, and combination wrenches so you pick the right tool for the job.
You’ll use open-end wrenches when space is tight or you need quick repositioning; open end advantages include speed and access on flats or close-clearance nuts.
Box-end wrenches grip more faces, reducing slip and rounding, so box end benefits show when loosening stubborn or high-torque fasteners.
Adjustable and combination wrenches give versatility: adjustable fits many sizes, combination pairs an open end with a box end for flexibility.
Choose based on access and torque needs.
Maintenance and Storage
After choosing adjustable or combination wrenches for their versatility, you’ll want to keep them in good shape so they work reliably.
Wipe tools after use, apply a light oil to prevent rust, and check moving parts on adjustable wrenches. Include seasonal maintenance—inspect before winter storage and after humid seasons.
Choose compact storage solutions like labeled trays or pegboards so you can grab the right size quickly. Store in a dry spot away from corrosive chemicals.
- Clean and dry after each job
- Lubricate adjustable threads monthly
- Inspect jaws and markings for wear
- Use dedicated storage solutions
Pliers: Needle-Nose, Slip-Joint, and Cutting
Pliers are some of the most versatile tools in your home toolbox, and knowing when to reach for needle-nose, slip-joint, or cutting pliers will save you time and frustration.
You’ll use needle-nose applications for tight spaces and delicate bends, gripping small wires or retrieving fallen screws. Rely on slip joint versatility for adjustable gripping on plumbing nuts or odd-shaped objects.
Use cutting techniques with diagonal or combination pliers to cleanly trim wire and remove insulation.
Keep pliers maintenance routine: wipe, lightly oil pivot points, and check jaws for wear so they stay reliable when you need them.
Tape Measures and Layout Tools
You’ll rely on a good tape measure and layout tools to get accurate measurements every time.
Learn simple marking techniques and the right tools for transferring lines, and you’ll avoid costly mistakes.
For odd shapes, pick up flexible tapes and contour gauges so you can measure irregular surfaces precisely.
Accurate Measurement Basics
Good measurements make projects go smoothly, so start by picking a reliable tape measure and a few layout tools that match the job.
You’ll learn basic measurement techniques that prevent costly mistakes: check tape measure accuracy against a known length, lock the blade for repeatable reads, and account for hook thickness when measuring inside versus outside dimensions.
Measure twice, cut once, and recheck critical spans. Keep tools clean and store them where they won’t bend or corrode. Use consistent units and note reference edges to avoid confusion.
- Verify tape calibration regularly
- Use a stable starting point
- Read at eye level
- Record measurements immediately
Marking and Layout Tools
A reliable tape measure and a few precise layout tools make marking quick and accurate, so choose blades with clear graduations and a sturdy locking mechanism.
You’ll want a 25-foot tape for most jobs and a compact pocket model for quick checks. Use a carpenter’s pencil and marking chalk for visible lines on wood and masonry.
A claw or combination square helps keep corners true; a folding rule offers rigid straight edges. For wall layouts and hanging, a laser level speeds alignment and reduces re-measurement.
Store these tools together so you can mark, check, and adjust without hunting gear.
Measuring Irregular Surfaces
When measuring irregular surfaces, pick tape measures and layout tools that stay steady against curves and edges so your readings don’t shift.
You’ll combine irregular surface techniques with advanced measuring tools to capture accurate lengths, contours, and offsets. Use flexible fiberglass tapes, retractable tapes with magnetic or hook anchors, contour gauges, and laser distance meters with spot-lock features.
Practice holding anchors steady, taking multiple passes, and transferring measurements to templates. Calibrate tools before precise cuts, and note reference points clearly so you avoid cumulative errors.
- Flexible fiberglass tape
- Magnetic/retractable tape
- Contour gauge
- Laser distance meter
Levels for Accurate Installations

Before you start hanging shelves, installing cabinets, or setting fence posts, pick the right level and learn to use it properly so your work sits true and functions as planned.
You’ll choose from spirit, torpedo, and laser level types depending on scale and precision. Hold a torpedo level against trim, a longer spirit level across cabinets, or mount a laser for long runs.
Check calibration against a known flat surface before use. Use shims, adjust fasteners, and recheck frequently during installation.
These installation tips help prevent crooked results, save time, and guarantee doors, shelves, and posts operate correctly.
Utility Knife and Cutting Tools
If you want clean, safe cuts for trim, carpet, drywall, or packaging, pick the right utility knife and keep its blade sharp and secure.
You’ll handle straight cuts, scoring, and trimming confidently when you follow utility knife safety: retract blades, lock mechanisms, and cut away from your body.
Practice steady pressure and change blades at the first dullness.
- Choose a comfortable, locking utility knife
- Store blades safely and dispose of used ones
- Use snips or shears for tougher materials
- Keep a small sharpening stone or replacement blades handy
Regular cutting tool maintenance prevents accidents and improves results.
Cordless Drill and Drill Bit Set
You’ve sharpened blades and learned safe cutting; now reach for a cordless drill and a matched bit set to handle holes, fasteners, and simple driving tasks.
You’ll want to compare cordless drill features like battery voltage, brushless motors, clutch settings, and compact size so you get power without excess weight.
Match drill bit types to the job: twist bits for wood and metal, masonry bits for brick, and screwdriver bits for various fasteners.
Keep a quick-change bit holder and a charged spare battery.
With those basics, you’ll tackle shelving, repairs, and small builds confidently and efficiently.
Stud Finder and Wall Anchors
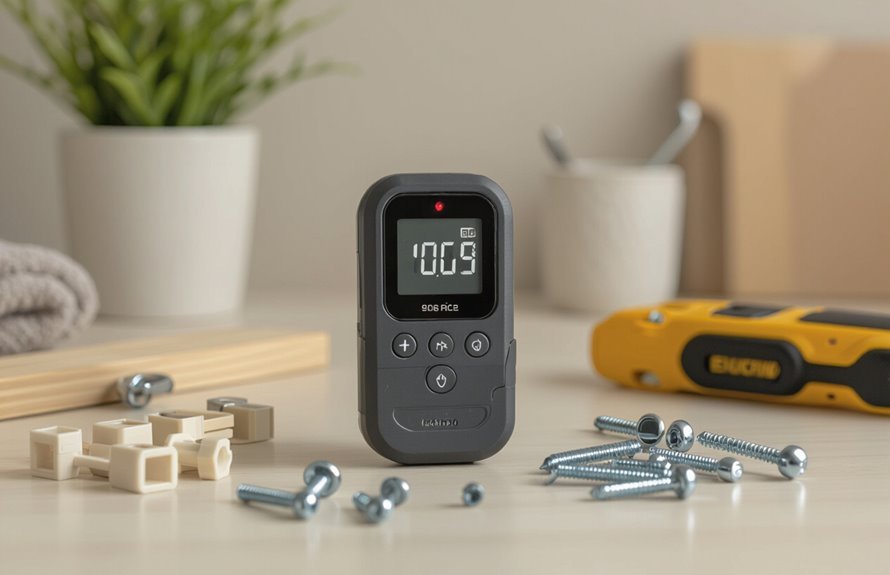
When you’re mounting shelves, TVs, or heavy fixtures, a reliable stud finder and the right wall anchors keep your work secure and stable.
You’ll learn stud finder techniques to locate studs quickly and avoid wiring. Scan slowly, mark edges, and confirm with a small pilot hole.
Match wall anchor types to load and wall material: plastic anchors for light loads, toggle bolts for heavy items, and molly bolts for medium loads in drywall. Use the correct drill bit and torque.
Anchor choice prevents sagging, protects walls, and keeps fixtures safe.
- Scan slowly and mark edges
- Confirm with a pilot hole
- Match anchor to load
- Use correct drill bit
Pipe Wrench and Plumbing Tools
You’ll want a couple pipe wrenches in different sizes—typically 10″ and 18″—so you can handle most household fittings.
Pair those with basic plumbing hand tools like a basin wrench, adjustable pliers, plumber’s tape, and a drain snake for common repairs.
Regular checks and simple preventative maintenance, such as tightening joints and clearing slow drains, will keep small issues from turning into big ones.
Essential Pipe Wrench Sizes
Picking the right pipe wrench sizes can make common plumbing jobs far easier and help you avoid damage to pipes and fittings.
You’ll want a small, medium, and large wrench to cover typical home pipes; consider pipe wrench types and pipe wrench materials when choosing — cast iron jaws for strength, aluminum for lightness.
Use an adjustable model for versatility, and keep a chain or strap wrench for delicate surfaces.
- 8–10 inch: tight spaces, small fittings
- 14–18 inch: general household work
- 24 inch: heavier valves, larger pipes
- Adjustable wrench: flexible, space-saving
Basic Plumbing Hand Tools
A few well-chosen plumbing hand tools will let you tackle most minor repairs without calling a pro.
Keep a reliable pipe wrench for threaded joints, adjustable wrenches for fittings, tongue-and-groove pliers for grip, a basin wrench for tight sink nuts, and a plumber’s tape and sealant for leak stops.
A drain snake and plunger clear clogs fast.
Learn basic techniques so you can handle plumbing emergencies tips confidently and perform DIY plumbing repairs safely.
Store tools together, inspect them before use, and replace worn parts.
Knowing when to stop and call a pro prevents bigger damage.
Preventative Plumbing Maintenance
Because regular checks keep small issues from turning into big repairs, preventative plumbing maintenance should be part of your routine — and your pipe wrench and basic plumbing tools are central to that work.
You’ll inspect for drips, test water pressure, and use leak detection methods to find hidden problems. Tighten fittings, replace washers, and maintain drains to avoid clogs.
Add simple upgrades like pipe insulation to prevent freezing and reduce heat loss. Keep a basic kit handy so you act quickly and save on repairs.
- Check under sinks monthly
- Test shutoff valves
- Use leak detection dye
- Insulate exposed pipes
Basin Wrench and Faucet Repair Tools
When you need to loosen hard-to-reach nuts under sinks, a basin wrench is the tool that saves time and frustration; paired with a few basic faucet-repair tools—like adjustable pliers, seat-wrench sets, and replacement O-rings—you can handle most common leaks and drips yourself.
Learn basin wrench usage so you can grip mounting nuts in tight spaces without removing the sink. Combine that with knowledge of faucet installation techniques to swap cartridges, tighten supply connections, or replace seals.
Keep a small parts kit and silicone grease handy. With these tools and skills, you’ll fix most faucet issues quickly and avoid costly calls.
Electrical Tester and Wire Strippers
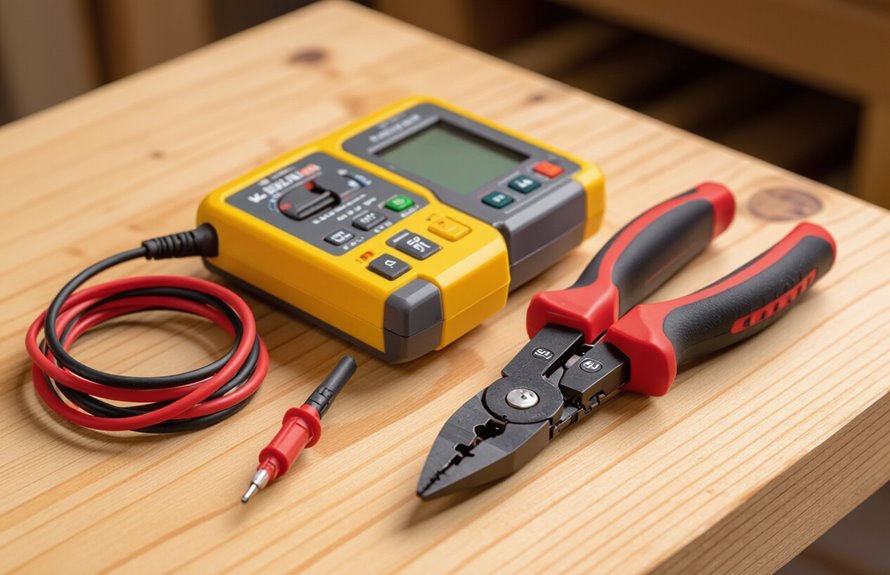
An electrical tester and a good pair of wire strippers are two of the first tools you’ll reach for when tackling household wiring tasks.
You’ll use the tester to confirm circuits are dead before you touch them, improving electrical safety, while wire strippers let you prep conductors cleanly for reliable connections.
Keep both in your basic toolkit, inspect tips and insulation regularly, and practice steady, controlled cuts to avoid damaging conductors.
- Test before you touch to prevent shocks.
- Use the right stripper gauge for each wire.
- Replace worn blades and flawed insulation.
- Keep tools dry and stored safely.
Flashlights and Portable Lighting
When you pick a flashlight, check brightness in lumens so you know how much light you’ll get.
Consider power source and runtime—rechargeable vs. disposable batteries affects how long a light lasts.
Also weigh size, weight, and durability so it fits your tasks and survives drops or weather.
Brightness and Lumen Ratings
Although you might just look at a flashlight and guess how bright it is, lumen ratings give you the measurable output you need to compare lights accurately.
You’ll use lumen ratings for brightness comparison and to judge lumen efficiency — higher lumens don’t always mean better usable light. Look for beam distance, lux at a distance, and whether the beam is floody or focused.
Consider color temperature for true visibility. Don’t assume marketing numbers tell the whole story; read specs and reviews so you pick the right tool for tasks like repairs, inspections, or storms.
- Compare lumen ratings
- Check beam type
- Note color temperature
- Read real-world reviews
Power Sources and Runtime
Because you rely on lighting in outages and projects, pick power sources and runtimes that match how you’ll use the light.
Choose rechargeable batteries or replaceable cells based on access and cost; rechargeables offer better power efficiency for frequent use, while disposables can be handy for long-term storage.
Check manufacturer runtime claims at different brightness modes and plan runtime management by rotating batteries, carrying spares, or using low modes for longer tasks.
For portable lighting, consider USB-rechargeable options with power banks for extended use.
Test lights before need arises so you know real-world runtimes and charging needs.
Size, Weight, Durability
Size, weight, and durability determine how and where you’ll actually use a flashlight or lantern. You want a balance: low tool weight for easy carry, but enough heft to feel solid.
Consider material durability against drops, water, and abrasion so the light works when you need it most.
- Pick compact models if you’ll pocket or clip them.
- Choose lanterns with stable bases for campsite and blackout use.
- Look for IP ratings and shock-resistant housings.
- Test ergonomics and switch placement to guarantee one-handed operation.
Smart choices guarantee your portable lighting is reliable, comfortable, and built to last.
Ladder Safety and Selection
A sturdy ladder is one of the most useful tools you’ll own, but choosing and using the right type takes thought; pick the correct height and material, check load ratings, and always set it on firm, level ground to reduce risk. You should learn ladder types, inspect for damage, and follow ladder maintenance routines. Keep three basic rules: secure footing, maintain three points of contact, and avoid overreaching. Use a helper for tall jobs. Store ladders dry and clean. Refer to this quick comparison:
| Type | Best for | Tip |
|---|---|---|
| Step | Indoor tasks | Stable |
| Extension | Exterior | Adjustable |
| Folding | Storage | Compact |
Portable Workbench and Clamps
After you’ve got a safe ladder routine, set up a stable workspace on the ground with a portable workbench and clamps to keep projects steady.
You’ll appreciate portable workbench benefits when you fold it away, move it where needed, and work at a comfortable height.
Choose clamps that suit the task and practice effective clamp techniques: align jaws, protect surfaces, and apply steady pressure. That keeps parts true and hands free.
Use quick-release models for speed and bar or C-clamps for strength.
Store gear nearby so you’ll stay efficient and finish small repairs or DIY projects with confidence.
- Portable, foldable bench
- Quick-release clamps
- Bar and C-clamps
- Protective jaw covers
Caulking Gun and Sealants
One reliable caulking gun and a few quality sealants will keep drafts, leaks, and gaps under control around your home. You’ll want a smooth-action gun and cartridges matched to caulking types—silicone for bathrooms, acrylic for trim, polyurethane for exterior joints. Learn basic sealant applications: sealing windows, patching trim, weatherproofing siding. Use steady pressure, tool the bead, and clean excess before it skins. Replace cartridges regularly and store sealants upright. Visualize choices:
| Tool | Use |
|---|---|
| Silicone | Wet areas, flexible seal |
| Acrylic | Paintable trim, interior |
Paint Brushes, Rollers, and Prep Tools
Once your seams and gaps are sealed, you’ll want the right brushes, rollers, and prep tools to get a clean, durable finish.
You’ll learn basic paint preparation techniques: sanding, cleaning, and priming. Choose brushes (angled for trim, synthetic for latex) and refer to a roller types comparison to match nap length to surface texture.
Prep tools—tape, drop cloths, filler knives—speed work and prevent mistakes. Store tools properly to extend life.
- Angled sash brush for precision
- Roller with appropriate nap for walls
- Sanding block and tack cloth
- Painter’s tape and drop cloth
Lawn and Garden Basic Tools
A few basic tools will make lawn and garden care faster and more effective: a sturdy spade for digging, a hand trowel for planting, a rake for leveling and clearing debris, and pruning shears for shaping shrubs and cutting flowers.
You’ll also want a wheelbarrow for moving soil, a hose with an adjustable nozzle for watering, and gloves to protect your hands.
Use these lawn maintenance tips: mulch beds, sharpen blades, and water early.
Keep everything accessible by designating garden tool storage—hooks, shelves, or a small shed—to extend tool life and speed routine chores.
Home Safety and Emergency Repair Kit
Because emergencies don’t wait, having a compact home safety and emergency repair kit keeps you ready for common incidents and minor repairs.
You’ll want tools and supplies that let you act fast, prevent damage, and stay safe until help arrives. Prioritize fire extinguisher safety by choosing the right type and keeping it accessible.
Include emergency flashlight essentials with extra batteries and a compact charger. Store items in a portable box and review them seasonally so nothing expires.
- Small fire extinguisher (ABC-rated) and clear instructions
- Flashlight, spare batteries, and charger
- First-aid kit and basic medications
- Multi-tool, duct tape, and tarp
Conclusion
You don’t need to be a pro to keep your home in great shape — these tools give you confidence for common fixes and projects. If you’re worried it’s too much upfront cost, start with the basics (screwdrivers, hammer, pliers) and add pieces as you go — you’ll save money on repairs and learn skills fast. Keep your emergency kit handy, and you’ll handle most surprises without stress.