40 DIY Old Furniture Makeover Ideas for a Budget-Friendly Upgrade
You can easily refresh your old furniture with budget-friendly DIY makeovers! Try revamping wooden chairs with vibrant paint, or transform an old dresser into a stylish TV stand. Create a vintage look by distressing surfaces, or upholster that tired sofa with eye-catching fabric. Turn a bookshelf into a chic bar cart and repurpose a crib into a unique bench. There are so many creative ideas waiting for you, and more are just around the corner!
Revamping Wooden Chairs With Paint
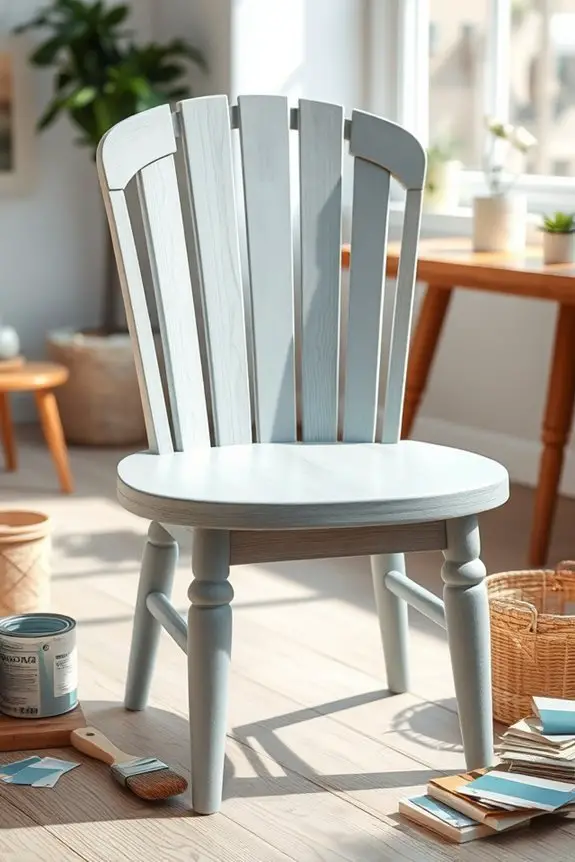
If you’ve got old wooden chairs that have seen better days, revamping them with paint can breathe new life into your space.
Start with furniture prep by sanding the surfaces, guaranteeing a smooth finish. Choose your paint brand wisely, opting for eco-friendly paints that match your decor style.
For a trendy twist, consider layering paint or using creative stenciling designs for added flair. Play with color choices and accent colors that evoke modern trends or vintage vibes.
Upgrade chair legs with a complementary hue, and don’t forget cushion upgrades with fabric choices that enhance your theme.
Finish with protective sealants to guarantee longevity. With the right DIY tools, you’ll transform those chairs into stunning statement pieces!
Transforming an Old Dresser Into a Stylish TV Stand

Old dressers can be a fantastic solution for creating a stylish TV stand, adding character and functionality to your living space. Start by choosing a paint color selection that complements your decor; soft neutrals or bold hues can make a statement.
Sand down the surface for better paint adhesion, then apply a primer and your chosen paint.
Next, consider cable management solutions to keep your setup tidy. You can drill holes in the back of the dresser for cables or use decorative clips to secure them.
Finally, arrange your media devices and decorative items on top, ensuring everything’s accessible yet stylish. With a few simple steps, you’ll turn that old dresser into a chic focal point in your room!
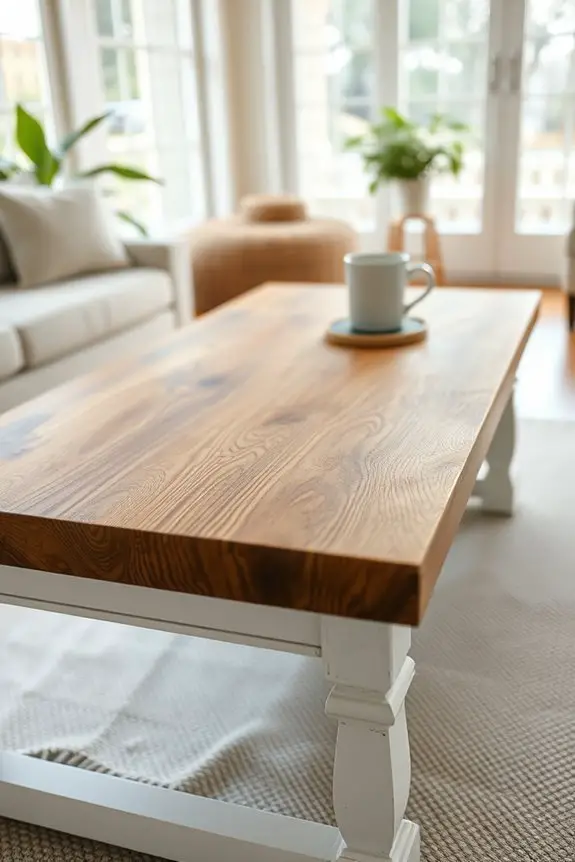
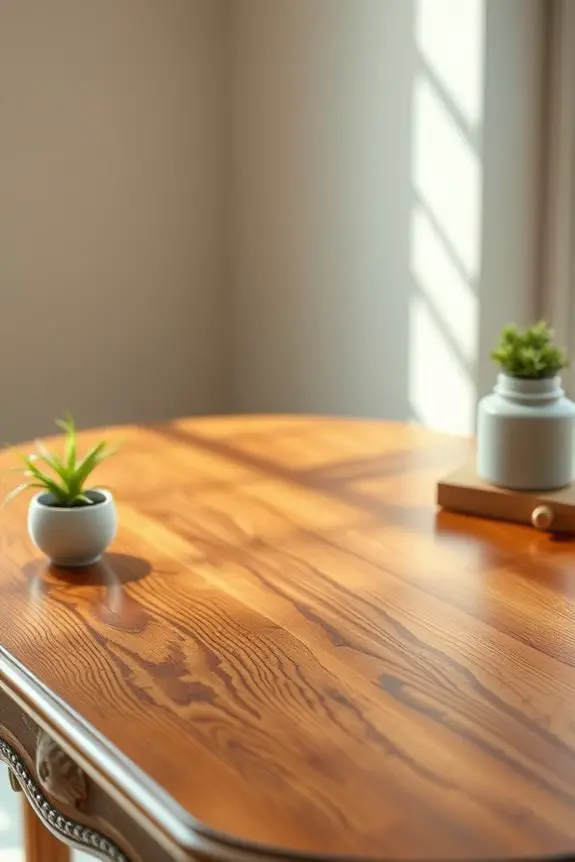
Repainting a Coffee Table for a Modern Look
If you’re looking to give your living space a fresh update, repainting your coffee table can make a significant difference.
Start by choosing a color that complements your decor—bold hues like navy or emerald can add a modern touch. When selecting your paint, consider using chalk paint or acrylic for sleek coffee table finishes that dry quickly and offer a durable surface.
Before you begin, sand the table lightly to guarantee the paint adheres well. Use modern design techniques like a two-tone approach, pairing a darker base with a lighter top for visual interest.
After applying a few coats, seal your masterpiece with a clear protective finish. Your revamped coffee table will surely become a stylish focal point in your room.
Adding New Hardware to Update Cabinets
Updating your cabinets can be as simple as swapping out the hardware. Consider replacing old cabinet knobs or drawer pulls with trendy handle styles that reflect modern designs or vintage accents.
When selecting new pieces, pay attention to hardware finishes like matte black, brushed nickel, or antique brass for a cohesive look. Don’t forget color coordination to guarantee the new hardware complements your cabinets.
Before you buy, think about size considerations; larger handles can make a bold statement, while smaller knobs may offer subtle elegance.
Installation tips include measuring existing holes to avoid extra drilling. With budget options widely available, you can easily elevate your cabinetry without breaking the bank.
A little hardware change can make a big difference!
Using Wallpaper to Refresh Drawer Interiors
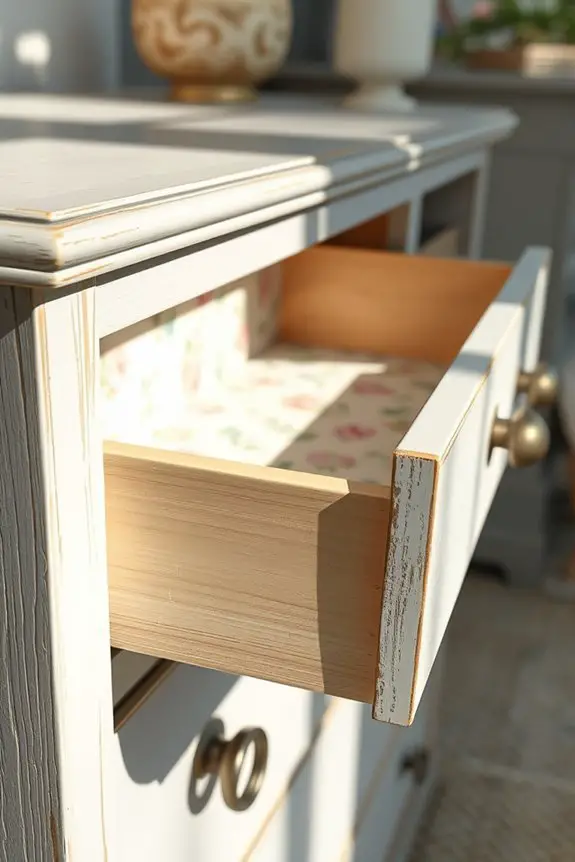
Transforming your furniture doesn’t have to stop at the surface. One of the easiest ways to elevate your pieces is by using wallpaper to refresh drawer interiors.
Choose vibrant wallpaper patterns that reflect your style, whether it’s bold florals or classic stripes. Begin by measuring the drawer’s interior and cutting the wallpaper to fit. You can apply it using decoupage glue or simply adhere decorative drawer liners over the wallpaper for added protection and style.
This small change creates a delightful surprise every time you open a drawer, making your furniture feel brand new. Plus, it’s a budget-friendly upgrade that showcases your creativity and makes your space feel uniquely yours!
Turning a Nightstand Into a Mini Desk
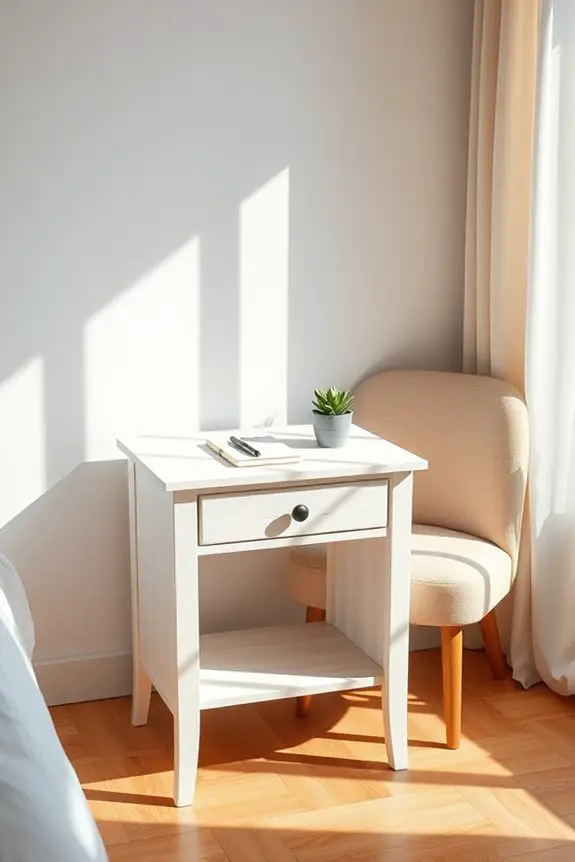
If you find yourself in need of a workspace but lack the room for a full desk, consider turning a nightstand into a mini desk. This nightstand transformation is easier than you think!
Start by clearing off any clutter and giving it a fresh coat of paint to match your decor. You can add a small drawer organizer or a cute desk lamp for functionality.
To enhance your workspace, attach a corkboard or a small floating shelf above the nightstand for notes and supplies. Don’t forget to personalize it with a few decorative items that inspire you!
With these mini desk ideas, you’ll create a cozy, productive spot that fits perfectly in your home without breaking the bank.
DIYING a Vintage Trunk Into a Coffee Table
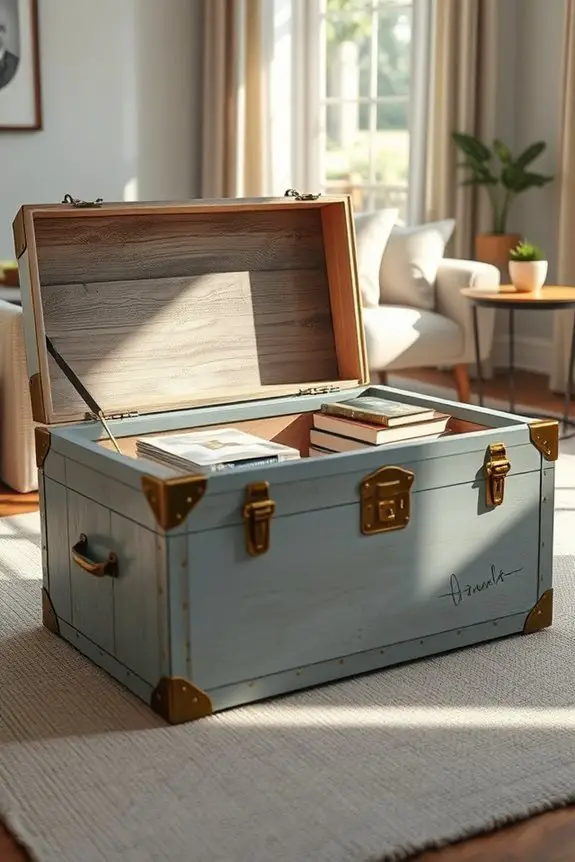
Turning a vintage trunk into a coffee table can add unique charm to your living space. This DIY project combines vintage trunk restoration with functional style.
Start by cleaning the trunk thoroughly, removing any old hardware or paint. You might want to sand it down to reveal its original beauty.
For a polished look, apply a fresh coat of paint or stain that complements your decor. If your trunk has a lid, consider adding a cushion for extra seating or comfort.
Finally, place a glass top on the trunk to create a flat surface while showcasing its unique details.
This coffee table transformation not only enhances your room’s aesthetic but also provides valuable storage space for blankets or books.
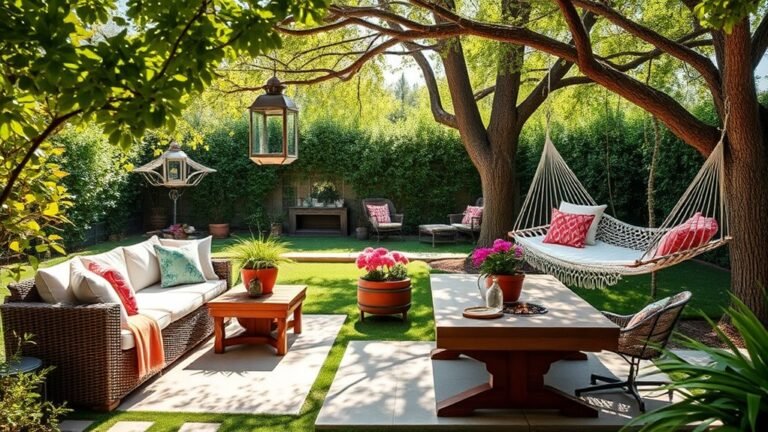
Creating a Garden Bench From Old Pallets
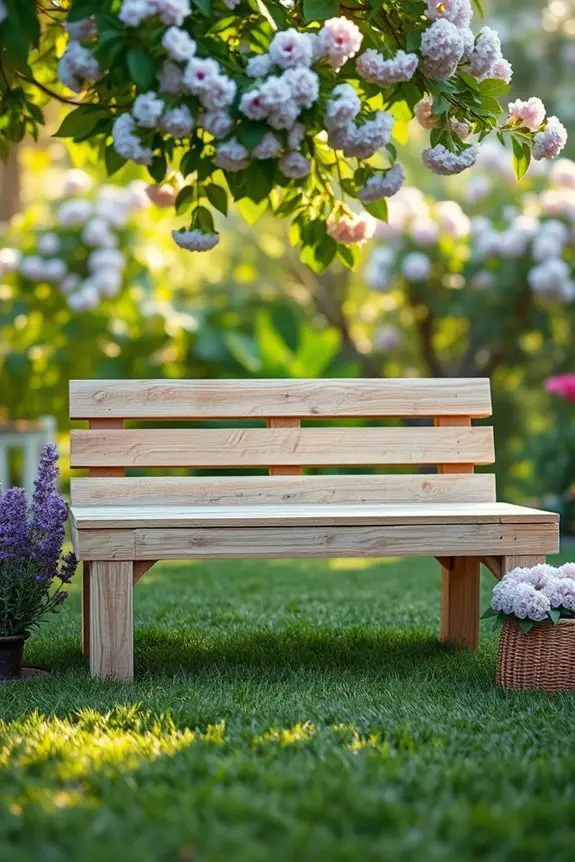
Creating a garden bench from old pallets is a fun and budget-friendly project that can elevate your outdoor space.
Start with pallet preparation by cleaning and sanding the pallets to remove any rough spots or splinters. Make certain the wood is in good condition, as this will guarantee durability.
Once prepped, you can begin bench assembly. Lay two pallets side by side for the bench seat and secure them together with screws.
For the legs, use two more pallets cut to size, attaching them securely to support the seat.
Finish by adding a coat of weather-resistant paint or sealant, giving your bench a polished look.
Enjoy your new outdoor seating area, perfect for relaxation!
Refurbishing a Dining Table With a Stenciled Design

While a worn dining table can seem like a lost cause, refurbishing it with a stenciled design can breathe new life into your space.
Start by sanding the table to remove any old finish, then wipe it down to guarantee a smooth surface for table refinishing.
Choose stenciled patterns that match your decor—floral, geometric, or even vintage motifs can work wonders.
After applying a base coat of paint, carefully place your stencil and use a sponge or brush to apply contrasting paint over the design.
Once it’s dry, seal your work with a clear topcoat to protect the patterns.
This budget-friendly upgrade transforms your dining area, making it a stylish centerpiece for family gatherings and dinner parties.
Painting a Metal Filing Cabinet for an Office Upgrade
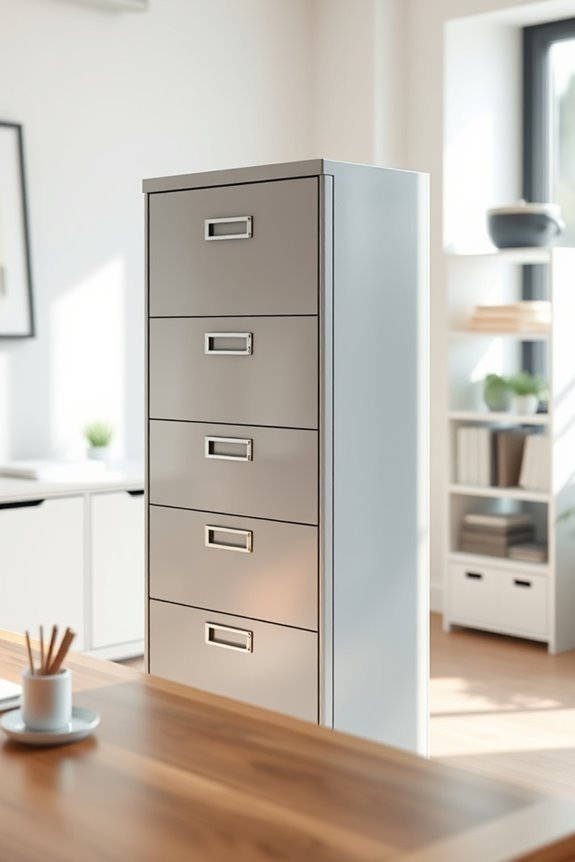
Revamping your office space can be as simple as giving your metal filing cabinet a fresh coat of paint.
Choose a color that complements your decor and helps enhance office organization. Start by cleaning the surface thoroughly, removing any dust or grease.
Consider using a primer specifically designed for metal finishes to guarantee better adhesion and durability. Once the primer dries, apply your chosen paint in thin, even coats, allowing each layer to dry completely before adding another.
You can opt for a matte, glossy, or metallic finish, depending on your style.
Once finished, your newly painted filing cabinet won’t only look great but also bring a sense of order to your workspace, making office organization a breeze.
Reimagining a Bed Frame With a New Headboard
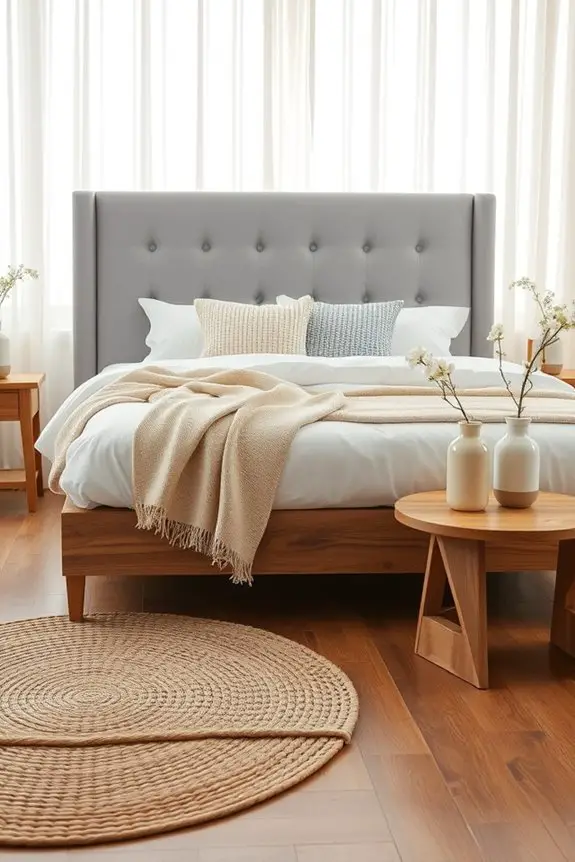
A stylish headboard can transform your bed frame into a stunning focal point in your bedroom. When reimagining your space, consider various headboard styles like tufted, panel, or even a reclaimed wood design to match your aesthetic.
Fabric choices play an essential role, too; think about soft velvet for a touch of luxury or easy-to-clean canvas for practicality.
To create your new headboard, you can repurpose old wood or find affordable options at thrift stores. Once you’ve chosen your style and fabric, secure the headboard to your existing frame, or mount it directly to the wall for a dramatic effect.
This simple upgrade can breathe new life into your bedroom without breaking the bank.
Making a Rustic Entryway Bench From Wood
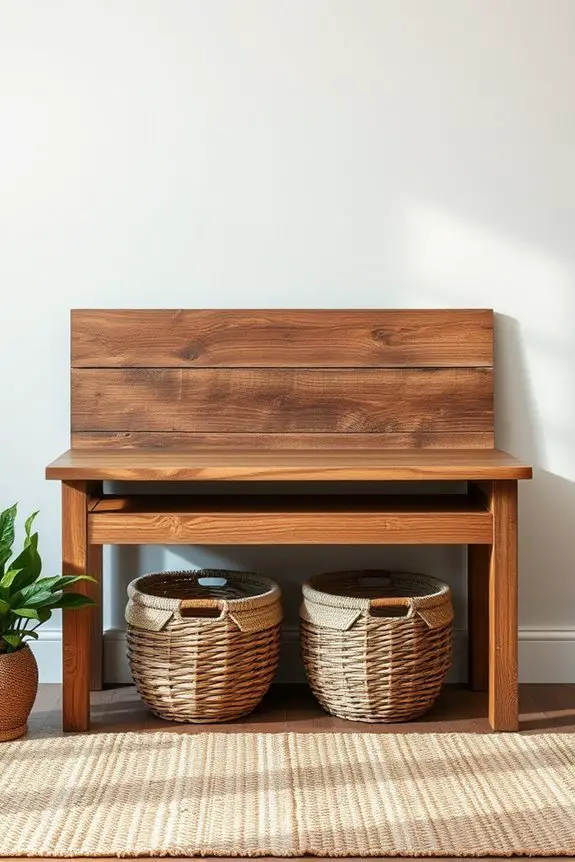
Transform your entryway with a rustic bench that combines style and function. Start by selecting sturdy wood, like pine or cedar, and sand it down for a smooth finish.
Apply rustic wood finishes, such as a weathered stain or whitewash, to enhance the natural beauty of the wood. For extra practicality, design the bench with built-in storage solutions. You can create a hollow space underneath the seat for shoes or out-of-season items.
Attach hinges to the top for easy access. Finish it off with a coat of sealant to protect against wear.
This DIY project not only elevates your entryway’s aesthetics but also provides essential storage, keeping your space tidy and organized.
Sprucing up a Worn-Out Ottoman With Colorful Fabric

Revamping an old ottoman can breathe new life into your living space without a hefty price tag. Start by choosing vibrant fabric choices that reflect your style, like bold patterns or rich colors.
Measure the ottoman’s surface, then cut the fabric to fit, allowing for some overlap. Secure it with a staple gun for a snug finish.
To add charm, consider ottoman embellishments such as decorative trim, buttons, or even stenciled designs. These details can transform a plain piece into a stunning focal point.
Finally, place your revamped ottoman in a cozy corner or use it as extra seating. With a little creativity, you’ll have a stylish, budget-friendly upgrade that enhances your home’s aesthetic!
Reupholstering Dining Chairs With Bold Patterns
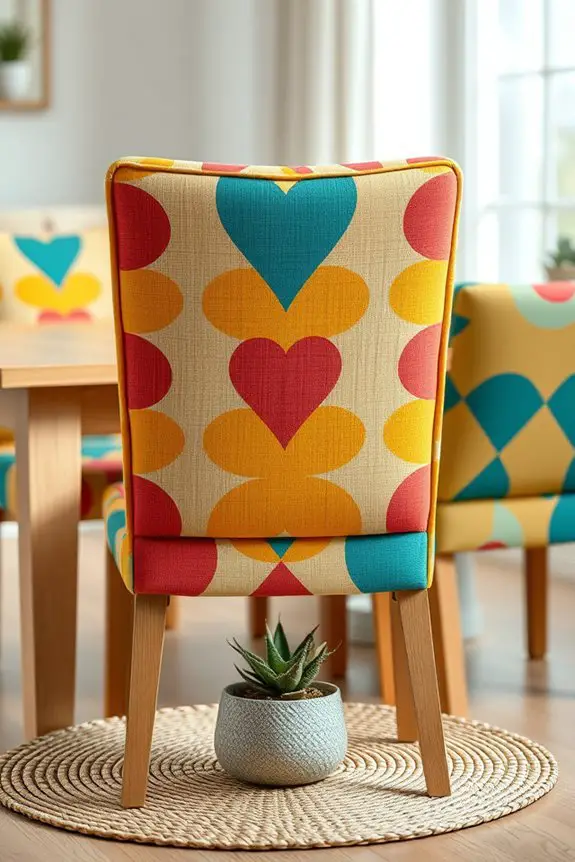
If you’ve enjoyed giving your ottoman a colorful facelift, why not take on your dining chairs next?
Reupholstering is a fun way to breathe new life into your dining area. Start by choosing bold fabric choices that reflect your personality—think vibrant florals or geometric patterns. Make sure the fabric is durable enough to withstand daily use.
When it comes to chair style tips, consider the shape and size of your chairs; a striking pattern can elevate even the simplest designs. Remove the old upholstery carefully, and use a staple gun to secure the new fabric tightly.
Finish off with some decorative trim for a polished look. With a little effort, your dining chairs will become a stunning focal point!
Refinishing a Wooden Side Table With Chalk Paint

A simple side table can become a stunning accent piece with just a few coats of chalk paint.
Start by prepping the wooden surface; clean it thoroughly and lightly sand any rough spots. This helps the paint adhere better.
Next, choose your favorite chalk paint color and gather your supplies. You can use various chalk paint techniques, like dry brushing for a textured look or a smooth finish with a brush or roller.
Apply the first coat and let it dry completely before adding a second coat. For added protection, finish with a clear wax or sealant.
In no time, your side table will transform into a stylish addition that enhances your home décor!
Turning an Old Ladder Into a Decorative Shelf
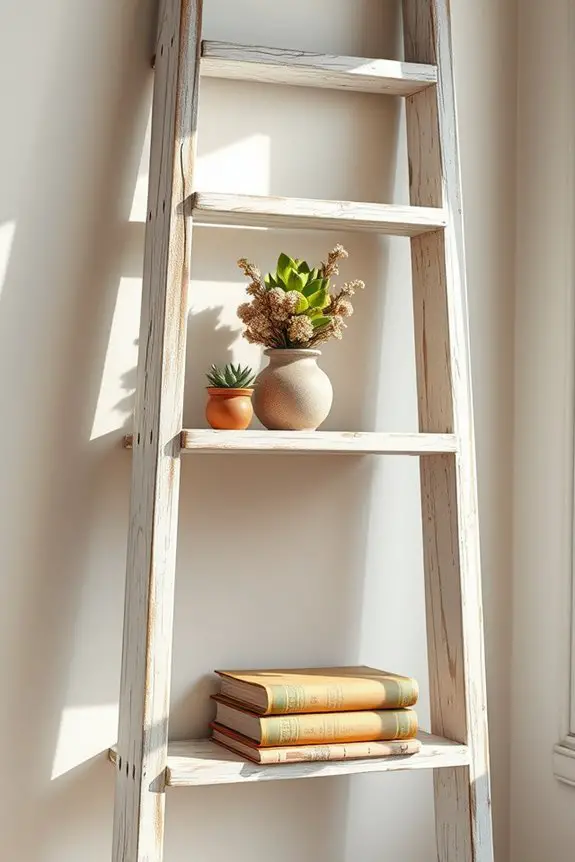
Transforming an old ladder into a decorative shelf can add unique character to your space while showcasing your favorite books or plants.
Start by giving the ladder a good clean and, if you want, a fresh coat of paint or stain. Position the ladder against a wall, securing it for safety.
Use the rungs to display decorative accents like framed photos, potted plants, or colorful books. You can also hang lightweight items, like small baskets, to create extra storage.
Feel free to personalize your ladder shelf by adding seasonal decorations or artwork.
This budget-friendly upgrade not only enhances your decor but also provides a charming, rustic touch that’s sure to impress your guests.
Building a New Top for an Old Coffee Table
Revamping the top of an old coffee table can breathe new life into your living space, making it a stylish focal point.
Start by selecting DIY materials that suit your coffee table design. Consider creative tops like reclaimed wood or plywood for a unique look. Measure your table to guarantee custom dimensions fit perfectly.
If you’re feeling adventurous, try wood staining to enhance the natural beauty of the wood. Pair your new top with table leg options that complement your style, whether it’s industrial metal or sleek wood.
Finish it off with modern finishes like polyurethane for durability. With some budget tools and a bit of effort, you’ll create functional surfaces that serve your needs while providing aesthetic upgrades.
Updating a Vintage Vanity With Mirrors
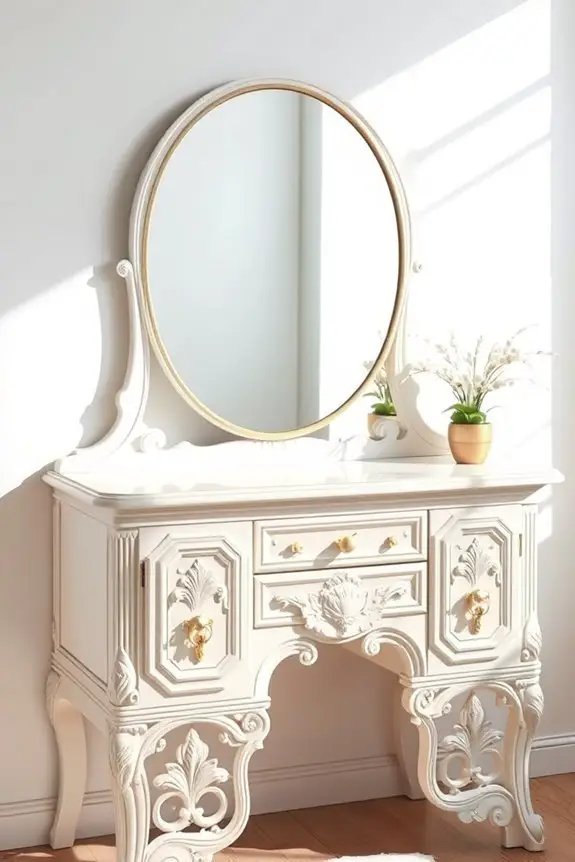
Updating a vintage vanity with mirrors can elevate its charm and functionality, making it a standout piece in your room.
Start by selecting the right mirrors; consider a large, wall-mounted option or smaller, decorative ones for a layered look. Pay attention to mirror placement—position them at angles that enhance light and create an illusion of space.
Next, freshen up your vanity with a coat of vintage paint, choosing a color that complements your existing decor. Don’t forget to seal the paint for durability.
Finally, accessorize with stylish knobs and elegant lighting to complete the transformation. With a little creativity and effort, your vintage vanity will shine anew, making your daily routines feel extra special.
Making a Unique Console Table From Reclaimed Wood
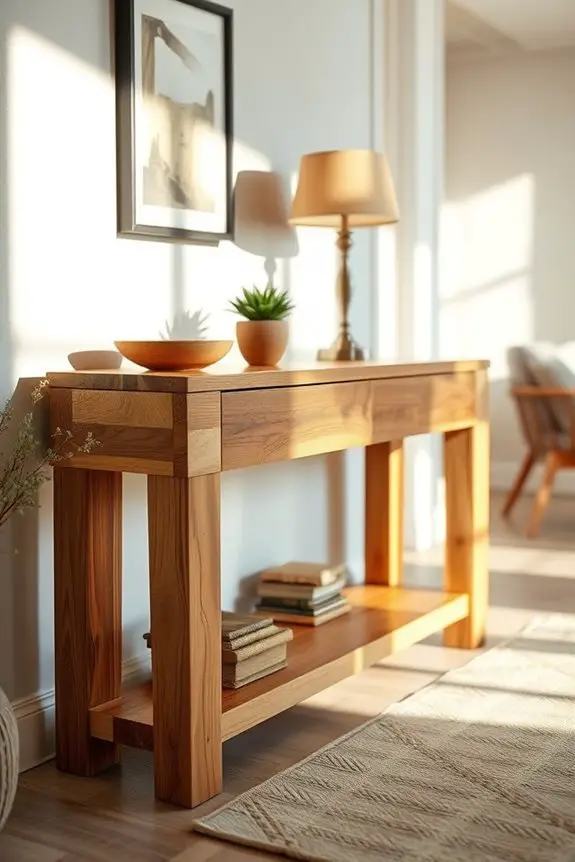
If you’re looking to add a touch of rustic charm to your home, making a unique console table from reclaimed wood is an excellent choice.
Start by sourcing reclaimed wood from old barns, pallets, or furniture. Measure the space where you want the console table and cut your wood to size, ensuring the top is sturdy and visually appealing.
Sand down the edges to create a smooth finish, then assemble the table using metal brackets or wood glue for extra support. You can leave the wood natural for a warm look or apply a stain to enhance its beauty.
Finally, add your favorite decorations, and you’ve got a stunning console table that’s not only budget-friendly but also full of character!
Turning Old Drawers Into Stylish Wall Shelves

When you want to add a unique touch to your walls, turning old drawers into stylish wall shelves is a fantastic solution.
Start by selecting drawers that fit your style—vintage, rustic, or modern. Clean them thoroughly and decide if you want to keep the original finish or add some personal flair.
Attach brackets or simply mount them directly to the wall for a floating effect.
Use your new drawer decor for shelf styling by displaying books, plants, or cherished knick-knacks. Mix and match sizes to create an eye-catching arrangement.
This project not only saves money but also gives your space a personalized charm. Plus, it’s a great conversation starter!
Enjoy your new, functional art pieces on the wall!
Transforming an Old Door Into a Headboard
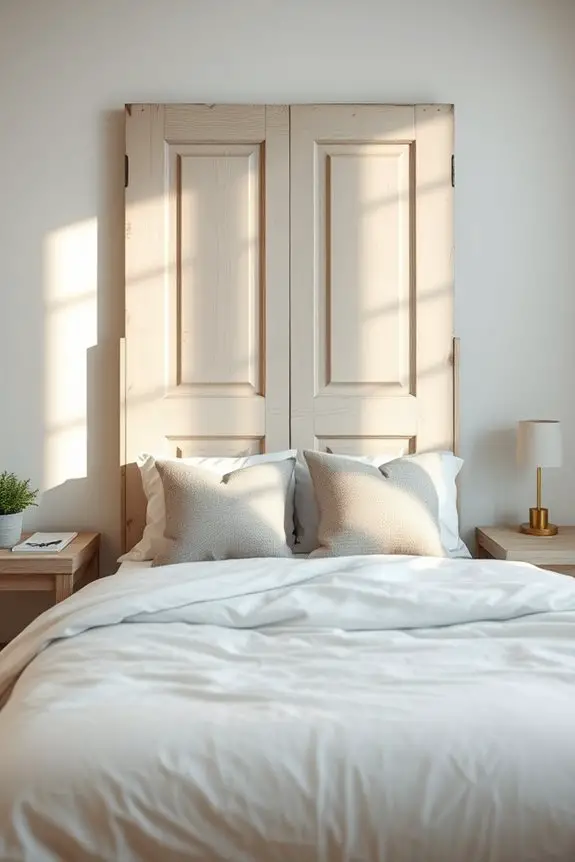
If you’ve got an old door lying around, turning it into a headboard can add character to your bedroom without breaking the bank.
Start by choosing a door style that matches your decor—whether it’s rustic, modern, or vintage, each style offers unique charm. Clean the door thoroughly and consider sanding down any rough edges.
You can leave it as is for a distressed look or paint it in a color that complements your bedding. Next, attach the door securely to the wall or use brackets to mount it behind your bed.
This DIY headboard design not only enhances your space but also serves as a conversation starter. Enjoy your new focal point that’s both functional and stylish!
Creating a Farmhouse Table From Reclaimed Wood

Wondering how to make a stunning farmhouse table that adds warmth to your dining space? Start with reclaimed wood sourcing; look for old barn wood, pallets, or even discarded furniture. Choose pieces that fit your style and have unique character.
Once you’ve gathered your materials, plan your design—rectangular tables are classic and functional.
Begin assembling your table by cutting the wood to size, then join the pieces securely. Sand the surface to guarantee a smooth finish.
For farmhouse table finishes, consider options like natural oil, matte polyurethane, or a simple stain to enhance the wood’s beauty while protecting it. With your new table, you’ll create a cozy gathering spot that showcases your DIY skills and love for rustic charm.
Adding a Glass Top to an Old Table
Revamping an old table by adding a glass top can breathe new life into its design while showcasing its unique features.
You have a variety of glass top materials to choose from, such as tempered or frosted glass, each offering a distinct look. When selecting, consider the table design options that complement your existing decor.
For a rustic table, a thick, clear glass top enhances the wood’s character, whereas a sleek, minimalist table pairs well with a frosted finish.
Ascertain you measure accurately to get the perfect fit, and use adhesive pads to secure the glass and prevent slipping.
This simple upgrade not only protects your table but also elevates its overall aesthetic, making it a stunning focal point in your space.
Refreshing a Worn-Out Armchair With New Cushions

A worn-out armchair can quickly become the centerpiece of your living room with just a few new cushions.
Start by selecting cushion fabric that complements your existing decor. Bold patterns or soft textures can breathe life into your chair while reflecting your personal style.
Next, choose the right size and shape for maximum comfort—consider lumbar pillows for extra support.
Don’t forget to accessorize your armchair with decorative throw blankets or a chic side table to create a cozy nook.
With these simple updates, your armchair transforms from tired to trendy, making it an inviting spot for relaxation.
Embrace your creativity, and enjoy the satisfaction of revamping your space without breaking the bank!
Conclusion
With a little creativity and effort, you can breathe new life into your old furniture, turning tired pieces into stunning focal points. Imagine swapping a dull, outdated dresser for a chic TV stand or transforming a worn-out sofa into a vibrant centerpiece. These budget-friendly makeovers not only elevate your space but also tell a story of renewal and style. So, roll up your sleeves, and let your imagination run wild—your home deserves this upgrade!