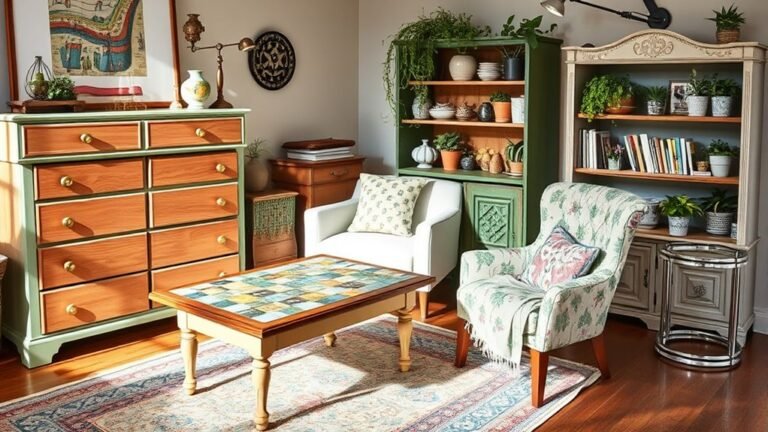
40 DIY Furniture Makeover Ideas for a Stylish Home Transformation
You can easily transform your home with stylish DIY furniture makeovers. Consider upcycling wooden pallets into trendy coffee tables or reupholstering vintage chairs with fresh fabrics. Try painting a dresser for a bold statement or applying a distressed finish to side tables for character. Using chalk paint can revolutionize your cabinets. Don’t forget vintage suitcases as unique side tables. Explore these ideas further, and you’ll discover even more creative possibilities waiting for you.
Upcycled Wooden Pallet Coffee Table

Transforming an old wooden pallet into a stylish coffee table isn’t only cost-effective but also a fun DIY project. You can explore various coffee table styles to match your decor, from rustic to modern.
First, gather your materials, ensuring the pallet is in good condition. Sand it down to remove any splinters, then consider painting or staining it for a polished look.
You might want to add wheels for mobility or a glass top for a sleek finish. With some creativity, you can customize the table to fit your space perfectly.
This project not only adds character to your home but also showcases your skills in pallet wood projects. So, roll up your sleeves and enjoy the process!
Vintage Chair Reupholstering
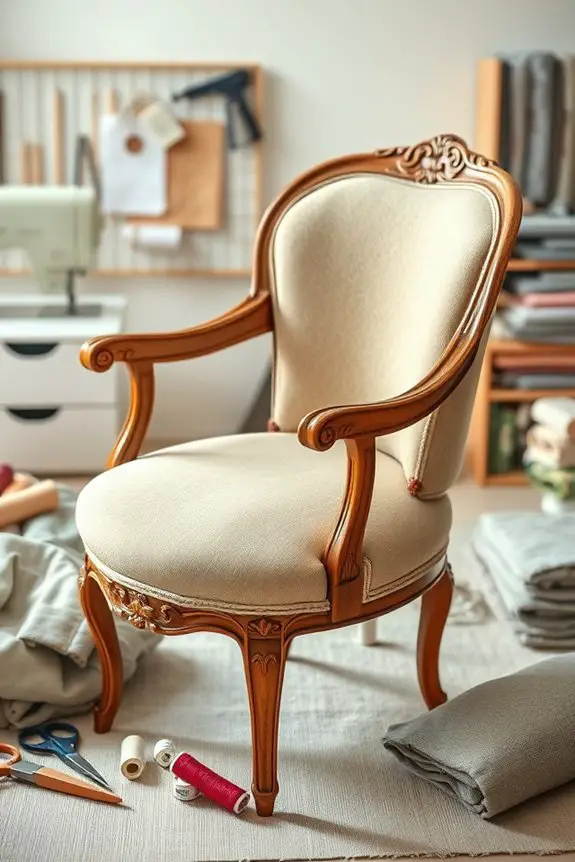
If you’ve got a vintage chair that’s seen better days, reupholstering it can breathe new life into your space.
Start by choosing a vibrant vintage fabric selection that reflects your style; think floral patterns or bold colors.
Next, remove the old upholstery carefully, taking note of how everything is assembled.
When you’re ready to replace the cushioning, consider chair cushioning techniques like using foam or batting for added comfort.
Cut your new fabric, allowing extra for staples, and secure it tightly over the cushioning.
Don’t forget to reattach any hardware or decorative elements.
With a little patience and creativity, your vintage chair will transform into a stunning focal point in your home.
Enjoy the process and showcase your personal touch!
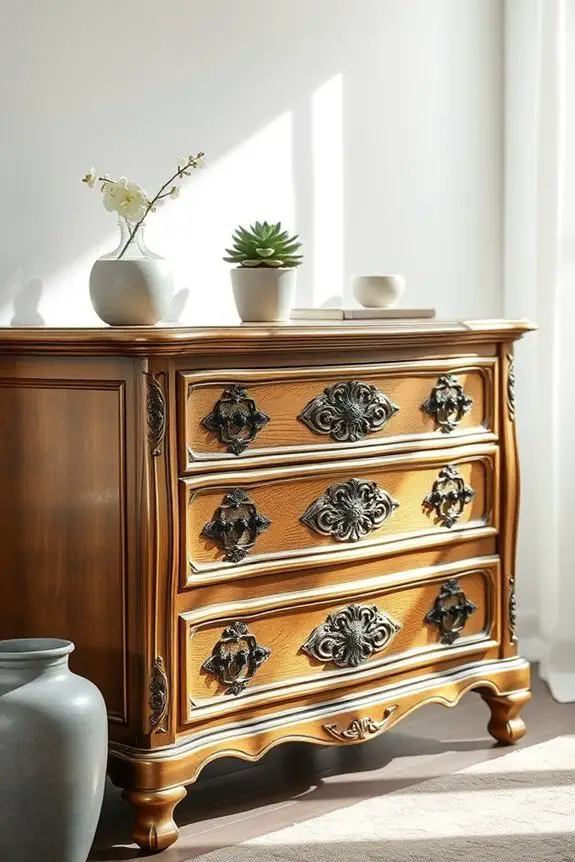
Painted Dresser for a Fresh Look

A painted dresser can instantly elevate the look of any room. With a splash of color, you can transform a tired piece into a stunning focal point.
Start by considering your color choices—bold hues like navy or emerald can add drama, while soft pastels create a serene vibe. Once you’ve chosen your color, explore different paint techniques to add depth and interest. A simple brush technique can give a smooth finish, while a sponge or rag can create a textured look.
Don’t forget to prep your dresser properly; sanding and priming will guarantee the paint adheres well. Finish off with a protective sealant to maintain your dresser’s fresh look for years to come.
Enjoy your stylish transformation!
Distressed Finish on a Side Table
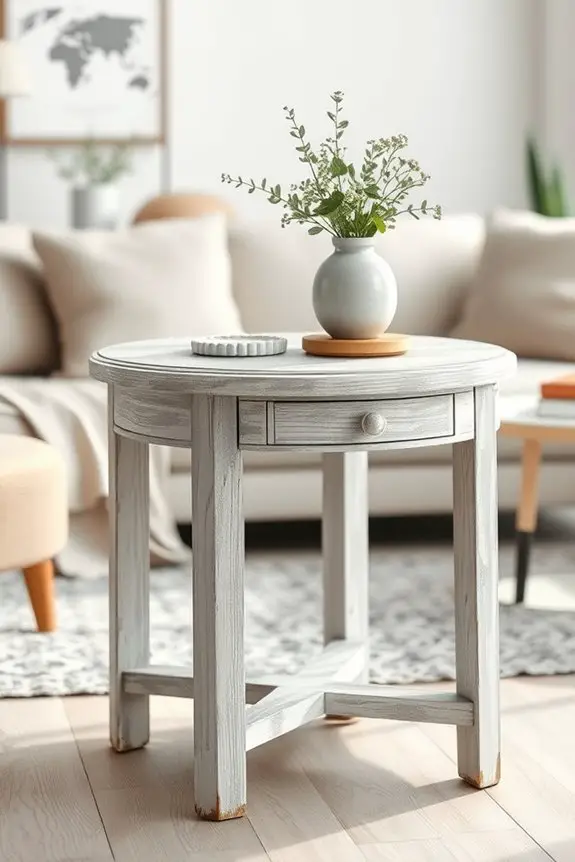
Adding a distressed finish to a side table can bring character and charm to your space, much like a painted dresser can brighten a room. You can achieve this look using various distressed techniques that enhance the table’s natural texture.
Start by sanding the edges and corners to create a worn appearance. Then, apply a base coat of your chosen color, followed by a lighter topcoat. Once dry, gently sand again to reveal the base color underneath.
For added depth, use a dark wax to highlight crevices. This simple process transforms ordinary side table finishes into unique, eye-catching pieces. Embrace your creativity, and you’ll enjoy a stylish update that reflects your personality throughout your home.
Chalk Paint Transformation for Cabinets
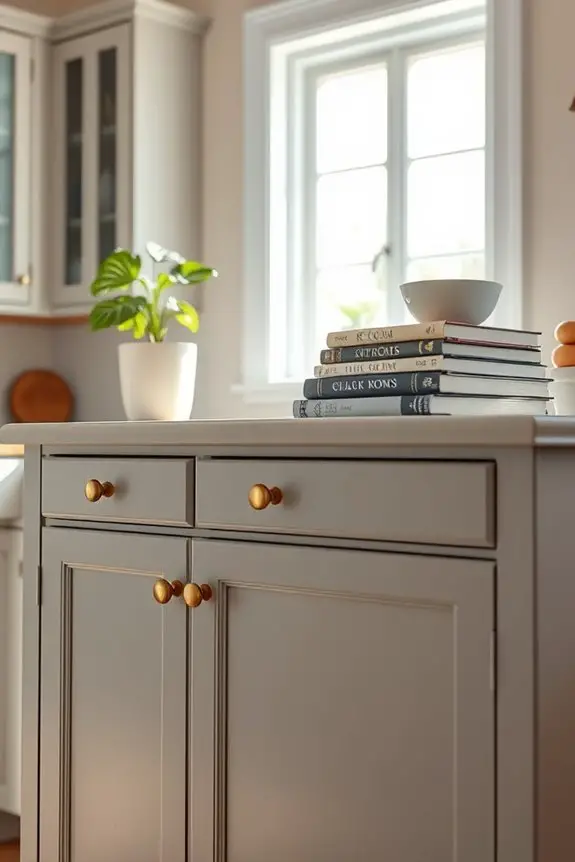
Transforming your cabinets with chalk paint can breathe new life into your kitchen or bathroom.
Start by cleaning the surfaces thoroughly, then apply a primer if needed. Use chalk paint techniques like brushing or rolling for a smooth finish. You’ll love how easy it’s to achieve vibrant colors or soft pastels that match your style.
Once the paint dries, consider cabinet distressing for an aged look. Lightly sand the edges and corners to reveal the wood underneath, adding character to your cabinets.
Finally, seal your work with a protective topcoat to guarantee durability. With these simple steps, you can create a stunning transformation that’s both stylish and functional.
Get ready to enjoy your refreshed space!
Stenciled Nightstand Design

If you’re looking to elevate your nightstand’s appearance, stenciling is a simple yet effective way to add personality and flair. You can choose from various stenciled patterns that suit your taste, whether it’s geometric shapes, floral designs, or abstract motifs.
Start by selecting a nightstand style that complements your room—be it rustic, modern, or vintage. Once you’ve picked your design, prep your nightstand by cleaning and painting it in a base color.
Then, using a stencil and a brush or sponge, apply your chosen patterns. This DIY project not only enhances the aesthetics of your space but also allows for customization.
With a little creativity, your stenciled nightstand will become a stunning focal point in your bedroom.
Mid-Century Modern Sofa Revamp
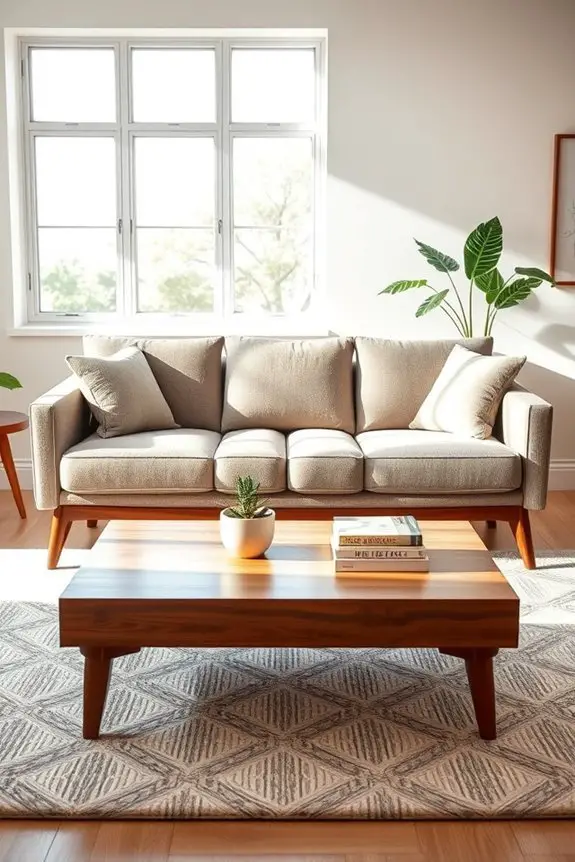
Revamping a mid-century modern sofa can breathe new life into your living space, much like a stenciled nightstand adds charm to a bedroom.
Start by removing the old upholstery, exposing that beautiful frame. Utilize mid-century upholstery techniques to guarantee a polished finish, maintaining the classic lines that define the style.
When choosing your new fabric, consider retro fabric choices like vibrant velvets or playful patterns that echo the era’s aesthetic. These fabrics not only revitalize the sofa but also invite warmth and personality into your room.
To complete the makeover, add complementary cushions that reflect your chosen colors.
With a little creativity and effort, your revamped sofa will become a stunning focal point in your home.
Repurposed Crates for a Unique Bookshelf
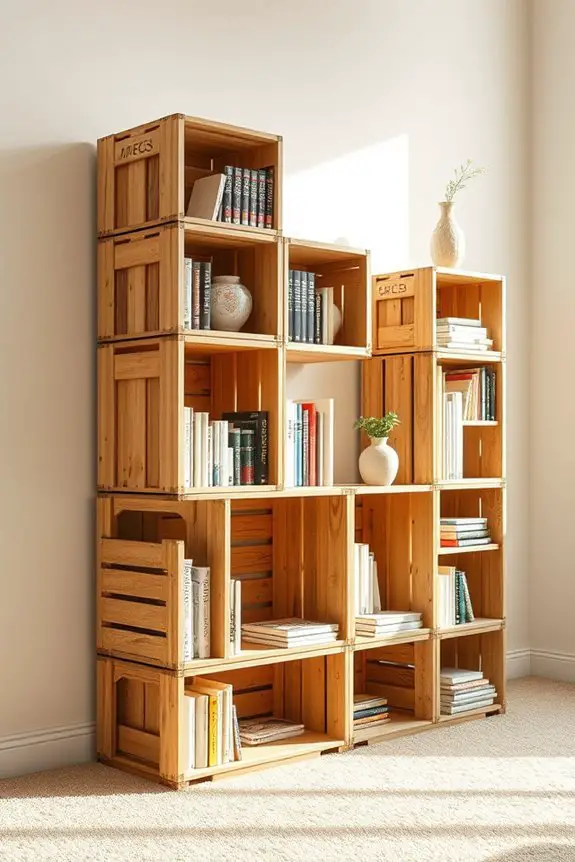
While it might seem challenging to create a unique bookshelf, repurposing wooden crates can be both simple and rewarding.
You can easily transform these crates into a stylish crate bookshelf that showcases your favorite reads. Start by cleaning and sanding the crates for a smooth finish.
Stack them in various arrangements to create unique designs that suit your space and style. You can paint or stain the crates to match your décor, adding a personal touch.
Secure them together for stability, and voilà! You’ve got a functional and eye-catching bookshelf.
Fill it with books, plants, or decorative items to make it truly yours. This DIY project not only saves money but also adds character to your home.
Glamorous Gold Leaf Accent Table
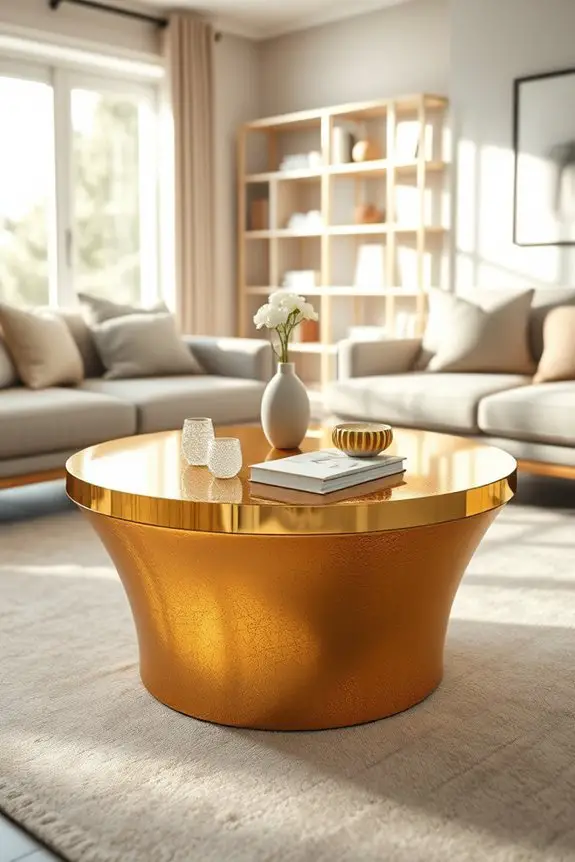
Transforming a plain accent table into a glamorous gold leaf masterpiece can elevate your space with elegance and sophistication.
Start by selecting your favorite gold leaf techniques—whether it’s full coverage or a subtle touch around the edges. Prepare your table by cleaning and sanding it, ensuring a smooth surface for the gold leaf to adhere.
Apply adhesive in your chosen areas, and carefully lay the gold leaf sheets, pressing gently to secure them. Once dry, seal with a clear coat for durability.
For accent table styling, pair your newly gilded table with chic decor items like a stylish lamp or a beautiful vase. This DIY project not only enhances your decor but also adds a touch of luxury to your home.
Farmhouse Style Bench Restoration
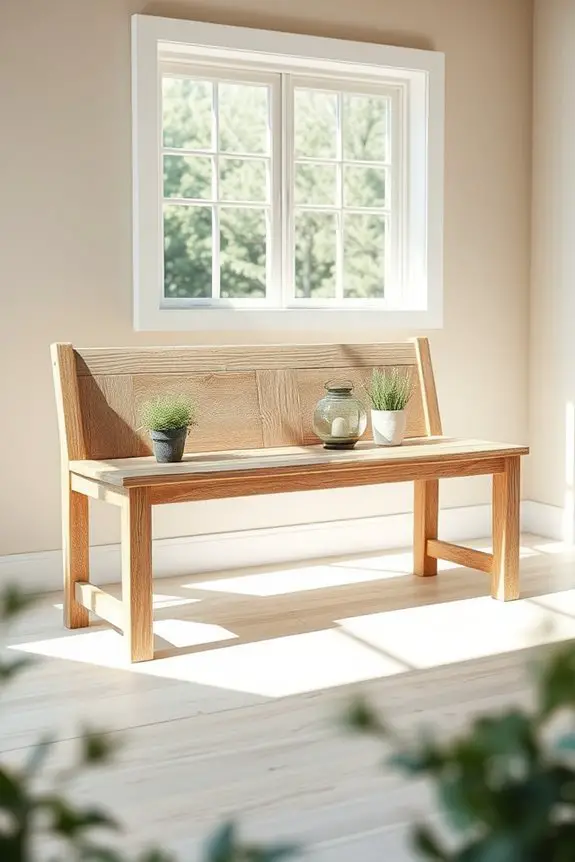
If you’ve got an old bench that needs a refresh, restoring it to a charming farmhouse style can be a rewarding project.
Start by sanding down the surface to eliminate any rough patches and prepare it for paint or stain. For a rustic look, consider using a whitewash technique or a muted color that complements your existing decor. Adding a distressed finish can enhance that farmhouse appeal.
You might also want to incorporate some simple bench design ideas, like adding a few rustic wooden crates underneath for storage.
Finally, accessorize your bench with cozy cushions or a soft throw to complete the look. With these farmhouse decor tips, your bench will become a delightful focal point in your home.
Color Blocked Dining Chairs
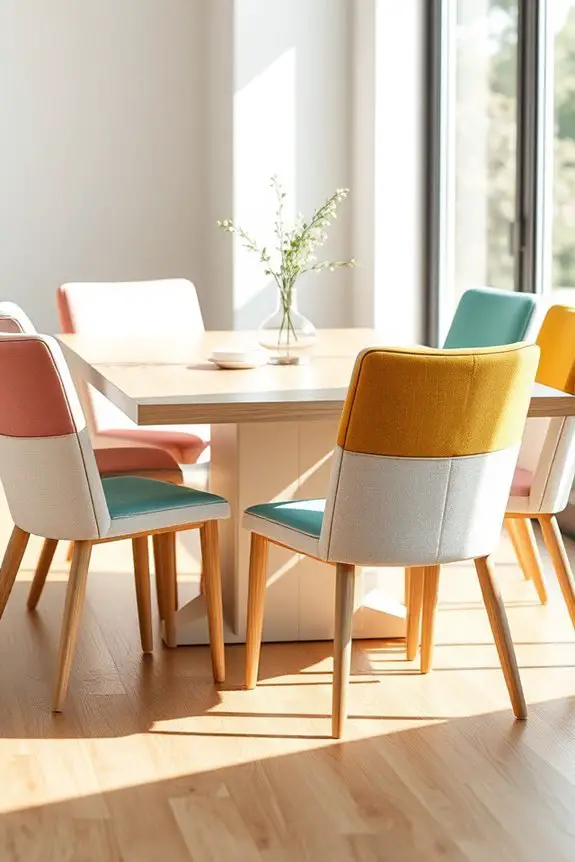
After sprucing up that farmhouse-style bench, you might be inspired to refresh your dining area as well. One fun way to do this is by applying color-blocked designs to your dining chairs.
Start with a thoughtful color palette selection that complements your existing decor. Choose two or three colors that work harmoniously together, and consider using painter’s tape to create sharp, clean lines.
For chair styling techniques, you can paint the seat and legs in contrasting colors for a bold look, or opt for subtle variations of the same hue for a more cohesive feel.
Whichever approach you choose, color-blocked dining chairs can breathe new life into your space and showcase your unique style.
Decoupage Design on a Nightstand
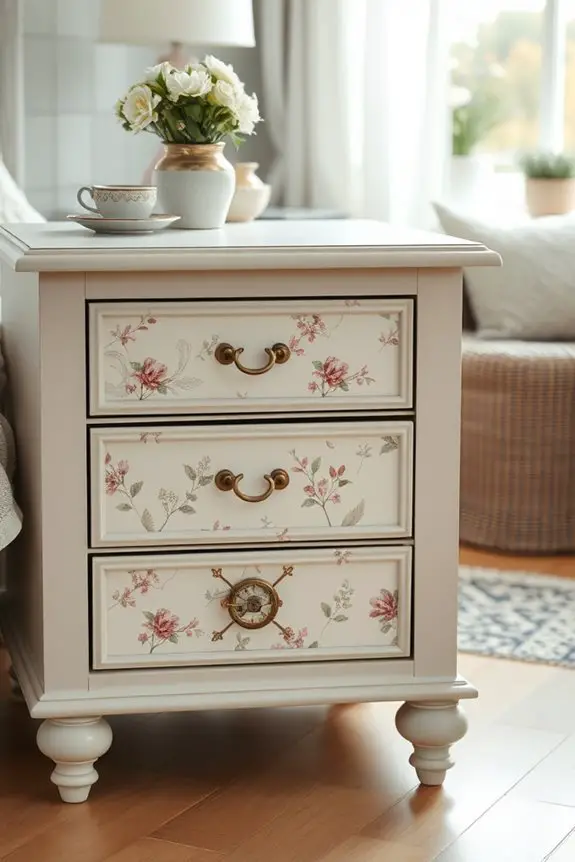
Transforming a plain nightstand into a stunning piece through decoupage can be an enjoyable and creative endeavor.
Start by selecting your favorite decorative paper—think floral patterns, geometric shapes, or vintage prints. Clean and sand your nightstand to guarantee a smooth surface.
Using decoupage techniques, apply a thin layer of decoupage glue to the wood and place your chosen paper, smoothing out any bubbles. Once it’s in place, seal it with another layer of glue for durability.
You can even add a pop of color by painting the edges or handles. Let it dry completely, and you’ll have a unique nightstand that reflects your style, bringing new life to your bedroom.
Enjoy your fabulous transformation!
Geometric Pattern on a Coffee Table
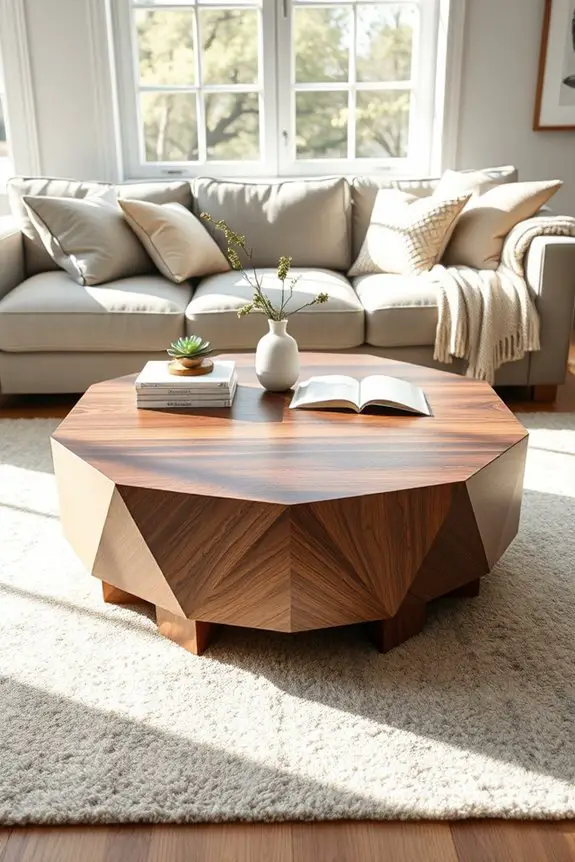
Adding a geometric pattern to your coffee table can instantly elevate its style and make it a focal point in your living space.
You can use various geometric design techniques to create eye-catching designs that suit your decor. For a sleek look, consider using painter’s tape to outline shapes, then paint or stain them in contrasting colors.
If your coffee table is made of wood, you might opt for a stained finish, while glass tables can feature vinyl decals or etching for a modern touch.
Don’t forget to seal your work with a clear varnish to protect your design.
With just a bit of creativity and the right coffee table materials, you can transform a simple piece into a stunning statement.
Rustic Wood Stain on a TV Stand
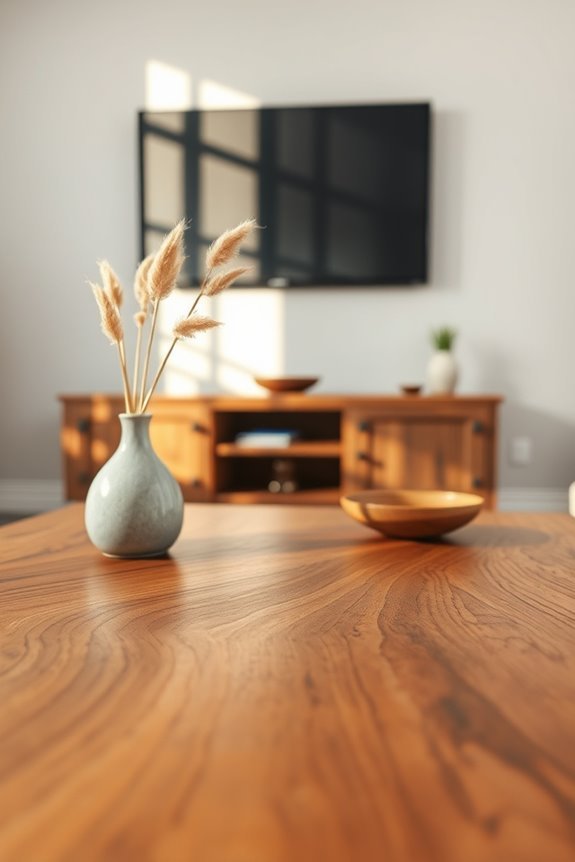
When you want to bring warmth and character to your TV stand, a rustic wood stain can make all the difference.
Start by selecting a high-quality wood stain that complements your home’s decor. Prepare your TV stand by sanding it down to create a smooth surface for the wood stain application.
Use rustic finish techniques like rag or brush application to achieve a natural look. Apply the stain evenly, working with the grain, and let it sit for a few minutes before wiping off any excess.
Depending on the desired depth, you might want to apply multiple coats. Finish with a clear sealant to protect your newly stained stand, ensuring it lasts while adding charm to your living room.
Upholstered Headboard DIY

After giving your living room a warm touch with a rustic wood stain on your TV stand, consider elevating your bedroom’s style with a DIY upholstered headboard.
This project allows you to express your creativity while enhancing comfort. First, choose a headboard shape that suits your taste—whether it’s a classic rectangle, an elegant arch, or a modern geometric design.
Next, select your fabric; options like velvet, linen, or faux leather can add a luxurious feel. Use upholstery techniques like padding and stapling to create a professional finish.
Don’t forget to secure it to your wall or bed frame for stability. With a few materials and a bit of effort, you’ll transform your space into a stylish retreat.
Metallic Spray Paint on Old Furniture
Transforming old furniture with metallic spray paint can instantly update your space and add a touch of glam.
To start, choose a piece that needs a refresh, like a chair or side table. Clean it thoroughly and sand any rough spots for a smooth finish.
When using spray paint techniques, apply a primer to help the metallic finishes adhere better. Shake the can well and spray from a distance, layering light coats to avoid drips. Gold, silver, or bronze can create a stunning effect, depending on your style.
Allow each coat to dry completely before adding more, ensuring a professional look. Finally, seal your masterpiece with a clear topcoat for durability and shine.
Enjoy your dazzling new furniture!
Vintage Trunk as a Coffee Table
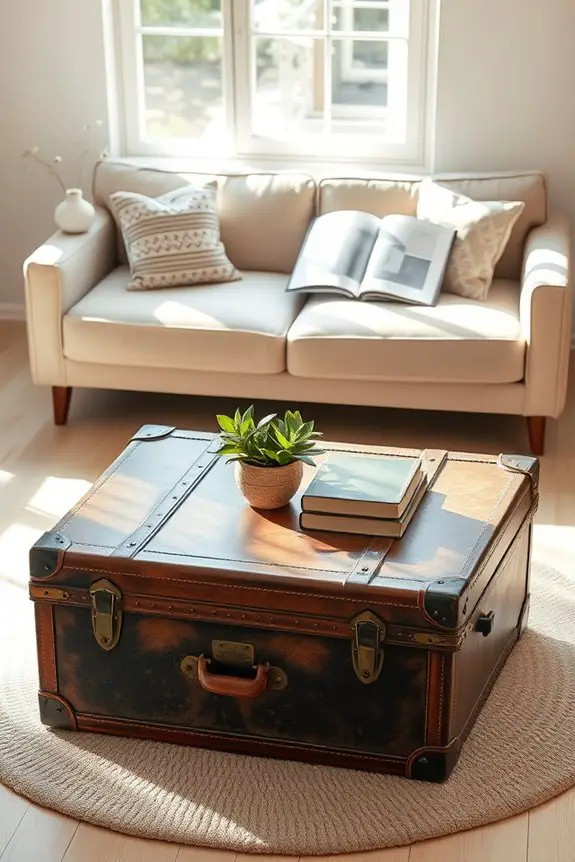
A vintage trunk can be a stunning centerpiece in your living room, blending functionality with charm. Not only does it serve as a unique coffee table, but it also offers ample vintage trunk storage for blankets, books, or games.
Choose a trunk that complements your decor style—whether rustic, industrial, or bohemian. For coffee table styling, layer it with a textured table runner and a few decorative items like candles or books. You can even use the trunk’s top for serving snacks during gatherings.
This versatile piece not only adds character but also keeps your space organized. Transform your living space with this practical yet stylish solution, and enjoy the conversation starter it becomes!
DIY Fabric-Covered Ottoman

Since you’re looking to add a touch of style and comfort to your space, a DIY fabric-covered ottoman is a perfect project.
Start by choosing the right base—an old coffee table or an inexpensive storage ottoman works well. For fabric selection, consider durability and ease of cleaning. Choose a pattern or color that complements your décor.
When it comes to ottoman design ideas, think about adding a tufted top for a chic look or using bold prints for a statement piece. Don’t forget to secure the fabric tightly and finish edges neatly to guarantee a polished appearance.
This simple makeover will enhance your space while providing a cozy spot for relaxation. Happy crafting!
Faux Marble Finish on a Desk
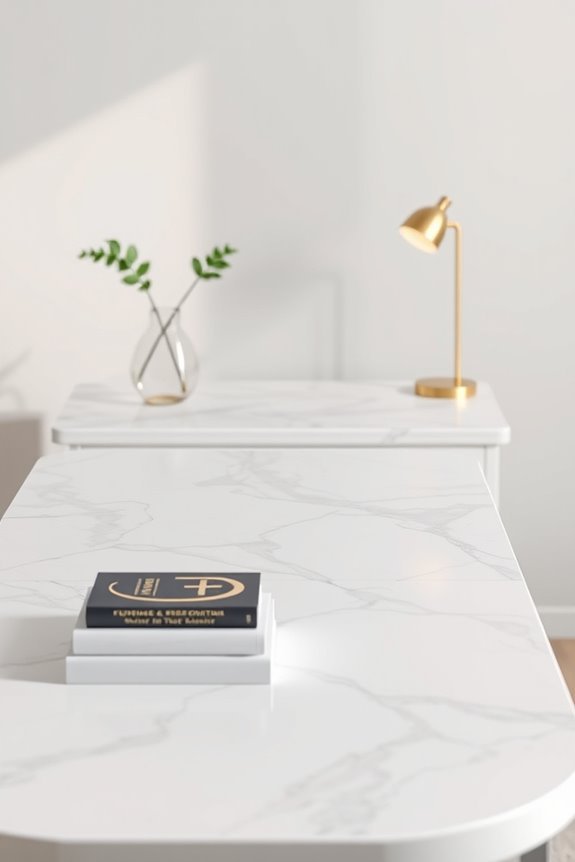
If you’re looking to elevate your workspace, applying a faux marble finish to a desk can bring a touch of elegance without the hefty price tag of real marble.
Start by prepping your desk with a thorough cleaning and sanding to guarantee a smooth surface.
Use faux marble techniques, like sponging or brushing, with a combination of white, gray, and black paint to mimic the natural veining of marble.
Layer the colors gradually, allowing each coat to dry before adding the next.
To finish, seal your masterpiece with a clear topcoat for durability.
These desk refinishing tips will help you achieve a professional look that transforms your workspace into a stylish haven while keeping it budget-friendly.
Painted Pine Furniture Refresh

There’s something invigorating about giving your pine furniture a new coat of paint.
Whether you’ve got an old dresser or a simple bookshelf, rejuvenating the finish can totally transform its look.
Start by choosing the right furniture paint techniques; chalk paint offers a matte finish while spray paint provides a smooth, even coat.
Prep your piece by sanding it down to guarantee better adhesion and longevity of your new pine furniture finishes.
Don’t forget to apply a primer if you’re using a bold color!
Once painted, seal it with a clear topcoat for durability.
You’ll love how a splash of color can breathe new life into your space, making your furniture a statement piece in your home.
Custom Drawer Pulls for Dressers
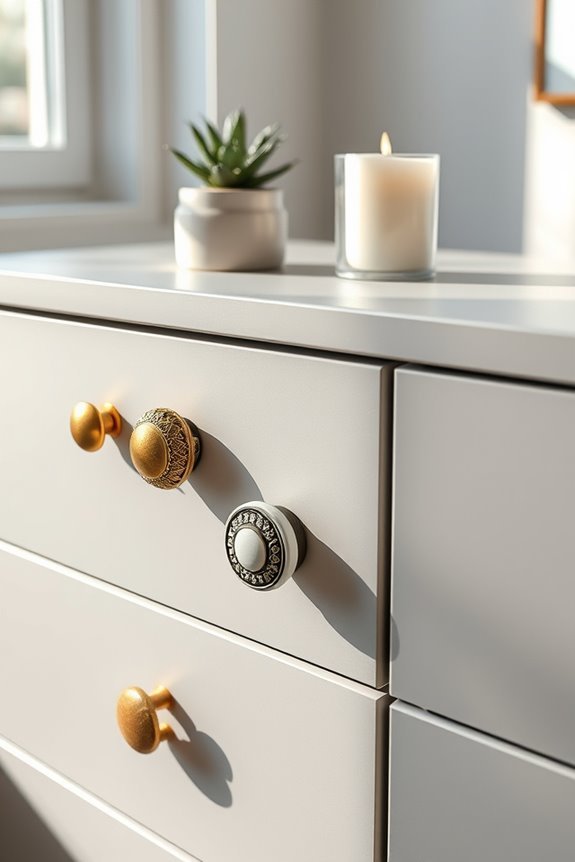
Adding custom drawer pulls to your dressers can make a world of difference in the overall look of your furniture. Instead of settling for standard options, you can choose custom designs that reflect your personal style.
Think about how unique pulls can transform the entire vibe of your room. With various material choices available—like brass, ceramic, or wood—you can easily match them to your existing decor.
Consider mixing and matching styles for an eclectic feel, or stick to a cohesive look for a more polished appearance. Not only will custom drawer pulls enhance functionality, but they’ll also create a statement piece that draws attention.
Don’t underestimate how such a small change can elevate your dresser’s aesthetic!
Painted Rattan Chair Makeover
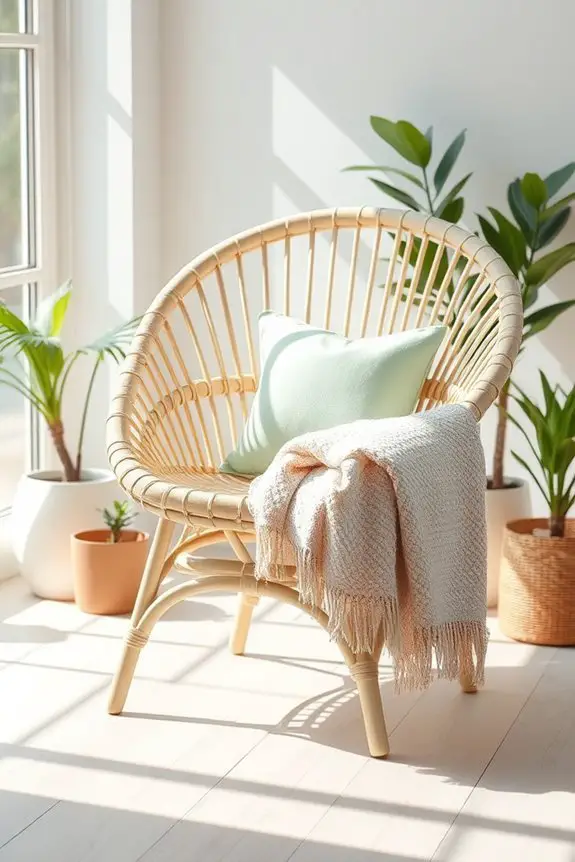
Transforming a rattan chair with a fresh coat of paint can breathe new life into your space.
Start by choosing a rattan chair style that fits your aesthetic—whether it’s boho, modern, or classic. Next, select your paint color options; bold hues like teal or mustard can create a striking focal point, while soft pastels offer a more subtle touch.
Before painting, clean the chair thoroughly and lightly sand the surface for better adhesion. Use a spray or brush-on paint designed for outdoor use to guarantee durability.
Once painted, let it dry completely before adding any cushions or accessories. With just a little effort, your revamped rattan chair will enhance your decor and showcase your creative flair!
Ombre Effect on a Plant Stand
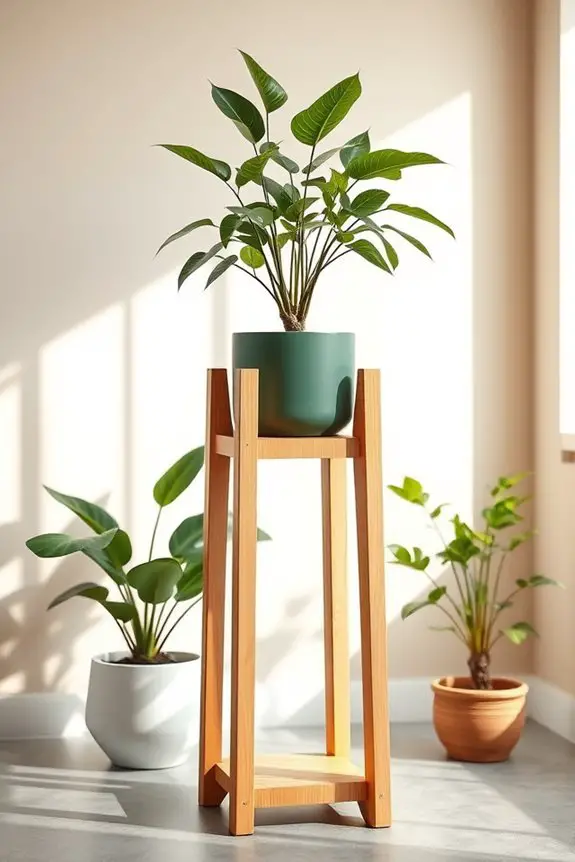
Five simple steps can take your plain plant stand to a whole new level with an ombre effect.
First, choose your paint colors—pick a lighter shade and a darker complementary color.
Next, sand the plant stand to guarantee proper adhesion. After cleaning it, apply a coat of primer.
Once it’s dry, start using ombre color techniques: paint the top with the lighter color, gradually blending in the darker shade as you move down. Use a sponge or brush to create a seamless shift.
Finally, seal your masterpiece with a clear topcoat for durability.
This plant stand customization not only enhances your decor but also adds a personal touch, making your space feel uniquely you. Enjoy your stylish transformation!
Rustic Ladder Shelf Creation
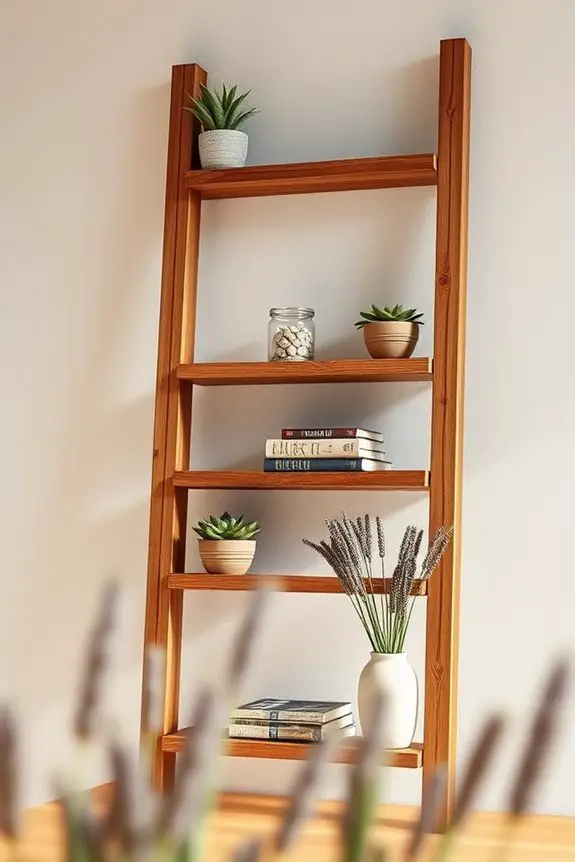
If you’re looking to add a touch of rustic charm to your home, creating a ladder shelf is a perfect project.
Start by gathering some rustic wood; reclaimed barn wood works beautifully. Measure and cut your wood into the desired lengths for the ladder design, ensuring you have a sturdy base.
Assemble the two side pieces and attach the shelves at your preferred intervals. Secure everything with screws or wood glue for stability.
Once assembled, sand the edges to prevent splinters and apply a wood finish that highlights the natural grains.
Finally, lean your ladder shelf against a wall and decorate it with plants, books, or your favorite knick-knacks. You’ll love how this simple project transforms your space!
Faux Leather Finish on Bookshelves

Transforming your bookshelves with a faux leather finish can elevate their style while adding a touch of sophistication. You can achieve this look using simple faux leather techniques that are both affordable and easy to execute.
Start by selecting a faux leather fabric in your desired color and texture. Measure and cut the fabric to fit your shelves, ensuring you leave extra for wrapping the edges. Use a strong adhesive to attach the fabric, smoothing out any bubbles for a sleek finish.
Once the glue dries, style your bookshelf with decorative items like books, plants, and art pieces that complement the faux leather. This stylish upgrade not only enhances your decor but also showcases your unique aesthetic.
Decorative Molding on Plain Furniture
Adding decorative molding to plain furniture can dramatically enhance its visual appeal and give it a high-end look. You can use various molding techniques to transform your pieces, whether it’s a simple chair or a basic dresser.
Start by choosing a style that complements your existing furniture aesthetics. For instance, consider crown molding for a classic touch or geometric designs for a modern vibe. Measure carefully and cut the molding to fit your furniture exactly.
Once it’s attached, paint or stain it to match or contrast with your furniture. This DIY project not only elevates the design but also showcases your creativity.
With a little effort, you can turn ordinary furniture into stunning focal points in your home.
Painted Floors for a Dramatic Effect

Transforming your floors with a splash of paint can instantly elevate the look of any room. You can choose from various floor painting techniques to create a stunning focal point.
For a bold statement, consider using dramatic color choices like deep navy or vibrant red. These hues can turn an ordinary space into a stylish haven.
If you’re feeling creative, try stenciling patterns or geometric designs that add depth and visual interest. Remember to prep your surface properly, ensuring it’s clean and primed for paint.
Whether you opt for a solid color or intricate designs, painted floors won’t only enhance your decor but also reflect your personality. So, grab your paintbrush and let your creativity flow!
Reclaimed Wood Dining Table

While creating a reclaimed wood dining table may seem intimidating, the result is a stunning centerpiece that brings warmth and character to your home. You’ll enjoy the reclaimed wood benefits, such as sustainability and durability, while adding a unique touch to your dining space.
Start by sourcing wood from old barns or pallets, ensuring it’s properly cleaned and treated. Embrace those rustic dining aesthetics by using natural finishes that highlight the wood’s grain and imperfections.
With a few tools, you can build a table that not only serves as a gathering spot but also tells a story. This project not only enhances your home but also helps the environment by repurposing materials that might otherwise go to waste.
Conclusion
With these 40 DIY furniture makeover ideas, you’ll turn your home into a style sanctuary that even the trendiest magazines would envy! You’ll be the talk of the town, as friends marvel at your upcycled treasures and personalized pieces. Say goodbye to boring furniture and hello to a dazzling transformation that’ll make your space feel like a million bucks—without breaking the bank! So roll up your sleeves, grab those paintbrushes, and let your creativity run wild!