Tile Backsplash Installation Cost: What to Expect and How to Save
You can expect to pay roughly $8–$50 per sq ft for a tile backsplash, with most homeowners spending $400–$1,800 total depending on materials and labor. Ceramic is cheapest; mosaics and specialty tiles cost more. Prep, removal, waterproofing, and complex patterns raise labor. DIY saves money but risks mistakes and added rework; pros are faster and offer warranties. Keep waste low and pick neutral tiles to save; continue for step‑by‑step tips and examples.
Tile Backsplash Installation Cost Quick Answer and What to Expect
You can expect a typical backsplash to cost about $8–$50 per square foot installed, depending on tile choice and complexity.
Most projects take a day or two for prep and installation, so you’ll need to decide quickly on tile, grout color, and whether to remove old backsplash first.
If you’re comfortable with cutting tiles and grouting, DIY can save money on simple layouts, but hire a pro for intricate patterns, uneven walls, or plumbing/electrical obstacles.
Direct cost range summary (materials + labor)
Most homeowners pay between $400 and $1,800 for a typical kitchen tile backsplash, which includes both materials and labor. You’ll ask how much for tile backsplash installation; expect lower-end ceramic and DIY, mid-range subway tile with pros, or high-end stone with full labor. Compare quotes and materials to hit your budget.
| Option | Typical cost |
|---|---|
| DIY ceramic | $400–$700 |
| Pro basic | $700–$1,100 |
| Mid-range | $1,100–$1,400 |
| High-end | $1,400–$1,800 |
Typical project timelines and immediate decisions homeowners face
When planning a tile backsplash, expect the whole process to take from a single day for a DIY ceramic job to several days or even a week when pros handle prep, cutting, grout curing, and cleanup.
You’ll decide tile style, size, and edge details, schedule work around meal prep, and plan temporary backsplash protection.
Confirm lead times for specialty tiles and grout color before ordering.
When to DIY vs hire a pro quick decision guide
After you’ve scheduled crews, chosen tiles, and arranged meal prep, decide whether to tackle the backsplash yourself or hire a pro based on skill level, time, and budget.
Weigh risk, timeline, tools, and finish expectations. If you’re unsure, get a pro estimate.
Consider trade-off between savings and longevity.
- Skill required
- Time available
- Tools and workspace
- Desired finish quality
Basic Understanding What a Tile Backsplash Is and Why Costs Vary
A backsplash can be a short strip behind the counter, a full wall to the ceiling, or anything in between, and your choice affects tile quantities and labor.
Expect prices to hinge on material type, installation complexity, surface prep, and the skill level of the installer. Local demand and labor rates also swing costs, so where you live matters as much as what you pick.
What counts as a backsplash (height, full wall vs partial)
Because backsplash choices affect both look and price, you’ll want to know what actually counts as one: a backsplash can be a short strip (4–6 inches) behind counters, a full-height run to upper cabinets (18–24 inches), or a full wall from countertop to ceiling.
You can also tile only behind stove areas or create a decorative panel—each scope changes materials and time required.
Key cost drivers overview (materials, labor, prep, complexity)
Now that you know the different backsplash heights and scopes, let’s look at what actually drives the price.
You’ll pay for tile type (ceramic, glass, stone), adhesive and grout, and trim.
Labor covers removal, layout, cutting, and installation time.
Prep work—wall repairs, waterproofing, substrate work—increases costs.
Complex patterns, small tiles, or intricate cuts raise labor and material waste, too.
Regional and market factors that affect pricing
While tile, grout, and labor are the basics, where you live has a big say in how much you’ll pay—urban areas and regions with high demand typically charge more for both materials and installers.
You’ll see seasonal swings, local supply shortages, and permit or disposal fees raise costs.
Compare quotes, consider off-peak scheduling, and source materials yourself to reduce regional markups.
Detailed Cost Breakdown Materials, Labor, and Additional Expenses
You’ll see costs vary widely depending on tile type—ceramic and porcelain are cheaper, while glass, natural stone, and intricate mosaics cost more.
Don’t forget adhesives, grout, sealers, trim, and backerboard, plus any demolition and wall repairs.
Labor can be charged per hour or per square foot and may include extra fees for electrical or plumbing adjustments.
Tile material costs with examples (ceramic, porcelain, glass, natural stone, mosaic)
A clear budget starts with the tile itself: ceramic runs cheapest at about $1–$5 per square foot, porcelain $3–$10, glass $7–$30, natural stone $5–$25, and mosaic panels can reach $15–$50 depending on quality and pattern. Pick tiles by durability, maintenance, and style to match your budget and kitchen needs.
| Type | Price/ft² | Notes |
|---|---|---|
| Ceramic | $1–$5 | Affordable, easy |
| Porcelain | $3–$10 | Durable, low porosity |
| Glass/Natural | $7–$30/$5–$25 | Glass glossy; stone varies |
| Mosaic | $15–$50 | Decorative, higher cost |
Adhesives, grout, sealers and accessory costs
Supplies like thinset, grout, sealers, and tools add predictably to your backsplash total, and knowing their typical prices helps you budget accurately.
Expect thinset mortar $10–$30 per bag, grout $8–$25 per bag, sealers $15–$40 per bottle, spacers, trowels and blades $10–$60.
Allow a materials contingency of 10–15% for waste, color matching, and specialty adhesives.
Labor costs explained (per hour vs per square foot, installer types)
While materials set the baseline cost, labor usually drives the final price you’ll pay for a backsplash. Understanding how installers charge—by the hour or by the square foot—lets you compare bids more accurately.
Hourly rates suit small repairs; square-foot pricing’s common for full installs. Expect higher rates from certified tile setters and lower from general contractors or handymen.
Ask about warranties and experience.
Preparation and demolition costs (old backsplash removal, wall repair)
After you compare bids and decide on an installer, you’ll need to budget for prep and demolition before new tile can go up.
Expect charges for removing old tile or adhesive, hauling debris, and basic wall repair like patching drywall or skim-coating uneven areas.
Costs vary by condition and access; get itemized estimates so you’re not surprised by hidden repair needs.
Additional charges (trim, backerboard, electrical/plumbing adjustments)
Because trim, backerboard, and any electrical or plumbing tweaks affect both materials and labor, you should budget for them separately from the tile and grout line items.
Trim pieces, metal edge profiles, and backerboard run $1–5/ft or $10–30/sheet; labor adds hourly or flat fees.
Expect electrician or plumber minimums for outlet relocation or faucet adjustments; get quotes up front.
How to Estimate Your Backsplash Cost Step-by-Step Calculator Guide
To estimate your backsplash cost, first measure the area to get square footage and pick a tile to calculate material cost per sq ft.
Then add labor using local rates, plus prep, a waste factor, and any extra supplies.
Finally, run totals for budget, mid-range, and premium scenarios to see realistic examples.
Step 1: Measure area and calculate square footage
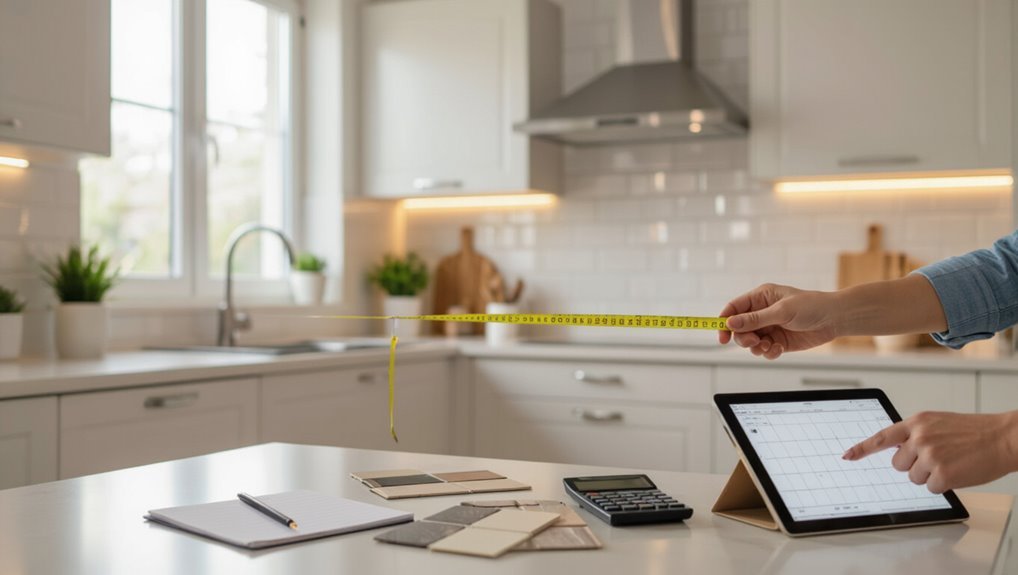
Start by measuring the length and height of each wall section where you’ll install the backsplash and multiply those numbers to get square footage.
Then add any small areas for outlets or trim and subtract large openings like windows or cooktop gaps.
Record dimensions, convert inches to feet if needed, and sum all sections.
Round up slightly to account for cuts and waste when totaling square footage.
Step 2: Choose tile type and determine material cost per sq ft
Once you’ve got your square footage, pick the tile type—you’ll use that choice to calculate the material cost per square foot.
Compare ceramic, porcelain, glass, and natural stone prices from suppliers, noting waste (usually 10–15%) and trim pieces.
Add adhesive, grout, and sealant costs per square foot. Sum these to get an accurate material cost you can plug into your estimator.
Step 3: Add installation labor and local rate adjustments
Because labor usually makes up a big chunk of your backsplash cost, you’ll need to add installer hours and any local rate adjustments next.
Estimate hours based on tile complexity and area, then multiply by hourly or per-square-foot rates.
Check local market rates, permit or specialty fees, and factor higher rates for evenings or rush jobs so your total reflects realistic labor expenses.
Step 4: Include prep, waste factor, and extra materials
After you’ve calculated tile and labor, add time and materials for surface prep, a waste/spare allowance, and any extras so your estimate won’t come up short.
Prep can include removing old backsplash, repairing drywall or skim-coating uneven walls, and priming, while extras cover caulk, adhesive, grout sealer, trim pieces, and boundary strips.
- Waste allowance (5–15%)
- Demo and disposal
- Adhesive, grout, sealer
- Trim and edge pieces
Step 5: Total estimate example scenarios (budget, mid-range, premium)
Now that you’ve broken down materials, labor, and extras, let’s pull everything together with three real-world total estimates—budget, mid-range, and premium—so you can see how choices affect the final price and where to cut or invest.
| Scenario | Total |
|---|---|
| Budget | $300–$600 |
| Mid-range | $700–$1,200 |
| Premium | $1,500–$3,000 |
Installation Process Overview (What Contractors Do) For Expectation Setting
You’ll see contractors start with prep and demolition, then prep the surface and add any needed waterproofing.
They’ll lay out the tile, cut and set pieces, grout and seal, and tidy the area.
Finally they’ll do a walkthrough, address punch-list items, and confirm everything’s square and sealed.
Prep and demolition
Start by clearing the workspace and protecting cabinets, countertops, floors, and appliances so dust and damage stay contained.
Then remove old tile, grout, caulk, and loose backsplash material, using appropriate tools and dust control.
Contractors disconnect outlets, remove trim and fixtures, and inspect the substrate for rot or mold.
Expect debris removal and a clean, safe area ready for the next steps.
Surface preparation and waterproofing
With the area cleared and inspected, contractors turn to preparing the wall surface and adding waterproofing where needed to secure a long-lasting backsplash.
They’ll repair uneven drywall, replace damaged backing, install cement board or membrane where moisture is likely, and apply a waterproof barrier or sealant.
You should expect seams taped, fasteners sealed, and surfaces smoothed to guarantee proper adhesion and protection.
Tile layout, cutting and installation
1. You’ll watch the installer layout tiles, snapping reference lines and dry-fitting pieces to balance cuts at edges.
They’ll mark, score, and wet-cut tiles for outlets and corners, then apply mortar with a notched trowel.
You’ll see tiles pressed and adjusted for alignment and spacing, with spacers used to guarantee consistent joints before grouting and sealing steps.
Grouting, sealing and cleanup
After the tiles are set and spacers removed, the installer will mix grout to the right consistency and push it firmly into joints using a rubber float, wiping excess with a damp sponge so grout lines stay smooth and even.
Then they’ll seal grout and any porous tiles to prevent stains, remove haze, clean surfaces, and dispose of debris so your backsplash looks finished and hygienic.
Final inspection and common punch-list items
Before the crew leaves, they’ll walk you through a final inspection to confirm every tile, grout line and edge meets the agreed standards and to note any remaining touch-ups.
You’ll sign off only when satisfied. Expect the contractor to correct minor issues quickly.
- Clean grout haze
- Replace chipped tiles
- Caulk joints neatly
- Adjust outlet or trim alignments
Ways to Save Money Without Sacrificing Quality
You can cut costs without lowering quality by choosing materials that give the look you want at a better price and by timing the job when contractors are less busy.
Pick a few focal areas to splurge on and use more affordable or prefabricated options elsewhere, and get multiple quotes so you can negotiate confidently.
Small scheduling tweaks and smart material choices often save more than haggling over labor alone.
Material choices that balance cost and appearance
Picking the right backsplash materials can cut costs without making your kitchen look cheap, and a few smart swaps get you most of the visual impact for far less money.
You can mix budget-friendly options that mimic pricier looks while keeping durability in mind:
- Ceramic or porcelain subway tiles for classic style
- Glass mosaic accents for shine
- Peel-and-stick tiles for easy updates
- Grout color to elevate simple tiles
Timing and scheduling strategies to reduce labor costs
If you schedule your backsplash installation during a contractor’s slow season or bundle it with other nearby projects, you’ll often pay less for the same quality of work.
Be flexible with start dates, request weekday openings, and book when tradespeople have lighter workloads.
Combining prep, demolition, or trim work cuts mobilization fees, shortens timelines, and lowers per-hour labor costs without compromising craftsmanship.
Where to splurge and where to save (focal areas vs filler)
A backsplash is one place where strategic spending pays off—invest in a striking focal strip, high-quality tile around cooking and sink areas, or premium grout and sealant, and save on plain field tiles and simpler cuts in less-visible zones.
Prioritize durability where water, heat, and wear concentrate; choose budget-friendly coordinating tiles elsewhere. You’ll get visual impact without overspending.
Using prefabricated options and tile alternatives
When you want a polished backsplash without the labor costs, prefabricated panels, peel-and-stick tiles, and large-format sheets deliver big visual impact for less effort and expense.
They cut installation time, reduce waste, and often come with manufacturer-backed durability. You can mix materials, use accent strips, or paint complementary colors to mimic custom work, saving money while keeping a durable, easy-to-maintain finish.
Negotiation tips and getting multiple quotes
Because getting several bids gives you leverage, start by collecting at least three detailed quotes so you can compare materials, labor, and timelines side by side.
Ask contractors for line-item breakdowns, references, and finish samples.
Negotiate on scope, scheduling, and payment terms, and mention competing offers.
Be flexible with timing for discounts, but insist on warranties and a clear contract before paying.
DIY vs Professional Installation Comparison and Decision Checklist
Decide whether a DIY backsplash fits your skills, tools, and the tile complexity before you start.
Compare total DIY costs (materials, tools, time) with pro quotes and factor in risks like mistakes, repairs, or wasted materials.
If you hire, ask for credentials, references, detailed quotes, and proof of insurance to choose a reliable installer.
When DIY is realistic (skills, tools, complexity)
If you’ve got steady hands, basic tiling tools, and a straightforward straight-run backsplash, tackling the job yourself can save a lot—but only if you honestly assess your skills, patience, and available time.
Choose DIY when cuts are simple, surfaces are plumb, and you can grout neatly.
Hire a pro for intricate patterns, uneven walls, electrical or plumbing obstacles, or tight deadlines.
Cost comparison: DIY total vs hiring pro
You’ve weighed whether your skills and time make DIY sensible; now compare dollars and trade-offs to pick the best route. Estimate material + tools + time for DIY versus pro labor + speed. Consider warranty, finish quality, and convenience when choosing.
| DIY | Pro |
|---|---|
| Lower cash cost, more time | Higher cost, faster |
| Full control | Warranty, professional finish |
Risks and hidden costs of DIY (common mistakes)
Because a backsplash sits between your cabinets and countertops, small mistakes can cost a lot in time and money: miscut tiles, uneven grout lines, improper substrate prep, or skipping waterproofing often lead to rework, staining, or damage to walls and cabinets.
If you DIY, expect hidden costs for wasted tile, specialty tools, extra sealants, cleanup, and time lost fixing errors—factor those into your decision.
How to vet and hire a good installer (questions, credentials, quotes)
Wondering how to pick a tile installer who won’t create more problems than they solve? You’ll want clear credentials, references, and written quotes.
Ask targeted questions, verify insurance, compare timelines, and insist on a materials list. Check past work photos and reviews, and get warranty terms in writing.
- Ask for license and insurance
- Request references and photos
- Compare detailed quotes
- Confirm warranty and timeline
Common Problems, Mistakes and How to Avoid Them
You’ll want to watch for layout and alignment mistakes, poor surface prep, and the wrong grout — each can ruin the look and longevity of your backsplash.
Plan for extra tile and accurate cuts, pick grout and sealers suited to your tile, and properly prepare the wall to prevent delamination or cracking.
Finally, set a firm scope and contingency budget to avoid costly change orders and scope creep.
Poor layout and pattern alignment errors
When your tile pattern isn’t planned before you start, grout lines can drift, focal points can end up off-center, and awkward partial tiles will dominate visual sightlines; that poor layout turns a professionally tiled backsplash into a DIY-looking one.
You should dry-fit tiles, snap reference lines, and establish symmetry around outlets and fixtures. Check spacing frequently and adjust before adhesive sets.
Inadequate surface prep leading to delamination or cracking
If you skip proper surface prep, tiles can lift, grout can crack, and the whole backsplash will fail sooner than you’d expect.
Clean, dry, and flat substrates matter: remove old adhesive, fix drywall damage, and sand glossy surfaces.
Use appropriate primer or backerboard for moisture-prone areas.
Take time here—proper prep prevents delamination, reduces rework, and saves money long term.
Wrong grout choice and staining issues
Because grout choice affects both appearance and durability, picking the wrong type or color can leave you with stubborn stains, premature discoloration, or weakened joints.
You should choose grout matched to tile porosity and traffic, use stain-resistant or epoxy grout where needed, seal sanded grout, and avoid very light colors in high-soil areas.
Test samples and follow manufacturer care instructions to prevent staining.
Underestimating waste and cutting losses
One common mistake is ordering just enough tile to the square foot instead of accounting for cuts, pattern repeats, and breakage — and that leaves you scrambling for matching pieces or paying rush charges.
Always add a waste buffer (typically 10–15%, more for complex patterns), keep extra boxes sealed, and coordinate batch numbers.
That prevents delays, costly reorders, and visual mismatches.
Costly change orders and scope creep prevention steps
When plans shift mid-project, change orders can quickly inflate your backsplash budget and delay completion; prevent that by clearly defining scope, materials, and approval steps up front.
You should document decisions, lock choices before work starts, set a written change-order process with cost/time estimates, and require signatures for alterations.
Communicate regularly, budget a small contingency, and reject nonessential midstream requests to avoid scope creep.
Best Practices and Maintenance to Protect Your Investment
You’ll want a simple maintenance routine to keep your backsplash looking new: regular cleaning, keeping grout sealed, and addressing chips or cracks as soon as they appear.
Follow sealing schedules suited to your tile type—porous stone needs more frequent sealing than glazed ceramic.
If damage is limited, repair grout or replace individual tiles; if wear is widespread, consider refinishing or full replacement.
Regular cleaning and grout care recommendations
Keeping your tile backsplash looking new starts with a simple, consistent cleaning routine you can do weekly: wipe splatters with a damp microfiber cloth, rinse residue with plain water, and dry to prevent water spots.
Spot-clean grease with a mild dish soap, scrub grout gently with a soft brush, avoid harsh abrasives, and address stains promptly to keep grout intact and tiles bright.
Sealing schedules for different tile types
Because different tile materials absorb moisture and stains at different rates, you should follow tailored sealing schedules to protect your backsplash and grout.
Seal porous natural stone (marble, travertine) immediately after installation and every 6–12 months.
Reseal unglazed ceramic or cement tiles yearly.
Glazed porcelain rarely needs sealing; treat grout with a sealer every 1–2 years.
Always follow manufacturer guidelines.
Repairing chips, cracked tiles and grout touch-ups
When a chip or crack appears, address it quickly to stop damage from spreading and to keep your backsplash looking sharp.
Clean the area, use matching epoxy or tile filler for small chips, and replace individual tiles if needed.
Regrout hairline gaps with color-matched grout, seal repaired areas, and inspect periodically to catch issues early and protect your investment.
When to refinish or replace vs repair
Small repairs will keep a backsplash looking good for years, but there comes a point where refinishing or replacing makes more sense than patching.
If widespread grout failure, long-term water damage, or multiple cracked tiles recur, opt for refinishing or replacement.
Choose refinishing for surface wear; replace when structural issues, mold, or outdated style justify the investment to protect value and function.
Real-World Cost Examples and Case Studies
You’ll see three real-world examples to help plan your project: a small-budget remodel with line-item costs for materials and labor, a mid-range kitchen case study with photos, and a high-end custom install that breaks down expenses and ROI.
Use these examples to compare trade-offs and set realistic expectations for your space.
Bring any questions about a specific example and I’ll help you apply the numbers to your kitchen.
Small budget remodel example (materials, labor, final cost)
Here’s a real-world example of a budget-friendly backsplash redo: you’ll see how modest materials, a bit of DIY labor, and one hired afternoon can transform a kitchen without breaking the bank. You pick subway tiles, grout, and adhesive; do prep and most tiling yourself; hire a pro for cutting/finish. Estimated total: $320.
| Item | Qty | Cost |
|---|---|---|
| Tiles | 30 sq ft | $120 |
| Adhesive/Grout | – | $40 |
| Labor (pro 4 hrs) | – | $120 |
Mid-range kitchen backsplash case study with photos
When you step up to a mid-range backsplash, expect better-quality tile, more intricate patterns, and a mix of DIY and pro work that raises costs but also the finished look.
You’ll see 3 photos: substrate prep, tile layout with accent band, and grout finish.
Total cost: $900–$1,800 for 20–30 sq ft.
Timeline: 2–4 days with contractor touch-ups.
High-end/custom tile installation breakdown and ROI considerations
If you want a truly custom, high-end backsplash, expect premium materials, complex layouts, and specialized installers that drive both labor and material costs higher—but also can deliver outsized aesthetic and resale value.
You’ll pay more for artisan tiles, intricate patterns, substrate prep, and warranty-backed tradespeople.
Calculate ROI by comparing incremental cost to neighborhood comps, projected resale bump, and personal enjoyment over time.
Frequently Asked Questions
You probably have a few direct questions about cost, timing, and practicality—like what a typical 10 sq ft backsplash costs, whether you can tile over an existing one, and how long the whole project takes.
You’ll also want to know if a backsplash boosts your home’s value and what warranties or guarantees reputable installers should offer.
Below are clear answers to those common questions.
How much does a typical 10 sq ft backsplash cost?
Curious what a standard 10 sq ft tile backsplash will cost?
You’ll typically pay $150–$600 for materials and $200–$500 for labor, so expect $350–$1,100 total.
Costs vary by tile type, complexity, and region. Simple ceramic stays cheaper; glass, stone, or intricate patterns push costs higher.
Always get multiple quotes and factor in grout, sealant, and minor demolition or prep.
Can I install tile over existing backsplash?
Wondering whether you can tile over an existing backsplash? You can, but only if the current surface is sound, flat, and well-adhered.
Remove loose tiles, repair grout, and degrease glossy surfaces; roughen smooth tiles or apply a suitable primer or membrane.
Consider added thickness around outlets and changes. When in doubt, consult a pro to avoid failures and warranty issues.
How long does installation take from start to finish?
How long will a tile backsplash take from start to finish?
Expect 1–3 days for a typical kitchen: prep (cleaning, removing outlet covers) takes a few hours, tile setting and grout usually one day, and curing plus final cleanup another day.
Complex patterns, large tiles, repairs or custom trims can extend the timeline to several days or a week.
Will a backsplash increase my home value?
Will a new tile backsplash raise your home’s value? It can, but expect modest gains.
Buyers appreciate updated kitchens, improved aesthetics, and durable materials. Choose neutral, high-quality tile and professional installation to appeal broadly.
In major remodels it’s a small value driver; alone, it improves marketability and perceived care but rarely produces a large return on investment.
What warranties or guarantees should I expect from installers?
When you hire a tile installer, expect two types of protection: a workmanship warranty from the contractor and a manufacturer’s warranty on the tiles and grout.
You should get written terms detailing coverage length (often 1–5 years), what’s included (repair, reinstallation), and exclusions.
Verify labor response time, transferability, and whether the installer requires specific maintenance to keep the warranty valid.