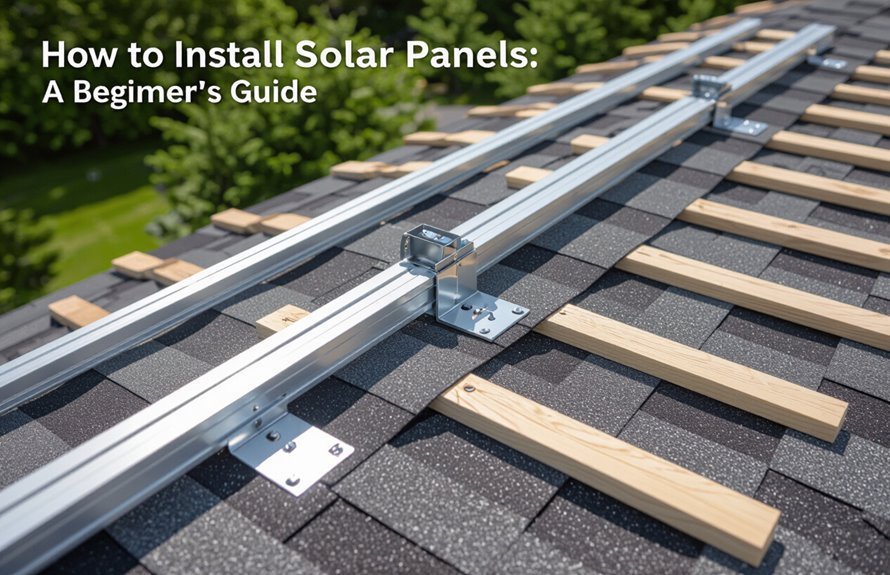
How to Install Solar Panels: A Beginner’s Guide
You can install solar panels by first evaluating sun exposure, roof condition, and your energy needs, then choosing panel type and grid-tied or off‑grid setup. Get permits, reinforce the roof if needed, mount rails and panels, wire the inverter to your panel with proper breakers and grounding, and commission the system with testing and monitoring. Follow safety practices and local codes, consider batteries for backup, and keep maintenance records — keep going to learn detailed steps and tips.
Assessing Your Home’s Solar Potential

Wondering if your home is a good fit for solar? You’ll start by checking solar access: measure daily sun exposure and run a shading analysis to spot trees or structures that cut production.
Note your roof angle and orientation since they affect output and mounting choices. Factor in local climate—cloud cover and temperature influence panel performance.
Review your current energy efficiency; sealing leaks and upgrading insulation can lower the system size you need.
Finally, compare utility rates and net metering policies to estimate payback. These steps give you a clear, realistic picture of your solar potential.
Understanding Different Solar Panel Types
Next you’ll compare the main panel types so you can pick what fits your roof and budget.
Monocrystalline panels are more efficient and compact, while polycrystalline panels cost less but take up more space.
Thin‑film options are lightweight and flexible but usually offer lower efficiency and shorter lifetimes.
Monocrystalline Vs Polycrystalline
Curious which solar panel type fits your roof and budget? You’ll choose between monocrystalline and polycrystalline panels.
Monocrystalline efficiency is higher because single-crystal cells convert sunlight more effectively, so you’ll get more power per square foot and better performance in limited roof space.
Polycrystalline cost is lower since manufacturing is simpler, making it a smart pick if you have ample roof area and a tighter budget.
Consider aesthetics—monocrystalline looks uniform and sleek; polycrystalline shows a bluish, speckled pattern.
Match cell type to your space, budget, and energy goals for the best installation outcome.
Thin-Film Characteristics
Think of thin-film panels as the lightweight, flexible alternative to traditional silicon modules: they use layers of photovoltaic material deposited on a backing, so they’re thinner, bendable, and often lighter per square foot.
You’ll appreciate thin film advantages like lower weight, easier installation on curved or portable surfaces, and better performance in low light or high temperatures. They cost less per area but deliver lower efficiency, so you’ll need more roof space.
Common thin film applications include building-integrated photovoltaics, RVs, and off-grid systems.
Consider durability, lifespan, and warranty when choosing thin-film for your project.
Calculating Your Energy Needs
Before you pick panels, figure out how much electricity your household actually uses so you can size the system correctly. Start with your utility bills: note monthly kilowatt-hours for a year to capture seasonal changes.
Perform an energy consumption analysis by listing major loads—HVAC, water heater, fridge, lighting—and their run times. Track solar usage patterns: when daytime consumption peaks and how much you can shift to sunlight hours.
Convert average daily kWh into required array output, account for system losses and local sun hours, and decide if storage or grid-tie will meet nighttime or backup needs.
Evaluating Roof Condition and Orientation
Start by inspecting whether your roof is structurally sound and properly oriented for solar: check age and condition of shingles or membrane, look for sagging, rot, or past repairs, and confirm the roof pitch and azimuth so you know how much sun you’ll actually get.
Next, evaluate roof materials—metal, tile, or asphalt affect mounting methods and lifespan. Measure usable area and note obstructions like chimneys or vents that cast shadows.
Assess roof angles; steep or complex slopes may need custom racks or reduce panel count. If you find problems, repair or replace sections before installing panels to avoid rework.
Choosing Between Grid-Tied and Off-Grid Systems
Once your roof is ready and oriented for good sun exposure, you’ll next decide whether to tie into the utility grid or go fully off-grid—each choice affects system design, cost, and how you store or sell power.
You’ll weigh grid tied advantages like lower upfront battery needs and net metering against off grid considerations such as energy independence and larger battery banks.
Think about reliability, budget, and local rules.
Visualize how each setup looks and behaves:
- Rooftop panels sending surplus to a city grid meter
- Battery bank humming in a garage corner
- Backup generator for cloudy spells
- Remote cabin fully solar-powered
Sizing Your Solar Array and Inverter
Now you’ll size the system by first calculating your household’s average daily energy use so you know how many kilowatt‑hours the array must produce.
Next pick a system voltage that fits your installation and battery setup (if any) to minimize losses and simplify wiring.
Finally, make sure the inverter’s continuous and surge ratings match the array’s output and your peak load so everything runs safely and efficiently.
Calculate Energy Needs
How much electricity do you actually use—and how much do you want your solar system to cover? Start by reviewing past utility bills to calculate daily average energy consumption and identify peak usage.
Estimate desired solar savings percent to set your target production. Convert kWh/day to required array size using local sun hours, then match inverter capacity to peak and continuous loads.
Consider future loads like EV charging.
- Morning coffee machine firing up
- Afternoon air conditioning cycling
- Evening lights and entertainment
- Weekend EV charging session
Document assumptions, then refine numbers before buying panels and an inverter.
Choose System Voltage
Several key factors determine the right system voltage for your array and inverter, and getting it right reduces losses and component costs.
You’ll weigh run length, expected current, breaker and fuse choices, and panel stringing limits. Higher voltages cut conductor size and resistive losses, so consider system voltage benefits like improved efficiency and lower wiring costs.
Common system voltage options include 12V, 24V, 48V for off-grid or battery-tied systems, and higher DC voltages for grid-tied arrays.
Pick a voltage that matches your balance of safety, available components, and future expansion without overcomplicating installation.
Match Inverter Capacity
To size your inverter correctly, start by adding up the peak AC load you expect and match that to an inverter whose continuous and surge ratings meet or exceed it; don’t rely solely on panel wattage, since inverter efficiency, derating for temperature, and startup surges from appliances all affect real-world performance.
You’ll compare inverter sizing guidelines and inverter types (string, micro, hybrid) to fit your roof and budget. Pick an inverter slightly oversized for frequent surges and future loads.
Consider ambient heat, mounting ventilation, and warranty limits so output won’t drop under real conditions.
- A fridge kicking on
- Afternoon heat
- Cloudy output dips
- Future EV charging
Selecting Mounting and Racking Systems
Because your panels need a secure, weather-resistant foundation, pick mounting and racking systems that match your roof type, local wind and snow loads, and installation goals.
You’ll evaluate mounting options—flush, rail, ballasted, or pole—and racking materials like aluminum or stainless steel.
Consider installation techniques that keep penetrations minimal and guarantee structural compatibility with rafters or decking.
Prioritize wind resistance, corrosion protection, and long term durability.
Balance aesthetic considerations with cost factors and maintenance needs.
Get components rated for your climate, follow manufacturer instructions, and plan for safe access and future panel replacement to protect your investment.
Permits, Building Codes, and Zoning Requirements
Before you start mounting panels, check local permits, building codes, and zoning rules so your system meets safety and legal requirements.
You’ll submit a permit application, review local regulations, and seek zoning approval if needed. Plan for building inspection and guarantee code compliance throughout installation.
Consider environmental considerations like tree setbacks and stormwater. Keep documentation handy and coordinate with inspectors early to avoid delays.
- Rooftop layout with clear setback for trees and neighbors
- Permit forms, site plan, and equipment specs ready
- Inspector evaluating roof anchoring and electrical work
- Zoned district map showing allowed installations
Obtaining Utility Interconnection and Net Metering
Getting your system tied into the grid requires coordinated steps with your utility: you’ll submit an interconnection application, meet technical requirements, and sign a net metering agreement so excess generation is credited to your account.
You should review utility interconnection requirements early to confirm paperwork, equipment standards, and inspection timelines. Provide accurate system specs and single-line diagrams to avoid delays.
Expect fees, a safety inspection, and possible export limits. Net metering benefits let you offset consumption by banking credits for surplus energy, lowering bills over time.
Keep copies of approvals and monitor your meter after activation to guarantee correct crediting.
Safety Equipment and Best Practices
When you work on or near a rooftop solar array, use the right personal protective equipment and follow clear procedures to prevent electrical shock, falls, and tool-related injuries.
Before starting, perform a risk assessment, gather safety gear, and brief helpers. Lock out inverters, wear insulated gloves and eye protection, and secure ladders.
Keep a tidy workspace and communicate continuously to avoid surprises.
- A co-worker steadying a ladder while you climb
- Insulated gloves gripping a panel edge
- A harness tethered to a roof anchor
- Clearly labeled breakers and a locked-out inverter
Stay alert, follow manuals, and stop if unsure.
Preparing the Roof and Structural Reinforcements
Before you mount panels, you’ll confirm the roof can handle the extra weight by doing a roof load assessment or hiring a structural engineer.
You’ll also inspect and repair flashing, seals, and shingles so water won’t penetrate around new mounts.
Proper reinforcement and waterproofing protect both the array and your home from long-term damage.
Roof Load Assessment
Although your roof might look sturdy, you should confirm its load capacity before mounting panels, since solar arrays add weight and wind loads that your structure must safely carry.
You’ll inspect rafters, attic joins, and sheathing to assess structural integrity and evaluate load distribution across supports. If needed, plan reinforcements like sistering rafters or adding blocking.
Hire an engineer for complex roofs or older homes.
Visualize the work:
- Carpenter measuring rafter spans and marking reinforcement points
- Attic view showing concentrated loads over beams
- New blocking fitted between joists for even load distribution
- Engineer reviewing plans and stamping approvals
Flashing and Waterproofing
With structural reinforcements in place, you’ll focus on flashing and waterproofing to keep your roof watertight around mounts and penetrations.
Start by choosing compatible waterproofing materials—EPDM, butyl, or roofing sealant—matching your roof type. Use proven flashing techniques: saddle flashing for pipe penetrations, step flashing along rafters, and continuous flange flashing for rails.
Pry back shingles carefully, slide flashing beneath, then reseal and replace shingles to shed water. Apply sealant liberally where screws penetrate mounts and add a secondary membrane under rail brackets for redundancy.
Inspect all seams, test with a garden hose, and correct any leaks before panel installation.
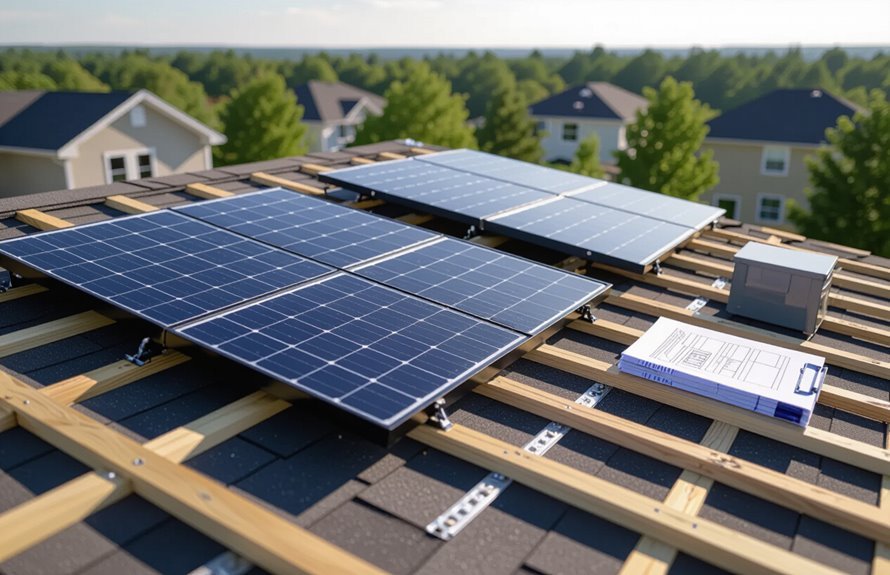
Installing Mounting Rails and Flashing
Now you’ll secure the mounting rails and flash the roof to keep the array watertight: align and fasten the rails to the rafter-mounted lag bolts, check that they’re straight and level, then install flashing around each penetration to seal against leaks.
You’ll choose mounting rail types that suit your roof—rail-span, rail-less, or rail-on-rafter—and match flashing materials like aluminum or rubberized boots for a tight seal.
Work methodically, torque bolts to spec, and overlap flashing correctly.
Picture the process:
- A straight row of rails clamped to rafters
- Flashing collars snug around bolts
- Sealed overlaps shedding water
- Finished rails ready for panels
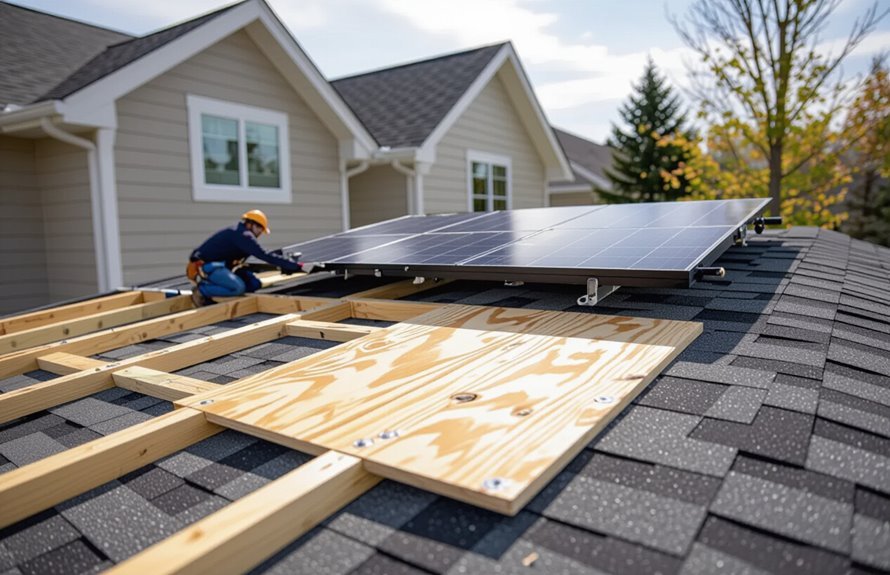
Mounting Solar Panels and Securing Wiring
Now you’ll mount the panels to the rails using the appropriate roof attachment methods so they’re secure and weatherproof.
You’ll route and fasten the PV cables with proper cable management practices to keep wiring tidy and protected.
Follow manufacturer torque specs and local codes to guarantee both the mounts and wiring are safe and code-compliant.
Roof Attachment Methods
Mounting solar panels securely to your roof and routing the wiring correctly are critical for system longevity and safety. You’ll choose compatible solar panel brackets, inspect rafters, and plan roof penetration techniques to prevent leaks.
Seal and flash each penetration, torque fasteners to spec, and use corrosion-resistant hardware. Position arrays for wind loads and maintenance access. Protect junction boxes and conduit entries with roof-rated boots.
- Imagine sturdy metal brackets bolted to rafters
- Visualize neat penetrations sealed with flashing
- Picture panels aligned to shed wind
- See conduit entering a weatherproof junction box
Cable Management Practices
When you route and secure PV wiring, keep runs tight, supported, and protected to reduce strain, chafing, and exposure to weather or UV.
Use cable organization techniques like labeled conduit, color-coded zip ties, and trunking to separate array, inverter, and monitoring cables. Secure wires to rails and racking with UV-resistant clamps at regular intervals, and maintain service loops near junctions for movement and maintenance.
Avoid sharp bends and metal edges; use grommets where wiring passes roofs or panels. Follow local code for conduit fill and grounding.
Effective wire management improves safety, simplifies troubleshooting, and extends system life.
Installing Inverters and Charge Controllers
Because inverters and charge controllers regulate and convert the power your panels produce, you’ll want to plan their placement and wiring carefully before you start connecting anything.
You’ll choose between inverter types (string, micro, hybrid) based on shading and system size, and match charge controller functionalities (PWM vs MPPT) to panel output and battery voltage.
Mount inverters close to the main service panel, keep controllers near batteries or combiner boxes, and run short, protected DC runs.
Label all connections, install proper fuses and disconnects, and follow manufacturer specs.
- Wall-mounted inverter with cooling clearance
- Short thick DC cables
- Labeled combiner box
- Accessible disconnect switch
Battery Options and Energy Storage Integration
If you want reliable backup and maximized self-consumption, choosing the right battery chemistry, capacity, and integration method is essential.
You’ll compare battery types like lead-acid, lithium-ion, and flow batteries for lifespan, depth-of-discharge, and cost.
Match capacity to your load and expected autonomy, and size for seasonal variability if needed.
Integrate via a compatible inverter/charger or hybrid inverter, set charge profiles, and enable smart export controls to prioritize self-consumption.
Monitor system performance and maintain batteries per manufacturer guidance.
Prioritize energy efficiency in loads and system design to reduce required storage and lower total cost.
Grounding, Bonding, and Lightning Protection
Although solar panels themselves rarely carry hazardous voltages under normal conditions, you still need proper grounding, bonding, and lightning protection to keep people and equipment safe and to meet code.
You’ll use grounding techniques to connect frames and racking to earth, and follow bonding methods to join all metal parts so faults don’t create touch hazards. Install surge protection devices at inverter and service points, and consider lightning rods and down conductors for high-risk sites.
Regular inspections guarantee connections stay tight and corrosion-free.
- metal rails tied to a ground rod
- bonded module frames
- rooftop lightning rods
- surge protection at equipment
Wiring the System to Your Electrical Panel
Now you’ll connect the inverter to your electrical panel, following the manufacturer’s wiring diagram and labeling each conductor clearly.
Choose the correct circuit breaker size and type to match the inverter’s output and local code requirements.
Make sure grounding and bonding continue from the array to the panel so the whole system is safely tied into your home’s earth fault protection.
Inverter Connection Steps
Before you connect the inverter to your electrical panel, turn off the main breaker and verify there’s no live voltage at the panel using a properly rated multimeter.
You’ll mount the inverter, route DC conduit from the array, and run the positive and negative strings to the inverter’s DC input, observing polarity and torque specs.
Verify inverter types and inverter sizing match your array and load.
Connect the AC output to the panel’s designated inverter landing, bond grounding conductors, and install a visible disconnect where required.
Test startup sequence per manufacturer instructions, watch for error codes, and confirm system reports expected voltage and frequency.
- metal conduit gleam
- snug lug connections
- labeled cables
- inverter status LEDs
Circuit Breaker Selection
When you tie the inverter’s AC output into your service panel, selecting the correct breaker type and size is critical for safety, code compliance, and reliable operation.
You’ll choose between breaker types (standard, GFCI, or AFCI where required) based on local code and inverter specs. Match circuit breaker ratings to the inverter’s maximum continuous current and the conductors’ ampacity, allowing the required safety margin.
Use listed equipment and follow manufacturer recommendations; oversized breakers defeat protection, undersized ones nuisance trip.
Always verify panel space, labeling, and obtain permits; have a licensed electrician inspect or install the breaker connection.
Grounding and Bonding
Although often overlooked, grounding and bonding are essential for safety and proper operation when you tie your solar system into the electrical panel.
You’ll follow grounding techniques to connect panels, racking, and inverter to a common earth electrode, preventing dangerous voltages. Use bonding methods to electrically join metal parts so faults clear at the breaker.
Inspect connections, torque to spec, and use listed clamps and conductors. If local code or utility requires, install a separate ground rod system or interconnect to the building ground.
When unsure, hire a licensed electrician to verify continuity and compliance.
- Copper conductor clamped to rack
- Ground rod driven beside meter
- Bonding jumper around disconnect
- Tightened lug on inverter
System Testing, Commissioning, and Inspection
During commissioning you’ll verify the system performs to design and local code by running functional tests, checking wiring and grounding, measuring voltages and currents, and confirming protective device settings.
You’ll follow inspection protocols, document findings, and correct defects before energizing. Test inverter startup, PV string continuity, and rapid shutdown where required.
Measure open-circuit and operating voltages, string and array currents, and insulation resistance; compare to design to confirm system performance.
Verify labels, access, and conduit integrity. Have local authority or certified inspector sign off.
Keep concise records of tests, corrections, and final approvals for warranty and code compliance.
Monitoring Performance and Maintenance Tips
After commissioning and inspections are signed off, you’ll want a clear plan for monitoring performance and keeping the system healthy.
Set up performance monitoring via the inverter app or a web portal so you spot drops quickly. Create a maintenance schedule: quarterly visual checks, annual professional inspections, and seasonal cleanings. Keep records of energy output, error codes, and service dates to compare trends.
- Walk the array, looking for debris, shading, or damage.
- Inspect mounting hardware for corrosion or looseness.
- Clean panels with soft water and a nonabrasive squeegee.
- Check inverter lights and log any faults immediately.
Estimating Costs, Incentives, and Return on Investment
Estimating what your solar system will cost and how quickly it pays you back starts with three numbers: total installed price, local incentives, and your current electricity rate.
You’ll want a clear cost breakdown: panels, inverter, mounts, labor, permits, and any upgrades.
Compare financing options—cash, loan, or lease—and factor tax credits and utility rebates into your investment analysis.
Calculate payback period by dividing your net cost by annual savings from avoided bills.
Include long term savings, maintenance, and degradation in projections.
Use conservative estimates so your ROI expectations are realistic and actionable.
Conclusion
So you want to solar-power your life — noble, slightly smug, and sensible. You’ve checked roof angles, chosen panels, wrestled with wiring (or bribed an electrician), and navigated incentives that feel like a scavenger hunt. Expect cleaner bills, awkwardly proud neighbors, and the occasional maintenance chore. Go on — flip the switch, watch the meter sigh, and enjoy being the household that harvests photons like it’s a hobby and a virtue.