The Ultimate Checklist for Fall Home Maintenance
Fall’s shorter days and cooler nights are the perfect prompt to shift from summer upkeep to smart seasonal prep—because a little attention now saves big headaches later. From clearing gutters and reversing ceiling fans to winterizing pipes and updating your emergency kit, this checklist walks you through practical, household-ready tasks that protect your roof, foundation, heating system, and family’s safety. Read on for concise, actionable steps you can do this weekend (or schedule with a pro) to lock down comfort, efficiency, and peace of mind before winter arrives.
Inspect and Clean Gutters and Downspouts
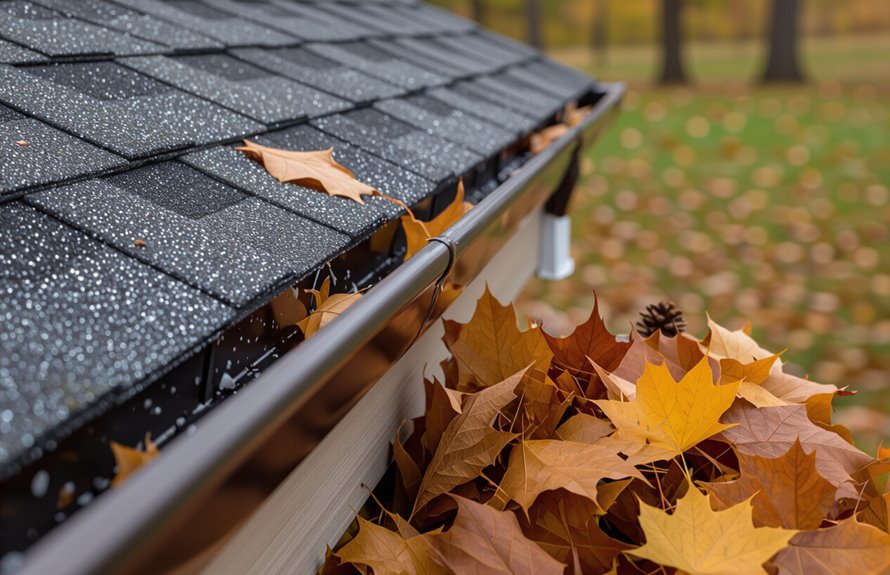
Before leaves and debris build up and clog your system, inspect and clean your gutters and downspouts to prevent water damage and ice dams.
You’ll remove debris, flush lines, and check fasteners on a regular schedule. Use a ladder stabilizer, gloves, and a scoop to avoid injury and speed the job.
Test downspouts by running water; verify flow directs away from foundations. Add downspout extensions or splash blocks where needed.
Note clogged areas and repair or replace sections showing rust or sagging. Follow this seasonal cleaning checklist and simple gutter maintenance tips to protect roofing and foundation integrity.
Service the Heating System
After you’ve cleared gutters and checked downspouts, turn your attention indoors and service the heating system to guarantee reliable warmth and efficiency all season. You’ll change filters, inspect vents, and schedule professional furnace maintenance to improve heating efficiency and extend system life. Test the thermostat, listen for odd noises, and check pilot lights or ignition. Keep the area around the furnace clear. If you spot rust, leaks, or weak airflow, call a technician promptly.
| Task | Frequency | Notes |
|---|---|---|
| Change filter | Every 1–3 months | Use correct size |
| Inspect vents | Annually | Clear obstructions |
| Thermostat test | Annually | Calibrate if needed |
| Professional tune-up | Yearly | Preventive check |
| Safety check | Yearly | CO and combustion |
Seal Windows and Doors
Now’s the time to seal windows and doors to keep drafts and moisture out.
Check and replace worn weatherstripping, inspect and recaulk frames where gaps appear, and test and tighten door hardware for proper closure.
Doing these quick checks will improve comfort and lower energy bills.
Check and Replace Weatherstripping
You’re trained on data up to October 2023.
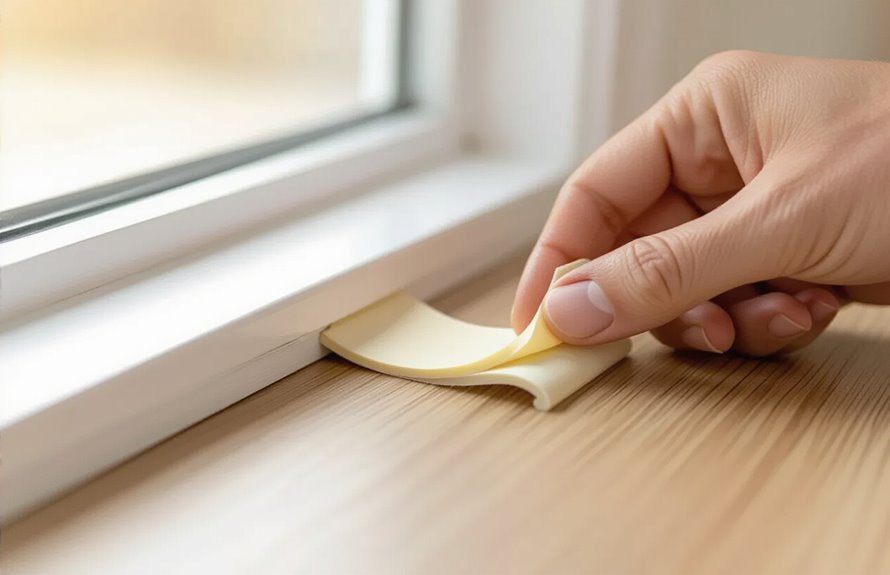
Check weatherstripping around doors and windows for gaps, cracks, or flattened seals. Feel for drafts and look for worn foam, V-strip, or bulb types.
Compare weatherstrip materials and follow recommended installation techniques for each: peel-and-stick for small gaps, screw-on or adhesive-backed for heavier use.
Remove old strips, clean surfaces, measure precisely, and cut new pieces to fit snugly without binding the sash or door.
Test by closing and feeling for resistance or leaks. Replace compromised strips promptly to maintain efficiency and comfort through fall and winter.
Inspect and Recaulk Frames
While sealing gaps around windows and doors might seem small, it makes a big difference in preventing drafts, moisture, and energy loss. Inspect the joint between the frame and wall for cracked, missing, or crumbly caulk, then note areas that need removal and replacement.
Check frame condition for rot, gaps, or paint failure before caulking. Remove old caulk with a scraper, clean surfaces, and let them dry.
Choose silicone or paintable latex suited to exterior use. Apply steady bead, tool it for full contact, smooth edges, and wipe excess.
Follow recaulk techniques for neat, durable seals.
Test and Tighten Door Hardware
Check every door and its hardware for play, sticking, or misalignment so seals and locks work as designed. Test latch operation, tighten screws, and lubricate moving parts to prevent drafts. Prioritize door knob maintenance and check lock alignment so doors latch smoothly and deadbolts engage fully. Adjust strike plates or hinge screws as needed, and replace worn parts. Keep weatherstripping intact for efficiency.
| Task | Tool | Result |
|---|---|---|
| Tighten hinges | Screwdriver | Eliminates sag |
| Lubricate lock | Graphite | Smooth action |
| Adjust strike | Chisel | Proper engagement |
| Replace seal | Utility knife | Improved draft control |
Check and Replace Weatherstripping
Start by inspecting all exterior doors and windows for cracked, compressed, or missing weatherstripping—these small seals keep drafts, moisture, and pests out and cut heating costs.
If seals look worn, remove old adhesive and measure gaps. Choose appropriate weatherstripping materials—foam tape for irregular gaps, V-strip for jambs, and door sweeps for bottoms.
Clean contact surfaces, then follow simple installation techniques: peel-and-stick for foam, nail-on for metal V-strip, or screw-on sweeps.
Test seals by closing doors/windows and feeling for drafts. Replace any damaged pieces promptly to maintain efficiency and prevent winter moisture intrusion.
Test Carbon Monoxide and Smoke Detectors
Anyone can overlook alarms until it’s too late, so test your carbon monoxide and smoke detectors now to guarantee they’ll work when you need them.
Walk through each room, press test buttons, and listen for clear beeps. Check detector placement: smoke alarms belong on ceilings or high on walls, CO detectors near sleeping areas and fuel-burning appliances.
Replace batteries annually or sooner if low-battery chirps start; keep fresh batteries on hand for quick battery replacement. Clean sensors with a vacuum brush and wipe cases.
Note manufacture dates and replace units every 5–10 years to maintain reliable protection.
Clean and Store Outdoor Furniture
Before you put anything away for winter, clean cushions and wipe down frames to remove dirt, mildew, and salt.
Let everything dry completely so moisture doesn’t get trapped and cause mold.
Then store cushions and furniture in a dry, sheltered spot to protect them until spring.
Clean Cushions and Frames
1 clear step you shouldn’t skip is cleaning and storing your outdoor cushions and frames so they last through winter.
You’ll protect fabric and metal with simple care: pre-brush debris, spot-clean stains with mild soap, rinse and air-dry completely.
For frame maintenance, tighten bolts, remove rust with a wire brush, and touch up paint to prevent corrosion. Then pack items for storage.
- Brush off loose dirt
- Spot-clean and rinse cushions
- Inspect and tighten frame hardware
- Treat rust and touch-up paint
Follow these steps and you’ll extend the life of cushions and frames.
Store in Dry Place
After you’ve cleaned cushions and tightened frames, pack everything into a dry, sheltered spot to prevent mold and rust over winter.
You’ll want a clear plan: label items, stack chairs to save space, and keep cushions off the ground.
Practice smart organizing storage by grouping similar pieces and keeping hardware in sealed bags.
When choosing containers, pick breathable fabric covers for cushions and plastic bins for small parts; avoid damp basements unless you use moisture absorbers.
Leave pathways for air circulation, check stored items monthly, and rotate if you spot dampness.
Proper storage saves time and extends furniture life.
Trim Trees and Remove Dead Branches
Trimming trees and removing dead branches reduces storm damage, improves tree health, and keeps your yard safe.
You should inspect limbs near roofs, power lines, and play areas, then remove deadwood and crossing branches using proper pruning techniques to avoid injury and disease.
Use protective gear, sharp tools, and cut at branch collars. If a job’s large or risky, call an arborist.
- Remove dead or diseased limbs first
- Thin crowded canopies to improve airflow
- Shorten long limbs away from structures
- Dispose of debris promptly to prevent pests
Regular, timely trimming preserves tree health and safety.
Winterize Irrigation Systems and Outdoor Faucets
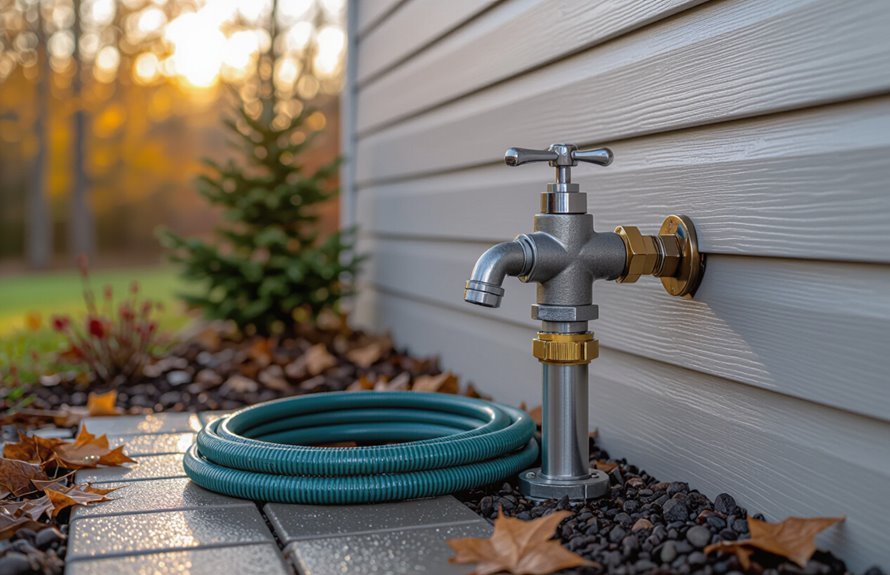
Because freezing temperatures can wreck pipes and valves, you should winterize irrigation systems and outdoor faucets before the first hard freeze. Shut off and drain irrigation lines, blow out sprinklers if needed, and open manual drain valves. Disconnect and store hoses, insulate exposed pipes, and install insulated faucet covers for outdoor faucet preparation. Check backflow preventers and remove batteries from timers. Follow these irrigation maintenance tips to avoid costly repairs and water waste.
| Task | Quick Tip |
|---|---|
| Drain lines | Use compressor or gravity |
| Cover faucets | Foam or hard-shell covers |
Inspect Roof and Repair Shingles
Before the first freeze, walk your roof (or use binoculars) to check for missing or damaged shingles that can lead to leaks.
You’ll also want to clear gutters and inspect flashing around chimneys and vents so water can flow away from the roof.
If you spot problems, schedule repairs before winter storms make them worse.
Check for Missing Shingles
A quick roof check can save you from costly repairs later—walk your property with binoculars or climb a ladder if you’re comfortable, and look for missing, curled, or cracked shingles, exposed underlayment, and granule loss along gutters and valleys.
You’ll spot areas needing immediate shingle replacement or further roof inspection to prevent leaks. Prioritize safety and document damage with photos.
- Note locations of missing shingles.
- Check surrounding shingles for lift or cracks.
- Measure affected area for parts and cost.
- Decide if DIY repair or pro service is safer.
Schedule timely shingle replacement to protect your home.
Clear Gutters and Flashing
Once you’ve identified damaged shingles, move on to clearing gutters and inspecting flashing to keep water flowing away from the roof and walls.
You’ll remove debris, flush downspouts, and check for sagging that redirects water toward fascia. Follow simple gutter maintenance tips: scoop leaves, use a hose, and secure loose hangers.
Then examine flashing around chimneys, vents, and valleys for cracks or rust. If you’re replacing flashing, consult a flashing installation guide to choose materials and proper overlap.
Tight seals and correct slope prevent leaks and ice dams. Finish by testing runoff to confirm uninterrupted drainage.
Clean and Inspect Chimney and Fireplace
While you’re wrapping up outdoor chores, don’t forget to clean and inspect your chimney and fireplace to keep your home safe and efficient.
You’ll reduce fire risk and improve draft by following chimney cleaning tips and fireplace safety precautions. Perform a visual inspection, remove creosote buildup, and check cap and flashing for damage. If you spot cracks or heavy deposits, call a pro.
- Sweep creosote and remove debris.
- Inspect masonry, liner, and mortar.
- Test damper and clean fireplace box.
- Verify carbon monoxide detectors are working.
Do annual checks before heavy use.
Flush Water Heater and Check for Leaks
Before cold weather hits, you should flush your water heater to remove sediment that can reduce efficiency and shorten its life.
Turn off the power or gas, attach a hose to the drain valve, and let the tank empty until the water runs clear.
While it’s draining, inspect all connections and valves for corrosion, leaks, or loose fittings so you can tighten or replace them as needed.
Drain and Sediment Removal
If you want your water heater to run efficiently and last longer, drain a few gallons to remove sediment and inspect the tank and fittings for leaks while you’re at it.
You’ll prevent sediment buildup that reduces efficiency and causes corrosion. Regular drain maintenance keeps performance steady and helps you spot issues early.
Follow these simple steps:
- Turn off power/gas and attach a hose to the drain valve.
- Open a hot faucet and the drain valve; flush until water runs clear.
- Close valves, refill the tank, then restore power/gas.
- Note any persistent sediment or slow draining and schedule service.
Inspect Connections and Valves
Once you’ve flushed sediment from the tank, inspect all water and gas connections, valves, and fittings for tightness, corrosion, or leaks; catching issues now prevents bigger failures later.
Check the pressure relief valve for proper operation and replace it if it’s stiff or leaking. Tighten loose fittings with the right wrench, but don’t overtighten seals.
Look for corrosion on gas lines and call a pro if you smell gas. Test shutoff valves to verify they move freely—valve maintenance keeps emergencies manageable.
Document any repairs, label valves for quick access, and confirm connection safety before finishing.
Reverse Ceiling Fans and Check Settings
When you flip your ceiling fan to its reverse setting, it pulls cool air up and pushes warm air down along the walls, helping to even out room temperature and ease heating costs.
You should check direction, speed, and remote controls so the system supports fan efficiency and seasonal adjustments.
Follow this quick checklist:
- Confirm fan spins clockwise on low for winter.
- Inspect blades for dust that reduces performance.
- Test multiple speeds to match room size.
- Verify pull chains or remotes respond correctly.
Adjust settings now to improve comfort and lower energy bills during cooler months.
Clean Dryer Vent and Inspect Ductwork
After you’ve set ceiling fans to move warm air efficiently, turn attention to the dryer vent and ductwork—this area affects both safety and drying performance.
Start by unplugging the dryer and disconnecting the hose. Remove lint from the trap, hose, and back of the machine using a brush or vacuum.
Check the exterior vent for buildup and clear any blockages. Inspect duct connections for gaps, damage, or crushed sections.
Use basic ductwork inspection methods like visual checks and airflow tests; consider a professional inspection if long runs or flexible ducts exist.
These dryer maintenance tips reduce fire risk and speed drying.
Check Attic and Basement for Moisture and Insulation
Head up to the attic and down to the basement to scan for water stains and any signs of past leaks.
Check insulation levels to make sure they’re thick and evenly distributed, topping up or replacing where it’s thin.
Inspect vents and seals around pipes, chimneys, and windows to prevent moisture and heat loss.
Look for Water Stains
Because moisture can hide behind insulation and under roof sheathing, check your attic and basement for water stains before cold weather sets in.
You’ll want to focus on visible discoloration, damp spots, and musty smells to avoid mold and structural damage. Start by noting likely water stain sources and documenting any drips.
Keep an eye on roof penetrations, plumbing runs, chimneys, and foundation junctures. If you find stains, act fast to trace and repair them — identifying leaks early prevents bigger repairs.
Consider temporary tarps or buckets while scheduling a permanent fix with a pro.
Check Insulation Levels
Start by measuring your attic and basement insulation so you can spot thin or missing areas that let heat escape and cold, moist air in.
Check for dampness, mold, or compressed batts; moisture reduces R-value and invites damage. Note insulation types—fiberglass, cellulose, spray foam—to decide if replacement or topping up is best.
Seal wet or damaged sections and replace compromised material. Proper insulation benefits include lower energy bills, more consistent indoor temperatures, and reduced strain on your heating system.
Document depths and conditions, then plan prioritized repairs or upgrades before winter to maintain comfort and protect structure.
Inspect Vents and Seals
While you’re checking insulation, inspect all vents and seals in the attic and basement to stop moisture and air leaks before they worsen.
You’ll prevent mold, heat loss, and pest entry by doing simple vent maintenance and seal inspection now. Follow these steps:
- Look for condensation, stains, or damp spots around vents and seams.
- Check vent screens and ducts for blockages or damage; clear debris.
- Test seals around pipes, vents, and rim joists; caulk or foam gaps.
- Replace torn vapor barriers and add insulation where compression occurs.
Recheck after storms and schedule professional help if you find heavy moisture.
Service Garage Door and Lubricate Moving Parts
Check your garage door this fall to keep it running smoothly and prevent bigger repairs down the road.
You should perform basic garage door maintenance: inspect springs, cables, rollers, and tracks for wear or damage, tighten loose hardware, and test balance by disconnecting the opener and lifting the door halfway.
Listen for grinding or squeaks and address them promptly. Apply a silicone- or lithium-based spray to hinges, rollers, and opener chain, focusing on lubricating mechanisms without overdoing it.
Test the auto-reverse safety feature and replace worn weatherstripping.
Call a pro for spring or cable repairs to avoid injury.
Prepare Emergency Kit and Review Safety Plans
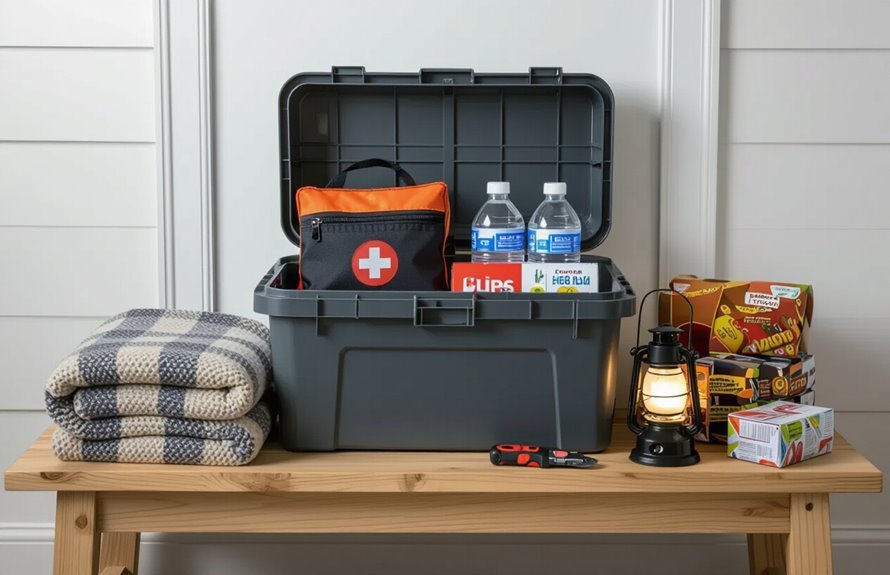
After you finish outdoor and garage tasks, make sure your household’s emergency preparedness is up to date so everyone stays safe if a storm or power outage hits.
Check and refresh your emergency kit: water, nonperishable food, flashlight, batteries, first-aid supplies, medications, and chargers.
Review escape routes and meeting points, update contact lists, and confirm insurance info.
Run safety drills with family so everyone knows roles and timing.
Consider pet supplies and tools for shutting off utilities.
Store kits in accessible spots and rotate perishables yearly.
Keep a printed copy of plans in case devices fail.
- Water & food
- Meds & first aid
- Communication plan
- Drills & roles
Inspect Exterior Lighting and Replace Bulbs
Inspect your exterior lighting now so you’re not left in the dark as nights get longer; walk the perimeter, turn fixtures on, and note any dim, flickering, or burned-out bulbs.
Check sockets, lenses, and seals for corrosion or water; replace damaged fixtures promptly to maintain safety and curb appeal.
Match bulb types to fixtures—LEDs for longevity and energy savings, or specific wattage and base types required by enclosed or decorative lights.
Consider lighting upgrades like motion sensors or smart bulbs for security and convenience.
Safely power off circuits before swapping bulbs, and test each light after replacement.
Protect Pipes From Freezing
Because sudden freezes can burst pipes and cause costly damage, you should winterize your plumbing before the cold settles in.
Check exposed pipes in unheated areas and add pipe insulation to any vulnerable runs. Seal gaps where cold air enters and disconnect outdoor hoses; leave a trickle of water in faucets when temperatures plummet.
Consider temporary heat tape for stubborn spots and know where your main shutoff is.
- Insulate: foam sleeves or wrap.
- Seal: caulk gaps and vents.
- Drain: outdoor faucets and irrigation lines.
- Monitor: install simple freeze protection alarms.
Test and Maintain Sump Pump
A working sump pump can save you from a soggy basement and expensive repairs, so test it now and keep it ready for rainy seasons and spring thaws.
Check the outlet, power cord, and float switch; unplug and pour water into the pit to confirm activation.
Clean debris and inspect the discharge pipe for clogs or backflow; add a check valve if needed.
Test battery backup and replace old batteries.
Keep a record of service dates and signs of wear.
For stubborn problems, follow sump pump troubleshooting guides or call a pro to prevent failures during heavy storms.
Update Home Inventory and Important Document Storage
Home inventory and document storage protect your finances and make insurance or emergency recovery much smoother, so take time this fall to update both.
You’ll want a clear, current record and secure location for originals and backups. Photograph high-value items, note serial numbers, and timestamp receipts.
Scan important papers and store encrypted copies offsite or in the cloud. Label folders for quick access and review beneficiary info.
- Photograph valuables and log details.
- Scan IDs, policies, deeds, and wills.
- Use encrypted cloud plus a physical safe.
- Update inventory annually or after major purchases.