40 Budget-Friendly Cheap Backyard Makeover DIY Ideas to Transform Your Outdoors
Transform your backyard without breaking the bank! Start by creating a cozy DIY fire pit, then add a vibrant vertical garden using pallets or trellises. Upcycle old furniture into charming seating and paint rocks for unique garden decor. Install a stylish gravel pathway to enhance your space. Don’t forget to craft a picnic table for gatherings and seasonal flower beds for color. Keep exploring for more budget-friendly ideas that will elevate your outdoor oasis!
Create a DIY Fire Pit
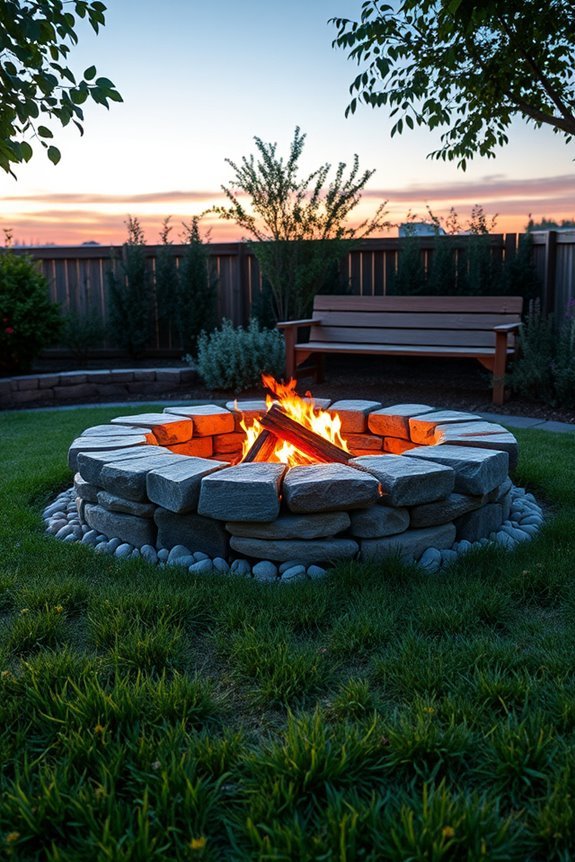
If you want to transform your backyard into a cozy retreat, creating a DIY fire pit is a fantastic project.
Start by gathering the right fire pit materials like brick, stone, or metal. Choose materials that match your backyard’s aesthetic and guarantee they’re heat-resistant.
Before you begin, take essential safety precautions; locate your fire pit at least 10-20 feet away from structures and overhanging branches. It’s wise to check local regulations regarding fire pits, too.
Dig a shallow pit and surround it with your chosen materials, forming a circle.
Finally, consider adding seating around your fire pit for a perfect gathering spot. With a little effort, you’ll create a charming space to enjoy warm evenings under the stars.
Build a Vertical Garden
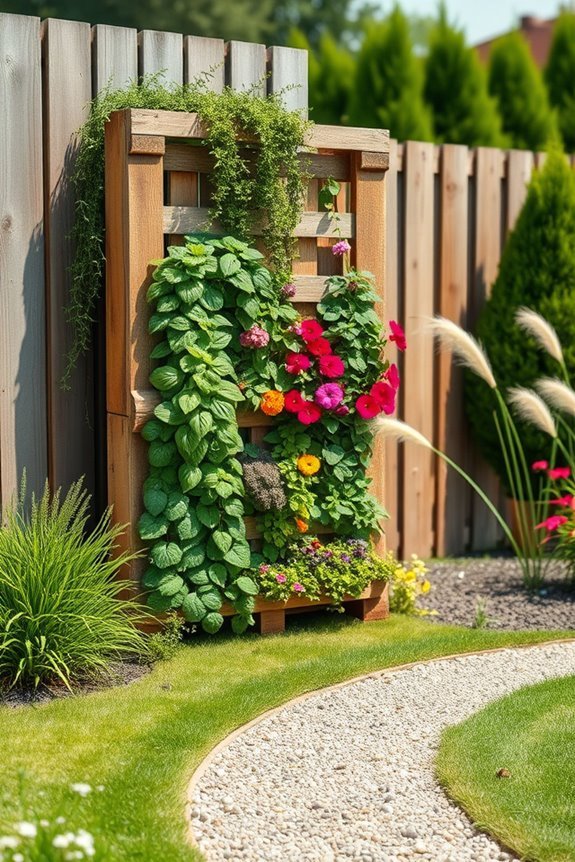
After enjoying cozy evenings by your DIY fire pit, why not enhance your outdoor space further with a vertical garden?
This trendy addition not only saves space but also brings life to your backyard. You can use various vertical garden materials like wooden pallets, trellises, or even old crates to create a stunning display.
Choose plants that thrive in vertical settings, such as herbs, succulents, or flowering vines. The vertical garden benefits include improved air quality and a beautiful focal point for your outdoor area.
Plus, it’s a rewarding DIY project that adds character without breaking the bank. Get creative, and soon you’ll have a lush, green wall that makes your backyard truly inviting!
Paint Rocks for Garden Decor

Adding a splash of color to your garden can be as simple as painting rocks. You can transform ordinary stones into eye-catching decor using various rock painting techniques.
Start by cleaning your rocks and applying a base coat in a color that matches your garden color schemes. Once dry, release your creativity with designs like polka dots, stripes, or even intricate patterns.
You can use acrylic paints for durability or outdoor-safe spray paint for quick coverage. Consider placing these painted rocks along flower beds, in pots, or scattered throughout your yard for added charm.
Not only will this DIY project enhance your outdoor space, but it’s also a fun way to express your personal style without breaking the bank!
Install a Gravel Pathway
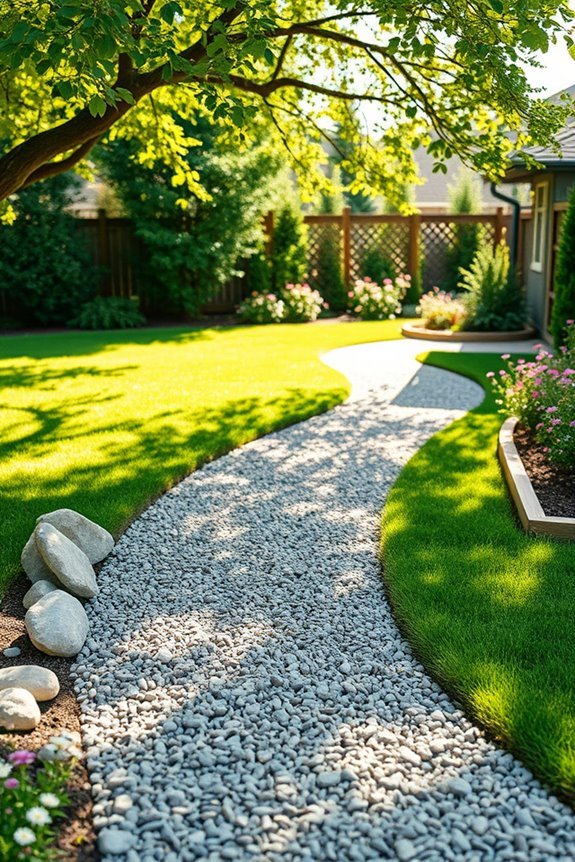
If you want to create a charming and functional pathway in your backyard, installing a gravel pathway is a fantastic option.
First, choose the right gravel types, like crushed stone or pea gravel, depending on your desired look and feel. Plan your pathway design carefully; consider its width, shape, and how it’ll connect different areas of your yard.
Next, mark the pathway’s outline with stakes and string, then dig a shallow trench to accommodate the gravel. Lay down landscaping fabric to prevent weeds, and pour in your chosen gravel type, leveling it as you go.
Finish by adding borders, like bricks or stones, to give your pathway a polished look. Enjoy your new outdoor space that’s both stylish and practical!
Create a Rustic Log Bench
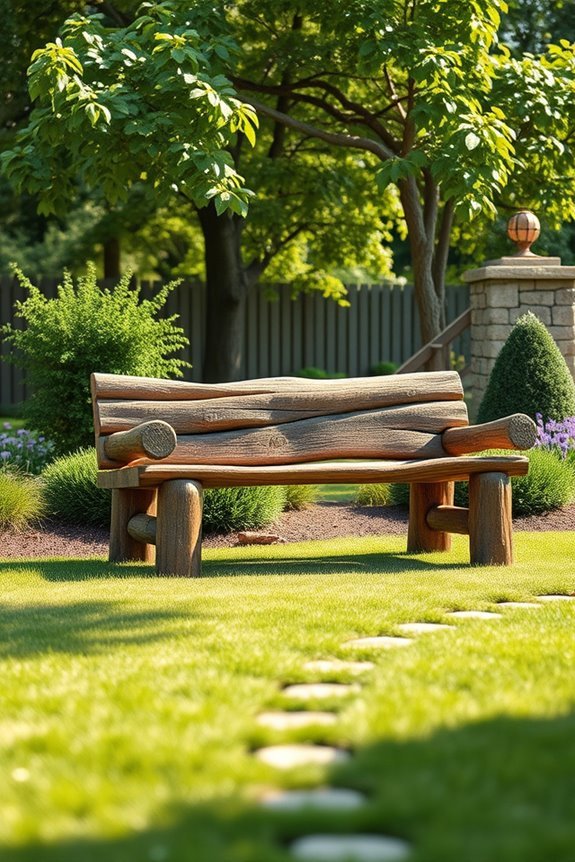
After creating a beautiful gravel pathway, you might want to enhance your backyard’s charm with a rustic log bench.
Start by making your log selection; choose sturdy, untreated logs that can withstand the elements. Look for logs of similar lengths for a cohesive look.
Next, consider bench placement. Position your bench near the pathway, facing a lovely view or a garden area, inviting relaxation.
Dig a shallow trench to stabilize the logs, ensuring they’re level and secure. You can add cushions for comfort or leave it natural for a more rustic appeal.
With a bit of effort, your log bench will become a cozy spot for gatherings and quiet moments, adding character to your outdoor space.
Use Tire Planters for Flowers
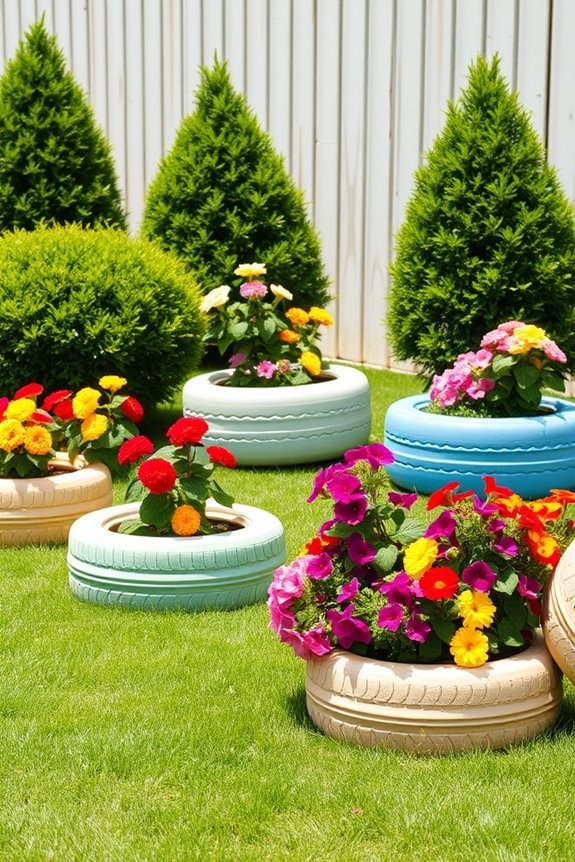
Tire planters can add a unique flair to your garden while being an eco-friendly option. You can easily transform old tires into vibrant planters with some creative tire painting. Choose bright colors or fun patterns to make them stand out.
For flower selection, consider hardy blooms like petunias or marigolds, which thrive in various conditions and add lively colors. Stack tires for height, or lay them flat for a more traditional look.
Fill them with soil, plant your flowers, and watch your garden come alive! This DIY project not only beautifies your outdoor space but also helps recycle tires, making it a win-win for your garden and the environment.
Enjoy your new floral display!
Build a Simple Trellis
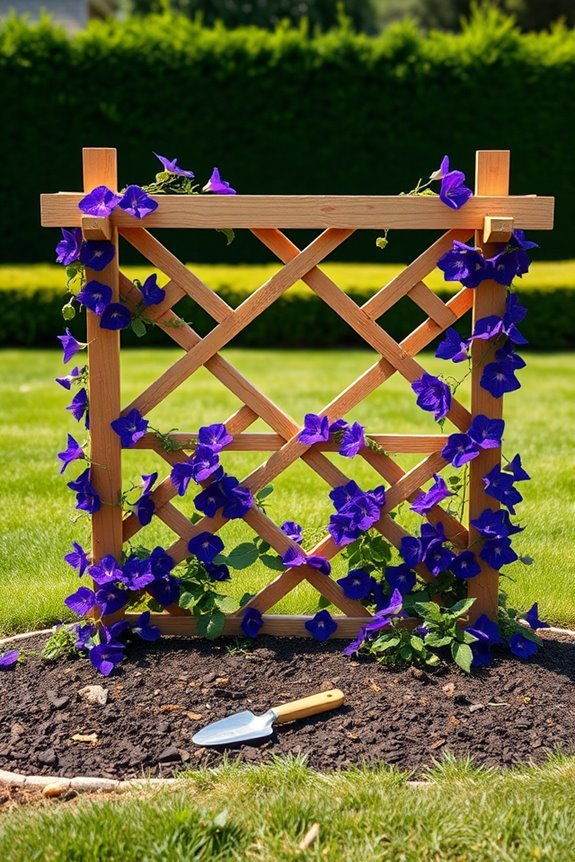
If you want to add vertical interest to your backyard, building a simple trellis is a great way to do it. You can use affordable trellis materials like wood or bamboo to create a structure that supports climbing plants.
Start by choosing a basic trellis design—an A-frame or a flat panel works well. Measure your space, then cut your materials to size. Secure the pieces with nails or screws for stability.
Once your trellis is up, plant vines or flowering climbers at its base. As they grow, they’ll transform your outdoor space into a lush retreat. Plus, you’ll enjoy a beautiful backdrop for your garden, enhancing your backyard’s overall appeal without breaking the bank.
Create a Faux Stone Wall
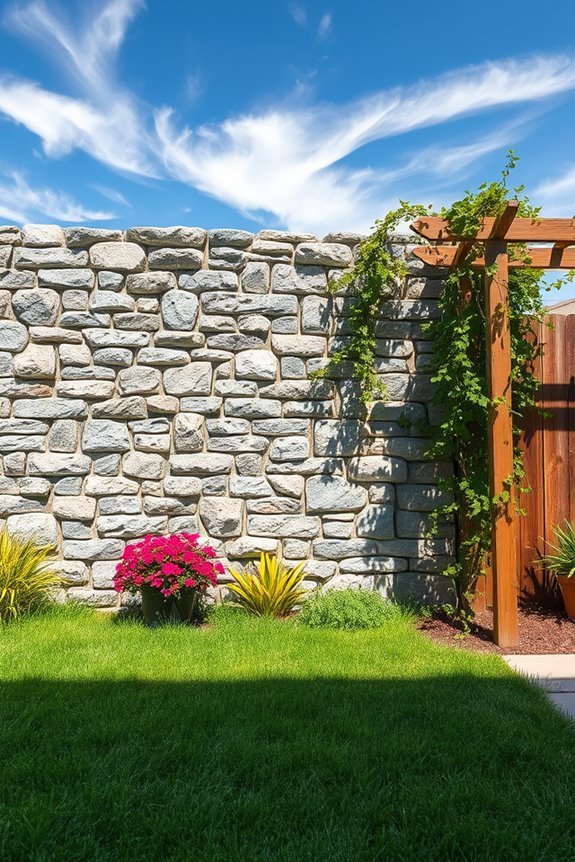
Creating a faux stone wall can dramatically elevate your backyard’s aesthetic, making it feel more inviting and sophisticated. You can use various faux stone techniques, like applying textured paint or using stone veneer panels, to achieve a stunning look without breaking the bank.
Start by planning your wall design ideas; consider whether you want a full wall, a partial divider, or an accent feature. Measure your area and gather materials, ensuring you have the right tools for a seamless installation.
Once you’re ready, apply your chosen faux stone method, blending colors for a natural appearance. Finish up with a sealant to protect your work from the elements, and you’ll have a beautiful faux stone wall that enhances your outdoor space.
Hang String Lights for Ambiance
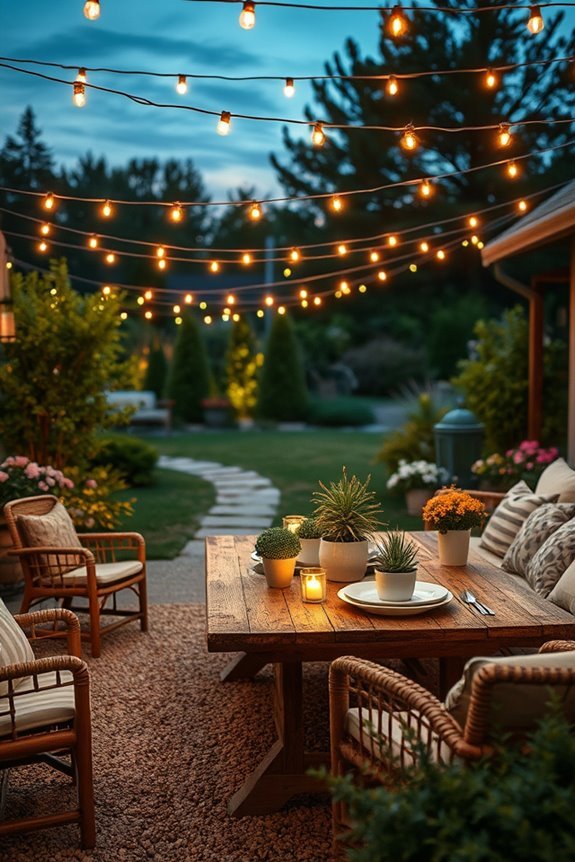
While transforming your backyard into a cozy retreat, hanging string lights can instantly add warmth and charm. Choose the right string light placement to create a magical atmosphere. Drape them along fences, wrap them around trees, or hang them overhead to form a twinkling canopy.
Consider various outdoor lighting options, like solar-powered string lights for energy efficiency or waterproof versions for durability. The key is to find a style that matches your backyard’s vibe, whether it’s casual or elegant.
Don’t forget to test the lights before final installation to guarantee you achieve the desired brightness and spacing.
With just a little effort, you’ll elevate your outdoor space, making it perfect for gatherings or quiet evenings under the stars.
Transform Old Furniture With Paint
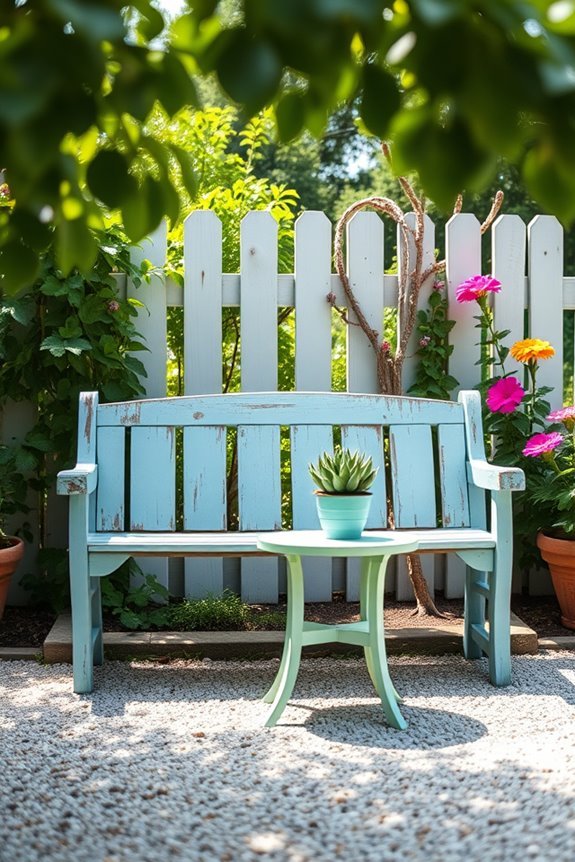
Transforming old furniture with paint can breathe new life into your outdoor space, making it feel fresh and inviting.
Whether you’ve got a classic rocking chair or a modern table, you can easily adapt different furniture styles with a splash of color.
Start by cleaning your pieces thoroughly and choosing a durable outdoor paint.
Consider using spray paint for a smooth finish or a paintbrush for texture and detail.
You can even experiment with techniques like distressing or color blocking to add character and depth.
Don’t shy away from bold hues that complement your garden, or stick to pastels for a softer touch.
With just a little effort, your revamped furniture will enhance your outdoor oasis beautifully!
Build a Small Water Feature

Creating a small water feature can instantly elevate your backyard’s tranquility and charm. You don’t need a massive budget or a professional’s help; simple water feature materials can do the trick.
Consider starting with a small basin or even a large decorative pot as your centerpiece. You can easily create a natural pond effect by adding pebbles, aquatic plants, and a small fountain or pump to circulate the water. This not only enhances aesthetics but also attracts birds and butterflies, making your outdoor space feel alive.
To complete the look, surround your water feature with rocks or decorative stones. With just a few hours and a little creativity, you’ll have a peaceful oasis right in your backyard!
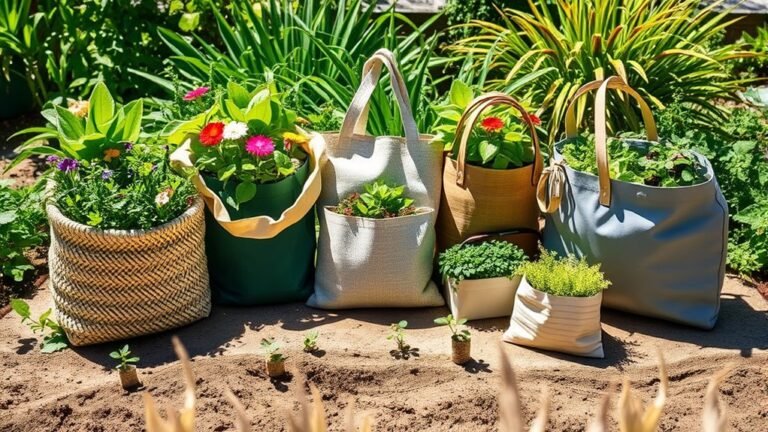
Repurpose Wooden Crates as Planters
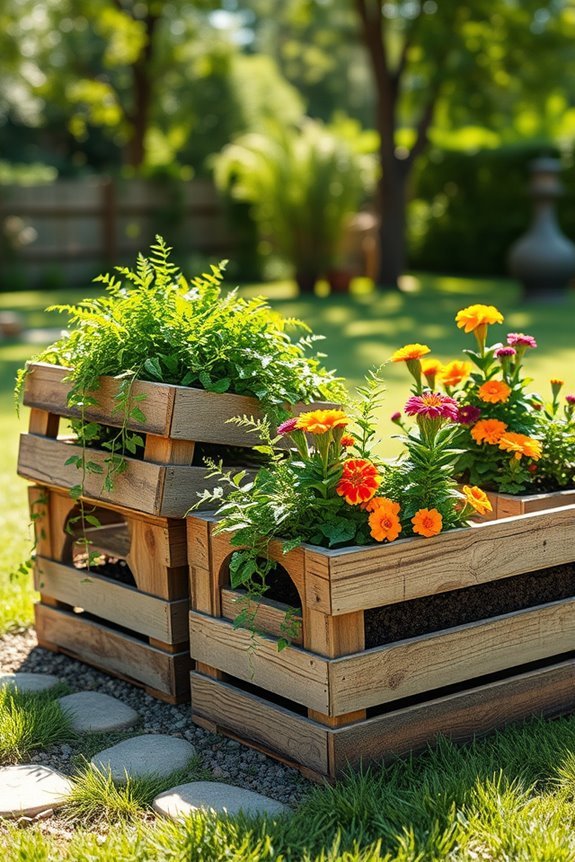
Wooden crates can be a stylish and practical addition to your backyard garden. You can easily repurpose crates into creative planters that enhance your outdoor space without breaking the bank.
Start by selecting a few sturdy crates; you might find them at local shops or flea markets. Once you’ve got your crates, give them a fresh coat of paint or leave them natural for a rustic look.
Drill some drainage holes in the bottom, and fill them with potting soil. Choose your favorite flowers, herbs, or vegetables to plant inside.
Arrange the crates at different heights for visual interest, and soon, you’ll have a charming garden display that’s both functional and visually appealing.
Enjoy your new DIY project!
Create a Herb Spiral Garden
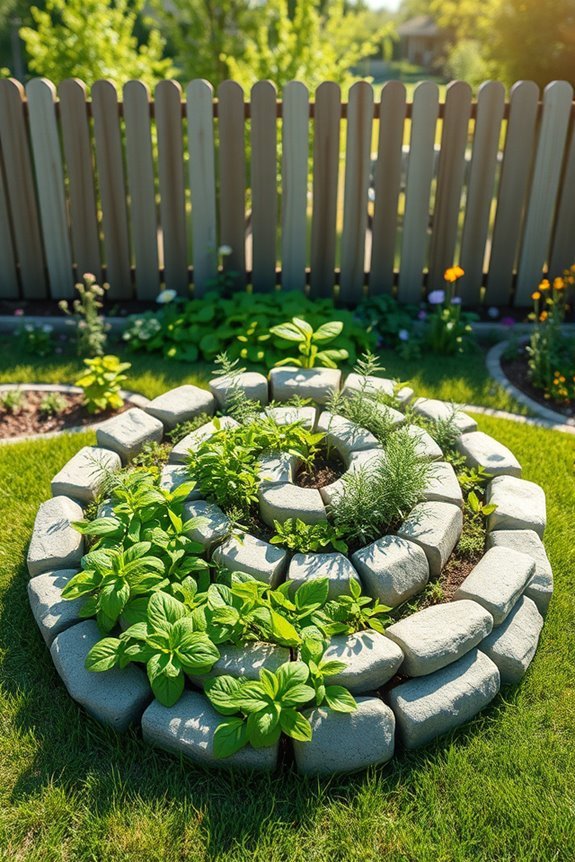
After sprucing up your backyard with repurposed wooden crates, consider adding a herb spiral garden for a unique and functional touch.
This spiral design not only looks stunning but also maximizes space and enhances plant growth. By stacking stones or bricks in a spiral, you create varying microclimates that allow different herbs to thrive in ideal conditions.
Think about planting basil, rosemary, and mint, all of which offer incredible herb benefits, from culinary uses to natural remedies.
Plus, the vertical structure makes it easy to care for your herbs while adding an eye-catching focal point.
With a little creativity and effort, your herb spiral garden can become a vibrant and productive part of your outdoor oasis.
Construct a Pergola Using PVC Pipes
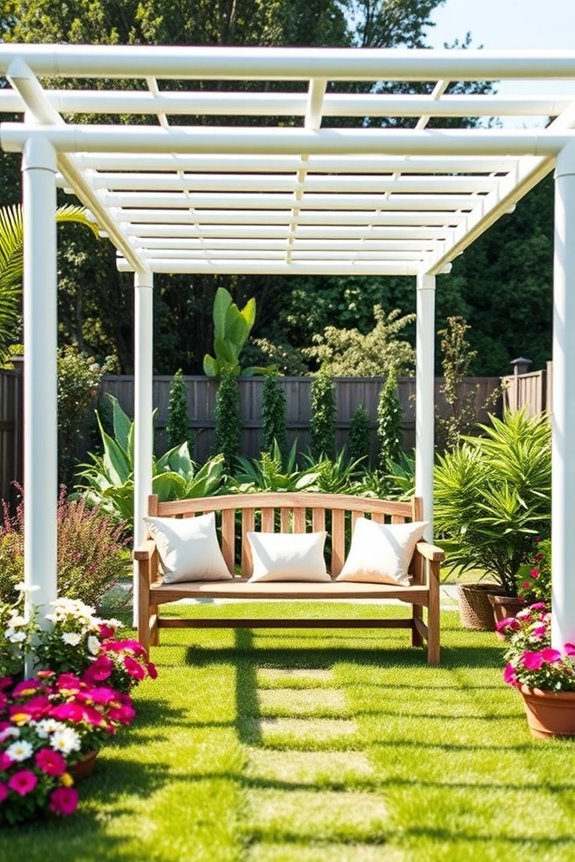
Adding garden markers can enhance the charm of your outdoor space, but if you want to take your backyard to the next level, consider constructing a pergola using PVC pipes.
This budget-friendly project isn’t only easy but also allows you to customize your design. Start by measuring your space and cutting the PVC pipes to size. Use PVC pipe joints to connect the pieces, forming a sturdy frame.
Once the structure is complete, you can add a decorative canopy made from fabric or climbing plants to provide shade and style. Not only will this pergola serve as a stunning focal point, but it’ll also create an inviting area for relaxation or gatherings with family and friends.
Make a Mosaic Tabletop
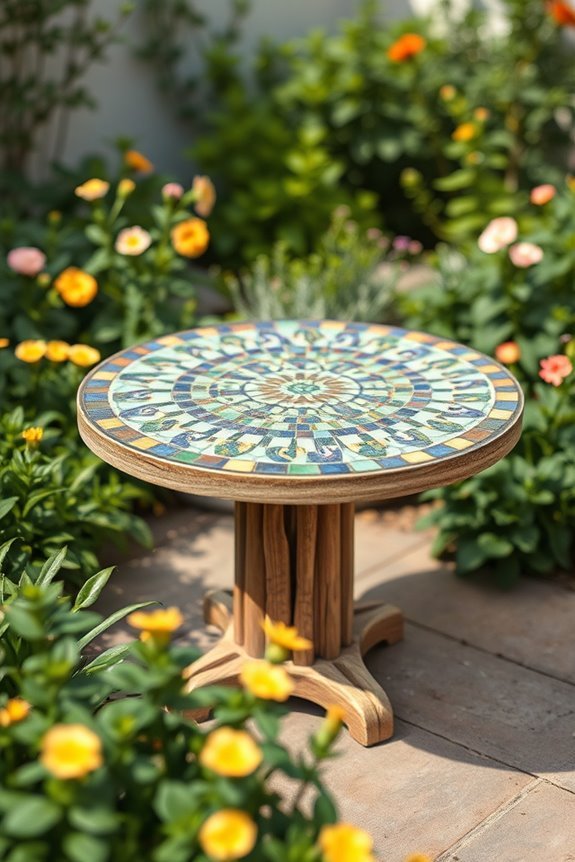
Creating a stunning mosaic tabletop can elevate the aesthetic of your backyard while providing a fun DIY project.
Start by gathering your mosaic materials, which can include colorful tiles, broken pottery, or glass pieces. Choose a tabletop design that reflects your style; it could be geometric patterns or floral motifs.
Clean the surface of your existing table, then sketch your design lightly using a pencil. Apply adhesive to the tabletop and carefully place your mosaic materials according to your design.
Once you’ve arranged everything, let it dry completely. Finish off by applying grout to fill in the gaps between the pieces, wiping off excess.
Seal your masterpiece with a waterproof sealant, and enjoy your beautiful, personalized outdoor table!
Use Cinder Blocks for Seating
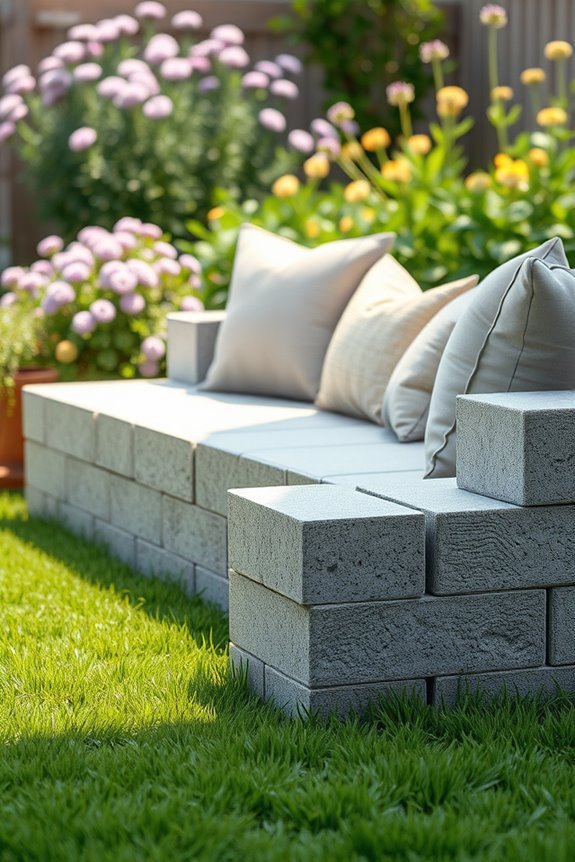
Cinder blocks can be an affordable and stylish solution for outdoor seating in your backyard. With a simple cinder block design, you can create unique seating arrangements that fit your style and space.
Start by stacking blocks in a configuration that suits your needs, whether it’s a bench or a more creative shape. You can even mix in wooden planks for added comfort and aesthetics.
To personalize your seating, paint the blocks or cover them with outdoor cushions. This DIY project not only saves money but also adds a modern touch to your outdoor area.
Plus, cinder blocks are durable, ensuring your outdoor seating lasts through the seasons. Get creative and transform your backyard into an inviting space!
Build a Raised Garden Bed
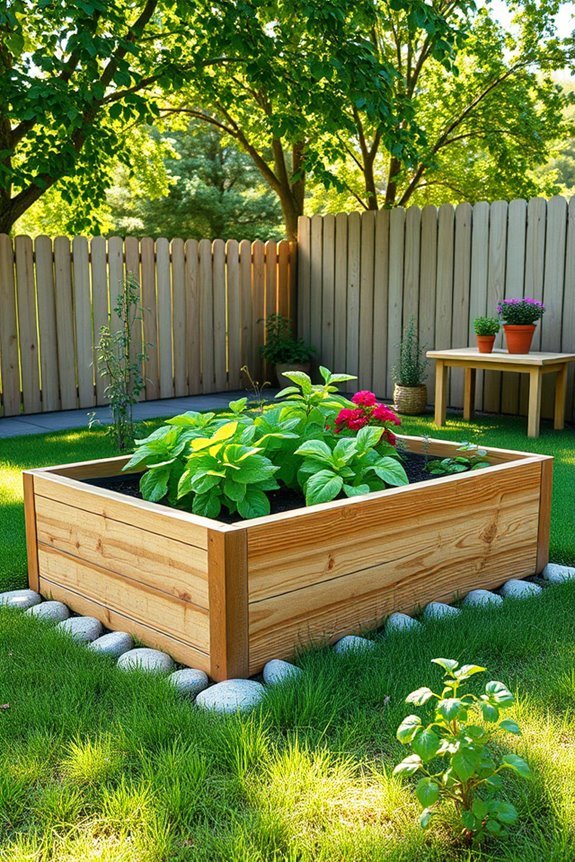
If you’ve been dreaming of a lush garden but lack the ideal soil, building a raised garden bed can be the perfect solution. It allows you to control the quality of your soil and maximize space.
Start by selecting a sunny spot and gathering materials like untreated wood or bricks. Construct a frame and fill it with a mix of quality soil and compost.
The compost benefits are immense; it enhances soil nutrients, helps retain moisture, and promotes healthy plant growth.
With your raised garden bed in place, you can grow vegetables, herbs, or flowers that thrive. Plus, maintaining your garden becomes easier with elevated planting, making it a rewarding and enjoyable outdoor project.
Get started today!
Install a Simple Privacy Screen
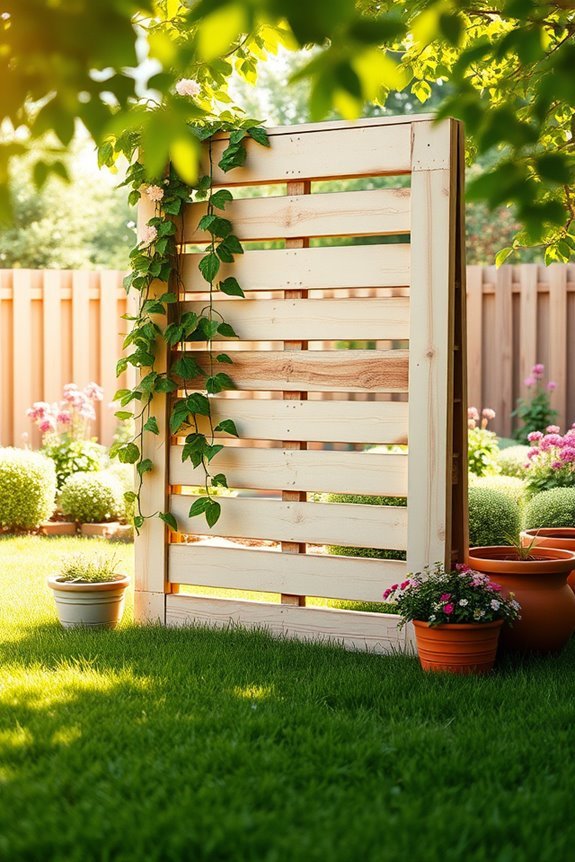
Installing a simple privacy screen can instantly transform your backyard into a more secluded oasis.
Whether you prefer wood, bamboo, or fabric, there are plenty of options to design privacy solutions that suit your style and budget.
Start by measuring the area where you want to install the screen, ensuring it provides the right amount of coverage. You can use planters to anchor your screen or attach it to existing structures for stability.
This not only enhances backyard aesthetics but also creates a cozy atmosphere for relaxation and entertaining.
With a few basic tools and materials, you can easily DIY your privacy screen and enjoy your outdoor space without the prying eyes of neighbors.
Paint a Mural on a Fence
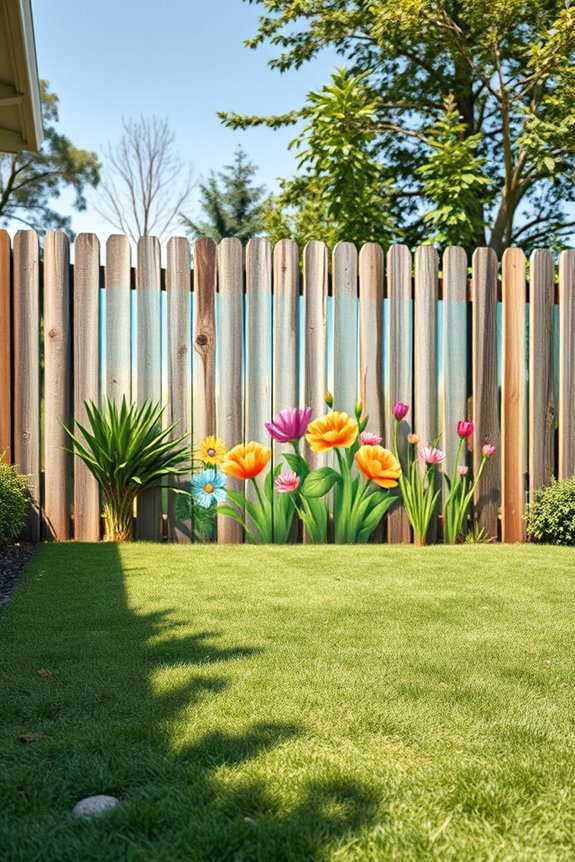
Transforming a plain fence into a vibrant mural can breathe new life into your backyard.
Start by planning your mural design; choose colors and patterns that reflect your personality and enhance your outdoor space.
Once you have your concept, it’s time for fence preparation. Clean the surface thoroughly to remove dirt and old paint, and guarantee it’s smooth for the best results.
If necessary, patch any holes and apply a primer to help the paint adhere better.
When you’re ready, use outdoor paint or weather-resistant spray paint to bring your design to life.
Don’t forget to add a protective sealant once it’s dry, ensuring your mural stays bright and beautiful for years to come.
Enjoy your artistic flair!
Build a DIY Sandbox for Kids
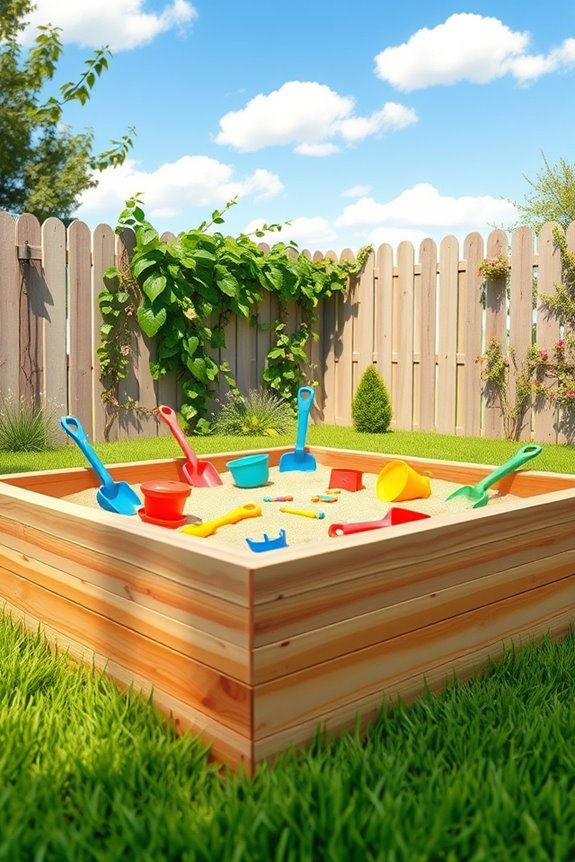
Building a DIY sandbox for kids not only creates a fun play area but also sparks their imagination and creativity.
To start, choose a safe location, ideally shaded, to protect little ones from the sun.
For sandbox materials, consider untreated wood or even plastic for easy assembly and maintenance.
Make sure you line the bottom with landscape fabric to keep weeds out.
When filling it, opt for clean, non-toxic sand to promote sandbox safety.
You can also add fun toys and tools to enhance their play experience.
Finally, cover the sandbox when not in use to keep animals away and maintain cleanliness.
Your children will love digging and building in their new backyard oasis!
Create a Butterfly Garden
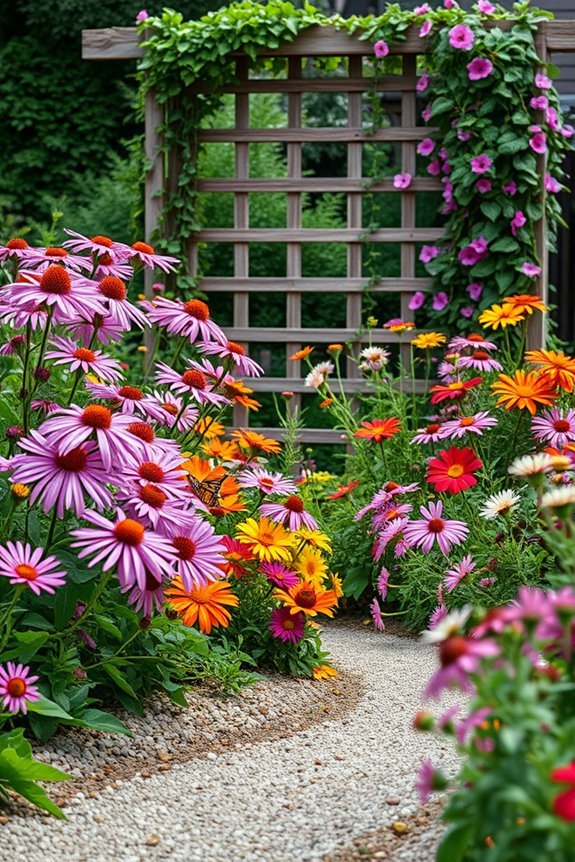
Once your kids have a fun sandbox to play in, why not enhance your backyard further by creating a butterfly garden?
Start with a thoughtful garden layout that attracts various butterfly species. Choose vibrant nectar plants and pollinator plants that bloom throughout the seasons to keep your garden lively. Incorporate natural attractants like host plants for caterpillars, ensuring a complete habitat design.
Pay attention to color selection, as butterflies are drawn to bright hues. Regular garden maintenance, such as deadheading flowers and watering, will keep your blooms healthy.
In addition to beauty, a butterfly garden offers wildlife benefits, supporting essential pollinators in your local ecosystem.
Get ready to enjoy the enchanting sight of butterflies fluttering in your backyard!
Make a Wind Chime From Recycled Materials
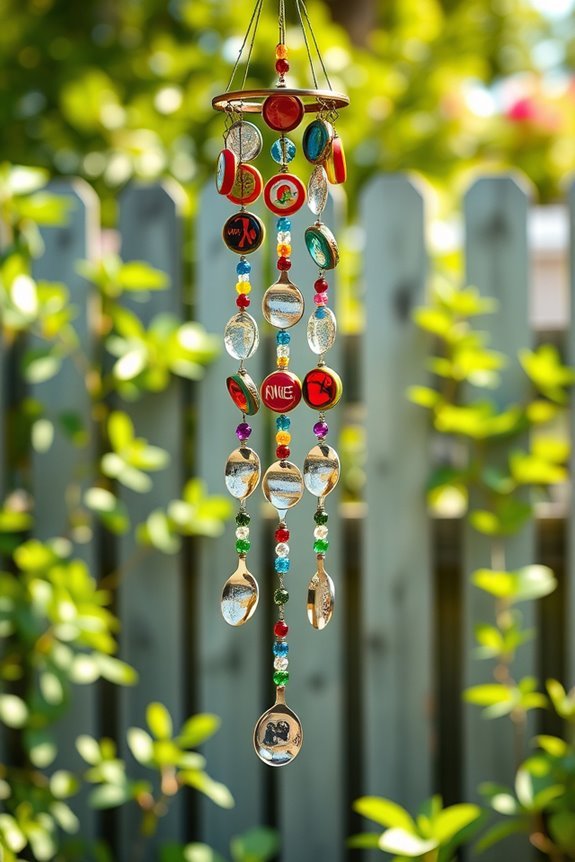
Wind chimes can add a soothing musical touch to your outdoor space, and making one from recycled materials is both creative and eco-friendly.
Start by gathering materials like old keys, bottle caps, or leftover beads. You’ll also need a sturdy base, such as a wooden dowel or a sturdy branch.
Drill small holes in your base and attach your recycled materials using fishing line or strong twine. Make sure to vary the lengths of each piece for a more dynamic sound.
Once you’ve arranged everything, hang your wind chime in a spot where it can catch the breeze. You’ll love how it not only enhances your backyard but also gives a second life to items that might otherwise end up in the trash!
Hang Upcycled Mirrors for Reflection
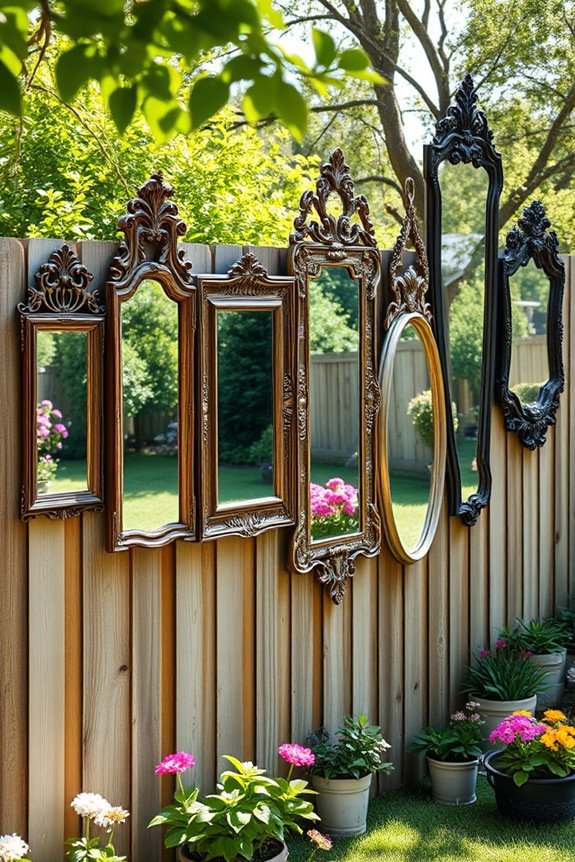
If you want to add a touch of charm and depth to your backyard, hanging upcycled mirrors can do wonders.
By strategically choosing mirror placement, you can create stunning reflective surfaces that enhance your garden aesthetics. Consider hanging mirrors on fences or walls to bounce light around and make your space feel larger.
Experiment with different shapes and sizes to complement your outdoor design. You might even place a mirror near plants to amplify their beauty through reflection.
Not only do these mirrors serve a practical purpose, but they also add a unique, artistic flair to your outdoor area.
Build a Compost Bin
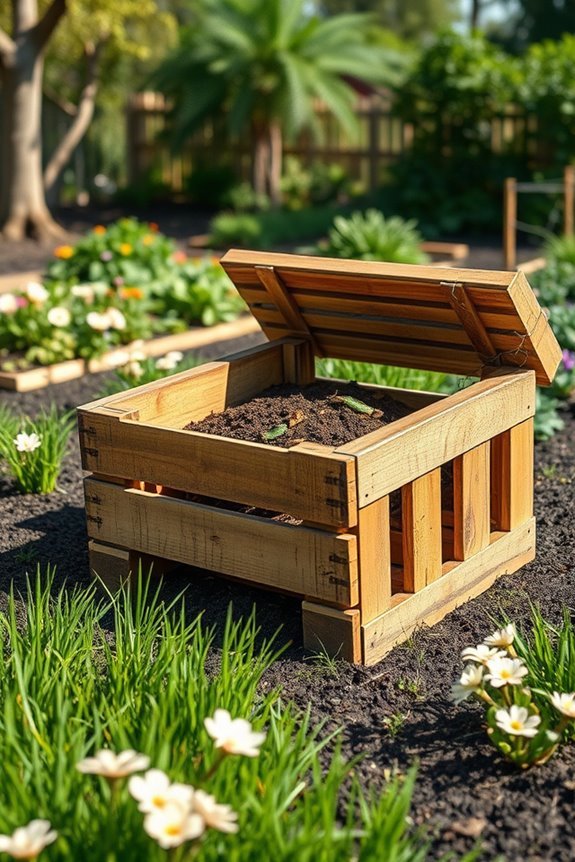
Building a compost bin is a fantastic way to recycle kitchen scraps and yard waste while enriching your garden soil. You can easily create one using inexpensive materials like wooden pallets or wire mesh.
Start by selecting a sunny spot in your yard, then construct your bin to guarantee proper airflow and drainage.
Fill it with compost materials such as fruit and vegetable scraps, coffee grounds, grass clippings, and dry leaves. Avoid meat and dairy to keep pests away.
The compost benefits are immense: it reduces waste, enriches your soil, and promotes healthier plant growth. With a little patience and regular turning, you’ll have nutrient-rich compost ready for your garden, transforming your outdoor space while being eco-friendly!
Create a Stone Fire Ring
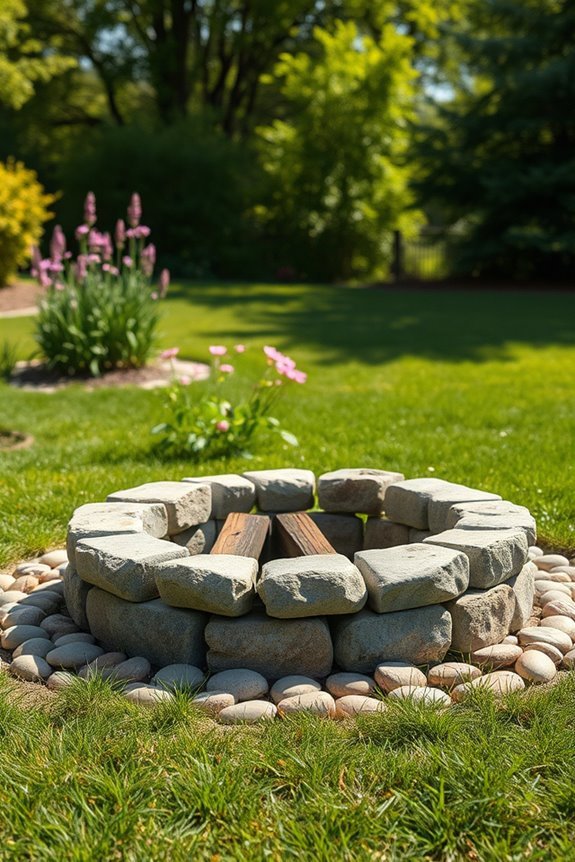
A stone fire ring can transform your backyard into a cozy gathering spot, perfect for evening bonfires and s’mores.
Start by choosing the right stones; consider durability and aesthetics for your fire ring design. Natural stones like granite or fieldstone not only provide strength but also blend beautifully with outdoor surroundings.
Once you’ve selected your stones, outline the fire ring’s shape, ensuring it’s large enough for logs while maintaining a safe distance from flammable materials.
Stack the stones in a circular pattern, securing each layer with gravel or sand for stability.
This DIY project not only adds charm to your space but also creates a functional area for friends and family to gather around, enjoying warmth and conversation under the stars.
Use Old Chairs as Flower Holders
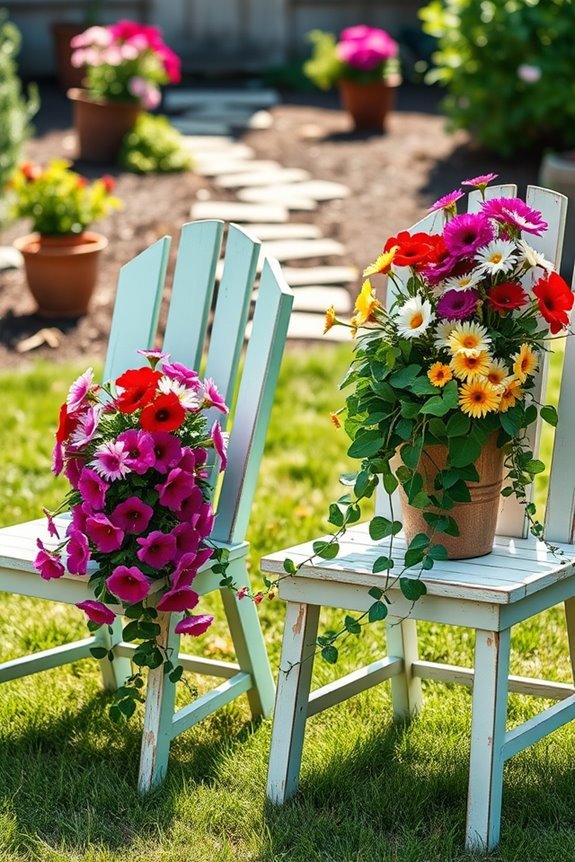
After creating a cozy fire ring, you can enhance your backyard’s charm with another creative project: using old chairs as flower holders.
This budget-friendly idea not only repurposes those forgotten chairs but also adds a unique touch to your outdoor space. Start by arranging your chairs in various ways—group them together for a vibrant display or scatter them around your garden for a whimsical effect.
Fill the seats with colorful pots or directly plant your favorite flowers to create stunning floral designs. You can paint the chairs in bright hues for added flair or leave them rustic for a more natural look.
This simple project will surely brighten up your backyard while showcasing your creativity!
Make a Simple Outdoor Movie Screen
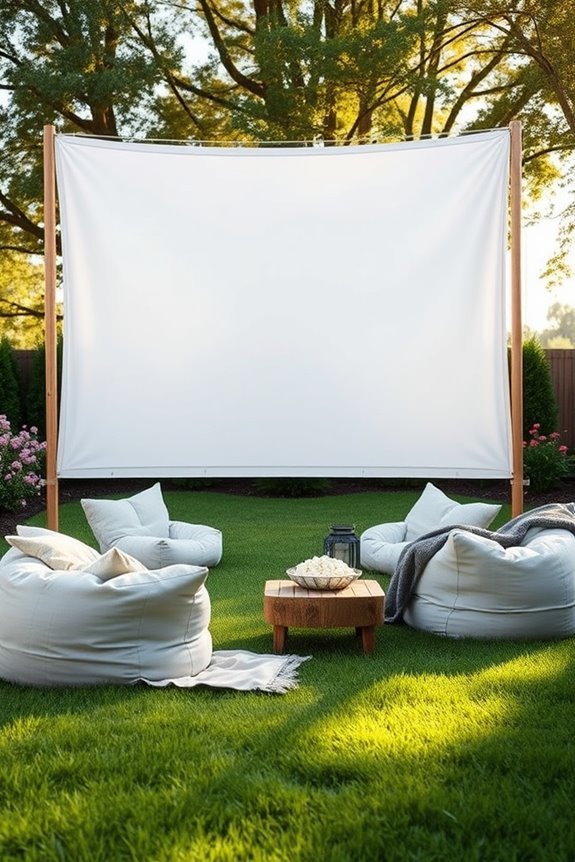
If you’re looking to transform your backyard into a cozy cinema under the stars, making a simple outdoor movie screen is a fantastic project.
Start by finding a blank wall or hanging a large white sheet between two trees. If you prefer a more portable option, use PVC pipes to create a freestanding frame. Secure the sheet tightly to avoid wrinkles that can disrupt your viewing experience.
Next, set up some comfy seating with outdoor cushions or blankets, and gather your favorite snacks. Don’t forget to invest in a good projector and speakers for the best sound.
Once you’ve got everything ready, invite friends over for a fun outdoor movie night that’s sure to impress in your backyard cinema!
Install a Garden Archway
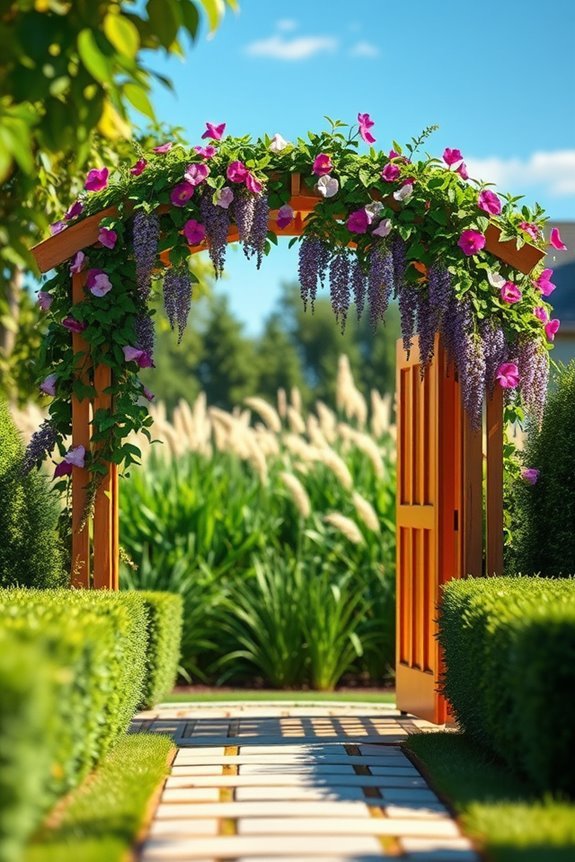
Creating an inviting atmosphere in your backyard doesn’t stop at movie nights. Installing a garden archway can elevate your outdoor space, adding charm and a focal point.
First, gather your garden archway materials; you can use wood, metal, or even PVC for a budget-friendly option. Once you have your materials, think about archway design inspiration—maybe a classic curved shape or a modern geometric style.
When you’ve decided, assemble your archway and secure it in place. Plant climbing vines or hang fairy lights to enhance the look. This simple addition can transform your backyard into a cozy retreat, perfect for gatherings or quiet moments.
Craft a DIY Picnic Table
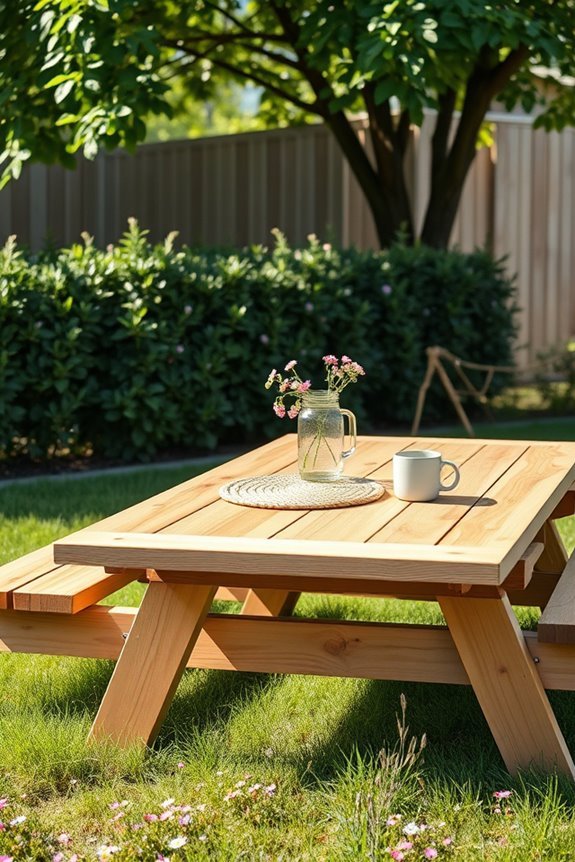
While you might think a picnic table is just a place to eat, crafting your own can enhance your backyard’s functionality and style. This DIY project allows you to customize the size and design to fit your space perfectly.
Start by gathering essential picnic table materials like treated lumber, screws, and wood glue. For easy DIY table ideas, consider a simple rectangular design with a classic bench on each side. You can also add a fun twist with colorful paint or stain.
Don’t forget to sand down the edges for safety and comfort. Once you’ve assembled your table, invite friends and family to gather around for meals, games, or just relaxing in your transformed outdoor oasis.
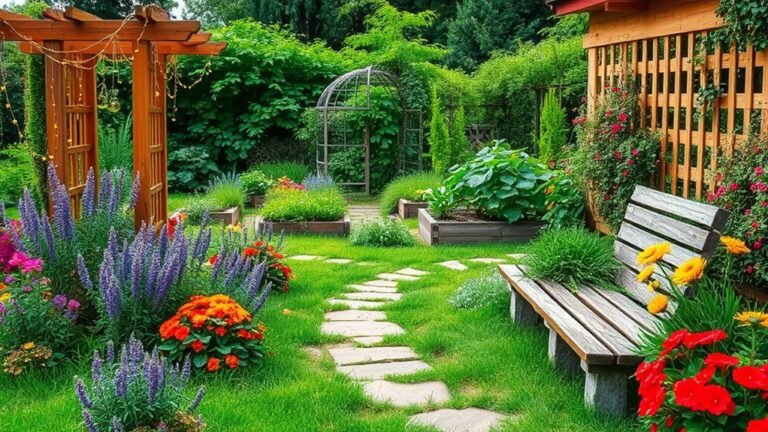
Create a Seasonal Flower Bed
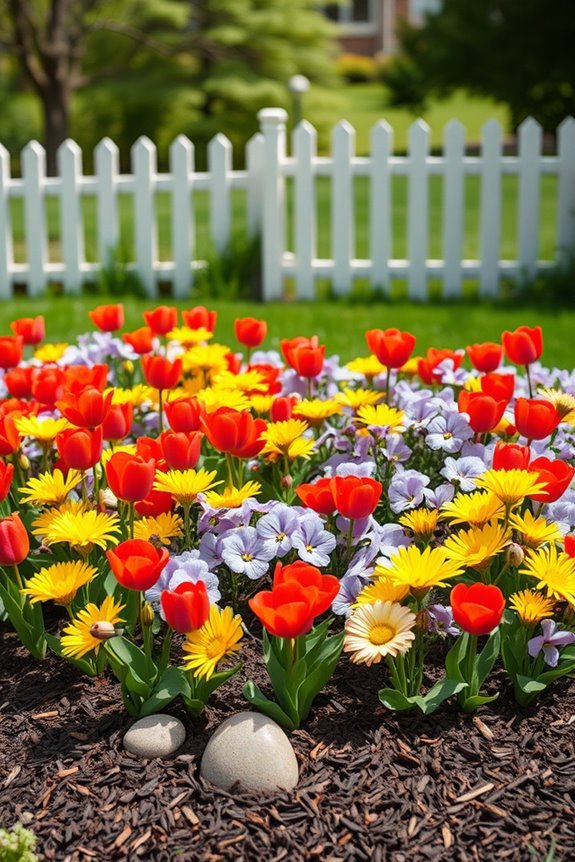
Transforming your backyard with a seasonal flower bed not only adds vibrant colors but also brings life to your outdoor space.
Start by choosing flower varieties that bloom in different seasons, ensuring your bed is always lively. For spring, contemplate tulips and daffodils; summer can be brightened with sunflowers and zinnias; fall brings stunning chrysanthemums and asters.
Plan your layout, grouping flowers by height and color for a visually appealing display. Don’t forget to take into account the sunlight and soil conditions for each plant.
As you plant, use mulch to retain moisture and prevent weeds. Regularly deadhead spent blooms to encourage new growth.
With a bit of effort, you’ll enjoy a beautiful seasonal flower bed that enhances your outdoor living area.
Use Bamboo Poles for Garden Support
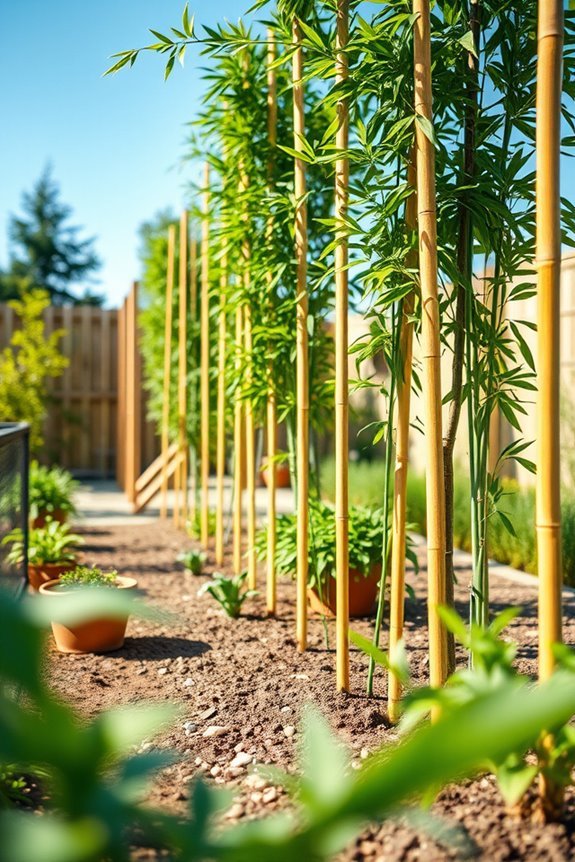
Bamboo poles are a versatile and eco-friendly option for supporting your garden plants. You can easily create a sturdy structure that enhances your garden aesthetics while also providing the necessary support for climbing plants, such as beans and cucumbers.
Simply drive the poles into the ground, spacing them according to the specific needs of your plants. You can tie them together with twine or string to create a trellis effect.
Not only does bamboo support your plants, but it also brings a natural look to your garden. Plus, it’s lightweight and durable, making it perfect for any outdoor space.
Transform your garden into a lush paradise while staying budget-friendly with this simple DIY solution!
Build a Small Outdoor Stage

If you want to elevate your backyard gatherings, building a small outdoor stage can be a fun and rewarding project. Start by choosing a level area in your yard, then gather materials like wooden pallets or reclaimed wood to create a sturdy platform.
You’ll want to guarantee it’s large enough for your performances but compact enough to fit your space. Consider adding some basic stage lighting to enhance the atmosphere during evening events. String lights or portable LED lights can create a magical vibe for your outdoor performances.
Don’t forget to personalize your stage with decorations or a backdrop that reflects your style. With a little effort, you’ll have a perfect spot for entertaining friends and family under the stars!
Conclusion
With these 40 budget-friendly DIY ideas, your backyard can transform into a personal oasis without breaking the bank. Just think of it as turning your outdoor space into a cozy living room under the stars, where you can unwind by the fire pit or enjoy a picnic table feast. So grab those tools and release your creativity—your dream backyard is just a weekend away, waiting to be brought to life like a Renaissance painting!