How to Prevent Water Damage in Your Home
Walk every room and the exterior to spot leaks, stains, or warped floors and prioritize fixes. Keep roof shingles, flashing, and gutters clear and in good repair so water flows away from the foundation. Seal hairline foundation cracks, grade soil to slope at least 6 inches over 10 feet, and install a sump pump with a backup. Insulate pipes, maintain appliances, and check insurance for flood coverage — keep an emergency plan and kit ready, and you’ll find practical steps next.
Assess Your Home’s Water Risk Areas
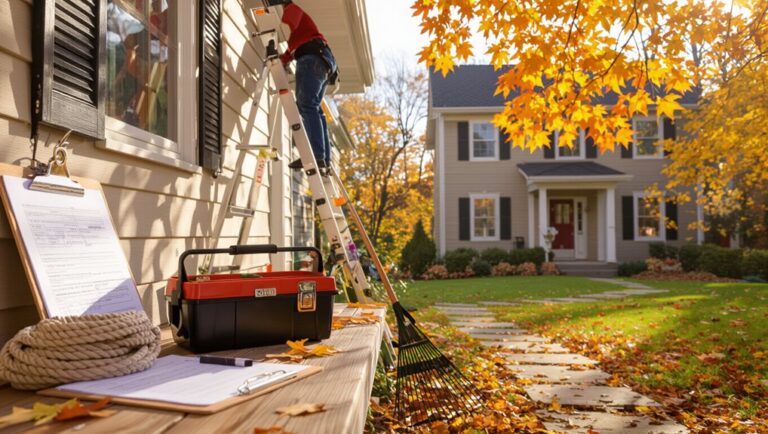
Start by walking every room and exterior area to spot where water could get in or pool—check basements, attics, around appliances, gutters, downspouts, foundation walls, and rooflines.
You’ll note visible stains, musty odors, warped floors, and pooling near appliances or low spots. Document locations, take photos, and prioritize by severity and likelihood.
This quick risk assessment helps you allocate fixes—seal gaps, elevate appliances, and improve drainage.
Regularly recheck after storms or seasonal changes. By focusing inspections and keeping concise records, you’ll reduce chances of costly water damage and act before small issues become emergencies.
Inspect and Maintain Roof and Gutters
Check your shingles and flashing for cracks or missing pieces so small problems don’t turn into leaks.
Keep gutters clear and repair any sagging sections to guarantee water flows away from your roof and foundation.
Also verify your roof ventilation is working so moisture can escape and shingles last longer.
Check Shingles and Flashing
Roof shingles and flashing are your roof’s first line of defense against water, so inspect them at least twice a year and after major storms.
Check for cracked, curled, or missing shingles—these harm shingle durability and let moisture reach underlayment. Look for granule loss and soft spots that suggest rot.
Examine flashing around chimneys, vents, and valleys; verify flashing materials are intact, sealed, and free of rust or gaps.
Tighten or reseal exposed edges with appropriate roofing cement, and replace deteriorated flashing promptly.
If you’re unsure about hidden damage, hire a qualified roofer for a focused inspection.
Clear and Repair Gutters
When gutters and downspouts are clogged or damaged, water can back up under shingles or pool against your foundation, so clear them at least twice a year and after heavy storms.
You should wear gloves and use a scoop to remove debris, then flush troughs and pause to inspect for leaks, sagging, or loose fasteners.
Tighten hangers, reseal seams, and replace sections that are corroded. Check that water flows freely through the outlet and perform downspout repair if joints are cracked or disconnected.
Extend downspouts away from the house to direct runoff safely and prevent basement seepage.
Ensure Proper Roof Ventilation
Besides keeping gutters clear, proper roof ventilation plays a big role in preventing water problems by managing moisture and temperature in your attic.
You should check roof airflow regularly to prevent condensation, rot, and ice dams. Make sure intake and exhaust vents aren’t blocked by insulation or debris, and balance them so air moves steadily across the attic.
Consider upgrading ventilation systems if your home lacks adequate passive or powered vents. Hire a pro for complex issues.
Follow these steps:
- Inspect soffit and ridge vents.
- Remove obstructions from vents.
- Measure attic temperature and humidity.
- Install or repair balanced vents.
Seal and Repair Foundation Cracks
Check your foundation regularly for hairline cracks, because even tiny openings can let water in and lead to bigger problems.
If you spot a crack, clean it out and use hydraulic cement to fill and stop active leaks quickly.
For long-term stability, monitor repaired areas and consult a pro if cracks recur or widen.
Inspect for Hairline Cracks
Cracks in your foundation may start as hairline splits but can let in moisture, pests, and further structural damage if you ignore them. Inspect walls and floors regularly so you can seal or repair small flaws before they worsen.
You should perform hairline crack detection during routine foundation inspection, using good light, a flashlight, and a magnifier to spot thin lines. Mark locations, measure length and width, and photograph for changes.
Note changing gaps after rain or freeze-thaw cycles. If cracks grow or leak, plan timely repairs. Prioritize safety and consult a pro for structural concerns.
- Observe
- Measure
- Record
- Act
Use Hydraulic Cement
When you spot small foundation cracks that let in water, use hydraulic cement to seal them quickly — it sets fast, expands as it cures, and creates a watertight patch that resists pressure from outside moisture.
You’ll clean and widen the crack, remove loose debris, then mix to a stiff consistency. Press the cement firmly into the gap, overfilling slightly because it shrinks minimally while expanding, and smooth the surface.
Understand hydraulic cement benefits: rapid set time, strong bond, and resistance to hydrostatic pressure.
Follow proper application techniques, wear gloves and eye protection, and recheck the repair after heavy rain.
Install and Test Sump Pumps Regularly
A properly installed sump pump can keep a basement dry and protect your home from costly water damage, so you should pick the right unit and test it regularly.
You’ll learn basic pump installation steps, perform routine sump pump maintenance, and schedule inspections. Test by pouring water into the pit until the pump starts and stops correctly.
Replace batteries in backup systems and clear debris from the basin. Keep a log of tests and repairs.
- Inspect float and power monthly
- Test auto-start with water quarterly
- Clean discharge and check valves yearly
- Service or replace worn parts promptly
Maintain Proper Grading and Drainage Around the House

Make sure the soil around your foundation slopes away so water doesn’t pool near your walls.
Keep gutters and downspouts clean and in good repair so rainwater is directed away from the house.
Small grading changes and regular gutter maintenance can prevent big water headaches.
Ensure Soil Slopes Away
Although it’s easy to overlook, proper grading around your foundation directs rainwater away from your home and prevents costly water intrusion.
You should guarantee soil slopes away at least 6 inches over the first 10 feet, preventing soil erosion and pooling near foundations. Check for low spots after heavy storms and add compacted fill where needed. Maintain nearby drainage systems to move water off your property.
Follow these key steps:
- Measure slope with a level and stakes.
- Add soil, compacting in layers.
- Install shallow swales to redirect runoff.
- Inspect slopes seasonally for settling.
Clean & Maintain Gutters
1 simple habit — clearing your gutters regularly — will keep water flowing away from your foundation and prevent overflow that soaks siding, landscaping, and basement walls. You should schedule gutter cleaning each spring and fall, remove debris, check downspouts, and repair fasteners. Gutter maintenance prevents clogs that cause pooling and soil erosion, so inspect after storms and direct downspouts at safe discharge zones. Use gloves, a ladder stabilizer, or hire pros if you’re unsure.
| Task | Frequency |
|---|---|
| Debris removal | Twice yearly |
| Downspout check | After storms |
| Fastener repair | Annually |
| Professional inspection | Every 2–3 years |
Protect Against Burst Pipes in Cold Weather
When temperatures drop, your pipes can freeze and expand until they burst, so you should take simple steps now to reduce the risk and avoid costly water damage.
Use pipe insulation and include winter preparation in your routine. Seal gaps where cold air enters, let faucets drip during extreme cold, and keep cabinet doors open to warm interior plumbing.
Know your main shutoff and test it.
- Seal gaps and vents near pipes.
- Keep a slow faucet drip overnight.
- Open cabinets to let warm air circulate.
- Locate and label the main water shutoff.
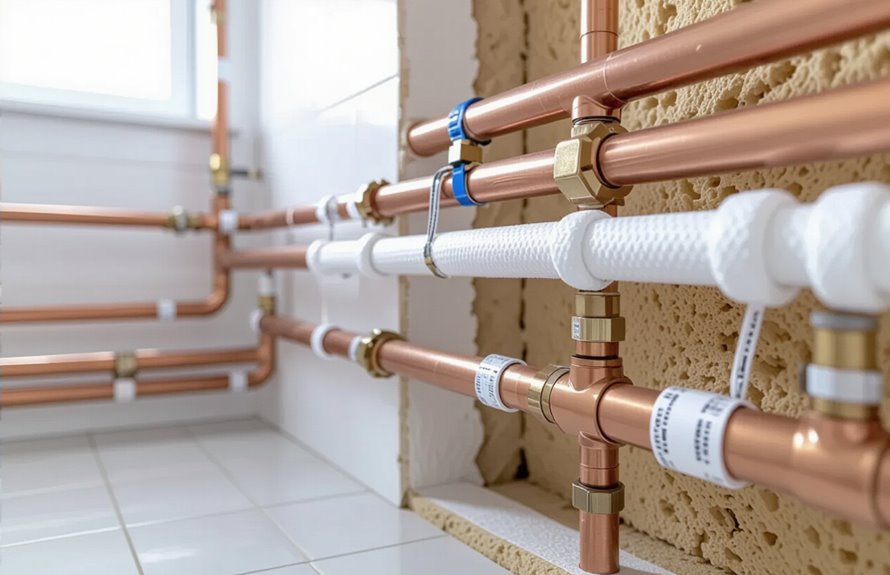
Insulate Exposed Pipes and Plumbing
You should wrap exposed pipes with foam or fiberglass insulation to reduce freezing risk and heat loss.
Don’t forget to protect outdoor faucets and hose bibs with covers or insulated jackets.
Also insulate any crawlspace plumbing to keep lines from freezing and to prevent condensation-related damage.
Wrap Pipes With Insulation
Seal cold spots by wrapping exposed pipes with insulation—it’s one of the simplest, most effective steps you can take to prevent freezing, condensation, and the leaks that follow.
You’ll see pipe insulation benefits immediately: reduced burst risk, lower energy loss, and less moisture buildup.
Choose insulation materials options like foam sleeves, fiberglass wrap, or rubber tubing to fit pipe size and location.
Install snugly, tape seams, and seal joints to stop drafts. Check annually for damage and replace degraded sections.
If pipes run through unheated spaces, add extra layers and secure with zip ties to maintain continuous coverage.
- Prevents freezing
- Reduces energy loss
- Limits condensation
- Extends pipe life
Protect Outdoor Plumbing
Because outdoor pipes face temperature swings, moisture, and physical damage, protect them with proper insulation and covers to prevent freezing and leaks.
You should wrap exposed lines with foam sleeves or heat tape rated for outdoor use, sealing joints with waterproof tape.
Drain and shut off outdoor faucets before cold spells, and install frost-free outdoor faucets or insulated faucet covers to reduce risk of frozen pipes.
Anchor and shield pipes from impact and UV exposure, and check insulation annually for gaps or deterioration.
Promptly repair any cracks or loose fittings to stop small problems from becoming major water damage.
Insulate Crawlspace Pipes
When cold air seeps into a crawlspace, exposed pipes can freeze, crack, and flood your home, so insulate them with foam sleeves, rubber insulation, or fiberglass wrap rated for damp environments.
You should inspect pipes, seal gaps, and install crawlspace insulation to stabilize temperatures and provide reliable pipe protection.
Work systematically, wear protective gear, and choose materials that resist moisture and pests.
- Locate all exposed plumbing and label vulnerable sections.
- Measure and cut insulation for snug fits.
- Seal joints with tape or adhesive made for damp areas.
- Recheck annually and after severe weather.
Monitor and Replace Aging Water Heaters
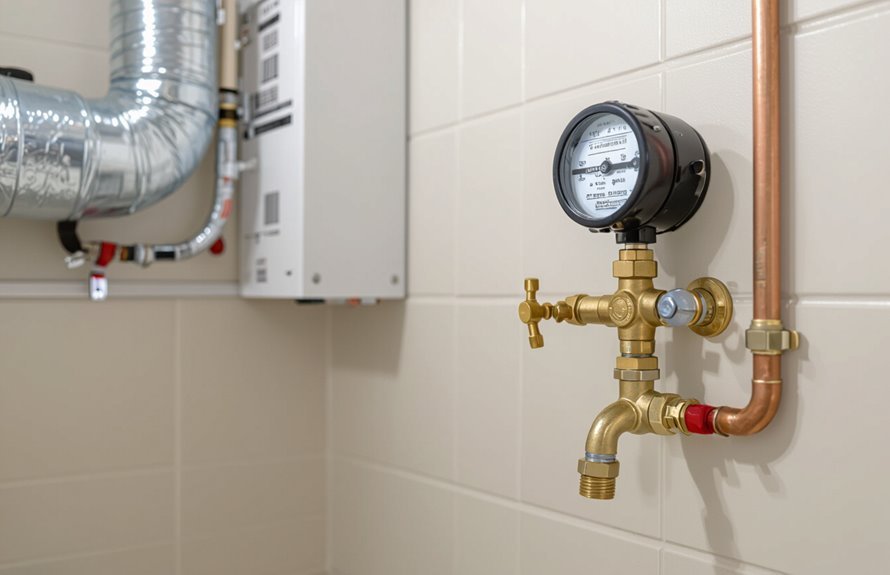
Anyone with a water heater should check it regularly for rust, leaks, or rumbling noises that signal imminent failure—do it at least twice a year and more often if your unit’s over 8–10 years old.
You should follow simple water heater maintenance: flush the tank annually to remove sediment, test the pressure relief valve, and inspect connections for corrosion.
Learn the signs replacement is needed—persistent leaks, rusty water, low hot-water capacity, or frequent repairs. If you spot these, plan a timely replacement to avoid catastrophic flooding.
Hire a licensed plumber for installation and proper disposal of the old unit.
Install Water Leak Detectors and Automatic Shutoff Valves
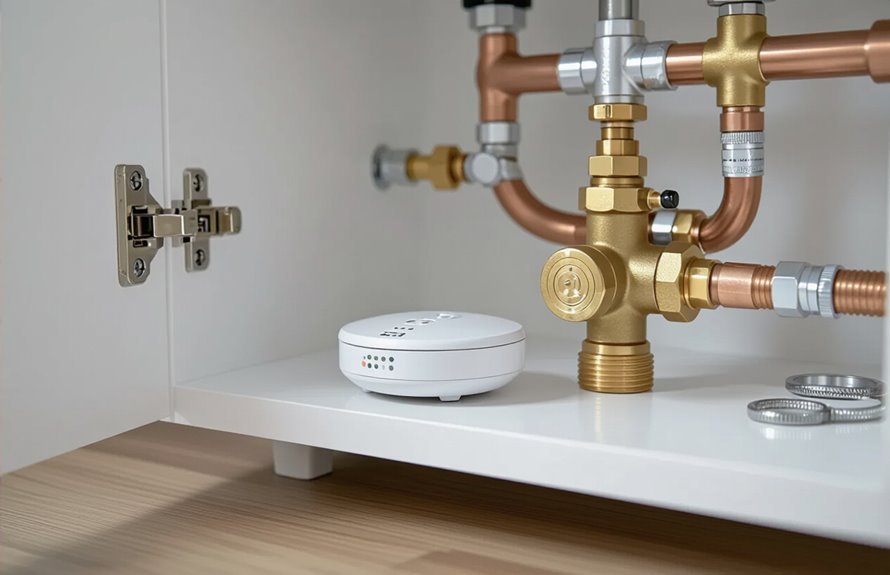
You should place detectors near water sources like water heaters, under sinks, by washing machines, and in basements or crawlspaces where leaks often start.
Consider motorized or mechanical shutoff valves for whole-house protection and local valves for individual fixtures.
Decide between battery, hardwired, or Wi‑Fi/Bluetooth-connected devices based on reliability and whether you want remote alerts and automatic shutoff.
Where to Place Detectors
Smart placement of water leak detectors and automatic shutoff valves makes them far more effective at stopping damage before it spreads.
You should match detector locations and sensor types to risk areas so alarms trigger early and valves shut fast. Place detectors where leaks start: under sinks, near water heaters, behind washing machines, and at basement floor drains.
Mount sensors at lowest points and near appliance supply lines; use moisture probes for floors and spot sensors for fittings. Test devices monthly and keep valves accessible.
Prioritize areas with past issues, long unattended absences, or complex plumbing to minimize damage quickly.
- Under sinks
- Water heater area
- Washing machine
- Basement drains
Types of Shutoff Valves
After you’ve placed detectors where leaks are likeliest, pair them with the right shutoff valves so alarms can actually stop the flow. You’ll choose valves by location and speed. Gate valves suit main lines for full open/close but move slowly. Ball valves act fast, ideal for appliances and branches. Automatic shutoffs often use motorized ball valves for quick response. Match valve size to pipe size and consider material durability. Test manually after installation and label valves for anyone in your household.
| Valve type | Best use |
|---|---|
| Gate valves | Main shutoff |
| Ball valves | Appliances |
| Motorized ball | Automatic systems |
| Knife valve | Heavy sediment |
Power and Connectivity Options
When choosing power and connectivity for leak detectors and automatic shutoffs, think about reliability and how fast signals must travel. Battery-powered sensors with long-life lithium cells and low-power wireless (Zigbee, Z-Wave, or Wi‑Fi) work well for most rooms, while motorized shutoff valves usually need AC power or a hardwired transformer because they draw more current during activation.
You should plan backups, use secure wireless protocols, and consider solar power for remote or secondary sensors. Integrate devices into your smart home hub for alerts and automatic actions so you’ll get timely notifications and reliable shutoffs.
- Battery life monitoring
- Hardwired power for valves
- Reliable mesh networking
- Redundant power sources
Keep Appliances Properly Hooked Up and Maintained
Because appliances connect directly to your home’s water supply, keeping them properly hooked up and maintained prevents most indoor floods and costly repairs. You should schedule routine appliance maintenance, verify proper installation, and tighten fittings. Inspect valves, drains, and connections for corrosion or leaks, and turn off water when replacing units. Consider installing accessible shutoffs and drip pans under vulnerable appliances. Keep manuals and records for warranties and service. Small fixes now stop large repairs later.
| Item | Action |
|---|---|
| Water valve | Test monthly |
| Connections | Tighten/inspect |
| Drip pan | Install/clear |
| Records | Keep service logs |
Check and Replace Worn Washing Machine Hoses
Along with checking valves and drip pans, you should inspect your washing machine hoses regularly for signs of wear.
You’ll avoid floods by replacing worn hoses every 5 years or sooner if you see cracks, bulges, or leaks. Turn off water, disconnect hoses, and check fittings for corrosion. Use reinforced stainless-steel braided hoses for longer life and stronger protection.
- Look for cracks, bulges, or soft spots.
- Check connections and clamps tightness.
- Replace hoses showing any damage immediately.
- Choose braided hoses rated for your washing machine.
Routine checks prevent costly water damage and give you peace of mind.
Maintain Toilet, Sink, and Shower Seals
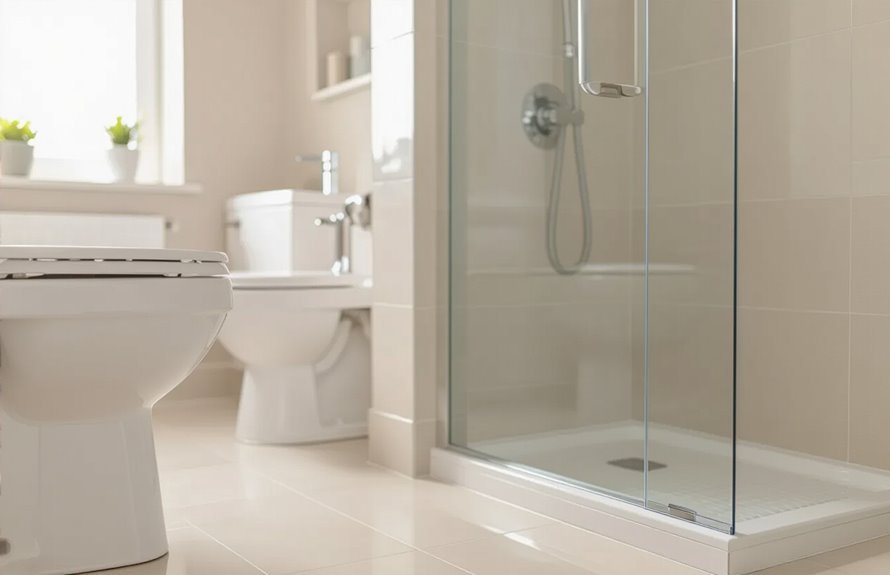
If seals around your toilet, sink, or shower start to fail, you’ll quickly notice drips, stains, or musty odors—signs that water’s escaping where it shouldn’t.
You should schedule regular toilet seal maintenance: check the wax ring or flange for leaks, tighten bolts, and replace components showing corrosion or wobble.
For sinks, inspect the P-trap, supply lines, and sink-to-counter seals, tightening or replacing washers as needed.
Perform shower seal inspection monthly: look for cracked grout, deteriorating silicone, or gaps at fixtures and joints.
Replace damaged seals promptly, dry areas after use, and test for unseen leaks to prevent mold and structural harm.
Ensure Proper Caulking Around Windows and Doors
When caulking around windows and doors, check for gaps, cracked sealant, and shrinking beads so you can stop drafts and moisture before they cause damage.
You should remove old caulk, clean the joint, and pick appropriate caulking materials for the climate and substrate. Apply smooth, continuous beads and tool them to bond properly.
Regular window maintenance prevents rot, mold, and higher energy bills.
- Inspect seals annually and after storms.
- Use silicone or polyurethane caulk for exterior joints.
- Replace damaged trim before sealing.
- Test for leaks with a hose and check interior staining.
Clean and Maintain Chimneys and Vent Flashings
Properly sealed windows and doors keep moisture out of your walls, but water can still enter your home from above if chimneys and vent flashings aren’t maintained.
Inspect flashings after storms and replace cracked mortar or worn metal to prevent leaks. Schedule regular chimney cleaning to remove creosote and debris that trap moisture and accelerate deterioration.
Check flashing sealant and roof shingles around vents, and reseal gaps with roofing-grade caulk. Remove nests and clear caps so water drains properly.
If you spot rust, loose flashing, or persistent stains on ceilings, call a pro promptly to avoid costly water damage.
Use Waterproofing in Basements and Crawl Spaces
Basements and crawl spaces are the most common entry points for ground moisture, so you should waterproof them to keep dampness and mold out of your living space.
You’ll seal walls and floors with waterproof membranes, install or clear basement drainage, and control humidity to protect structure and belongings. Regular checks catch issues early.
- Apply waterproof membranes to walls and slab edges.
- Verify basement drainage routes water away from foundation.
- Install a sump pump and test it seasonally.
- Use dehumidifiers and inspect seals for gaps.
Take these steps before moisture leads to costly repairs.
Inspect and Repair Balcony and Deck Flashing
Because balcony and deck flashing keeps water from sneaking into your house, you should inspect it regularly and repair any damaged sections right away.
Check seams, fasteners, and flashing overlaps for cracks, rust, or gaps after storms and during deck maintenance routines. Verify balcony drainage paths aren’t blocked so water flows away from the wall and not under flashings.
Patch minor tears with compatible sealant and replace corroded metal or compromised membranes promptly. If flashing bonds to different materials, confirm proper changes to prevent leaks.
When in doubt, hire a qualified contractor to assess and fix flashing correctly.
Manage Landscaping to Prevent Water Intrusion
After checking flashings and drainage at your balcony or deck, look at the yard: landscaping directs how water hits and leaves your foundation.
You should shape soil to slope away, choose plants that tolerate wet feet, and avoid grading that funnels water to walls.
Use landscaping techniques that combine swales, rain gardens, and permeable beds.
Install targeted drainage solutions like French drains or dry wells where needed.
Maintain gutters and downspouts so runoff routes to safe discharge points.
Regularly inspect after storms and adjust plantings or hardscape to keep water moving away from the foundation.
- Create positive grade
- Add swales/rain gardens
- Install French drains
- Maintain gutters
Plan for Emergency Water Damage Response
When flooding or a sudden leak happens, you need a clear, practiced plan so you can act fast to protect people and property.
Create a response plan listing shutoff valves, evacuation routes, and emergency contacts. Assemble an emergency kit with waterproof flashlight, batteries, first-aid supplies, bottled water, and copies of essential documents in a sealed bag.
Practice the plan with household members so everyone knows roles and meeting points. Turn off electricity if water reaches outlets and prioritize human safety.
After stabilizing the scene, document damage with photos and call a qualified mitigation professional to limit long-term loss.
Review Homeowner Insurance and Flood Coverage
If you want to limit financial fallout from water damage, review your homeowner’s policy and add flood coverage where needed.
Check whether flood insurance is separate from your policy, note policy exclusions, and confirm deductible amounts.
Know what’s covered: structural damage, contents, and temporary living expenses. Document valuables and store photos offsite.
- Verify if flood insurance is required for your zone.
- Read policy exclusions to avoid surprises.
- Increase coverage for high-value items if needed.
- Ask your insurer about endorsements that fill gaps.
Act now so a claim won’t leave you underprotected.
Schedule Regular Professional Plumbing Inspections
Because small leaks and corroded fittings often go unseen until they cause major damage, schedule a professional plumbing inspection at least once every 12–24 months so a licensed plumber can spot problems early, test drain and sewer function, and recommend repairs or upgrades that prevent costly water loss.
You’ll get thorough leak detection, pressure checks, and pipe assessments that home DIYs can’t match. Treat inspections as essential plumbing maintenance: keep records, act on recommended fixes, and ask about preventative upgrades like shutoff valves or sump pumps.
Regular pros save you from surprises, reduce repair costs, and protect your home’s structure.
Conclusion
You’ve got the tools to protect your home: inspect roofs and gutters, seal foundation cracks, test your sump pump, and keep grading and landscaping pointed away from the house. Schedule plumbing inspections, plan emergency response steps, and double-check your insurance and flood coverage. Stay proactive — think like a medieval watchman guarding the keep — and you’ll minimize surprises and costly repairs. Small, consistent actions now save you major headaches later.